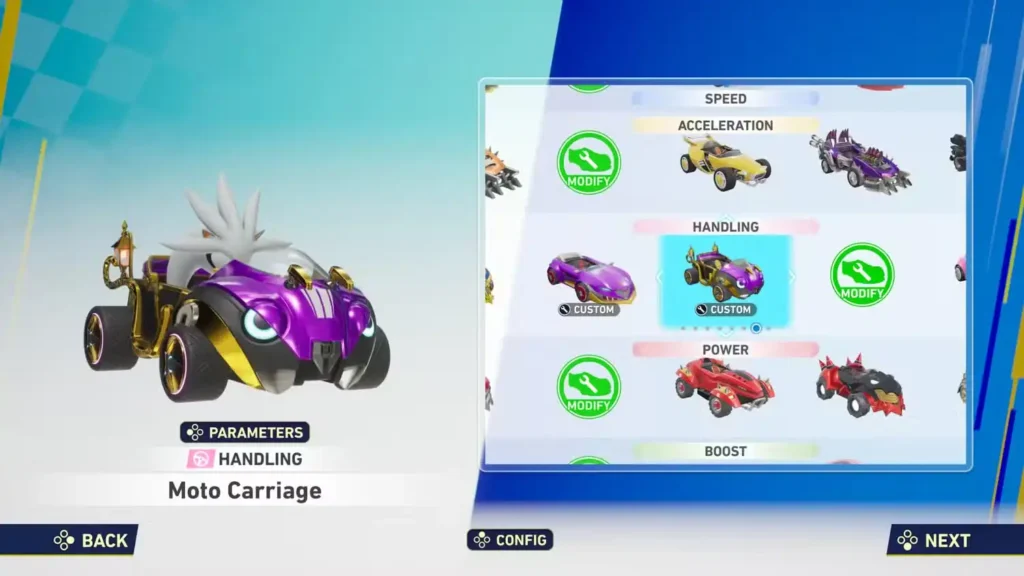
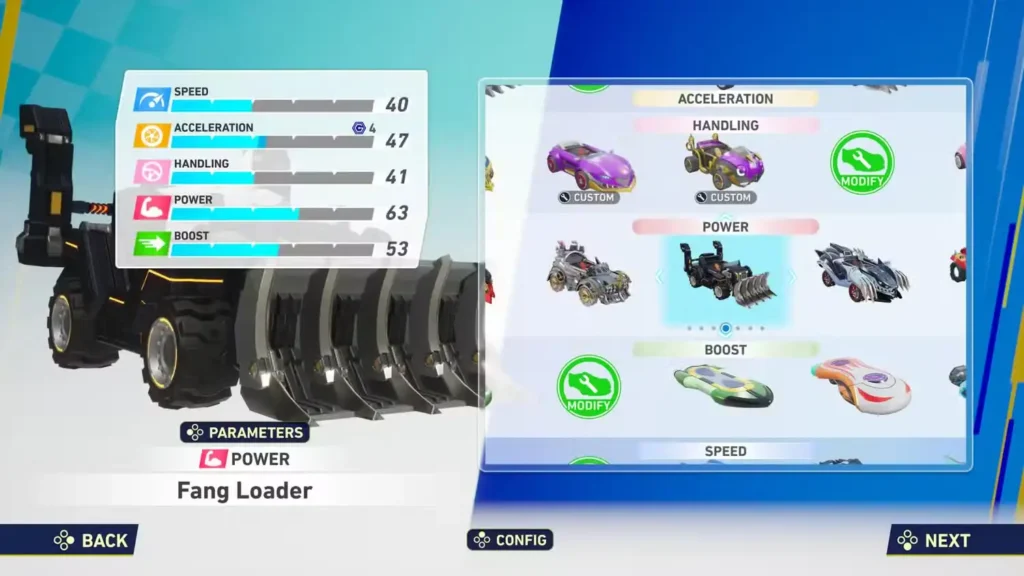
Master all 5 vehicle stats in Sonic Racing CrossWorlds. Learn Speed, Acceleration, Handling, Power & Boost to create winning car builds for every racing situation!
Why Understanding Stats Is Your Key to Victory
Sonic Racing CrossWorlds elevates kart racing beyond simple “pick and play” mechanics by offering deep vehicle customization that rivals professional racing simulators. With five distinct stats governing every aspect of your car’s performance, understanding these systems isn’t just helpful – it’s essential for competitive success.
Unlike arcade racers where all cars feel similar, CrossWorlds rewards players who understand the intricate balance between Speed, Acceleration, Handling, Power, and Boost. Each stat serves a specific purpose, and mastering their interactions will transform you from a casual racer into a strategic competitor who can adapt to any track or racing situation.
The Strategic Foundation: Your stat distribution choices define not just how your car performs, but how you approach racing itself. A high-handling build encourages aggressive cornering, while a speed-focused setup demands careful positioning and defensive play.

Complete Vehicle Stats Breakdown
Speed: Your Maximum Velocity Potential
What It Does: Speed determines your car’s absolute top velocity when driving on optimal surfaces with maximum ring collection.
When It Matters Most:
- Long straightaways where cornering isn’t a factor
- Final sprint sections before finish lines
- Open track areas with minimal obstacles
- Time trial modes where pure pace determines success
Strategic Considerations: High speed builds excel on tracks with long straight sections but struggle in technical courses with frequent direction changes. Speed becomes exponentially more valuable when combined with effective ring management.
Pro Insight: Speed alone doesn’t win races – it’s the foundation that other stats build upon. Think of it as your performance ceiling rather than your guaranteed advantage.

Acceleration: Recovery and Responsiveness
What It Does: Controls how quickly your vehicle reaches its top speed from a standstill or after speed-reducing events.
Critical Acceleration Moments:
- Perfect race starts from the starting line
- Recovery after being hit by enemy items
- Regaining speed after track edge penalties
- Post-collision speed recovery
- Navigating stop-and-go technical sections
Build Philosophy: Acceleration-focused builds trade peak performance for consistency and resilience. They’re particularly effective in chaotic multiplayer races where interruptions are frequent.
Advanced Strategy: High acceleration pairs excellently with defensive gadget loadouts that help you recover from setbacks quickly.
Handling: Precision and Control
What It Does: Governs your vehicle’s responsiveness to steering inputs and stability through corners.
Handling Advantages:
- Maintaining speed through tight corner sequences
- Precise navigation around track obstacles
- Quick evasive maneuvers to avoid items or collisions
- Reduced risk of wall impacts that cost precious rings
- Better control during boost phases
The Underrated Champion: Many players overlook handling in favor of flashier stats, but superior control often determines race outcomes more than raw speed. Clean, precise driving consistently outperforms erratic high-speed attempts.
Track-Specific Value: Technical tracks with numerous elevation changes, tight corridors, or complex racing lines heavily favor handling-focused builds.
Power: Durability and Impact Resistance
What It Does: Determines your vehicle’s ability to withstand damage and reduce the negative effects of collisions.
Power Applications:
- Reduced ring loss from impact events
- Decreased vulnerability to enemy item attacks
- Minimized consequences from racer-to-racer contact
- Complete immunity to wall collision ring penalties
- Enhanced survivability in aggressive racing situations
Defensive Strategy: Power builds excel in chaotic multiplayer environments where contact is inevitable. They’re particularly effective for players who prefer aggressive, contact-heavy racing styles.
Synergy Potential: Power combines excellently with ring-focused strategies since it protects your hard-earned speed bonuses from being lost to incidental contact.
Boost: Enhanced Speed Burst Efficiency
What It Does: Controls both the intensity and duration of temporary speed increases from various sources.
Boost Sources Include:
- Boost pads scattered throughout tracks
- Ring collection bonuses
- Special item activations
- Drift charge releases
- Track-specific speed zones
Optimization Strategy: Boost-focused builds transform temporary advantages into significant positioning gains. They’re most effective on tracks with abundant boost opportunities or when paired with boost-generating gadgets.
Compound Effect: High boost stats create snowball effects where early advantages compound throughout the race, making them excellent for skilled players who can maximize boost opportunities.

Building Winning Vehicle Configurations
The “Speed Demon” Build
Primary Stats: Speed (Max), Boost (High) Secondary Stats: Acceleration (Medium) Sacrifice: Handling, Power
Best For: Time trials, tracks with long straights, experienced players who rarely make mistakes Strategy: Maximize ring collection early, maintain clean racing lines, avoid contact at all costs
The “Technical Master” Build
Primary Stats: Handling (Max), Acceleration (High) Secondary Stats: Power (Medium) Sacrifice: Speed, Boost
Best For: Complex tracks, multiplayer chaos, defensive racing styles Strategy: Focus on consistency, take optimal racing lines, capitalize on others’ mistakes
The “Balanced Competitor” Build
Primary Stats: Even distribution across all stats Secondary Stats: Slight emphasis based on personal preference Sacrifice: Peak performance in any single area
Best For: Versatile racing, unknown track types, beginners learning the game Strategy: Adapt tactics based on race situations, maintain solid fundamentals
The “Aggressive Bruiser” Build
Primary Stats: Power (Max), Acceleration (High)
Secondary Stats: Handling (Medium) Sacrifice: Speed, Boost
Best For: Contact-heavy multiplayer, chaotic race situations, aggressive players Strategy: Use contact as a weapon, focus on disruption and recovery
The “Boost Specialist” Build
Primary Stats: Boost (Max), Speed (High) Secondary Stats: Acceleration (Medium) Sacrifice: Handling, Power
Best For: Tracks with abundant boost pads, skilled boost management, combo-focused gameplay Strategy: Chain boost opportunities, maximize temporary speed advantages
Advanced Stat Synergy Strategies
The Ring Protection Combo
Power + Handling creates a resilient build that maintains ring advantages through contact while navigating precisely to avoid unnecessary risks.
The Recovery Machine
Acceleration + Power builds bounce back from setbacks faster than opponents can capitalize, making them excellent for chaotic racing situations.
The Speed Sustainability Setup
Speed + Boost maximizes both baseline and enhanced velocity, creating devastating straightaway performance when boost opportunities arise.
The Technical Perfection Build
Handling + Acceleration enables aggressive cornering with quick recovery from minor mistakes, perfect for complex track layouts.
Stat-Specific Gadget Enhancement
Speed Optimization
- Speed Tuner gadgets provide flat speed increases
- Ring capacity gadgets enable sustained maximum velocity
- Ring gain gadgets create speed feedback loops
Acceleration Enhancement
- Quick starter gadgets boost early-race acceleration
- Recovery gadgets minimize downtime from setbacks
- Collision-based gadgets turn contact into advantages
Handling Improvement
- Handling tuner gadgets provide direct control enhancement
- Drift-focused gadgets reward precise cornering
- Stability gadgets reduce mistake consequences
Power Amplification
- Crash protection gadgets reduce damage vulnerability
- Ring protection gadgets preserve speed advantages
- Defensive gadgets complement power’s natural durability
Boost Maximization
- Boost tuner gadgets increase effectiveness
- Boost generation gadgets create more opportunities
- Duration enhancement gadgets extend temporary advantages
Track-Type Optimization Guide
High-Speed Circuits
Prioritize: Speed, Boost Strategy: Focus on straightaway performance and boost chaining Example Build: 70% Speed, 20% Boost, 10% other stats
Technical Challenges
Prioritize: Handling, Acceleration
Strategy: Emphasize clean lines and quick recovery Example Build: 50% Handling, 30% Acceleration, 20% other stats
Combat-Heavy Multiplayer
Prioritize: Power, Acceleration Strategy: Survive chaos and recover quickly Example Build: 40% Power, 35% Acceleration, 25% other stats
Mixed Circuit Types
Prioritize: Balanced distribution Strategy: Adapt to changing track demands Example Build: 20% each stat for maximum versatility
Common Build Mistakes to Avoid
The “All-In” Error: Maxing one stat while completely ignoring others creates exploitable weaknesses.
The “Meta Copying” Trap: Using builds designed for different skill levels or racing styles without understanding why they work.
The “Static Build” Problem: Using the same configuration for all tracks instead of adapting to specific challenges.
The “Gadget Mismatch” Mistake: Choosing gadgets that don’t complement your stat distribution effectively.
Essential Resources for Build Masters
Optimize your CrossWorlds vehicle builds with these key resources:
- Official Game Hub: Sonic Racing CrossWorlds Official Site – Latest balance updates and build insights
- Start Building: Sonic Racing CrossWorlds on Steam – Begin your customization journey today
- Community Database: Sonic Racing CrossWorlds Wikipedia – Comprehensive vehicle and build information
The Art of Stat Mastery
Understanding vehicle stats in Sonic Racing CrossWorlds isn’t just about memorizing numbers – it’s about developing the strategic thinking to match your build choices with your racing style, the specific challenges of each track, and the tactical demands of different race situations.
The most successful CrossWorlds racers don’t just build fast cars; they build smart cars that excel in their intended roles while minimizing weaknesses through strategic play. Whether you’re crafting a technical precision machine or a straight-line speed monster, the key is understanding how each stat contributes to your overall racing philosophy.
The Handling Advantage: While speed often gets the spotlight, many expert players consider handling the most crucial stat for consistent competitive success. The ability to maintain speed through complex sections while avoiding costly mistakes often outweighs pure straight-line velocity.
Your journey to stat mastery begins with experimentation. Try different build philosophies, adapt your configurations to specific tracks, and gradually develop the intuitive understanding that separates good racers from great ones. In CrossWorlds, the fastest car isn’t always the one with the highest speed stat – it’s the one that best matches the driver’s skills and the race’s demands.