Understanding the Healing System in Where Winds Meet
The healing mini-game in Where Winds Meet offers a strategic card-based challenge that lets you treat sick NPCs throughout the Jianghu. Think of it as a combat encounter, but instead of dealing damage to enemies, you’re fighting against diseases while protecting your own vitality. The system works similarly to Gift of Gab debates, requiring tactical thinking rather than quick reflexes.
What makes healing particularly interesting is the co-op potential—you can actually help cure other players online, making it a genuinely social profession. Whether you’re pursuing the Silver Needles Sect path or just want to earn some extra Echo Jade and Memory rewards, understanding how the healing mechanics work will save you from failed treatments and wasted time.
Check: Where Winds Meet Complete Guide
Finding and Diagnosing Sick Patients in WWM
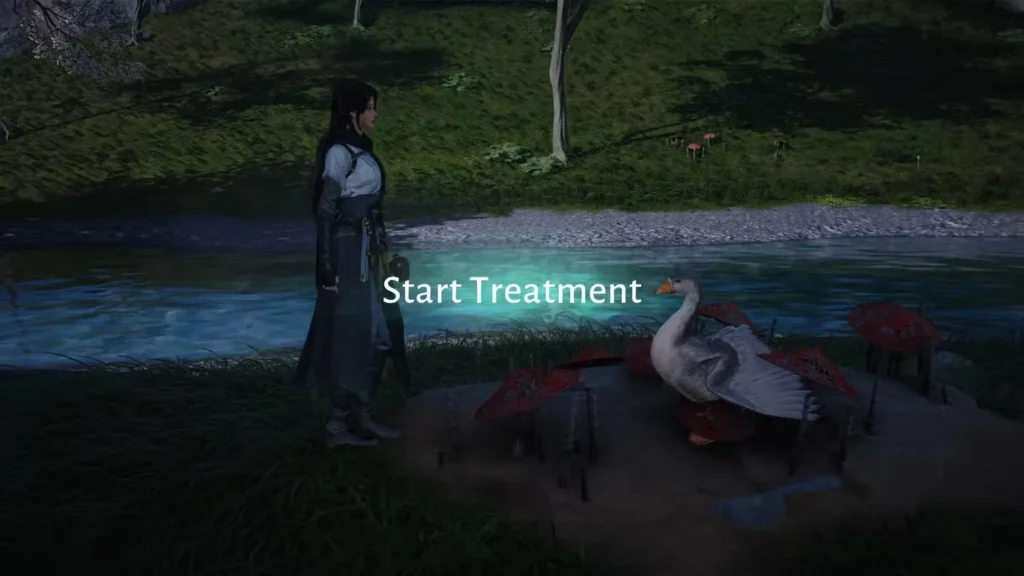
Before you can start any treatment, you need to locate someone who’s actually ill. Sick NPCs appear throughout the game world, and occasionally you’ll encounter players who need assistance in co-op sessions.

Step 1: Use Wind Sense for Diagnosis
Once you’ve found a sick character, activate Wind Sense on them to identify their specific illness. This diagnostic step is crucial because different ailments require different approaches. The game won’t let you proceed without this initial scan, so make it a habit whenever you interact with potentially sick NPCs.
Step 2: Choose Your Treatment Method
After diagnosing the patient, you’ll select between two treatment approaches:
- Physiotherapy – Physical manipulation and external remedies
- Qi Therapy – Internal energy manipulation and spiritual healing
The good news? The game helpfully suggests which method works best for each illness. Both approaches use identical mechanics, so once you understand one, you’ve mastered both. Don’t stress too much about making the “wrong” choice here—the recommendation system is pretty reliable.
Quick Treatment vs. Manual Healing
If you’ve invested time into leveling up your Healing Mastery (more on that later), you’ll unlock the Quick Treatment option. This essentially auto-completes the mini-game, skipping straight to success. It’s perfect for common illnesses you’ve treated dozens of times already.
However, when your Mastery is still developing or you’re facing a particularly tough case, you’ll need to manually work through the treatment process using Prescription cards. This is where the actual strategy comes into play.
How the Healing Mini-Game Works
Once treatment begins, you’re essentially playing a resource management puzzle with a 10-round limit. Here’s what you’re working with:
Key Resources and Meters:
- Fireyhearts (bottom-left corner) – Your action currency that lets you play Prescription cards
- Vital Energy (your health bar) – If this reaches zero, the treatment fails
- Affliction Severity (patient’s bar) – Reduce this to zero to successfully cure them
- Round Counter – You have 10 rounds before the illness spirals out of control
You get a generous 20-minute timer for each treatment session, so there’s no need to rush your decisions. Take your time analyzing which Prescriptions to use, especially when facing unfamiliar illnesses.
Essential Treatment Strategies
After working through various healing encounters, some patterns become clear. Most illnesses follow predictable attack patterns, which means you can develop reliable strategies.
Round 1: Always Shield First
Almost every illness will chip away at your Vital Energy at the start of each turn. Your first move should nearly always be defensive:
- Inner Stillness (for Physiotherapy)
- Visualization (for Qi Therapy)
These shield cards protect your Vital Energy from incoming damage. If you’re facing something particularly aggressive, don’t hesitate to stack two shield cards in a row—surviving the encounter matters more than speed.
Offensive Prescription Choices
Once you’ve established protection, focus on cards that provide dual benefits:
- Essential Remedies/Dietary Therapy – These simultaneously deal damage while reducing the illness’s defense, making subsequent attacks more effective
- Anesthesia Powder/Fasting Therapy – High-risk, high-reward options that sacrifice some of your Vital Energy to deliver massive damage
That second category requires careful judgment. Only use Vital Energy-consuming cards when you’ve built up enough protection to afford the cost. Getting greedy early in a treatment often backfires.
Look for Efficient Cards
The best Prescriptions offer multiple benefits in one action:
- Cards that provide both protection AND damage
- Cards that restore Fireyheart while attacking
- Cards that apply lasting debuffs to reduce future damage
These efficient options help you win the round economy, letting you accomplish more within your 10-turn limit.
Step-by-Step Treatment Checklist
Here’s a condensed strategy guide you can reference during treatments:
✓ Use Wind Sense to properly diagnose the patient
✓ Choose the recommended therapy method (Physiotherapy or Qi Therapy)
✓ Prioritize defense early – Shield yourself before going aggressive
✓ Use combo cards that offer protection plus damage or extra Fireyheart
✓ Deploy high-cost cards strategically – Only sacrifice Vital Energy when you can afford it
✓ Monitor your round count – Finish healing before round 10 ends
✓ Plan ahead – Starting the next healing cycle restores all Fireyheart
What Happens After Treatment
Successful Healing Rewards:
When you reduce Affliction Severity to zero before running out of rounds or Vital Energy, you’ll receive rewards including:
- Echo Jade (useful currency for various systems)
- Memory (another valuable resource)
- Special rewards if you’ve joined the Silver Needles Sect
Silver Needles Sect members get to choose their own rewards as part of the faction’s unique perks—one of several reasons to consider which sect fits your playstyle best.
Failed Treatment Consequences:
If the treatment fails, some patients will actually turn hostile and attack you. The sick goose is a particularly memorable example—mess up its treatment, and suddenly you’re fighting an aggressive waterfowl consumed by illness. It’s equal parts frustrating and hilarious the first time it happens.
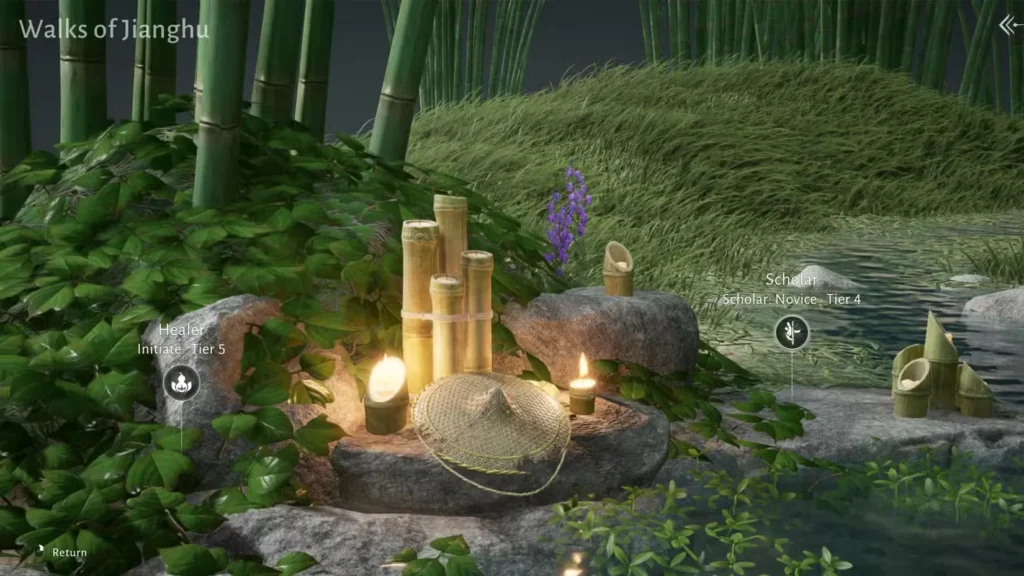
Unlocking the Healing Profession
You won’t have access to healing mechanics right from the start. The profession unlocks after reaching Level 13 and completing the exploration quest called Legacy: Healer’s Calling.
This requirement means newer players should focus on breaking through level caps and progressing through main story content before worrying about becoming a dedicated healer. The quest itself isn’t particularly difficult once you meet the level requirement, so don’t stress about it being a major roadblock.
Leveling Up Your Healing Mastery
Once you’ve unlocked the Profession system, you can actively improve your healing capabilities through two upgrade paths. Both require gathering specific materials, but the investment pays off through better success rates and eventually that coveted Quick Treatment option.
Upgrading Healer Attributes
Find the Profession section in your menu to access the Healer’s upgrade tree. This system affects your baseline Vital Energy and overall healing effectiveness.
What you need:
- Career Notebooks – Obtained through exploration or purchased from the Season Shop
Progression structure:
- Five total ranks to work through
- Each rank contains five tiers
- Higher tiers significantly boost your Vital Energy pool and skill effectiveness
Having more Vital Energy means you can afford to use those powerful Prescriptions that consume your health, making difficult treatments much more manageable. Exploration Points become valuable here since they help you find Career Notebooks scattered throughout the world.
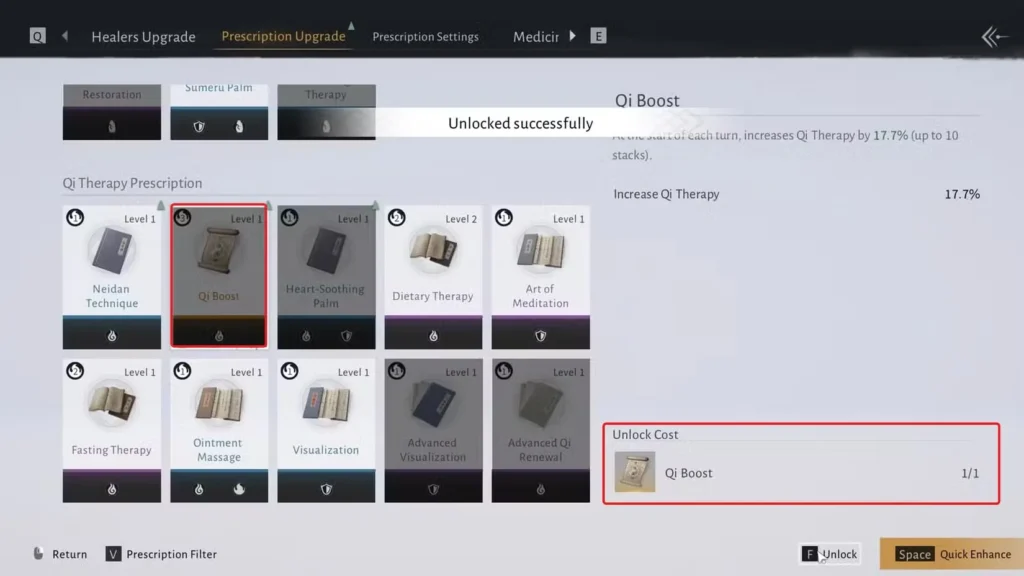
Upgrading Prescription Cards
Your individual Prescription cards can also be enhanced to deal more damage, provide better shields, or restore more Fireyheart. Stronger cards mean faster treatments and higher success rates.
Where to get upgrade materials:
- Healer Giftbox – Available in the Season Shop
- Custom Career Giftbox – Also purchasable from the Season Shop
Check the Season Shop regularly since stock rotates. Missing a giftbox one season means waiting for it to cycle back around.
Unlocking Additional Prescriptions
Here’s something that catches new healers off-guard: some Prescription cards exist in your collection but remain locked until you specifically unlock them. You won’t be able to use these in treatments until you’ve met their requirements.
Make it a habit to periodically open your Profession menu and check which cards need unlocking. You might discover you’ve been attempting difficult treatments without access to the exact Prescription that would make them trivial. It’s like trying to beat Elder Gongsun without proper preparation—technically possible, but unnecessarily painful.
Healing Tips for Beginners
If you’re just starting out in Where Winds Meet, here are some practical tips to make your healing journey smoother:
Practice on easy cases first: Not all illnesses are created equal. Some sick NPCs have much lower Affliction Severity, making them perfect for learning the mechanics without serious consequences.
Don’t ignore the timer: Yes, you get 20 minutes per treatment, but don’t interpret that as unlimited time. Plan your moves thoughtfully but avoid overthinking to the point of paralysis.
Healing complements other activities: You can work on healing mastery while pursuing other goals like unlocking Kaifeng or completing dungeon runs like Echoes in the Shrine. The profession integrates naturally into normal exploration.
Co-op healing is worth trying: Helping other players cure their illnesses provides the same rewards while building community connections. Plus, teaching someone else the mechanics solidifies your own understanding.
Resource management matters everywhere: The skills you develop managing Fireyheart and Vital Energy translate surprisingly well to combat encounters and other mini-games. It’s all about making efficient choices under constraints.
Why Bother with Healing?
Healing might seem optional compared to combat-focused abilities like Celestial Seize or movement skills like flying, but it offers unique benefits that complement your overall progression.
The Echo Jade and Memory rewards add up over time, providing resources useful across multiple systems. For players interested in roleplaying or immersion, being able to heal fits perfectly into the wandering hero fantasy. And if you’re someone who enjoys puzzle-solving over pure action, the strategic depth of the healing mini-game provides a welcome change of pace.
The PlayStation and Steam versions both handle healing identically, so these strategies work regardless of platform. Whether you’re working through quests like March of the Dead or just exploring the world, keep an eye out for sick NPCs—they represent both challenges and opportunities wrapped into one interesting mini-game.