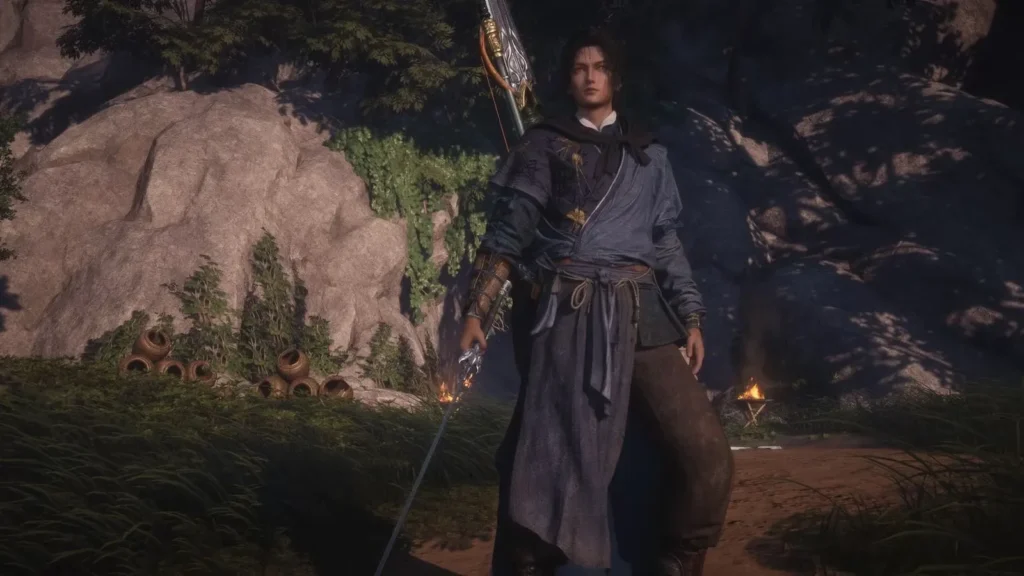
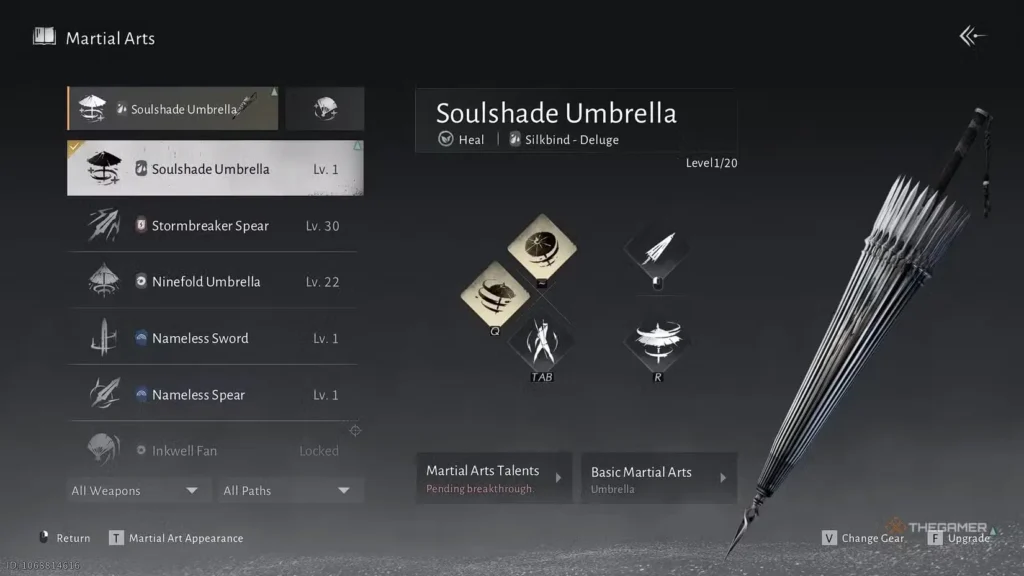
What Is Soulshade Umbrella? (Overview)
The Soulshade Umbrella is the premier support-oriented martial arts weapon in Where Winds Meet, offering unparalleled healing capabilities that make it essential for group content. As one of only two weapons capable of healing allies—alongside the Panacea Fan—the Soulshade Umbrella excels at keeping teams alive through both burst and sustained recovery abilities.
Unlike its offensive counterpart, the Vernal Umbrella, which prioritizes damage and crowd control, the Soulshade Umbrella sacrifices personal damage output to provide critical support from the backlines. This makes it the ideal choice for players who prefer enabling their teammates rather than dealing direct damage like weapons such as the Nameless Sword or Stormbreaker Spear.
How to Get Soulshade Umbrella in Where Winds Meet
There are two methods to unlock the Soulshade Umbrella in Where Winds Meet:
Method 1: Join the Hollow Vale Sect
The simplest method is joining the Hollow Vale Sect, which automatically grants access to the Soulshade Umbrella martial art.
Quick Access Tip: Navigate to Main Menu → Develop → Martial Arts, select the Soulshade Umbrella, and press “Obtain” to view all available unlock methods with precise map locations.
Method 2: Complete Soulshade Umbrella Post Station Quest (Recommended Walkthrough)
This stealth-focused mission in eastern Kaifeng provides a thrilling alternative to unlock the weapon.
Prerequisites: Complete Chapter 1: Heaven Has No Pier to unlock the Kaifeng region.
Complete Step-by-Step Walkthrough
Step 1: Reach the Post Station Travel to the Soulshade Umbrella Post Station in eastern Kaifeng. The location will be marked on your map once you select “Obtain” from the Martial Arts menu.
Step 2: Infiltrate the Station At the station entrance, locate the house on the left side. Climb onto and inside this structure to begin your infiltration.
Step 3: Clear the Entrance From the rooftop position, drop down to the right side. Assassinate the roaming guards near the entrance to secure the station’s main pathway.
Step 4: First Interior Section Move deeper into the station and eliminate the patrolling guard ahead. Enter the house on the right and loot the second chest inside.
Step 5: Pool Area Continue forward until you reach the pool on the far side of the station. Eliminate the roaming disciple, then collect the chest located in the center of the pool.
Step 6: Upper Floor Access Return toward the main entrance and climb the overgrown branches along the wall. This grants access to the upper floor of the main house. Loot the chest on the second floor, then descend using the ladder inside.
Step 7: Hidden Underground Area Descend the stairs and eliminate the disciple watching the lower floor. Look inside the coffin to find a hidden ladder leading to a concealed area below.
Step 8: First Underground Room Drop down into the underground section. Clear the disciples in this room, prioritizing the one farthest from the chest first, then the closest one. Once safe, climb the wall on the right to reach the elevated chest.
Step 9: Hanging Coffins Area Proceed deeper into the hideout until you reach the area with hanging coffins. Drop down carefully and assassinate the disciples below to secure the next chest.
Step 10: Vertical Climb Use the ladder to return to the top level. Climb upward using the hanging coffins as footholds. Defeat the disciple positioned on the ledge and continue climbing to reach the final chest.
Step 11: Obtain the Martial Art From the last chest location, proceed down the torch-lit passage. Climb the branches on the right side to reach the objective area. Use Skill Theft on the Master NPC to obtain the Soulshade Umbrella Martial Art.
Best Build: Silkbind – Deluge Development Path
The Silkbind – Deluge path transforms the Soulshade Umbrella into a comprehensive healing powerhouse, featuring both burst and sustained recovery options that cover single-target and group healing scenarios. This build’s unique revive abilities allow defeated allies to rejoin combat while providing team-wide damage buffs.
Build Strengths
- Exceptional Support: Unmatched healing and revival capabilities
- High Survivability: Strong defensive options keep you alive while supporting
- Low Difficulty: Straightforward mechanics compared to damage-focused weapons
Build Weaknesses
- Minimal Mobility: Limited repositioning options compared to the Vernal Umbrella
- Low DPS: Severely lacks personal damage output
- No Control: Unlike weapons such as the Nameless Spear, offers minimal crowd control
This build excels in multiplayer environments where keeping allies alive takes priority over personal damage contribution.
Best Internal Arts for Soulshade Umbrella
Internal Arts significantly enhance the Soulshade Umbrella’s healing effectiveness. Unlock these through exploration and mission completion:
Royal Remedy (Priority: High)
Type: Support/Martial Arts/Recover
Increases the healing effect of the water clone created by Panacea Fan’s Martial Art Skill (Cloudburst Healing) by 10%. When within the clone’s range, you gain 1 Dewdrop each time you receive healing over time. This synergy between Soulshade Umbrella and Panacea Fan makes dual-wielding these weapons extremely effective.
Restoring Blossom
Type: Support/Buff/Stacking
Dealing Critical Healing applies one stack of Nurturing for 3 seconds, increasing healing received by 2%. Stacks up to 3 times for a maximum 6% boost, creating a powerful feedback loop for sustained healing scenarios.
Esoteric Revival
Type: Support/Buff/Recover
Increases the healing of Panacea Fan’s Perception Skill (Resurrection) by 50% on the revived target. Essential for keeping freshly revived allies alive during dangerous encounters.
Mending Loom (Exclusive to Silkbind – Deluge)
Type: Support/Buff/Recover
Casting Soulshade Umbrella’s Special Skill (Echoing Grow) restores 5 Dewdrops and additionally heals 10% of your Max HP for every 100 Dewdrops consumed. This powerful sustain ability makes you remarkably self-sufficient while supporting your team.
Best Gear Sets for Soulshade Umbrella
Ivorybloom Set (Recommended)
2-Piece Bonus: Critical Rate +0.1%
4-Piece Bonus: At Max HP, gain a bonus 5% chance to deal Critical Healing and Damage, with 15% increased effects from Critical Healing and Damage.
How to Obtain:
- Campaign – Ever-Normal Granary
- Sword Trial
- Group Dungeons
This set rewards maintaining full health, encouraging smart positioning and defensive play while maximizing healing output through critical heals.
Whirlsnow Set (Emergency Recovery Option)
2-Piece Bonus: Physical Defense +1
4-Piece Bonus: When you lose more than 40% of Max HP in a single instance or when your HP falls below 20%, the next healing you receive within 5 seconds restores an additional 25% of your Max HP. Triggers once every 60 seconds.
How to Obtain:
- Campaign – Ever-Normal Granary
- Campaign – Furnace of Righteousness
- Sword Trial
- Group Dungeons
Perfect for healers who occasionally find themselves in dangerous situations, providing a powerful emergency recovery mechanism that can save you from burst damage.
Gear Tuning & Stat Priorities
Focus your gear optimization on these stats in order:
- Min Physical Attack – Establishes baseline effectiveness
- Max Physical Attack – Increases damage ceiling (even for healers)
- Critical Rate – Maximizes Critical Healing frequency for burst recovery
While the Soulshade Umbrella prioritizes healing, these offensive stats still contribute to your overall effectiveness and help with the minimal damage output required during solo play.
Note: While Physical Attack stats are listed, Soulshade Umbrella healing scales primarily through Critical Healing effects and Silkbind-related bonuses. Damage stats are secondary and mainly help during solo play or downtime.
Martial Arts Talents Progression
Talents unlock every 10 levels through Breakthroughs:
1. Buff Enhancement (Initial)
Unlock: Available after learning Martial Arts
Your Martial Art Skill allows you and allies to deal bonus damage against Exhausted enemies. When equipped with both Soulshade Umbrella and Panacea Fan, increases Mystic Arts damage by 20%, making the dual-weapon support build extremely potent.
2. Physical Attack Increase (Tier 1)
Unlock: Complete Breakthrough to Tier 1
Agility now increases Min Physical Attack, providing valuable scaling for support players who invest in evasion stats.
3. Critical Heal Enhancement (Tier 2)
Unlock: Complete Breakthrough to Tier 2
Increases the Critical Healing effect of Special Skills, dramatically amplifying your burst healing potential during critical moments.
4. Silkbind Attribute Increase (Tier 3)
Unlock: Complete Breakthrough to Tier 3
Increases Silkbind Attack and grants Silkbind Penetration based on Min Silkbind Attack, improving your overall effectiveness.
5. Attribute Attack Damage Enhancement (Tier 3)
Unlock: Complete Breakthrough to Tier 3
Provides bonus healing based on Silkbind Attack. All skills deal damage based on Attribute Attack with additional Silkbind damage increases, making your healing scale more effectively.
Soulshade Umbrella Skills Explained
Martial Arts Skill: Floating Grace
Cooldown: 60.0s | Key: Q
Sends out the umbrella to grant yourself and nearby allies 15% increased damage for 8 seconds while providing immediate healing. This powerful team buff combines offensive and defensive support, making it essential for coordinated group pushes.
Tactical Usage: Activate before major damage phases to amplify your team’s burst potential while ensuring everyone enters the fight at full health.
Special Skill: Echoes of a Thousand Plants
Cooldown: 60.0s | Key: ~
Tosses the umbrella into the air and draws a hidden sword from the handle. During this state:
- Increases healing by 15%
- Generates Dewdrops over time (up to 60)
- The umbrella hovers autonomously, automatically healing the ally with the lowest HP percentage nearby (including yourself)
- Self-healing receives a 50% effectiveness boost
You can switch to another weapon or use the hidden sword’s basic skills while the umbrella continues healing. Use the Special Skill again to recall the umbrella early if needed.
Strategic Value: This is your primary sustained healing tool. Position yourself centrally to maximize coverage, and let the umbrella handle healing while you provide additional support or minimal damage contribution.
Light Attack: Umbrella – Light Attack
Cooldown: 0.1s | Key: Left Click
Executes up to three consecutive light attacks dealing close to medium-range damage. While damage output is minimal, these attacks can generate Dewdrops and apply minor pressure when healing isn’t immediately required.
Heavy Attack: Umbrella – Heavy Attack
Cooldown: 1.6s | Key: R
Sends the umbrella forward to perform a spinning attack, dealing moderate damage. Basic but functional for contributing when allies don’t need immediate healing.
Charged Skill: Pale Petal
Key: Hold R
Sends the umbrella forward for a spinning attack with enhanced properties. If the target is already Exhausted, this attack extends the Exhausted status duration. Holding the skill button increases both damage and effect duration.
Synergy Tip: Coordinate with damage dealers who apply Exhausted status to maximize this skill’s utility and trigger your Buff Enhancement talent.
Dual-Weapon Skill: Umbrella – Conversion
Cooldown: 3.0s | Key: TAB
Switches to the umbrella and swings for damage while increasing healing by 5% and generating Dewdrops over time (up to 30). This skill is essential for resource management, providing consistent Dewdrop generation during extended encounters.
Soulshade Umbrella Mechanics Guide
Dewdrop Resource System
Dewdrops are a special martial arts resource shared between Soulshade Umbrella and Panacea Fan, with a maximum of 100 points. Generate Dewdrops through:
- Echoes of a Thousand Plants (up to 60 over time)
- Umbrella – Conversion (up to 30 over time)
- Royal Remedy Internal Art (1 per healing-over-time tick received)
Resource Management Strategy: Maintain consistent Dewdrop generation to enable frequent Special Skill usage. The Mending Loom Internal Art provides bonus healing for every 100 Dewdrops consumed, creating additional incentive to actively generate and spend this resource.
Inner Demon – Healing Reduction
Before completing first clear challenges against Campaign and Mysterious Bosses, battles are affected by Inner Demons that greatly reduce Healing Effects. This mechanic requires healers to:
- Overheal anticipating the reduction
- Coordinate with teammates for damage mitigation
- Time heals more carefully during these encounters
Mystic Art Damage Bonus
When equipped with both Soulshade Umbrella and Panacea Fan, Mystic Arts damage increases by 20%. This substantial bonus makes dual-wielding these support weapons a powerful endgame strategy.
Sense Skills
In certain special cases, corresponding skills may transform into alternative forms. Check individual skill description pages for details about these situational transformations.
Combat Strategy & Team Support for Soulshade Umbrella
Pre-Battle Preparation
- Verify your Dewdrop gauge is at maximum (100)
- Position yourself centrally but safely behind frontline allies
- Communicate with your team about heal timing for major damage phases
- Ensure Ivorybloom Set bonus is active by maintaining full HP
Sustained Healing Rotation
- Activate Echoes of a Thousand Plants (~) at battle start for consistent healing
- Use Umbrella – Conversion (TAB) during downtime to regenerate Dewdrops
- Save Floating Grace (Q) for coordinated damage phases or emergency group healing
- Maintain awareness of lowest HP allies as your umbrella automatically targets them
Emergency Response Protocol
- Immediate Crisis: Use Floating Grace (Q) for instant group healing
- Single Target Emergency: Position near the endangered ally—Echoes of a Thousand Plants prioritizes lowest HP percentage
- Personal Danger: Recall umbrella early if you need the self-heal boost (50% increased effectiveness)
- Team Wipe Prevention: Coordinate with Panacea Fan users for resurrection abilities
Boss Encounter Strategy
- Phase 1 (Learning): Focus on consistent healing while observing boss mechanics
- Buff Timing: Use Floating Grace before major DPS windows to amplify team damage
- Inner Demon Awareness: Account for healing reduction on first-time boss encounters
- Dewdrop Conservation: Avoid overcapping—spend Dewdrops before regeneration sources max out
- Positioning Priority: Stay alive over maximizing healing—a dead healer helps no one
Dual-Weapon Synergy (Advanced)
When combining Soulshade Umbrella with Panacea Fan:
- Alternate between weapons to maximize healing coverage
- Leverage the 20% Mystic Arts damage bonus
- Utilize Royal Remedy and Esoteric Revival Internal Arts for enhanced effectiveness
- Coordinate Dewdrop generation across both weapons
Advanced Tips to Optimize Soulshade Umbrella Healing
1. Critical Healing Priority
With the Ivorybloom Set and Critical Heal Enhancement talent, your critical heals become dramatically more effective. Maintain full HP to maximize the 5% bonus critical chance, turning you into a burst healing powerhouse.
2. Positioning Mastery
Unlike damage dealers who can afford occasional deaths, healers must survive at all costs. Position:
- Behind melee attackers but within healing range
- Near cover for quick protection during dangerous attacks
- Centrally enough that your umbrella reaches all allies
- Away from predictable boss AoE patterns
3. Resource Flow Optimization
Never let Dewdrops cap at 100. Implement a rotation:
- Spend at 100: Activate Special Skill
- Regenerate during cooldown: Use Conversion and natural generation
- Repeat cycle for maximum uptime on Echoes of a Thousand Plants
4. Exhausted Status Coordination
Your Buff Enhancement talent and Pale Petal skill both interact with Exhausted enemies. Coordinate with teammates using weapons like the Strategic Sword to maximize this synergy.
5. Whirlsnow Emergency Recovery
The Whirlsnow Set’s emergency healing triggers when you drop below 20% HP or take 40%+ damage in one hit. In dangerous content, this can save your life—but never rely on it. Proper positioning prevents needing it.
6. Agility Investment
Post-Tier 1 Breakthrough, Agility increases your Min Physical Attack. While healing remains your priority, this stat becomes more valuable than pure damage stats for support builds, as it also helps with positioning and dodge timing.
Soulshade Umbrella: Solo vs. Group Content Viability
Group Content (Primary Focus)
The Soulshade Umbrella excels in:
- Group Dungeons: Essential for challenging content
- Raid Encounters: Multiple allies benefit from Floating Grace
- Sword Trial: Coordinated groups progress faster with dedicated healing
- Campaign – Heavenfall & Furnace of Righteousness: Healing enables aggressive strategies
Solo Content (Limited Viability)
The Soulshade Umbrella struggles significantly in solo play due to:
- Minimal personal DPS compared to weapons like Vernal Umbrella
- Healing benefits wasted without allies to support
- Lack of crowd control unlike weapons such as Nameless Spear
Solo Recommendation: Switch to a damage-focused weapon for solo content, reserving Soulshade Umbrella exclusively for group activities.
Frequently Asked Questions (FAQ)
Is Soulshade Umbrella Good in Where Winds Meet?
Yes. Soulshade Umbrella is the best dedicated healing weapon in Where Winds Meet and is essential for high-level group content. It provides consistent autonomous healing, strong burst recovery, and powerful team buffs through Floating Grace. While it performs poorly in solo play due to low damage output and limited mobility, it excels in dungeons, raids, Sword Trials, and coordinated boss fights. Players who enjoy support roles and group-focused gameplay will find Soulshade Umbrella irreplaceable in endgame content.
What makes Soulshade Umbrella different from Panacea Fan for healing?
Both weapons excel at healing, but their approaches differ significantly. The Soulshade Umbrella provides consistent autonomous healing through Echoes of a Thousand Plants, allowing hands-free recovery while you reposition or swap weapons. The Panacea Fan offers more direct control over healing targets and stronger burst recovery options. For optimal support play, many healers equip both weapons to leverage their combined 20% Mystic Arts damage bonus and complementary healing styles.
Which unlock method is easier for getting Soulshade Umbrella?
Joining the Hollow Vale Sect is significantly easier and faster than completing the Post Station quest. The sect method requires minimal effort beyond joining, while the Post Station involves a 20-30 minute stealth infiltration mission with multiple combat encounters. However, the Post Station quest provides valuable experience with stealth mechanics and rewards additional loot along the way.
Can Soulshade Umbrella be effective in solo play?
Not recommended. The Soulshade Umbrella severely lacks personal DPS and has no meaningful crowd control, making solo content extremely slow and tedious compared to damage-focused weapons like the Vernal Umbrella, Nameless Sword, or Stormbreaker Spear. Reserve this weapon exclusively for group content where its healing capabilities truly shine.
How important is Critical Rate for Soulshade Umbrella healing builds?
Extremely important after unlocking the Tier 2 Talent “Critical Heal Enhancement,” which amplifies your Special Skills’ critical healing effects. Combined with the Ivorybloom Set’s bonuses (5% additional critical chance and 15% increased critical effect at Max HP) and Restoring Blossom Internal Art, critical heals become your most powerful burst recovery tool. Prioritize Critical Rate in your gear tuning after securing adequate Physical Attack stats.
Does the Inner Demon healing reduction affect all content?
No, only first-time clears of Campaign and Mysterious Bosses. Once you complete the first clear challenge against a specific boss, the Inner Demon debuff is permanently removed for that encounter. This mechanic creates initial difficulty spikes for healers but becomes irrelevant after progression, allowing your full healing potential to emerge in subsequent attempts.
What’s the best way to generate Dewdrops quickly during combat?
The most efficient Dewdrop generation combines multiple sources: Echoes of a Thousand Plants (~) generates up to 60 over time, Umbrella – Conversion (TAB, 3-second cooldown) provides up to 30, and the Royal Remedy Internal Art grants 1 Dewdrop per healing-over-time tick received. Maintain all three sources active during encounters for maximum resource flow. The Mending Loom Internal Art also restores 5 Dewdrops when casting your Special Skill, creating a positive feedback loop.
Should I focus on healing or damage stats for gear?
Prioritize healing-adjacent stats: While gear tuning recommends Physical Attack and Critical Rate, these stats benefit your healing output more than pure damage contribution. Critical Rate directly impacts Critical Healing effectiveness, while Physical Attack influences your overall scaling. The Soulshade Umbrella will never compete with dedicated DPS weapons, so optimize for your support role rather than trying to match damage dealers.
How does the Mystic Art damage bonus work with dual weapons?
When you have both Soulshade Umbrella and Panacea Fan equipped (not just unlocked, but actively in your loadout), all Mystic Arts gain a 20% damage increase. This substantial bonus makes dual-wielding support weapons surprisingly effective for contributing additional damage during healing downtime, though your primary value remains in keeping allies alive.
Is the Whirlsnow Set better than Ivorybloom Set?
Ivorybloom is superior for experienced healers who can maintain proper positioning and stay at Max HP consistently. The 5% bonus critical chance and 15% increased critical effectiveness provide significantly more healing throughput than Whirlsnow’s emergency recovery. However, Whirlsnow serves as excellent training wheels for newer healers still learning encounter mechanics, as its emergency heal can save you from positioning mistakes. Transition to Ivorybloom once comfortable with fight patterns.
The Soulshade Umbrella represents the pinnacle of support gameplay in Where Winds Meet, offering unmatched healing capabilities that transform group content difficulty. While it sacrifices the personal damage output of weapons like the Vernal Umbrella, Nameless Sword, or Strategic Sword, its ability to keep entire teams alive through challenging encounters makes it absolutely essential for endgame progression.
By mastering the Silkbind – Deluge development path, optimizing your gear sets for critical healing, and understanding the intricate Dewdrop resource system, you’ll become an invaluable asset to any group. The Soulshade Umbrella’s autonomous healing through Echoes of a Thousand Plants combined with the powerful team buff from Floating Grace creates a comprehensive support toolkit that no serious group composition should overlook.
For players seeking to maximize their support potential, combining Soulshade Umbrella with Panacea Fan unlocks the powerful 20% Mystic Arts damage bonus and provides unparalleled healing versatility. For more information about Where Winds Meet and its deep combat systems, visit the official resources and continue exploring the game’s rich martial arts mechanics.
Embrace the support role with the Soulshade Umbrella and become the lifeline your team desperately needs!