Learn how to get Slippy, the legendary fish grenade in Borderlands 4. Farm Shadowpelt boss at Whistler’s Maw or try fishing at Coastal Bonescape. Complete guide with strategies and stats.
Let’s be real: only in Borderlands 4 can you weaponize a literal fish and have it be one of the most devastating grenades in the game. Slippy is exactly what it sounds like—a slimy, scaly grenade that you chuck at enemies for absolutely absurd damage. It’s equal parts hilarious and lethal, which pretty much sums up the Borderlands experience perfectly.
What makes Slippy stand out from other legendary grenades isn’t just the comedy value (though watching a fish explode your enemies never gets old). This bad boy deals Melee Damage instead of Ordnance Damage, has a massive blast radius, and splits into multiple projectiles after detonation. Whether you’re running a melee-focused build or just want raw explosive power, Slippy delivers.
This guide covers both farming methods for obtaining Slippy: fighting the dedicated boss Shadowpelt at Whistler’s Maw, and trying your luck with the fishing minigame. Let’s dive in (pun absolutely intended).
Why Slippy is Worth Farming
Before we get into the how, let’s talk about the why. Here’s what makes Slippy one of the best legendary grenades in Borderlands 4:
Slippy’s Key Features:
- Unique damage type: Deals Melee Damage, not Ordnance Damage (benefits from melee bonuses)
- Massive explosion radius: Clears entire enemy groups with one throw
- Multi-projectile split: After the initial blast, it fragments into additional projectiles
- High base damage: Strong even without melee-focused builds
- Effective crowd control: Perfect for mobbing and clearing out packed areas
Best used by:
- Amon builds that stack melee damage bonuses
- Any Vault Hunter looking for reliable AoE damage
- Players tackling Order Bunkers and other endgame content
Even if you’re not building specifically around melee damage, Slippy’s raw power makes it a top-tier option for your grenade slot. Plus, the sheer satisfaction of slapping enemies with an explosive fish? Priceless.
Method 1: Farming Shadowpelt at Whistler’s Maw Auger Mine
The most reliable way to get Slippy is by farming Shadowpelt, a challenging boss located in the Whistler’s Maw Auger Mine. This is your classic “dedicated drop” farming route—kill the boss, check the loot, reset, repeat.
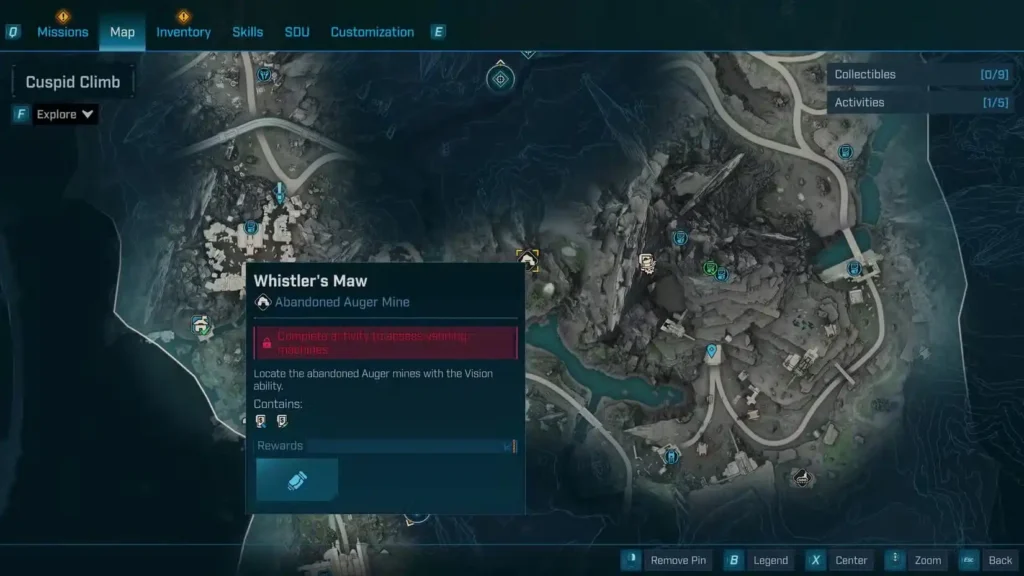
Location: Where to Find Shadowpelt
Region: Cuspid Climb, Terminus Range
Dungeon: Whistler’s Maw Auger Mine
Prerequisite: Complete the Shadow of the Mountain main quest to unlock Auger Mines
Once Auger Mines are unlocked, head to Cuspid Climb and locate Whistler’s Maw on your map. This mine is crawling with Manglers—those annoying flesh-based enemies—so come prepared with the right elemental loadout.
Pro tip: If you’re still early in the game and need to unlock more areas, check out our main story mission list to track your progress.
Recommended Loadout for Shadowpelt
Before you dive into Whistler’s Maw, make sure you’re packing the right gear:
Primary Weapons:
- Incendiary (Fire) weapons for Manglers and Shadowpelt’s flesh bar
- Shock weapons for stripping Shadowpelt’s shield quickly
Why these elements?
Manglers have pure Flesh health bars, making them extremely vulnerable to fire damage. Shadowpelt has a Shield + Flesh combo, so you’ll want Shock to burn through his shield, then switch to Incendiary to melt his health. If you need a refresher on elemental matchups, our elemental damage guide breaks down all the weaknesses and resistances.
Suggested weapon types:
- Legendary shotguns for close-range burst damage
- SMGs with high fire rate for shield stripping
- Assault rifles for consistent DPS
Additional prep:
- Stock up on ammo at the nearest vending machine
- Make sure your skill specializations are optimized for boss fights
- Consider respecting if your current build isn’t working
Clearing Whistler’s Maw Auger Mine
The path to Shadowpelt is straightforward but enemy-dense:
- Enemy type: Primarily Manglers (Flesh health)
- Strategy: Use Incendiary weapons to burn through waves quickly
- Bonus objective: If you have any Mangler bounties from your safehouse, this is the perfect place to complete them
The mine is relatively linear, so just push forward while clearing enemies. Don’t rush too fast—there are often ambushes around corners. If you’re playing solo and find yourself struggling, check out our best solo class guide for character recommendations.
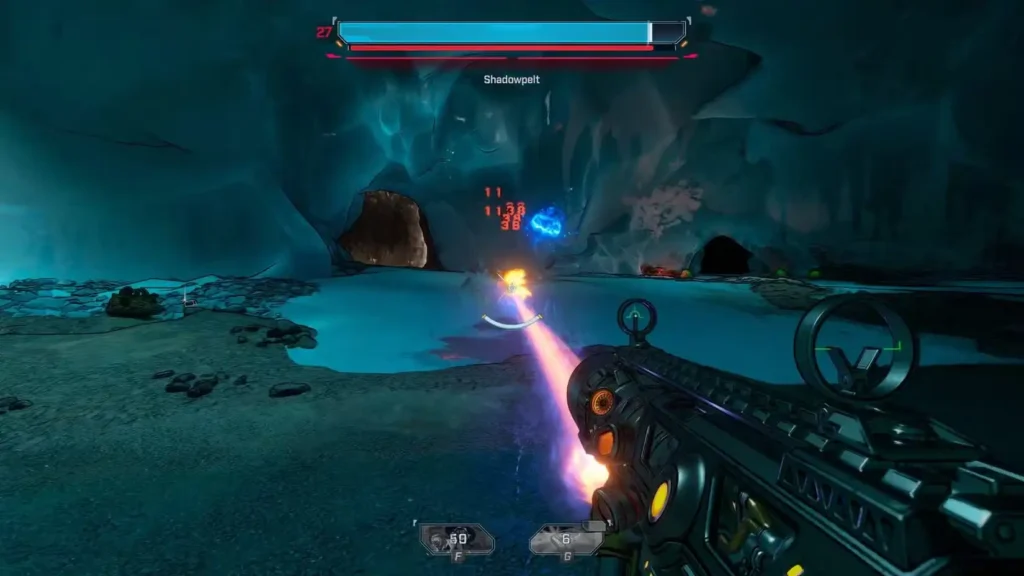
Shadowpelt Boss Fight Strategy
Now for the main event. Shadowpelt is a legitimately challenging boss fight with some annoying mechanics, but once you understand the pattern, it becomes manageable.
Shadowpelt’s Mechanics:
- Shield Regeneration + Invisibility
When Shadowpelt regenerates his shield, he becomes completely invisible. You can’t see him or target him until you destroy the shield again. This is his most frustrating mechanic. - Leaping Attacks
Shadowpelt loves to jump around the arena, making him hard to track. He’ll often leap directly at you for melee attacks. - Shock AoE Attacks
He’ll periodically unleash area-of-effect Shock damage. Stay mobile or you’ll get zapped hard. - Add Spawns
Throughout the fight, smaller Manglers continuously spawn. These can be used for Second Wind revives if you get downed.
How to Beat Shadowpelt:
Phase 1 – Shield Stripping:
- Equip your Shock weapon immediately
- Focus fire on Shadowpelt to break his shield as quickly as possible
- Once the shield breaks, he becomes visible and vulnerable
Phase 2 – Damage Phase:
- Switch to your Incendiary weapon
- Unload on his Flesh health bar while he’s visible
- Stay aggressive—the longer you take, the more likely he’ll regenerate his shield
Phase 3 – Repeat:
- When he goes invisible again (shield restored), immediately switch back to Shock
- Repeat the cycle until he’s dead
Key survival tips:
- Never stop moving – Shadowpelt’s leap attacks and AoE require constant repositioning
- Keep your eyes on him – Even when he’s visible, he’s fast. Lose track and you’ll eat a leaping attack
- Use the adds strategically – If you get downed, kill a Mangler for an easy revive
- Manage your ammo – You’ll be weapon-swapping a lot, so don’t burn through all your reserves
Difficulty scaling:
If you’re attempting this at-level, the fight should take 3-5 minutes with decent gear. If you’re struggling, consider coming back after gaining a level or two. The fast leveling guide can help you power up quickly.
Shadowpelt’s Loot Pool
After defeating Shadowpelt, check the corpse and the surrounding area for drops. His loot pool contains three legendary items:
- Slippy (Legendary Grenade) – The fish you’re here for
- Eviscerating Vamoose (Legendary Sniper Rifle) – High-damage precision weapon
- Sparky Shield (Legendary Shield) – Shock-based defensive gear
With a 1-in-3 chance per kill, you’re looking at decent odds compared to some other legendary farms. However, RNG is RNG, so don’t be surprised if you need multiple runs.
Farming efficiency tips:
- After killing Shadowpelt, quit to main menu and reload to reset the boss
- If you’re farming multiple bosses, check our boss farming guide for route optimization
- Consider farming during Maurice’s Black Market rotation for bonus legendary chances
Method 2: Fishing at Coastal Bonescape
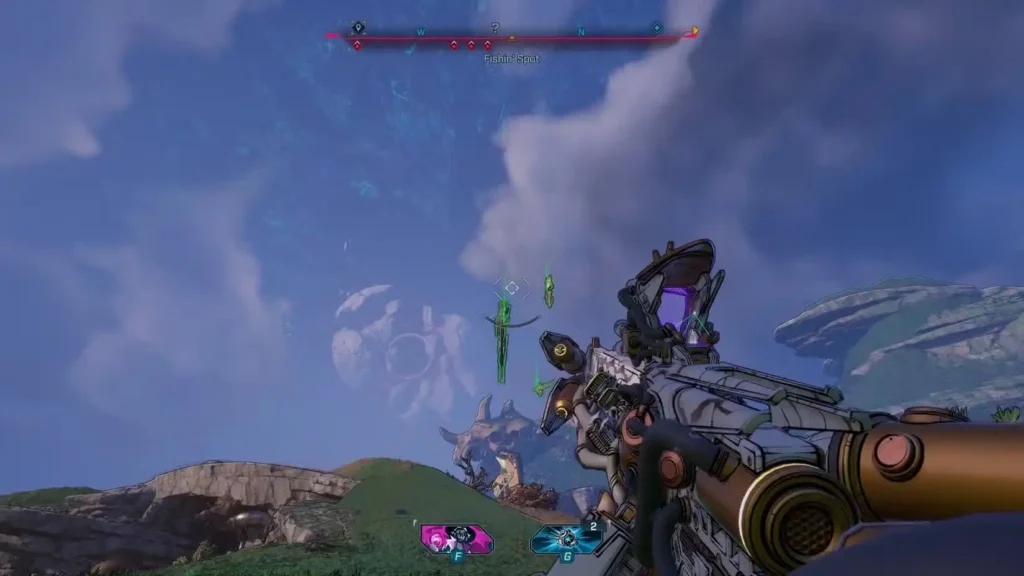
If you’d rather avoid the boss fight or just want to try your luck with a more chill farming method, you can attempt to fish Slippy directly out of the water. Fair warning: this method is significantly less reliable than farming Shadowpelt, but it requires zero combat and can be done immediately after leaving the prologue.
How Fishing Works in Borderlands 4
Fishing is a simple minigame mechanic:
- Find a fishing spot (look for ripples/splashes on the water’s surface)
- Use your grapple hook to yank items out of the water
- Collect whatever loot appears (usually junk, occasionally legendaries)
- Reset by fast traveling or reloading
No requirements:
- No specific weapons needed
- No level requirements
- Available as soon as you reach the open world of Kairos
The randomness is brutal, though. Slippy is classified as a very rare drop from fishing, meaning you could fish for hours without seeing it. This is more of a “do it while hanging out with friends” activity than a serious farming method.
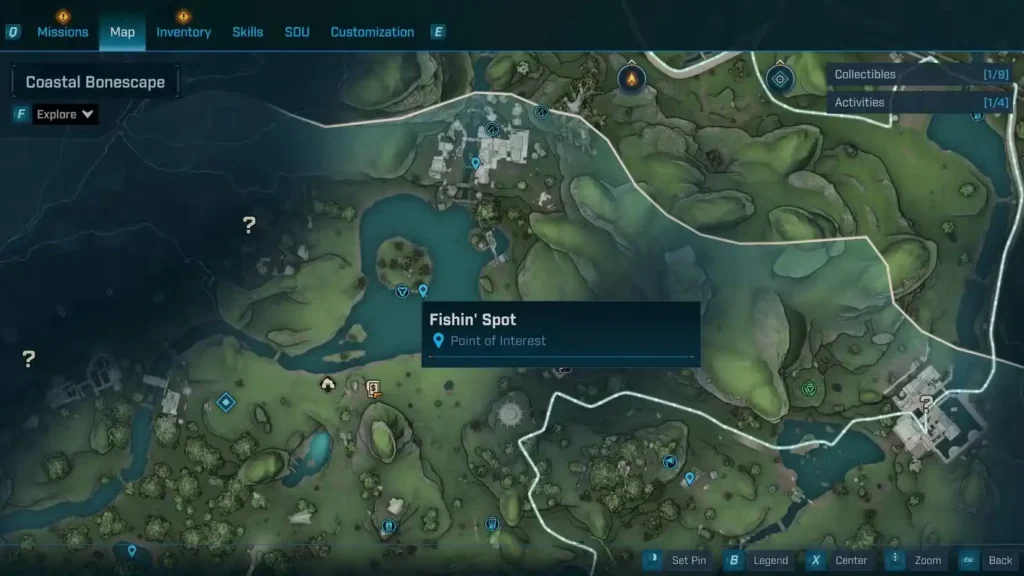
Best Fishing Location: Coastal Bonescape
The absolute best spot to fish for Slippy is at the Fishin’ Spot in the Coastal Bonescape region. This location has:
- Multiple fishing spots around a large pond
- Easy access – You’ll likely discover it during the first few hours of the main story
- Quick reset – Fast travel points nearby for efficient re-rolls
How to reach it:
Follow the main story through Kairos until you reach Coastal Bonescape. The Fishin’ Spot is marked on your map and impossible to miss—it’s a giant pond in a central location. If you need help with navigation, check out the beginners guide for map tips.
Fishing for Slippy: Step-by-Step
- Fast travel to Coastal Bonescape
- Head to the Fishin’ Spot pond
- Look for water splashes indicating active fishing spots
- Use your grapple hook (aim and pull) on the splash
- Collect the loot that emerges
- If it’s not Slippy, fast travel away and back to reset the spots
- Alternatively, quit to main menu and reload for a fresh instance
- Repeat until Slippy appears
Time investment:
This method is pure RNG. Some players report getting Slippy within 20 attempts; others go hundreds of tries without seeing it. Your mileage will vary dramatically.
Is fishing worth it?
Honestly? Only if you:
- Don’t want to fight Shadowpelt
- Are already fishing for other reasons
- Enjoy the meditative nature of fishing minigames
- Have friends online to chat with while grinding
Otherwise, farming Shadowpelt is objectively faster and more reliable. But hey, if RNG blesses you and Slippy pops up on your fifth fishing attempt, you’ll feel like a lottery winner.

How Slippy Works: Stats and Mechanics
Alright, you’ve got Slippy in your inventory. Now let’s talk about why this fish is actually one of the best grenades in the game.
Slippy’s Unique Mechanics
1. Melee Damage Classification
This is the big one. Most grenades deal Ordnance Damage, which scales with grenade damage bonuses. Slippy deals Melee Damage, meaning it benefits from:
- Melee damage bonuses from skills
- Melee damage bonuses from class mods
- Firmware sets that boost melee
This makes it especially powerful on melee-focused builds like Amon Onslaught or Rafa Arc Knives.
2. Massive Explosion Radius
Slippy doesn’t just hit one target—it nukes an entire area. The explosion radius is comparable to some of the game’s best AoE weapons, making it perfect for:
- Clearing enemy mobs
- Taking out multiple priority targets simultaneously
- Damage during boss fights with adds
3. Projectile Split Mechanic
After the initial detonation, Slippy fragments into multiple secondary projectiles that spread outward and hit additional targets. This effectively gives you two waves of damage:
- Initial blast (high damage, large radius)
- Secondary projectiles (additional cleanup damage)
This split mechanic means Slippy often secures kills on enemies that survive the first explosion, making it incredibly efficient for mobbing.
4. Raw Damage Output
Even if you’re not running a melee build, Slippy’s base damage is absurdly high. It competes with top-tier ordnance grenades purely on damage numbers, making it a viable choice for any Vault Hunter.
Best Builds for Slippy
Top synergies:
- Amon Onslaught (melee build guide) – Stacks melee damage for insane Slippy explosions
- Amon Scourge (cryo build) – Pairs cryo control with Slippy’s AoE
- Rafa Arc Knives (build guide) – Another melee-focused character who benefits from the melee damage scaling
Universal application:
Even on non-melee characters like Vex Incarnate, Slippy’s raw damage and AoE make it a solid grenade choice. It’s one of those “works on everything” legendaries.
Slippy vs. Other Top Grenades
How does Slippy stack up against other legendary grenades in the game?
Slippy’s advantages:
- Highest raw damage in most scenarios
- Melee damage scaling opens unique build opportunities
- Excellent AoE coverage
- Projectile split provides follow-up damage
Potential alternatives:
- Elemental grenades for specific enemy weaknesses
- Status effect grenades for crowd control
- Fast-recharging grenades for spam-heavy builds
Slippy isn’t necessarily the only grenade you’ll ever need, but it’s definitely top three for most builds. If you’re into collecting all the best gear, also check out our guides for legendary weapons and farming strategies.
Additional Farming Tips
While you’re in the Terminus Range area farming for Slippy, here are some other things worth your attention:
Other activities in the region:
- Auger Mines – Complete all Auger Mine locations for additional legendary drops
- Lost Capsules – Collect SDU tokens to increase your inventory capacity
- Vault Symbols – Find all Fadefields Vault symbols for completion rewards
- Lost Loot Machines – Check Lost Loot Machine locations to recover any legendaries you missed
Farming optimization:
- Use Golden Keys for guaranteed legendary gear while you farm
- Check SHIFT codes regularly for freebies
- Maximize your loot by visiting your Bank locations to store extra gear
Ending Notes
Slippy is more than just a meme grenade—it’s a legitimately powerful piece of equipment that can carry you through endgame content and beyond. Whether you prefer the reliable Shadowpelt farm or the chaotic fishing method, getting Slippy in your arsenal is worth the effort.
My personal recommendation? Farm Shadowpelt. The fishing method is fun conceptually, but the RNG is too brutal for serious farming. Plus, you might snag the Eviscerating Vamoose sniper or Sparky Shield in the process, both of which are excellent pieces of gear in their own right.
Once you’ve got Slippy, experiment with different builds. Even if you’re not running a melee character on PlayStation, the raw damage and AoE make it worthwhile. And let’s be honest—there’s something deeply satisfying about yeeting a fish at your enemies and watching them explode.
Now get out there, hunt down that invisible panther boss, and claim your explosive fish. Happy farming, Vault Hunter!
Need more legendary farming guides? Check out our complete list of boss drops and legendary loot, or browse our complete achievement guide to track your completion progress.