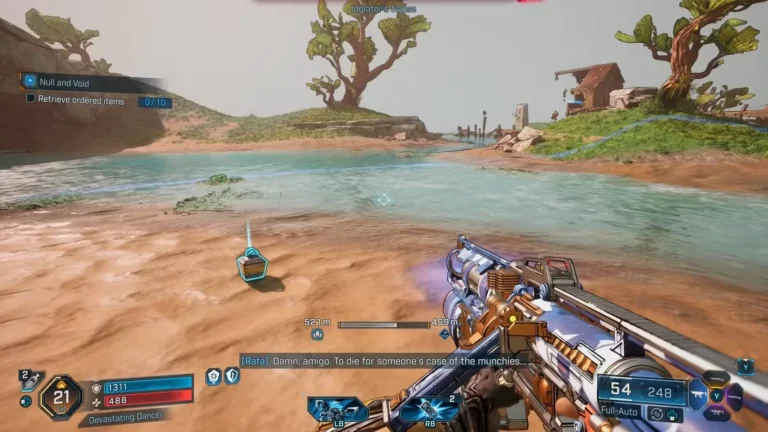
Ashes of the Damned is Black Ops 7’s first Zombies map, and if you’ve been exploring this sprawling TranZit-inspired nightmare, you know it’s huge. We’re talking multiple landmarks connected by roads, Ol’ Tessie the bus making return appearances, and all 12 Perk-a-Cola machines scattered across the map in various locations.
Finding these perks quickly can mean the difference between surviving to high rounds or becoming zombie food by round 10. Whether you’re hunting for Jugger-Nog’s survivability, Speed Cola’s reload speed, or the brand new Wisp Tea companion support, knowing exactly where each perk spawns saves precious time and Essence.
I’ve mapped out every single Perk-a-Cola location on Ashes of the Damned, organized by landmark, so you can plan your perk route efficiently. Plus, I’ll cover Der Wunderfizz’s spawn location for when you need a one-stop-shop for all your beverage needs. Let’s grab Ol’ Tessie and get driving—those perks aren’t going to buy themselves.
Quick Reference: All Perk Locations by Landmark
Before we dive into detailed directions, here’s a quick overview of where each perk spawns:
| Landmark | Perks Available | Count |
|---|---|---|
| Janus Towers Plaza | Quick Revive, Der Wunderfizz (Round 15+) | 2 |
| Blackwater Lake | Melee Macchiato, Speed Cola | 2 |
| Ashwood | Jugger-Nog, Double Tap, Vulture Aid | 3 |
| Zarya Cosmodrome | PhD Flopper, Wisp Tea | 2 |
| Vandorn Farm | Stamin-Up, Death Perception | 2 |
| Exit 115 | Deadshot Daiquiri, Elemental Pop | 2 |
Pro tip: Ashwood has the highest concentration of perks with three machines, making it a crucial landmark for early-game perk collection. Plan your routes accordingly, especially if you’re trying to set up quickly for high-round runs.
Janus Towers Plaza: Spawn Area Perks
1. Quick Revive
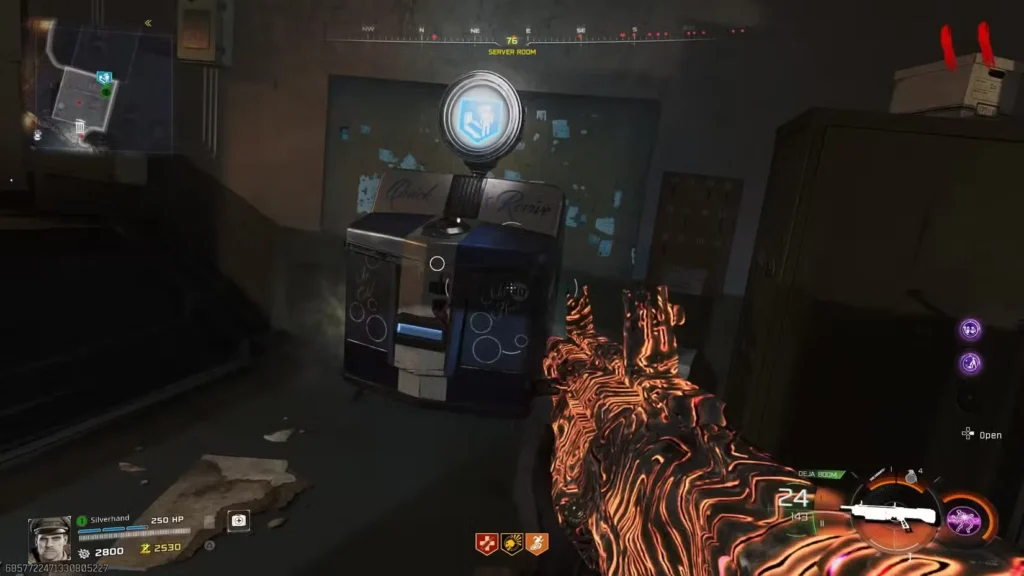
Location: Inside the Server Room building
Exact Position: East wall of the Server Room
Description: Recover health and revive allies faster
Quick Revive is the easiest perk to find in Ashes of the Damned since it’s located in your spawn area—Janus Towers Plaza. When you spawn in, look for the Server Room building and head inside. The perk machine is pressed against the east wall, impossible to miss.
Why grab this first: With the Equivalent Exchange Augment, Quick Revive becomes one of the most powerful perks in the game. Getting it early means you have instant access to self-revive capabilities that can save failed high-round attempts.
Cost: Standard perk pricing (2,500 Essence typically)
2. Der Wunderfizz (Round 15+)
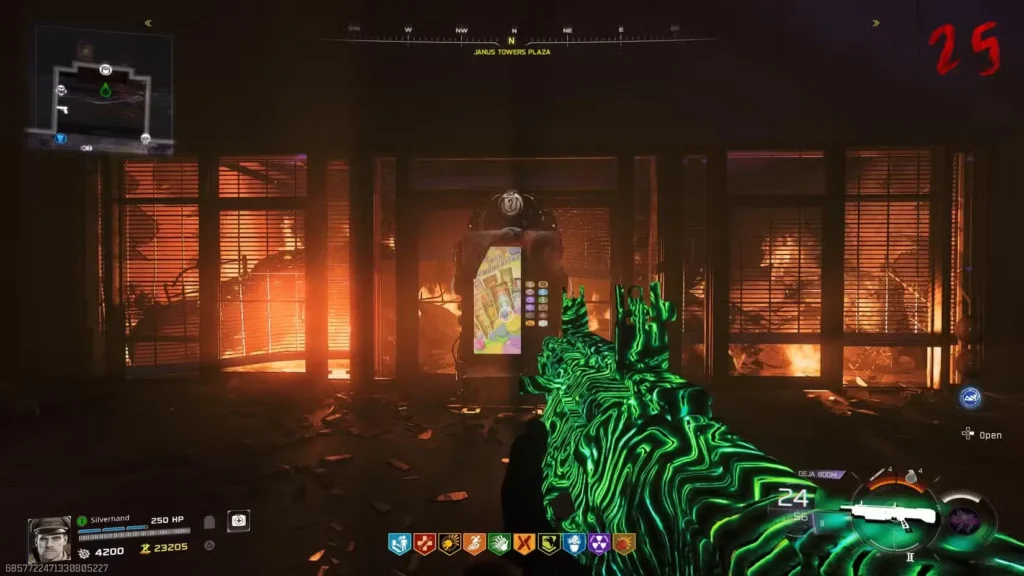
Location: North area of Janus Towers Plaza entrance
Exact Position: Directly in front of the blocked front doors
Description: Random perk dispenser featuring all 12 Perk-a-Colas
Important note: Der Wunderfizz doesn’t spawn until Round 15 or later, so don’t waste time looking for it in early rounds. Once it appears, it spawns in the same location every match—at the entrance to Janus Towers Plaza, right in front of the blocked northern doors.
Why use Der Wunderfizz: If you’re missing specific perks late into your run or want to complete your perk loadout without traveling across the entire map, Der Wunderfizz is your best friend. It’s also useful if you’re going for max perks and need that final machine.
Cost: 1,500 Essence per spin (randomly gives you a perk you don’t already own)
Blackwater Lake: Lakeside Perks
3. Melee Macchiato
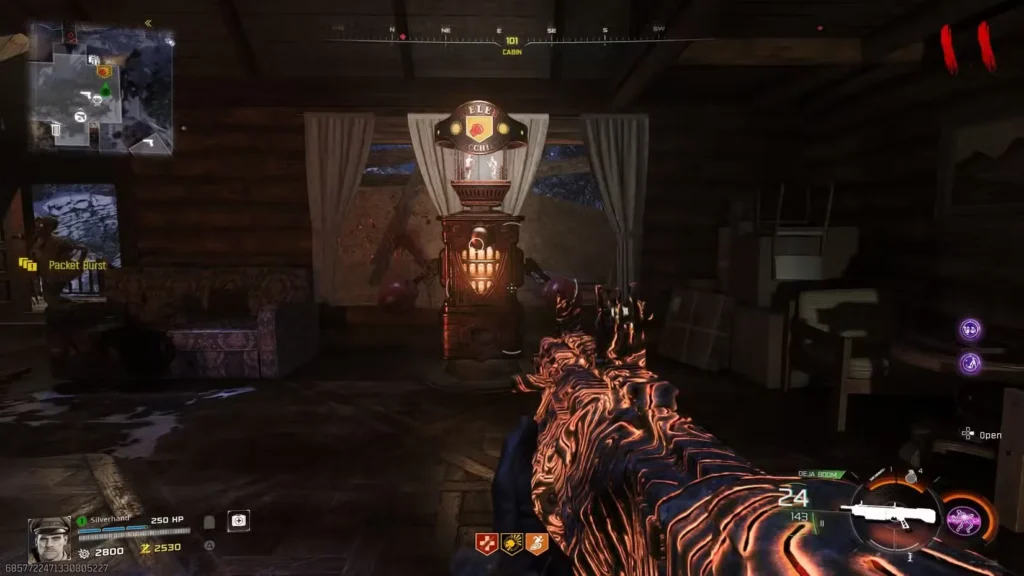
Location: Inside the Cabin (ground floor)
Exact Position: East corner of the ground floor
Description: Replace weapon gun butt with a deadly punch
To reach Blackwater Lake, hop on Ol’ Tessie and take the right path from Janus Towers Plaza. Once you arrive at Blackwater Lake, find the Cabin landmark and head inside. Melee Macchiato sits in the east corner of the ground floor—you’ll spot the distinctive perk machine immediately.
Build synergy: If you’re running a melee-focused build, combine this with the Flatline MK.II melee weapon and the Expresso + Stick ‘n Move Augments for maximum melee speed and mobility.
Cost: Standard perk pricing
4. Speed Cola
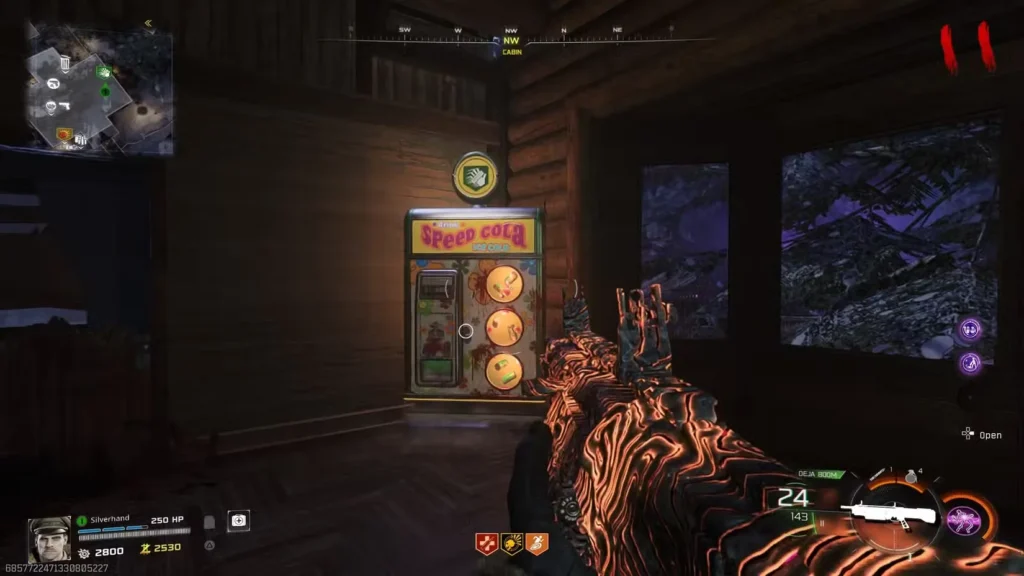
Location: Inside the Cabin (top floor)
Exact Position: Northwest corner of the upper floor
Description: Reload weapons and replate armor faster
Speed Cola is also inside the Cabin at Blackwater Lake, but you’ll need to head upstairs this time. The perk machine is in the northwest corner of the top floor. Note that you’ll need to spend Essence to open the Cabin before accessing either of these perks.
Why this matters: Speed Cola’s 30% reload speed buff becomes essential on high rounds when downtime equals death. The Classic Formula Augment pushes this even further, making reloads nearly instant.
Cost: Standard perk pricing, plus Essence to unlock the Cabin
Ashwood: The Perk Hub (3 Perks)
Ashwood is the cowboy-themed landmark that serves as the central perk hub for Ashes of the Damned. You can reach it by traveling past either Blackwater Lake or Vandorn Farm from Janus Towers Plaza—it’s accessible from either direction via Ol’ Tessie.
5. Jugger-Nog
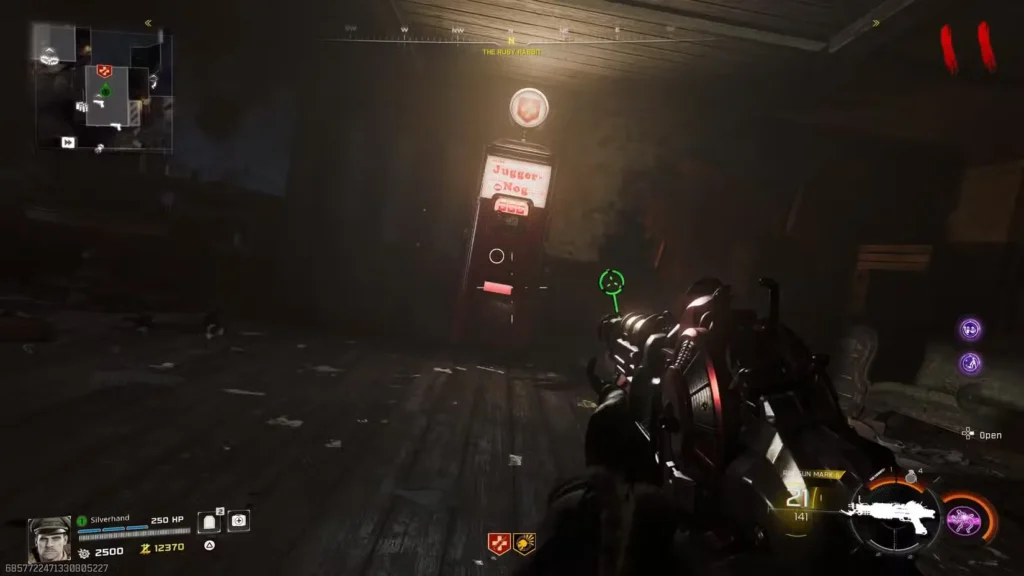
Location: Inside The Ruby Rabbit (Ashwood)
Exact Position: North wall of The Ruby Rabbit
Description: Increase maximum health
Getting to Jugger-Nog requires a bit of navigation. Once you’re in Ashwood, use the zipline to travel upward, then head north to find the entrance to The Ruby Rabbit. This location requires Essence to open (doors cost Essence throughout the map).
Once inside The Ruby Rabbit, you’ll find Jugger-Nog against the north wall. This is arguably the most important perk in Zombies history, and its location inside a named building shows just how essential it is.
Must-have Augments: Turtle Shell (rear damage absorption) + Durable Plates (increased armor durability) make Jugger-Nog even more broken than usual. Check the full Augment guide for the complete breakdown.
Cost: Standard perk pricing, plus Essence to unlock The Ruby Rabbit
6. Double Tap
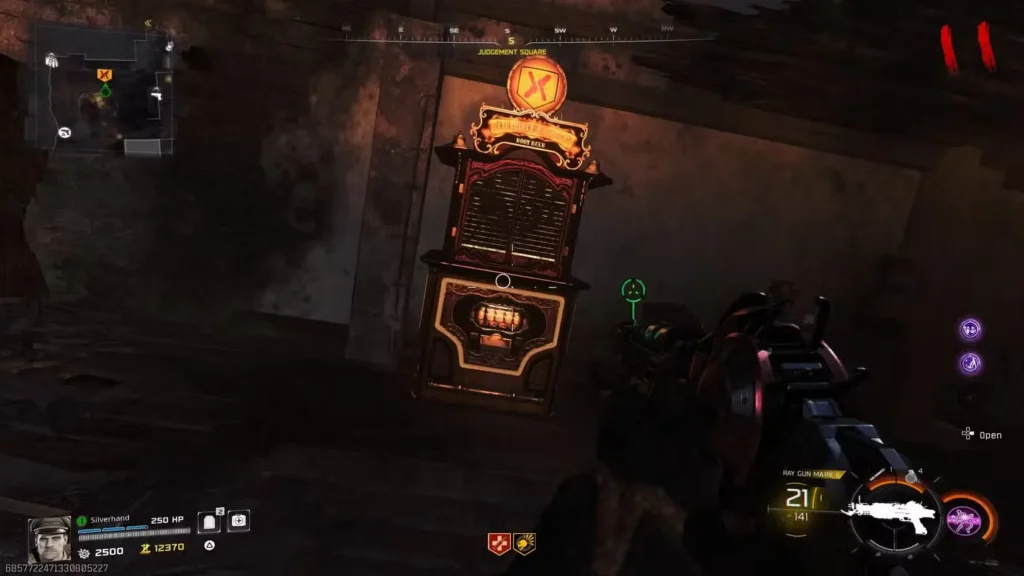
Location: Judgment Square (Ashwood)
Exact Position: South wall of Judgment Square
Description: Increase weapon fire rate
To find Double Tap, you’ll need to use the zipline to the east in Ashwood—it takes you vertically upward. Follow the path forward and you’ll reach Judgment Square, where Double Tap sits against the south wall.
DPS boost: Double Tap is essential for damage output, especially when combined with the Double Dealer Augment (every 4th bullet deals double damage). This combo shreds through Elite zombies and Special enemies effortlessly.
Cost: Standard perk pricing
7. Vulture Aid
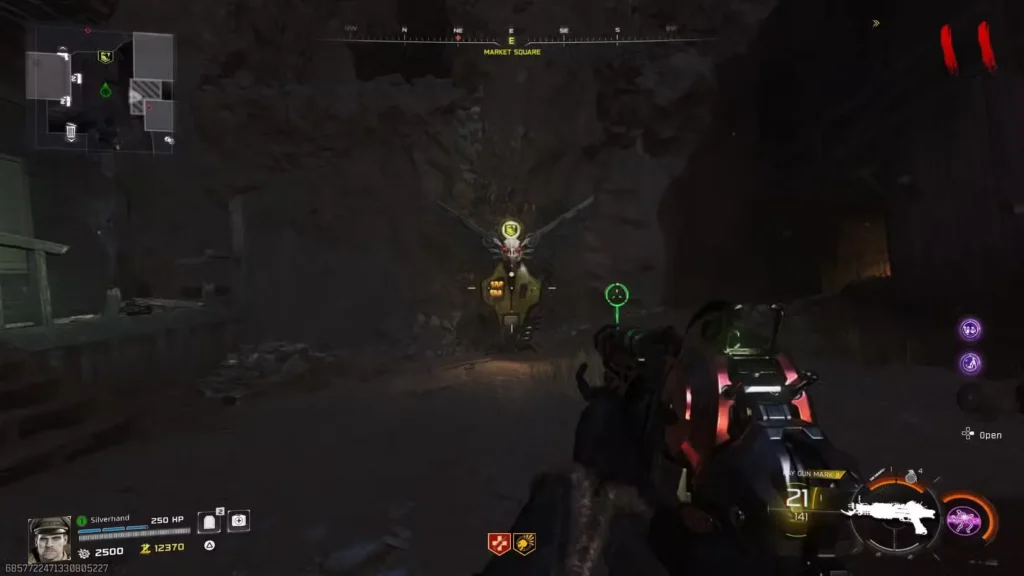
Location: Market Square (Ashwood)
Exact Position: Between two buildings in Market Square
Description: Increase the variety of loot dropped by enemies
After using the zipline to the east in Ashwood, continue heading east until you reach Market Square. Vulture Aid spawns out in the open, positioned between two buildings—it’s hard to miss once you’re in the right area.
Quality of life: Vulture Aid isn’t the flashiest perk, but the Armor-matic + Condor’s Reach Augments make it incredible for passive armor management. You’ll never manually equip armor plates again.
Cost: Standard perk pricing
Zarya Cosmodrome: Space-Age Perks
8. PhD Flopper
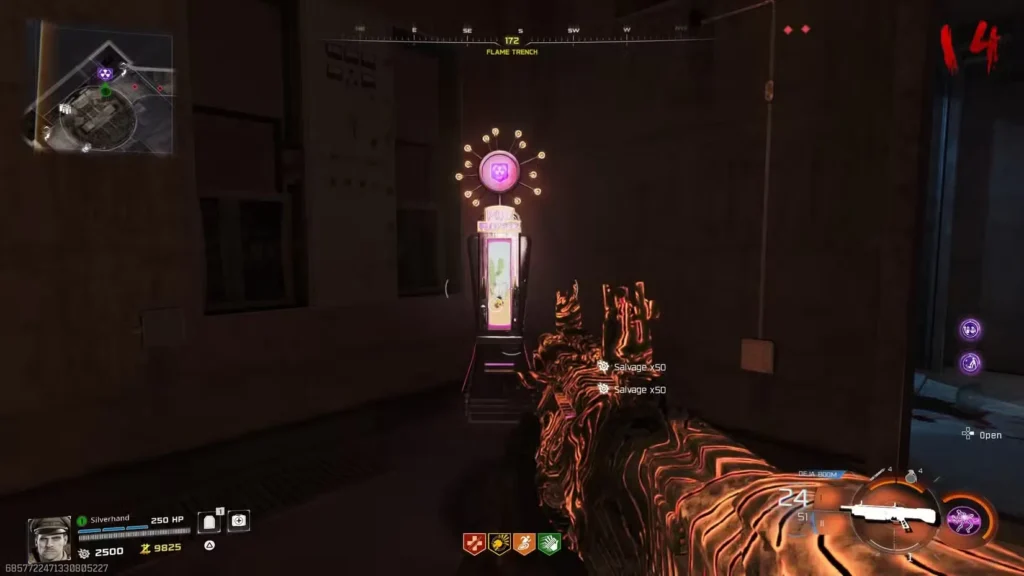
Location: Flame Trench (lower area, underneath the giant rocket)
Exact Position: South corner of the Flame Trench
Description: Explosive dive to prone and immunity to self-inflicted explosive damage
Zarya Cosmodrome is southeast of Ashwood. Once you arrive, use either the zipline or stairs to descend into the lower area beneath the massive rocket. You’re looking for the Flame Trench—a location directly underneath the rocket structure.
PhD Flopper spawns in the south corner of the Flame Trench. The iconic dive-to-prone explosion mechanic returns in full force here.
Pro strategy: The DR RAM Augment (sprint into zombies to knock them down) turns PhD Flopper from a novelty perk into a legitimate training tool. Combine with Tribologist for increased slide speed.
Cost: Standard perk pricing
9. Wisp Tea (NEW PERK)
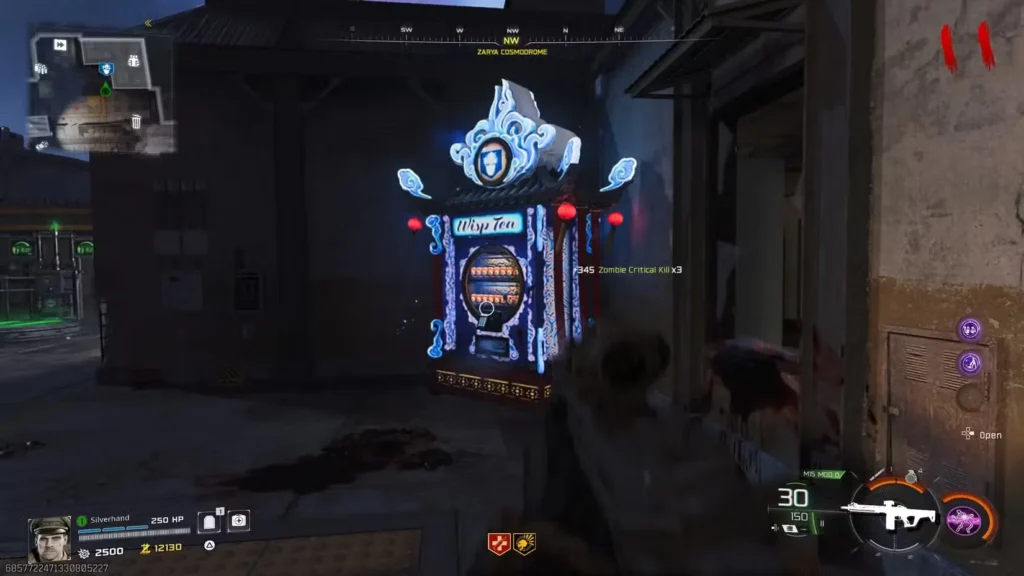
Location: Northwest corner of Zarya Cosmodrome
Exact Position: Against the back wall, near a building with an Armor Wall-Buy
Description: Summon a companion wisp after killing zombies
Wisp Tea is Black Ops 7’s brand new Perk-a-Cola, making its debut in Ashes of the Damned. You’ll find it in the northwest corner of Zarya Cosmodrome, positioned against a back wall close to a building that features an Armor Wall-Buy.
New perk mechanics: Every 2 minutes after killing zombies, you’ll summon a companion wisp that either attacks enemies or heals you depending on your Augments. The Mask of Benevolence Augment turns it into a healing support that doesn’t interfere with zombie trains.
Cost: Standard perk pricing
Vandorn Farm: Agricultural Perks
10. Stamin-Up
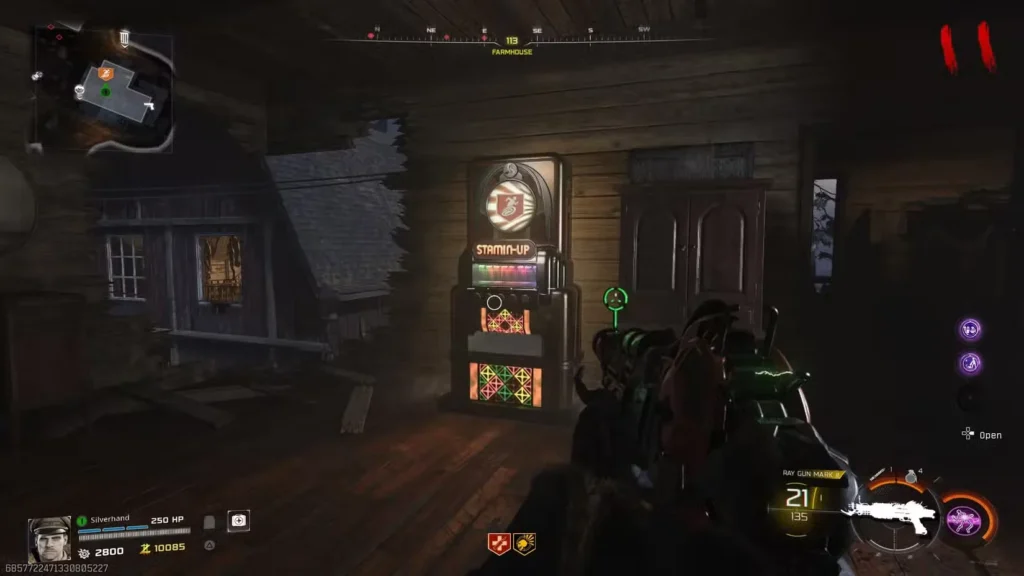
Location: Inside the Farmhouse (upstairs)
Exact Position: Southeast wall, just before the large hole in the wall
Description: Increase movement speed
To reach Vandorn Farm, take Ol’ Tessie to the left path from Janus Towers Plaza. Once you arrive, locate the Farmhouse and head inside. Go upstairs and look toward the southeast wall—you’ll find Stamin-Up positioned just before a large hole in the wall.
Mobility king: Stamin-Up with the Guns Up Augment (fire while sprinting) is one of the most fun combinations in the game. Add Footwork for increased strafing speed, and you become an unstoppable mobile death machine.
Cost: Standard perk pricing
11. Death Perception
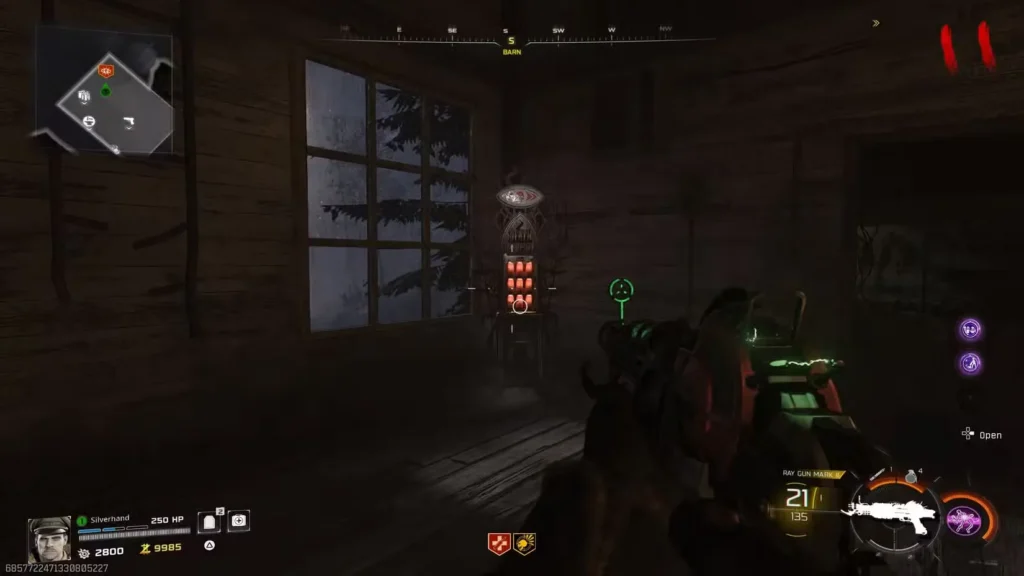
Location: Inside the Barn (upstairs)
Exact Position: South wall of the upper floor
Description: Obscured enemies are outlined
Death Perception is located in the upstairs section of the Barn at Vandorn Farm, against the south wall.
Important: You’ll need to activate power in this location before the perk machine turns on. Activating power is simple—just shoot the bulbs on the energy generator nearby.
Defensive synergy: Death Perception’s Sixth Sense Augment (reduced rear damage) stacks beautifully with Jugger-Nog’s Turtle Shell. Together, these make rear attacks almost negligible, which is perfect for high-round training.
Cost: Standard perk pricing, requires power activation
Exit 115: Roadside Diner Perks
Exit 115 is the neon-lit diner area southwest of Ashwood. You’ll recognize it immediately by the retro diner aesthetic and bright signage.
12. Deadshot Daiquiri
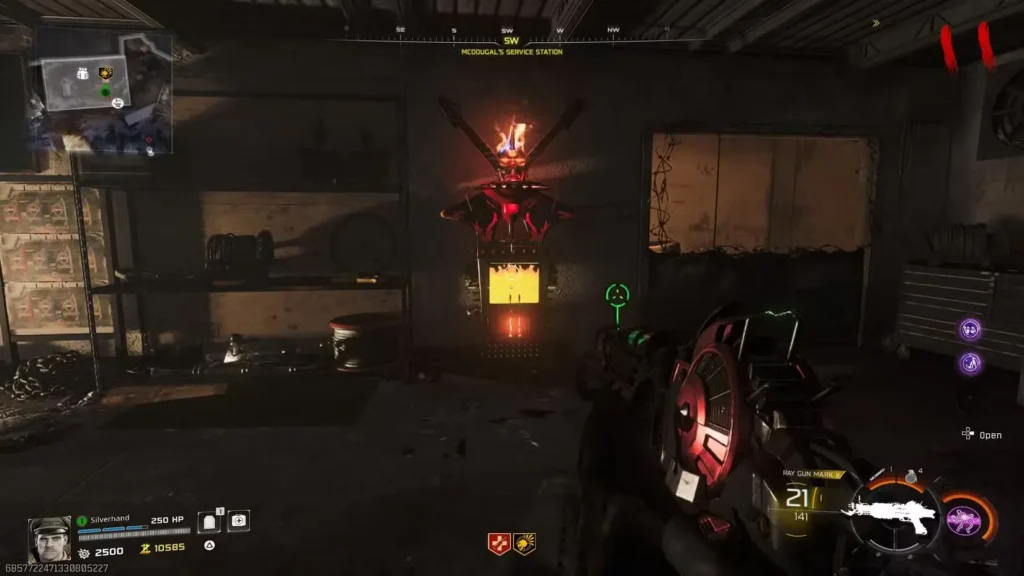
Location: Inside McDougal’s Service Station
Exact Position: Southwest wall of the service station
Description: Improve ADS precision and increase Critical Damage of bullets
Head southwest of Ashwood via Ol’ Tessie to reach Exit 115. You’ll find McDougal’s Service Station here, which needs to be opened with Essence. Once inside, Deadshot Daiquiri sits against the southwest wall.
Sniper essential: If you’re running sniper loadouts or shotguns, Deadshot Daiquiri is mandatory. The Dead First Augment (double critical damage on full-health enemies) turns every first shot into an instant kill on most enemies.
Cost: Standard perk pricing, plus Essence to unlock McDougal’s Service Station
13. Elemental Pop
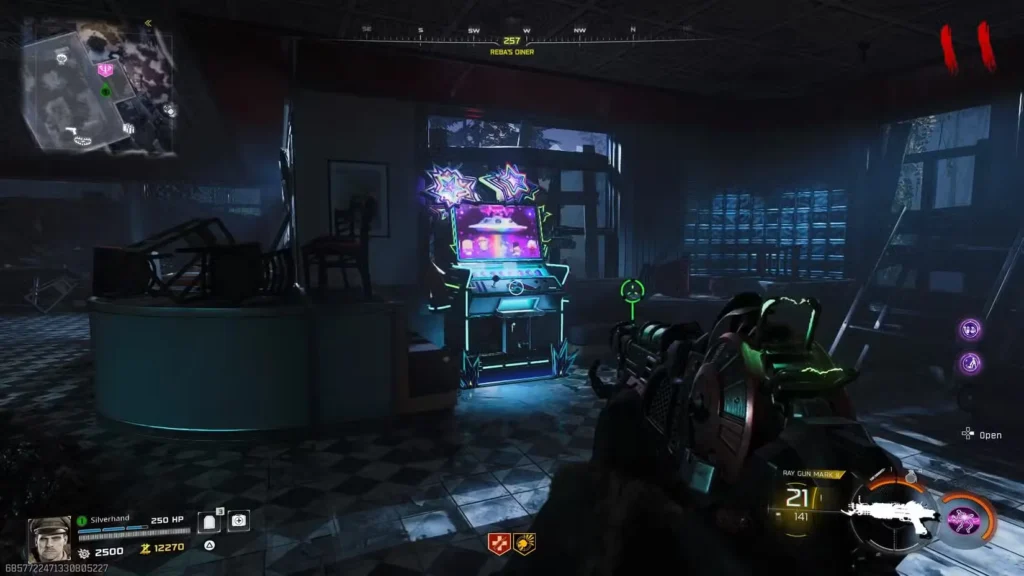
Location: Inside Reba’s Diner
Exact Position: West wall of the diner
Description: Attacks can trigger random Ammo Mods
Elemental Pop can be found inside Reba’s Diner at Exit 115. Like McDougal’s Service Station, Reba’s Diner requires Essence to unlock. Once inside, the perk machine is positioned against the west wall.
Ammo Mod synergy: Elemental Pop’s randomness is mitigated by the Rainbow Pop Augment, which increases your chance to trigger the correct elemental weakness. Pair with Vulnera Bean for maximum elemental damage output.
Cost: Standard perk pricing, plus Essence to unlock Reba’s Diner
Efficient Perk Collection Routes
Now that you know where every perk spawns, here are some optimized routes for collecting perks quickly:
Early Game Route (Rounds 1-10):
- Quick Revive – Janus Towers Plaza (spawn area)
- Take Ol’ Tessie left to Vandorn Farm
- Stamin-Up – Farmhouse upstairs
- Take Ol’ Tessie through to Ashwood
- Jugger-Nog – The Ruby Rabbit (requires Essence)
- Double Tap – Judgment Square (use zipline)
This gives you the four essential perks (Quick Revive, Stamin-Up, Jugger-Nog, Double Tap) in a relatively efficient loop.
Mid-Game Route (Rounds 11-20):
- Head to Zarya Cosmodrome (southeast of Ashwood)
- PhD Flopper – Flame Trench
- Wisp Tea – Northwest corner
- Travel to Blackwater Lake
- Speed Cola – Cabin upper floor
- Melee Macchiato – Cabin ground floor (if running melee build)
Late-Game Route (Rounds 20+):
- Return to Ashwood
- Vulture Aid – Market Square
- Head to Exit 115 (southwest of Ashwood)
- Deadshot Daiquiri – McDougal’s Service Station
- Elemental Pop – Reba’s Diner
- Return to Vandorn Farm
- Death Perception – Barn upstairs (requires power)
Round 15+ Convenience:
Once Der Wunderfizz spawns at Janus Towers Plaza on Round 15+, you can use it to fill in any missing perks rather than traveling across the map. This is especially useful if you’re going for a full 12-perk loadout or if you missed grabbing something earlier.
Perk Priority Recommendations
Not sure which perks to grab first? Here’s my recommended priority order based on survival value:
Must-Have Tier (Buy First):
- Jugger-Nog – Non-negotiable increased health
- Quick Revive – Self-revive capabilities with Equivalent Exchange
- Speed Cola – Combat efficiency, faster reloads
- Stamin-Up – Mobility for training zombies
High-Value Tier (Buy Second): 5. PhD Flopper – Spawn protection with DR RAM Augment 6. Double Tap – Increased DPS for high rounds 7. Deadshot Daiquiri – Critical damage for precision weapons
Situational Tier (Buy Third): 8. Wisp Tea – Support healing or damage 9. Death Perception – Defensive synergy with Jugger-Nog 10. Vulture Aid – Quality of life for armor management
Niche Tier (Buy Last): 11. Melee Macchiato – Only for dedicated melee builds 12. Elemental Pop – Fun but inconsistent without proper Augments
For more details on optimal Augment combinations for each perk, check out the complete Perk Augments guide.
Tips for Navigating Ashes of the Damned
Use Ol’ Tessie Efficiently:
- The bus (Ol’ Tessie) connects all major landmarks automatically
- Plan your perk route to minimize backtracking
- Wait for Ol’ Tessie at designated stops rather than running between landmarks on foot
Manage Your Essence:
- Many perk locations require opening doors with Essence
- Prioritize Jugger-Nog’s Ruby Rabbit unlock early
- Kill zombies efficiently to farm Essence for door purchases
Power Activation:
- Death Perception at Vandorn Farm requires power activation
- Shoot the bulbs on energy generators to activate power in each area
- Some wall buy locations also require power
Der Wunderfizz Strategy:
- Don’t wait for Der Wunderfizz if you need perks before Round 15
- Use it to complete your loadout after manually collecting essentials
- Remember: 1,500 Essence per spin, always gives you a perk you don’t own
Final Thoughts: Master Your Perk Routes
Ashes of the Damned is a massive map, and knowing exactly where each Perk-a-Cola spawns is crucial for efficient high-round setups. Whether you’re a casual player working through Prestige ranks or a hardcore Zombies veteran pushing for round 100+, these perk locations will save you time and keep you alive longer.
My personal recommendation? Memorize the Ashwood perk cluster (Jugger-Nog, Double Tap, Vulture Aid) and the early-game route I outlined above. Get those four essential perks ASAP, then expand your loadout based on your playstyle and what weapon loadout you’re running.
And don’t sleep on the new Wisp Tea perk—it’s more useful than it sounds, especially with the right Augments. Now grab Ol’ Tessie, plan your route, and go collect those perks. Those zombies aren’t going to survive themselves… wait, wrong way around.
Related Guides:
- Best Perk Augments for All 12 Perks
- Pack-a-Punch Location & Guide
- All Wall Buy Locations
- Complete Level Unlocks (1-55)
- All Prestige Rewards
- Best Settings & Optimization