Ammunition management is one of the trickiest aspects of Arc Raiders. You never know if you’re about to walk into a quiet raid where you’ll encounter minimal resistance or a chaotic firefight that drains your entire magazine reserve. Running out of ammo mid-combat against a Harvester or hostile players is basically a death sentence, which is why Supply Drops are so valuable.
Supply Drops offer a lifeline when you’re running low on critical resources, but they come with their own set of challenges. You need to find the console, call in the drop, and secure the loot—all while potentially attracting every hostile entity in the area. Let me break down everything you need to know about Supply Drops, including how to find them, use them safely, and complete the related quest.
What Are Supply Drops in Arc Raiders?
Supply Drops are emergency resource packages that players can call in during raids. They contain valuable items, with ammunition being the primary reward. When you’re deep in enemy territory and your ammo count is getting dangerously low, a Supply Drop can mean the difference between successful extraction and becoming another corpse on the wasteland.

Supply Drop Loot: Ammo, Grenades & Shield Rechargers
While the exact contents vary, Supply Drops typically include:
- Ammunition for various weapon types (primary benefit)
- Healing items and consumables
- Crafting materials like Mechanical Components
- Occasional equipment or attachments
- Currency items worth selling
The ammunition alone makes Supply Drops worthwhile, especially during extended raids where you’ve burned through your reserves fighting ARC machines or other players.
How to Call a Supply Drop in Arc Raiders (Step-by-Step)
Getting a Supply Drop isn’t as simple as finding a loot crate. The process involves several steps, each with its own risks.
Step 1: Locate a Supply Drop Console
The first challenge is finding the console itself. Supply Drop consoles are scattered across all maps (Dam Battlegrounds, Buried City, Spaceport, and Blue Gate), but they don’t appear on your map or show up with markers. You have to physically find them during your exploration.
What to look for:
- Tall, thin antennae—these are the visual indicator for Supply Drop locations
- Rooftop positions—many consoles are placed on building corners at roof level
- Ground-level installations—some antennae are situated at street level or near structures
- Interactive consoles—once you’re close enough, you’ll see the interaction prompt
The antennae can be surprisingly easy to miss, especially during combat or when you’re focused on other objectives. They’re designed to blend into the environment rather than stand out obviously.
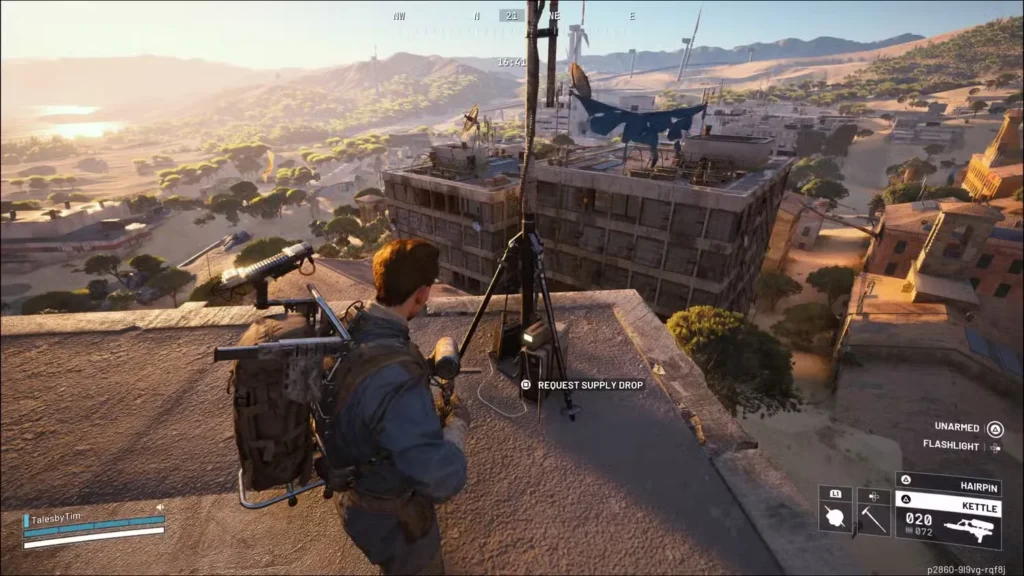
Step 2: Interact with the Console
Once you’ve located a console, approach it and interact to send off a signal flare. This is where things get interesting—and dangerous.
When you activate the console:
- A bright, highly visible flare launches into the sky
- The flare is loud and attracts attention from both ARC enemies and hostile players
- The Supply Drop package appears shortly after, attached to a parachute
- The package descends at the flare’s location
Step 3: Track the Supply Drop
After launching the flare, keep your eyes on it. The supply package will appear in place of the flare and slowly parachute down to the ground. If you lose track of where it lands, you might waste valuable time searching while enemies close in.
Pro tip: Position yourself near where you expect the package to land before it touches down. This minimizes the time you’re exposed while looting.
Step 4: Loot the Package
Once the package hits the ground:
- Approach it carefully—scan your surroundings for threats first
- Hold the indicated button to open and loot the contents
- Grab what you need quickly—don’t linger examining items
- Be ready to fight or flee—you’re vulnerable during the looting animation
The looting process takes a few seconds, during which you’re stationary and exposed. This is when hostile players will try to eliminate you and claim the loot for themselves.
Supply Drop Call Station Locations (All Maps)
Supply Drop consoles spawn in numerous locations across all maps, but their spawns are not guaranteed. A console might be present in a specific location during one raid and absent during the next—it’s randomized.
Known Spawn Areas by Map
Dam Battlegrounds:
- Near Dam Surveillance areas
- Around major POIs like Formicai Outpost
- Scattered throughout mid-map regions
Buried City:
- Multiple locations throughout the urban sprawl
- Near quest locations like areas for Marked for Death
- Around major structures and rooftops
Spaceport:
- Industrial areas with tall structures
- Near warehouses and shipping containers
- Around the perimeter of major facilities
Blue Gate:
- Village area with multiple potential spawns
- Near locations used in With a Trace quest
- Around Pilgrim’s Peak and other elevated positions
Detection Tips
Challenge: Supply Drop consoles don’t reveal themselves until you’re relatively close, which means you need to actively search for them rather than relying on map markers.
Solutions:
- Use binoculars—You can purchase and equip binoculars to scan distant areas for antennae. This isn’t foolproof since the antennae are thin and easy to miss even with magnification, but it helps
- Check rooftops systematically—Many consoles are elevated, so scan building tops as you move through areas
- Look for antenna silhouettes—Against the sky, the tall thin antennae are more visible than against cluttered ground-level backgrounds
- Listen for other players—If you hear a flare go off, someone else has called in a Supply Drop. You can potentially intercept it
Thoroughness is key: The best way to find Supply Drops is to explore systematically rather than rushing through areas. Take your time checking corners, rooftops, and structures.

A Better Use Quest Guide
If you’re working on the A Better Use quest, you’ll need to call in and secure at least one Supply Drop as part of the objective. This quest introduces players to the Supply Drop mechanic while providing decent rewards for completion.
Quest Objectives
- Find a Supply Drop console on any map
- Call in the Supply Drop by activating the console
- Successfully loot the Supply Drop package
- Extract safely (extraction may not be required for quest completion, but recommended to keep rewards)
Quest Completion Tips
Choose your map wisely: Dam Battlegrounds tends to have lower player traffic in certain areas, making it safer for solo players attempting this quest.
Timing matters: Call in the Supply Drop when you have a clear area around you. Don’t activate it if you’ve just heard gunfire nearby or spotted other players.
Have an escape route: Before activating the console, identify multiple paths away from the area in case you need to retreat quickly after looting.
Consider bringing teammates: This quest is significantly easier with friends who can provide overwatch while you loot.
Quest Rewards
While specific rewards may vary, completing A Better Use typically provides:
- Currency (Coins) for purchasing upgrades
- Crafting materials for workbench projects
- Potential equipment or attachments
- Experience toward leveling up
Even beyond the quest rewards, the Supply Drop itself contains valuable ammunition and resources, making this a worthwhile mission to complete early.
Solo vs. Team Supply Drop Strategies
Solo Strategy
Going for Supply Drops alone is risky but manageable with the right approach:
Before activation:
- Scout the entire area thoroughly for other players and ARC enemies
- Position yourself with good sightlines and cover nearby
- Have an extraction route planned
- Ensure your ammunition is sufficient to defend yourself
During the drop:
- Stay mobile and don’t wait directly under the descending package
- Keep scanning for threats approaching from all directions
- Be ready to abandon the loot if a superior force arrives
After looting:
- Grab the essentials and move immediately
- Don’t try to sort through items in the danger zone
- Head toward extraction or a safer area to assess your haul
Team Strategy
With teammates, Supply Drops become much more manageable:
Designated roles:
- One person activates the console and loots the package
- Others provide overwatch from elevated or covered positions
- Someone monitors flanking routes to prevent ambushes
Communication is critical:
- Call out threats as they approach
- Coordinate who grabs specific items from the package
- Have a unified extraction plan
Combat preparation:
- Spread out to avoid being wiped by a single grenade or flanking player
- Use shields effectively to absorb damage
- Focus fire on threats to eliminate them quickly
Risks of Calling Supply Drops (Flare & Raider Ambush)
The Flare Problem
The signal flare is essentially a beacon that announces “FREE LOOT HERE” to everyone in the area. Within seconds of launching, you can expect:
- Hostile players rushing to intercept the drop
- ARC enemies investigating the disturbance
- Opportunistic Raiders watching from a distance with sniper rifles
Risk mitigation:
- Activate Supply Drops in less trafficked areas when possible
- Never call in a drop if you’re already in combat or being pursued
- Have smoke grenades or other tactical equipment to cover your looting
Common Ways Players Die at Supply Drops
Tunnel vision while looting: Players focus so intently on the package contents that they ignore approaching threats until it’s too late.
Predictable positioning: Standing directly beside the package makes you an easy target. Keep moving.
Greedy looting: Trying to grab every item instead of prioritizing ammunition and essentials. Speed matters more than thoroughness.
Post-loot complacency: Players relax after securing the loot, not realizing threats are still converging on their position.
Advanced Supply Drop Tips
When to Use Supply Drops
Ideal situations:
- You’re running low on ammunition during an extended raid
- You’ve completed most other objectives and have spare time
- You’re in a relatively quiet area with good defensive positions
- You have teammates providing security
Avoid when:
- You’re already being hunted by other players
- Heavy ARC presence makes the area extremely dangerous
- You’re close to extraction with valuable loot you don’t want to risk
- The area is a known hotspot like Control Tower or Pilgrim’s Peak
Combining with Other Activities
Supply Drops work well when combined with:
- Quest completion: If you’re doing quests in an area, check for Supply Drop consoles
- Blueprint farming: While hunting blueprints, call in drops for additional resources
- Material gathering: Collecting crafting resources alongside Supply Drops maximizes raid efficiency
Using Binoculars Effectively
While binoculars can help spot distant antennae, they have limitations:
Pros:
- Extended vision range for scanning rooftops
- Can spot antennae from relatively safe distances
- Useful for planning your route to the console
Cons:
- Antennae are still difficult to identify even with magnification
- You’re vulnerable while using binoculars
- Not always reliable in cluttered urban environments
Best practice: Use binoculars from elevated or safe positions to scan areas before committing to exploration.
Are Supply Drops Worth It? Loot Quality vs. Risk
Supply Drops are part of Arc Raiders’ broader resource management system. Smart players integrate them into their overall survival strategy:
Ammunition planning: Don’t rely solely on Supply Drops. Carry adequate ammo for your loadout, and treat drops as emergency reserves.
Safe Pocket usage: If you call in a drop and get valuable items, use Safe Pockets to protect them from loss if you die.
Economic consideration: Sometimes it’s smarter to extract early with what you have rather than risk everything for a Supply Drop.
Common Mistakes to Avoid
Activating in obvious locations: Calling drops at major POIs like Village or Control Tower almost guarantees hostile player response.
Not preparing for combat: Players activate drops without adequate ammo, healing items, or shield charges.
Ignoring audio cues: The sound of footsteps, gunfire, or ARC machines approaching while you’re looting the package.
Staying too long: After grabbing the loot, players linger in the area organizing inventory instead of relocating immediately.
Solo attempts in dangerous zones: Trying to secure Supply Drops alone in high-traffic areas is usually suicidal.
Final Thoughts
Supply Drops in Arc Raiders are high-risk, high-reward opportunities that can save your raid when ammunition runs low. The key to using them successfully is understanding when and where to call them in, having a plan for securing the loot, and knowing when to abandon the attempt if the situation becomes untenable.
For the A Better Use quest, treat it as a learning experience. Choose a low-risk location like the outskirts of Dam Battlegrounds, activate the console, grab the loot quickly, and extract. Once you understand the mechanics, you can start incorporating Supply Drops into more aggressive farming strategies.
Remember: the flare is a double-edged sword. It gives you resources but also advertises your position. Use that knowledge to your advantage—either by being prepared to defend your claim or by intercepting other players’ Supply Drops when you hear their flares launch.
Now get out there, find those antennae, and secure some critical resources. Just don’t forget to watch your back while you’re looting.
Available on PlayStation and Xbox, Arc Raiders continues to challenge players with dynamic resource management. Good hunting, Raider!