Lance’s Multi-Map Scavenger Hunt
Medical Merchandise stands out among ARC Raiders quests because it requires you to complete objectives across three different maps. Unlike single-location quests such as A First Foothold or Eyes in the Sky, Lance sends you on a genuine expedition spanning Spaceport, Buried City, and Dam Battlegrounds.
The concept is straightforward: visit medical facilities on three maps and loot containers for supplies. No combat requirements, no special items needed, no complicated puzzles. Just navigate to the right buildings, search the right containers, and extract safely.
However, “straightforward” doesn’t mean “easy.” Each location presents unique challenges—from finding obscure entrances to dealing with ARC patrols in tight corridors. Let’s break down exactly where to go and how to survive each objective.
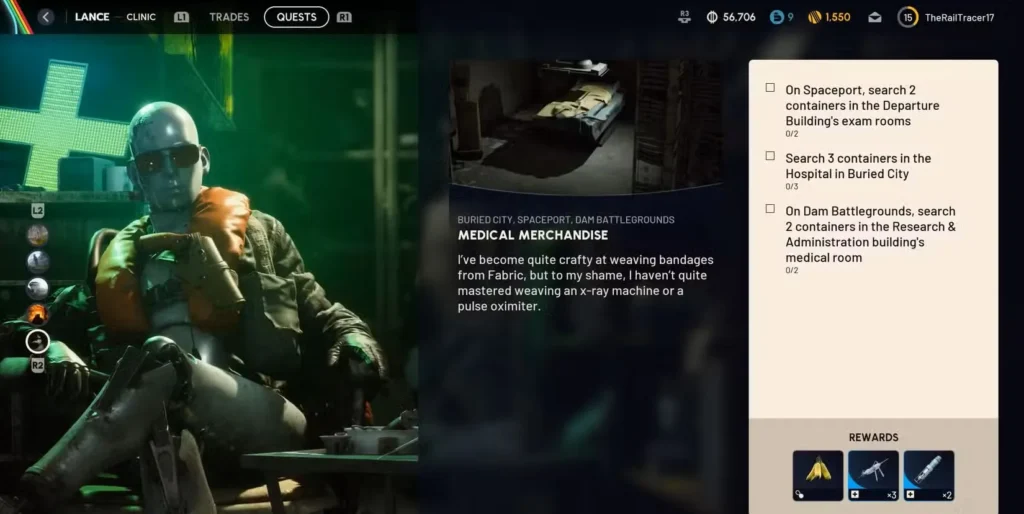
Medical Merchandise Quest Overview – Lance’s Quest Objectives
Quest giver: Lance
Number of maps required: 3 (Spaceport, Buried City, Dam Battlegrounds)
Total objectives: 3 separate looting tasks
Can complete in any order: Yes
Items required: None
The three objectives:
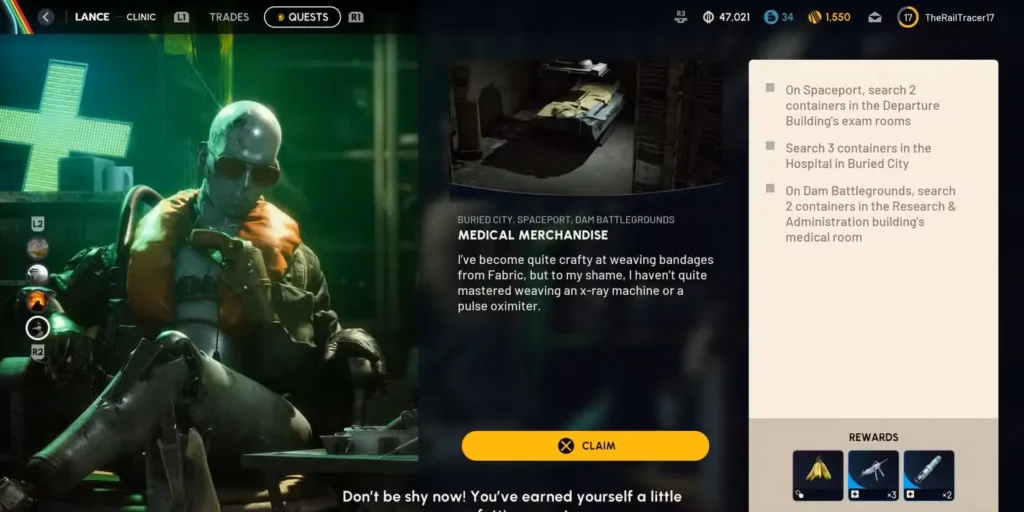
- Search 2 containers in the Medical Exam Room at Spaceport’s Departure Building
- Search 3 containers in the Hospital at Buried City
- Search 2 containers in Research & Administration at Dam Battlegrounds
Each objective requires you to physically loot containers in medical facilities. The game tracks how many you’ve searched, so you’ll know exactly when you’ve completed each location’s requirement.
Best Loadout for Medical Merchandise – Why Free Gear Works
Lance’s quest doesn’t require any special equipment, making it ideal for zero-risk farming. Here’s why free loadouts are actually optimal:
No combat requirements means:
- You don’t need powerful weapons
- Shield quality doesn’t matter as much
- Healing items are optional (though still recommended)
- You can avoid fights entirely if you want
The free loadout advantage:
- Zero financial risk – Dying costs you nothing
- Fast respawns – Jump back in immediately if things go wrong
- Stress-free exploration – Navigate unfamiliar areas without gear anxiety
The trade-off: You lose Safe Pocket access, meaning any valuable loot you stumble upon is vulnerable. But since this quest focuses on container looting rather than high-value targets, the risk is manageable.
If you prefer some insurance, bring a minimal budget loadout with basic gear and a Ferro shield. Check our loadout optimization guide for more thoughts on when to go free versus when to invest.
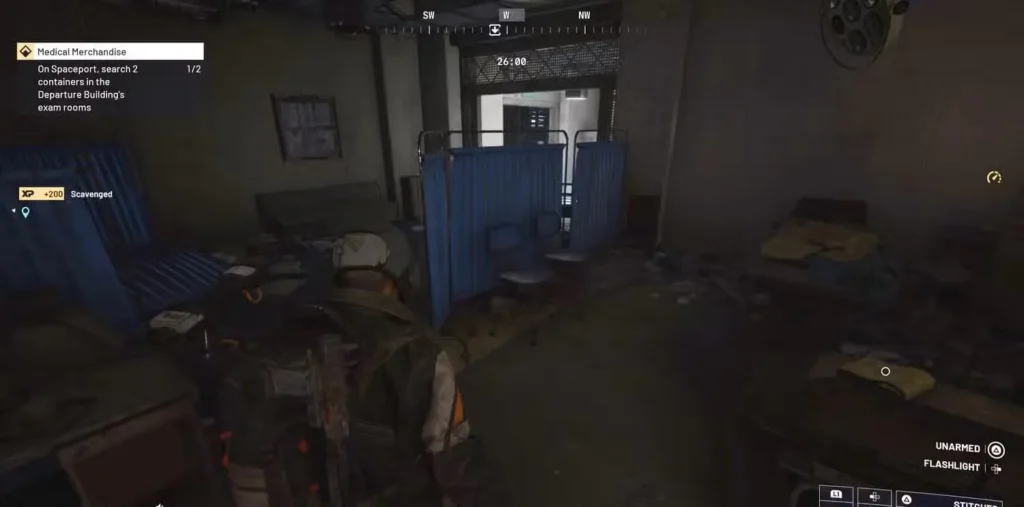
Spaceport Location – Departure Building Medical Exam Room Containers
Location: Central area of Spaceport map
Containers needed: 2
Primary threat: Pop ARC units
Difficulty: Easy to Medium
How to Reach Departure Building at Spaceport
The Departure Building sits roughly in the center of Spaceport, making it accessible from most spawn points. Open your map and locate the building—it’s one of the larger structures in the area.
Recommended approach:
- Use the northeast entrance – Top entrance provides easier access
- Climb the stairs immediately after entering
- Turn left to reach the Medical Exam Room
The northeast entrance saves time compared to ground-level entries that force you through more of the building’s interior. Getting in and out quickly reduces your exposure to both ARCs and hostile players.
How to Deal with Pop Units at Spaceport
Pop ARCs frequently patrol this area, and the confined spaces inside the Departure Building make them more dangerous than usual. These small, agile robots can swarm you in hallways where you have limited room to maneuver.
Combat tips for Pops:
- Engage from distance – Don’t let them close the gap in tight spaces
- Use doorways for cover – Pop in and out while they approach
- Listen for audio cues – You can hear Pops before seeing them
- Consider stealth – Sometimes avoiding combat is smarter than fighting
If you’re running a free loadout with basic weapons, Pops can be challenging in close quarters. Our weapon upgrade guide explains how to maximize even budget guns for situations like this.
Which Containers to Search in Medical Exam Room
Once you reach the Medical Exam Room, you’ll find multiple containers:
- Drawers – Check desks and medical carts
- Cabinets – Wall-mounted and standing units
- Wardrobes – Larger storage furniture
You only need to search two containers to complete this objective. The game tracks your progress, so you’ll see confirmation once you’ve hit the requirement.
Looting strategy:
- Clear the room first – Make sure no ARCs followed you
- Loot systematically – Don’t miss obvious containers
- Grab extras if safe – Medical areas often have mushrooms and healing items
- Extract immediately – Don’t linger once you’ve completed the objective
Buried City Hospital Location – Medical Merchandise Containers
Location: Next to Parking Garage in Buried City
Containers needed: 3
Primary threat: Vertical navigation confusion
Difficulty: Medium
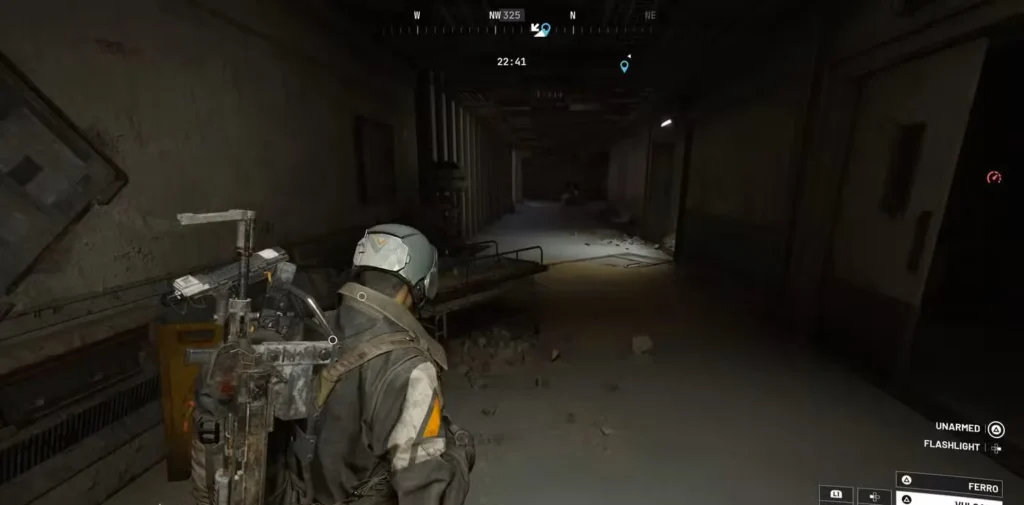
How to Find Hospital Entrance in Buried City
The Hospital in Buried City presents a unique challenge: finding a way inside. Unlike clearly marked entrances in other buildings, the Hospital’s access points aren’t immediately obvious.
The scaffolding route (recommended):
- Locate the scaffolding on the building’s exterior
- Climb up using the construction framework
- Enter through upper levels – Much easier than ground entrances
This scaffolding approach bypasses potential ground-level choke points and deposits you directly into the building’s interior. It’s the fastest route for players who know about it.
Alternative entry points:
If you can’t find the scaffolding or it’s being camped by other players, look for:
- Side doors partially obscured by debris
- Breachable walls marked with the standard indicators
- Upper-floor windows accessible from adjacent buildings
The Hospital’s proximity to the Parking Garage—another high-traffic location—means you’ll often encounter other players. Be prepared for potential PvP, especially if you’re carrying loot from previous objectives.
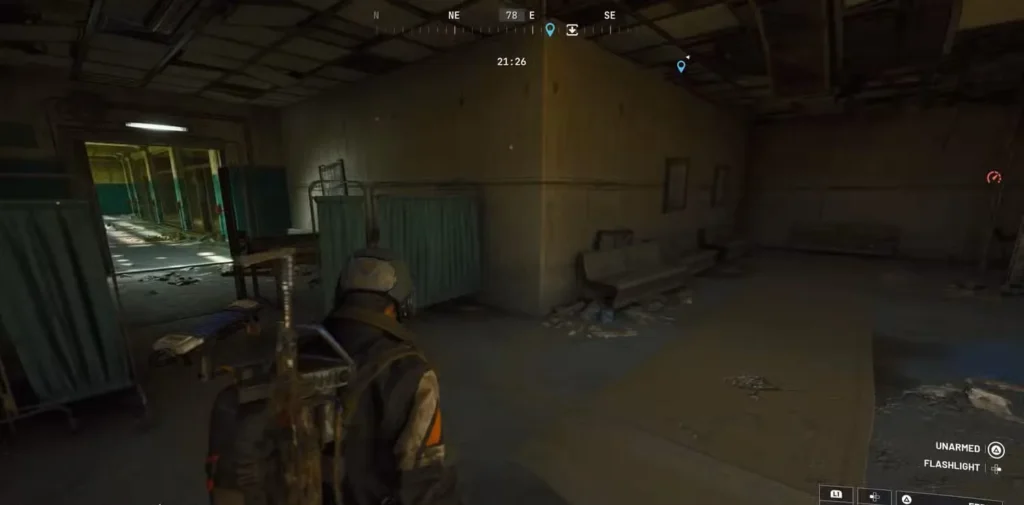
Which Hospital Containers Count for Medical Merchandise
Once inside the Hospital, you need to search three containers. The building has multiple rooms, each containing medical storage:
Container types you’ll find:
- Medical cabinets with supplies
- Storage lockers in staff areas
- Examination room drawers
- Supply closets with shelving
Systematic approach:
- Pick a floor and clear it methodically
- Check every room – Don’t assume containers are only in obvious medical spaces
- Count as you go – Track how many you’ve searched
- Watch your back – Hospital corridors create ambush opportunities
The Hospital often contains valuable medical supplies beyond just quest objectives. If you brought Safe Pockets, this is a good time to use them for items like prickly pears or other healing consumables.
Why Hospital Objective Takes Longer Than Others
Searching three containers instead of two means more time exposed in a contested building. The Hospital’s multi-floor layout and confusing interior also increase the time you spend navigating.
Time management tips:
- Don’t search optimally – Just hit three containers and leave
- Avoid unnecessary fights – You’re here for containers, not combat
- Plan your exit – Know where you’ll go after completing the objective
If you’re completing multiple quests simultaneously, consider combining this with other Buried City objectives to maximize efficiency per raid.
Dam Battlegrounds Location – Research & Administration Medical Room
Location: Dam Battlegrounds central area
Containers needed: 2
Primary threat: Sentinel ARCs
Difficulty: Medium to Hard
How to Reach Research & Administration Building
The Research & Administration building in Dam Battlegrounds is easier to locate than Buried City’s Hospital but presents different challenges. It’s a well-known landmark, which means more player traffic.
Navigation instructions:
- Locate the building on your map (central area)
- Find the southeast entrance – Look for blue staircases
- Climb to the top floor – This is where medical supplies are located
The blue staircase on the southeast side provides direct access to upper floors where the medical storage rooms are located. Ground-level entrances exist but force you through more of the building.
Dealing with Sentinels at Dam Battlegrounds
Unlike Pop units at Spaceport, Research & Administration often hosts Sentinel ARCs—significantly more dangerous opponents. These wall-mounted or patrolling units pack serious firepower and can shred unprepared players.
Sentinel survival strategies:
- Scout before entering – Look for red laser indicators
- Use cover aggressively – Sentinels have predictable firing patterns
- Prioritize destruction – Sometimes you must fight rather than sneak
- Bring appropriate gear – Free loadouts struggle against Sentinels
If you encounter a Sentinel, our complete ARC combat guide explains weak points and optimal engagement strategies.
Navigating Research & Administration Interior Layout
Once you’re on the top floor, navigation becomes straightforward:
Step-by-step:
- Enter the building via blue staircase
- Head to the hallway on the right after reaching the top floor
- Open the door and proceed left
- Continue down the hallway until you reach multiple rooms
- Search containers in any of these rooms (need 2 total)
Container locations:
- Medical supply rooms along the left corridor
- Storage areas with cabinets and drawers
- Examination spaces with lootable furniture
Why Dam Battlegrounds Is the Hardest Medical Merchandise Location
Research & Administration combines several risk factors:
- High player traffic – Well-known building attracts raiders
- Sentinel presence – More dangerous than Pops
- Limited escape routes – Upper floors can become traps
- Valuable loot nearby – Players farming blueprints or resources complicate things
Recommended approach:
- Complete this objective first if you’re running multiple maps in one session
- Bring backup gear if you’re risk-averse (not a free loadout)
- Play during off-peak hours to reduce player encounters
- Extract immediately after searching two containers
Consider this location similar to other high-risk Dam Battlegrounds objectives like Control Tower missions—valuable but contested.
Optimal Completion Order
Since you can tackle these objectives in any sequence, strategic ordering matters:
Order 1: Difficulty Progression (Recommended for New Players)
Easiest → Hardest:
- Spaceport (Departure Building) – Simplest entry and exit
- Buried City (Hospital) – Moderate difficulty, confusing layout
- Dam Battlegrounds (Research & Administration) – Hardest, Sentinel presence
Reasoning: Build confidence with easier objectives before tackling the challenging Research & Administration building. If you die at the final location, you’ve still completed 2/3 of the quest.
Order 2: Geographic Efficiency (For Quest Stacking)
Based on other objectives you’re completing:
If you’re doing A Lay of the Land at Dam Battlegrounds, complete Research & Administration in the same raid. Stack Medical Merchandise objectives with other quests on the same maps.
Order 3: Risk Management (For Valuable Cargo)
Safest → Riskiest:
If you’re carrying valuable items and want to minimize loss risk, complete the least contested location first, extract, store your loot, then tackle more dangerous areas.
Medical Merchandise Rewards Breakdown
After completing all three objectives and returning to Lance, you receive:
Reward Analysis
1. Banana (x1)
- Consumable food item
- Restores health and potentially other stats
- Not particularly rare, but useful for sustaining expeditions
2. Defibrillator (x3)
- Revival device for downed teammates
- Critical for squad play
- Can turn losing fights into victories by bringing allies back
3. Vita Shot (x2)
- Instant health restoration item
- Clutch healing during active combat
- More valuable than gradual healing items in PvP
Overall value assessment:
The Defibrillators are the standout reward here. In a game where extraction is everything, having the ability to revive downed squadmates dramatically improves group survival rates. Solo players won’t benefit from these immediately, but they’re valuable trade items or future-proofing for when you do group up.
Vita Shots provide immediate tactical value for any playstyle. Fast healing can be the difference between winning and losing a fight, making them universally useful.
The banana is… well, it’s a banana. Appreciate it for what it is—a small heal and a quirky inclusion.
Advanced Tips for Efficient Completion
Speed Running Medical Merchandise
If you’re trying to complete this quest as quickly as possible:
Optimization strategies:
- Memorize exact container locations – Don’t waste time searching entire buildings
- Skip all unnecessary loot – Only search quest-required containers
- Use fastest spawn points – Select spawns closest to each objective
- Extract immediately – Don’t explore or fight unless necessary
Experienced players can complete each objective in under 5 minutes with optimal routing and zero distractions.
Solo vs. Squad Completion
Solo advantages:
- Faster movement through buildings
- Less detectable by other players
- Simpler extraction coordination
- Keep all rewards for yourself
Squad advantages:
- One person loots while others provide security
- Easier to fight through Sentinel opposition
- Shared Safe Pocket space for bonus loot
- Someone can revive you if you mess up
Choose your approach based on your playstyle and available friends.
Combining with Resource Farming
Since you’re visiting three major maps, consider multi-tasking:
While at Spaceport:
- Check for supply drops
- Farm Arc Motion Cores from defeated ARCs
While at Buried City:
- Loot mechanical components from industrial areas
- Search for rusted gears
While at Dam Battlegrounds:
- Hunt for Sentinel Firing Cores
- Check blueprint farming spots
Efficient raiders never make single-objective trips when they can accomplish multiple goals per expedition.
Common Mistakes and How to Avoid Them
Mistake #1: Looting Too Many Containers (Waste of Time)
You only need to search 2-3 containers per location, but many players waste time searching everything in sight. This increases your exposure time and death risk.
Solution: Search the minimum required containers, then extract. You can always come back for additional loot later.
Mistake #2: Fighting Every Enemy (Unnecessary Risk)
ARCs are everywhere, and fighting them all is exhausting and dangerous—especially on free loadouts.
Solution: Learn to avoid and evade rather than fighting every enemy. Stealth and smart pathing often beat direct combat.
Mistake #3: Not Extracting Between Maps (Risking Progress)
Some players try to complete all three objectives in a single mega-raid, traveling between maps without extracting.
Solution: That’s not how the game works. You must extract, change maps, and re-deploy for each objective. Accept that this is a three-expedition quest.
Mistake #4: Using Expensive Loadouts (Unnecessary Cost)
This is a container-looting quest with no special requirements. Bringing expensive loadouts just increases your loss potential.
Solution: Use free or budget loadouts. Save your premium gear for high-value objectives that actually require firepower.
Medical Merchandise Quest Story – Why Lance Needs Medical Supplies
Medical Merchandise fits Lance’s merchant personality—he’s collecting supplies to either use or trade. Unlike Apollo’s infrastructure quests or Shani’s reconnaissance missions, Lance’s objectives tend to be resource-focused.
Lance’s typical quest themes:
- Gathering trade goods
- Collecting valuable items
- Scavenging specific resources
Completing his quests builds your relationship with him, potentially unlocking better trades or additional missions. Even seemingly simple fetch quests contribute to your overall progression and leveling.
Related Quests Worth Completing
If you’re working through Lance’s quest line or similar multi-map objectives:
Similar structure quests:
- Trash into Treasure – Multi-item collection
- Greasing Her Palms – Specific item hunting
- A Bad Feeling – Map exploration requirements
Map-specific quest stacks:
- Hatch Repairs for extraction point knowledge
- Marked for Death for combat objectives
- With a Trace for exploration practice
Preparation Checklist Before Starting
Before accepting Medical Merchandise from Lance, make sure you’re ready:
Pre-quest preparation:
✓ Free loadout slots available – You’ll need space for three separate expeditions
✓ Map knowledge – At least basic familiarity with Spaceport, Buried City, and Dam Battlegrounds
✓ Extraction routes memorized – Know where hatches are located on each map
✓ Time commitment – Three full raids means 30-60 minutes depending on efficiency
✓ Storage space – Room in your stash for rewards and any bonus loot
If you’re new to any of these maps, consider doing reconnaissance runs first to familiarize yourself with layouts and extraction points.
After Medical Merchandise Quest – Next Steps & Progression
Once you’ve finished all three objectives and collected your rewards from Lance:
What to Do Immediately After Quest Completion
1. Store your Defibrillators safely – Don’t bring them on risky raids until you need them
2. Save Vita Shots for emergencies – These are clutch-healing tools for tough situations
3. Consume or store the banana – Not particularly rare, use it whenever
Best Quests to Do After Medical Merchandise
Continue your quest progression:
- Check for new Lance quests that may have unlocked
- Explore other vendors for fresh objectives
- Use your newfound map knowledge for resource farming routes
Apply what you learned:
- You now know valuable container locations across three maps
- Medical facilities often respawn loot, making them good farming spots
- The navigation skills transfer to other quests requiring similar locations
Medical Merchandise Pro Tips – Advanced Strategies
Tip #1: Complete Medical Merchandise at Night (Less PvP)
If you’re struggling with PvP interruptions, try completing objectives during in-game night cycles or real-world off-peak hours. Fewer players means easier, faster completion.
Tip #2: Mark Medical Container Locations for Future Quests
After completing Medical Merchandise, you’ll know exactly where medical containers spawn. These locations remain valuable for healing item farming on future raids.
Tip #3: Learn All 3 Maps While Doing Medical Merchandise
Medical Merchandise forces you to navigate three major maps thoroughly. Treat it as a learning experience—memorize landmarks, extraction routes, and high-value loot areas while completing objectives.
Tip #4: Medical Merchandise Rewards Fund Better Loadouts
Once you have Defibrillators and Vita Shots, you can take more risks. Having revival capability and fast healing means you can push fights you’d normally avoid. This accelerates your coin farming and loot acquisition.
Medical Merchandise Quest Summary – Key Takeaways
Lance’s Medical Merchandise quest isn’t flashy or exciting—it’s a straightforward fetch quest spread across three maps. But that simplicity is exactly why it’s valuable for newer players.
What this quest teaches:
- Multi-map navigation and planning
- Risk assessment (which location to tackle first)
- Efficient looting (only take what you need)
- Extraction discipline (don’t get greedy)
The rewards may not be game-changing, but Defibrillators specifically become more valuable as you progress into harder content and group play. Vita Shots remain universally useful regardless of your experience level.
Key takeaways:
- Free loadouts are optimal for this quest
- Complete objectives in any order based on your comfort level
- Don’t over-loot – Search minimum containers and extract
- Watch for Sentinels at Research & Administration
- Use scaffolding to enter Buried City Hospital
This quest rewards methodical players who prioritize efficiency over combat. If you’re looking to improve at surviving and extracting consistently, Medical Merchandise provides excellent practice.
Ready to start your medical supply run? Download ARC Raiders on PlayStation or Xbox and begin raiding today.
Good luck with your container hunting, and remember—sometimes the best fight is the one you avoid!