Quest Overview: Prescriptions of the Past
In the brutal world of ARC Raiders, maintaining strong relationships with Speranza’s vendors can mean the difference between survival and death. Lance, running the medical clinic, offers some of the most valuable health-related supplies in the game—making his questline essential for players who want to maximize their survivability.
“Prescriptions of the Past” is one of Lance’s intermediate-level missions that sends you into Spaceport’s high-traffic Departure Building to recover lost medical records. While the objective itself is straightforward—find documents in a medical room—the real challenge lies in navigating one of the game’s most contested areas while avoiding both ARC threats and opportunistic players.
Quest Giver: Lance
Location: Spaceport – Departure Building
Difficulty: Medium (High player competition, moderate ARC presence)
Objective Type: Item collection (single location)
Why Complete This Quest?
Before diving into the walkthrough, let’s discuss why “Prescriptions of the Past” deserves priority in your quest progression:
Rewards Breakdown
Primary Rewards:
- 25,000 XP – Massive experience boost toward max level
- Spaceport Container Storage Key – Access to premium locked loot room
Strategic Value:
The 25,000 XP reward is one of the largest single-quest XP gains in the game, making this quest excellent for leveling progression. The Container Storage Key, while map-specific, opens one of Spaceport’s best loot locations—potentially yielding rare blueprints and high-tier crafting materials.
Lance’s Questline Benefits:
Completing Lance’s missions unlocks progressively better medical supplies, including:
- Advanced healing items
- Heavy shields
- Premium healing augments
- Defibrillators and Surge Shield Rechargers
For players focused on survivability and support roles, Lance’s entire questline is invaluable.
How to Prepare for Prescriptions of the Past Quest
Best Loadout for Spaceport Departure Building
Since you’re heading into one of Spaceport’s most dangerous areas, proper preparation matters:
Weapon Selection:
- Medium-range primary weapon (assault rifle or DMR preferred)
- Close-quarters secondary for building interiors
- Avoid pure sniper loadouts—building navigation requires versatility
Defensive Gear:
- Medium or Heavy Shield (Departure Building sees heavy combat)
- 2-3 healing items minimum
- Smoke grenades for disengagement
Utility Items:
- Zipline or grappling hook for alternate entry routes
- Safe Pocket augment to protect the Container Storage Key
- Binoculars for scouting before approaching
Optional but Helpful:
- Barricades or door blockers to secure your position
- Noisemakers to distract ARCs or players
- Extra ammo for extended engagements
Why Stealth Matters in This Quest
Timing Your Run:
The Departure Building’s popularity fluctuates throughout a raid:
- Early Raid (0-5 minutes): Extremely hot—aggressive players rush here immediately
- Mid Raid (5-15 minutes): Moderate traffic—best window for quest completion
- Late Raid (15+ minutes): Lower player count but picked-over loot
Recommendation: Deploy mid-raid when initial rushers have moved on but the area hasn’t been completely looted.
Squad vs. Solo:
This quest works for both playstyles:
Solo Advantages:
- Lower profile, easier stealth approach
- Faster navigation through building
- No coordination required
Squad Advantages:
- Overwatch coverage while searching
- Better defense against player ambushes
- Can split up to scout/secure multiple entry points
How to Complete Prescriptions of the Past (Step-by-Step)
Step 1: Navigate to Spaceport Departure Building
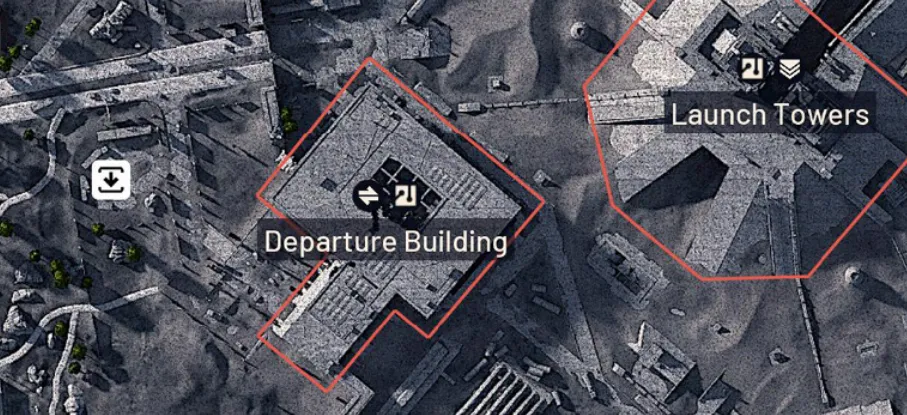
The Departure Building occupies a central position on the Spaceport map, making it impossible to miss once you know where to look.
Map Location: Center of Spaceport
Landmark Identification: Large multi-story structure with distinctive architecture
Approach Routes: Multiple entry points available
Safe Approach Strategy:
- Scout from distance using binoculars before closing in
- Listen for combat sounds indicating active player engagements
- Watch for open doors suggesting recent player activity
- Check surroundings for sniper positions overlooking the building
Danger Zones:
The Departure Building sits in an exposed area with multiple sightlines:
- Surrounding buildings provide sniper positions
- Open approaches leave you vulnerable during transit
- Multiple entry points mean threats can come from any direction
Counter-Measures:
- Use smoke grenades to obscure your approach
- Sprint unpredictably across open ground
- Enter from less obvious side entrances rather than main doors
- Time your approach when other combat draws attention elsewhere
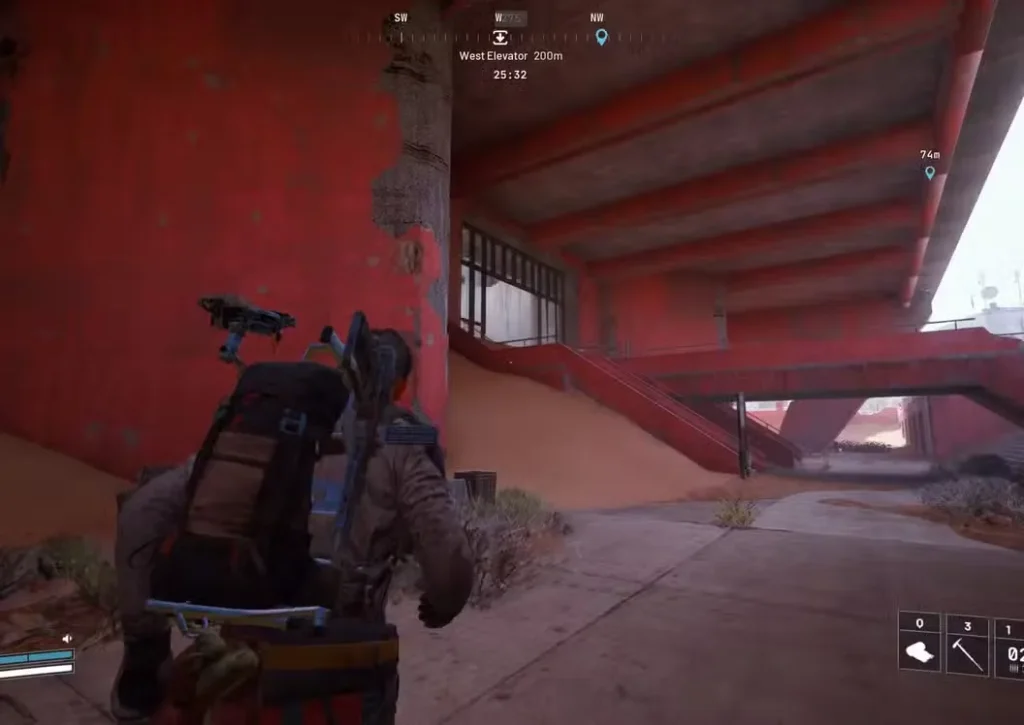
Step 2: Enter Departure Building Safely
Once you’ve reached the Departure Building, navigation becomes crucial. The building’s multi-story layout can confuse first-time visitors.
Recommended Entry Point: North Entrance
The north entrance provides the most direct route to the medical room:
- Locate the north entrance of the Departure Building
- Enter cautiously – check for campers immediately inside
- Find the staircase leading to the second floor
- Ascend to the second floor
Navigation Tips:
Staircase Safety:
- Stairs are common ambush points—approach slowly
- Listen for footsteps above before ascending
- Have your weapon ready when cresting the top
- If you hear combat upstairs, consider waiting or using an alternate route
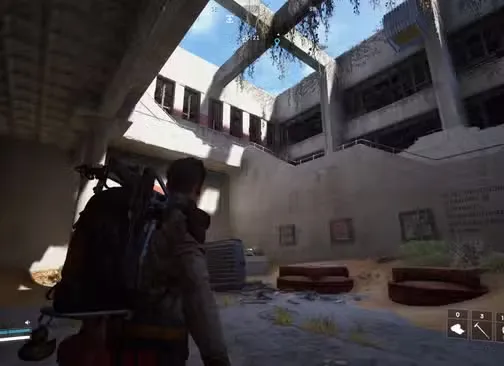
Second Floor Navigation:
After reaching the second floor:
- Turn left from the staircase
- Look for the balcony area
- The medical room entrance is adjacent to the balcony
- Identify the white cross medical symbol on the wall
Visual Identification:
The medical room is clearly marked with medical iconography:
- White cross logo prominently displayed
- Medical equipment visible through doorways
- Distinctive sterile appearance compared to other rooms
Alternative Entry Routes:
If the north entrance is contested:
- South entrance provides access but requires more internal navigation
- Side breaches may exist depending on map state
- Roof access is possible with ziplines/grappling hooks but leaves you exposed
Step 3: Find the Medical Exam Room Inside
Once inside the medical room, you’ll need to locate the medical records—a seemingly simple task that often confuses players.
What You’re Looking For:
The medical records appear as a pile of documents or papers placed on flat surfaces throughout the medical room. They’re not in a specific container or locked cabinet—just sitting on furniture.
Common Spawn Locations:
- Reception desk in the medical room entrance area
- Large office desks in examination rooms
- Counter surfaces near medical equipment
- Tables in waiting or administrative areas
Search Strategy:
- Systematically check each room section
- Approach every large flat surface (desks, counters, tables)
- Watch for interaction prompts when near the correct location
- Don’t rush – the records can be easy to miss if you’re moving too quickly
Random Spawn Mechanic:
The medical records spawn randomly on different surfaces each raid. This means:
- You can’t memorize a single location
- Each quest run requires fresh searching
- Some spawns are more obvious than others
- Patience is required for thorough searching
If You Can’t Find Them:
- Slow down and check methodically – rushing causes misses
- Look for the subtle interaction prompt appearing on screen
- Check behind obstacles or in corners of rooms
- Ensure you’re in the correct medical room (verify the white cross symbol)
Safety While Searching:
Searching leaves you vulnerable:
Defensive Measures:
- Close doors behind you when entering the medical room
- Position yourself with sight lines to entrances while searching
- Listen constantly for footsteps or combat nearby
- Don’t tunnel vision on searching—maintain situational awareness
- Consider placing a barricade at the main entrance
Time Management:
The longer you stay, the more risk you accumulate:
- Aim to find the records within 2-3 minutes of entering
- If other players arrive, assess whether to fight, hide, or flee
- Once you have the records, extraction becomes the priority
Step 4: Locate and Interact with Medical Records
When you locate the correct pile of documents, an interaction prompt appears. Simply interact to collect the medical records.
What Happens:
- Quest objective updates to show completion
- Medical records are added to your quest items (not inventory)
- You’re now free to extract or continue looting
Post-Collection Options:
Option A: Immediate Extraction
- Safest approach if you only need the quest completion
- Head directly to nearest extraction point
- Minimizes risk to quest completion
Option B: Continue Looting
- Departure Building contains high-value loot worth exploring
- Weapon crates, ammo, and crafting materials are abundant
- Keys for other map locations occasionally spawn here
- Increased risk but potentially higher rewards
Recommendation: Unless your loadout is extremely valuable or you’re low on supplies, spend 2-3 minutes looting the building. The Departure Building frequently contains items worth the minor additional risk.
Departure Building Loot Opportunities (Bonus Rewards)
Since you’re already in one of Spaceport’s premium locations, maximizing your visit makes sense:
High-Value Loot Areas in Departure Building
Security Rooms:
- Often contain locked lockers with premium items
- May require security breach or keys
- Worth checking if you have access
Weapon Crates:
- Purple and blue rarity weapons spawn regularly
- Check multiple floors for crate locations
- Can significantly upgrade your loadout
Container Spawns:
- Crafting materials in desks and cabinets
- Healing supplies in medical areas
- Keys for other locations (including Container Storage)
Common Resources:
- Ammo resupply in military areas
- Basic crafting materials throughout
- Food items in break rooms
Quest Item Synergies
The Departure Building overlaps with several other quest locations:
- Check if you have other Spaceport quests active
- Some objectives may be nearby or in the same building
- Stack multiple quest completions in one run for efficiency
Prescriptions of the Past Extraction Strategies
With quest completion secured, safe extraction becomes paramount:
Nearest Extraction Points from Departure Building
Return Points:
- Identify the closest active Return Point from your map
- Plan your route before leaving the building
- Avoid predictable paths that enemies may watch
Raider Hatches:
- If you have a Raider Hatch Key, use it for guaranteed safety
- Note: Hatches are disabled during Hidden Bunker events
Safe Exit Routes After Getting Medical Records
Safe Extraction Principles:
- Scout your exit before leaving the building
- Time your exit during quiet moments (no nearby combat sounds)
- Use different routes than your entry path
- Move unpredictably across open areas
- Have escape items ready (smoke grenades, ziplines)
High-Risk Scenarios:
If you encounter resistance during extraction:
Aggressive Players:
- Don’t fight unless necessary—quest completion is more valuable
- Use terrain and buildings for cover while escaping
- Smoke grenades create crucial disengagement opportunities
- Safe Pockets protect your Container Storage Key even if eliminated
ARC Encounters:
- Avoid unnecessary fights that slow extraction
- Use noisemakers to redirect ARC attention
- Sprint past when possible—speed over combat
Multiple Threats:
- Sometimes fleeing toward ARCs deters player pursuit
- Other players fighting provides extraction windows
- Map chaos can work in your favor
How to Use Container Storage Key Reward
After completing the quest, you’ll receive a Spaceport Container Storage Key—but it only works on Spaceport raids.
Where to Find Container Storage in ARC Raiders
Map Position: Container Storage POI on Spaceport
Key Usage: Unlocks secured room on top floor
Navigation to Container Storage:
- Locate the Container Storage POI on your map
- Navigate to the main building structure
- Find the staircase to the top floor
- Look for a locked door with key interaction prompt
- Use your key to unlock and access premium loot
What’s Inside:
The locked room typically contains:
- High-tier weapon blueprints
- Advanced crafting components
- Rare weapon attachments
- Sometimes legendary items
Strategic Use:
Since the key only works on Spaceport:
Immediate Use:
- If you’re already on Spaceport with the key, detour to Container Storage
- Worth the risk if your loadout can handle potential encounters
- Stack this with other Spaceport objectives
Save for Later:
- Store the key in your stash for future Spaceport runs
- Combine with other Spaceport quests for efficient completion
- Use during lower-traffic raids for safer looting
Key Management:
- The key doesn’t expire—save it until you’re ready
- Bring it specifically when planning Spaceport farming runs
- Consider using Safe Pockets to protect it during risky raids
- One key = one use, so make it count
4 Common Prescriptions of the Past Problems & Solutions
Problem #1: Can’t Find Medical Records in Building
Solutions:
- Slow down your search—rushing causes misses
- Check EVERY desk, table, and counter systematically
- Look for the interaction prompt appearing on screen
- Some spawns are in corners or behind equipment
- Verify you’re in the correct medical room (white cross symbol)
Problem #2: Departure Building Contested by Players
Solutions:
- Wait 5-10 minutes after deployment before approaching
- Use alternate entry points instead of main doors
- Bring squad for covering fire and overwatch
- Consider abandoning the run and trying when map traffic is lower
- Use smokes and terrain to minimize exposure
Problem #3: Eliminated Before Finding Records
Solutions:
- Run cheaper loadouts to minimize loss
- Play more defensively while searching
- Close doors and secure your position before searching
- Bring better defensive equipment (shields, healing)
- Improve your general survival skills
Problem #4: Can’t Extract After Completing Quest
Solutions:
- Identify extraction points BEFORE entering the building
- Keep escape items (smokes, ziplines) for emergencies
- Don’t overstay looting—get in and get out
- Use Safe Pockets so death doesn’t lose quest progress
- Learn multiple exit routes from Departure Building
Integration with Lance’s Questline
“Prescriptions of the Past” is part of Lance’s broader medical-focused quest series:
Related Lance Quests:
- Doctor’s Orders – Starter medical quest
- Medical Merchandise – Mid-tier collection mission
- Life of a Pharmacist – Advanced medical quest
- Prescriptions of the Past – This quest
Progression Benefits:
Completing Lance’s questline unlocks:
- Tactical MK.3 Healing Augments
- Heavy Shield rewards
- Premium medical supplies for purchase
- Better healing item selection in his shop
For players focused on survivability, completing Lance’s entire quest series should be a priority alongside other trader missions.
Alternative Strategies
Speed Run Method (Under 3 Minutes)
For experienced players who know the layout:
- Deploy to Spaceport with minimal gear
- Sprint directly to Departure Building’s north entrance
- Rush to medical room (know the route by memory)
- Quickly scan spawn locations for records
- Extract immediately via nearest Return Point
Time: 3-5 minutes
Risk: Medium (speed reduces exposure time)
Reward: Quest completion with minimal investment
Opportunistic Loot Approach (Maximize Rewards)
For players doing other Spaceport activities:
- Work on other Spaceport quests first
- Save Departure Building for later in the raid
- Complete medical records as part of larger loot run
- Extract with multiple objectives completed
Time: 15-20 minutes
Risk: Higher (extended exposure time)
Reward: Maximum value from single raid
Squad Sweep Strategy (Team Play)
For coordinated teams:
- Entire squad deploys together
- One player searches for records
- Others provide overwatch and security
- Team moves together through building
- Loot efficiently before group extraction
Time: 10-15 minutes
Risk: Lower (safety in numbers)
Reward: Secure completion + team loot collection
XP Optimization Tips
The 25,000 XP reward is substantial. Maximize your leveling by:
XP Stacking:
- Complete multiple quests before turning them in
- Combine with other high-XP activities
- Use any XP boost items or bonuses if available
Efficient Questing:
- Stack Spaceport quests together
- Complete “Prescriptions of the Past” alongside other nearby objectives
- Maximize XP per raid deployment
Leveling Priorities:
- Focus on high-XP quests like this one first
- Balance quest completion with general leveling strategies
- Unlock best skills as you level
Final Tips for Prescriptions of the Past Quest Success
“Prescriptions of the Past” exemplifies ARC Raiders’ quest design: simple objectives made challenging by environmental dangers and player competition. While finding medical records in a building sounds straightforward, executing it safely in one of Spaceport’s hottest locations requires planning, awareness, and sometimes a bit of luck.
The massive 25,000 XP reward makes this quest worth prioritizing in your progression path, and the Container Storage Key provides ongoing value for future Spaceport raids. Combined with strengthening your relationship with Lance for medical supply access, this quest offers multiple layers of benefit.
Whether you choose the cautious methodical approach or the risky speed run strategy, remember that quest completion is more valuable than any loot you might find along the way. Get in, grab the records, and get out safely. The Container Storage Key in your stash and the XP toward your next level make it all worthwhile.
Pro Tip: After completing this quest, immediately plan a follow-up Spaceport raid bringing your new Container Storage Key. The locked room’s contents often contain items worth multiple times more than the risk of acquiring them.
Available Now: PlayStation | Xbox | Official Site
What strategy worked best for you on this quest? Did you use the Container Storage Key immediately or save it for later? Share your Departure Building survival stories in the comments!