The Assault class in Battlefield 6 has evolved far beyond its “run and gun” roots. While you’re still the tip of the spear leading your team into combat, DICE has added layers of tactical depth that make modern Assault players more versatile than ever before. You’re no longer just a kill-chasing machine—you’re a breaching specialist, area denier, and objective catalyst all rolled into one.
After countless hours testing different Assault configurations across every game mode and map, I’ve identified three core playstyles that genuinely change how you impact matches. Whether you’re smashing through fortified positions, raining explosives from unexpected angles, or enabling your squad to pressure objectives relentlessly, there’s an Assault loadout that fits your approach.
Let’s break down each build, explain why they work, and cover the tactics that transform good Assault players into absolute menaces on the battlefield.
How Assault Has Changed in BF6
Before we dive into loadouts, here’s what makes Assault different in this iteration:
Team-focused utility: Previous Battlefield games treated Assault as a purely selfish class—maximize kills, ignore everything else. BF6 flips this by giving Assault players tools that directly benefit their squad: Deploy Beacons for spawning, breaching equipment for entry denial, and Field Specs that buff nearby teammates.
Diverse gadget options: You’re not locked into a single playstyle anymore. Want to breach rooms? There’s a loadout for that. Prefer indirect fire support? You can build for that too. Need to enable aggressive objective play? Yep, covered.
Enhanced mobility tools: The Assault Ladder and various breaching equipment let you create unconventional angles and entry points that catch enemies completely off-guard.
What I love about these changes: Assault still rewards aggressive play and mechanical skill, but now smart gadget usage and tactical thinking matter just as much as raw aim. You can legitimately carry games through intelligent positioning and timing, not just by fragging out.
If you’re coming from Engineer or Support classes, Assault will feel more fast-paced and less forgiving—but infinitely more rewarding when executed correctly.
Loadout #1: The CQB Breacher (Close-Quarters Domination)
This is my personal favorite when playing tight urban maps or modes with heavy interior combat. Your entire existence revolves around one question: “How do I get inside and eliminate everyone before they know what hit them?”
Primary Weapon: M433
The M433 is an absolute monster in close quarters and—critically—it’s available from rank 1. No grinding required to access this beast.
Why it dominates CQB:
- Lightning-fast rate of fire shreds enemies at close range
- Manageable recoil pattern makes it easy to control in panic situations
- Quick ADS time lets you react instantly to threats around corners
- Excellent hipfire accuracy for snap encounters
The weakness? Range dropoff is brutal beyond 15-20 meters. You’re not winning medium-range duels with this thing unless your opponent is already wounded. But in its intended range, the M433 is nearly unbeatable with proper aim.
For attachment optimization, check our weapon unlock guide and recoil control tips.
Secondary Weapon (Sling): M87A1 Shotgun
The sling weapon system in BF6 lets you carry a secondary primary weapon—and the shotgun is perfect for the breacher role.
When to use it:
- Ultra-tight spaces where even the M433’s TTK isn’t fast enough
- Wounded enemies you need to finish instantly
- Destroying doors and weak cover
- Moments when you’re caught reloading your primary
I typically keep the shotgun ready when I’m about to breach a doorway. Nothing says “surprise” like a face full of buckshot the instant you kick in a door.
Gadget: Breaching Projectile Launcher
This is what separates amateur breachers from pros. The Breaching Projectile Launcher fires a flashbang-style explosive through walls and barricades.
How to use it effectively:
- Shoot it at walls you’re about to breach—it detonates on the other side
- Enemies get disoriented before you even enter
- Combine with Stun Grenades for total sensory overload
- Use it through destructible cover to create chaos before your push
The psychological impact is underrated. Most players aren’t expecting disorientation before they even see an enemy, so they’re already mentally behind when you come through.
Pro tip: Learn the common defensive positions on each map. Pre-fire your breaching launcher at these spots before entering, and you’ll catch multiple enemies off-guard.
Grenade: Stun Grenade
Standard flashbangs are fine, but Stun Grenades in BF6 have a longer effect duration and slightly better area coverage.
Stun Grenade tactics:
- Cook them slightly before throwing so enemies can’t escape the radius
- Bounce them around corners to avoid direct-line counters
- Use them AFTER your breaching launcher for sequential disorientation
- Toss them into objectives during the final seconds of captures
The mistake I see constantly: players throw stuns and immediately rush in. Wait one second for the stun to actually take effect, then enter. That extra beat makes all the difference.
Melee Weapon: Sledgehammer
The sledgehammer isn’t just for style points—it’s a tactical tool for creating your own entrances.
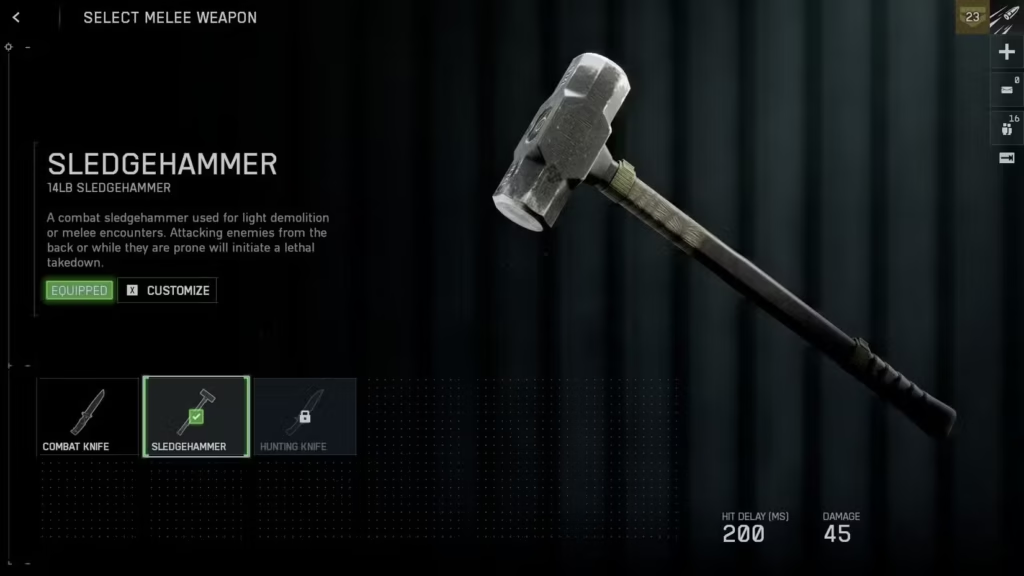
Sledgehammer applications:
- Smash through doors faster than opening them normally
- Create new breach points in destructible walls
- Eliminate downed enemies instantly without wasting ammunition
- Destroy enemy equipment and gadgets quietly
The noise is loud, so enemies will hear you breaching. But speed matters more than stealth in CQB scenarios—you want to be inside before they can set up a proper defense.
Field Spec: Breacher
This Field Spec is purpose-built for aggressive entry play:
- Damage resistance during breaches – Take less damage immediately after breaking through doors/walls
- Increased sprint speed after eliminations – Chain kills faster by moving between targets quicker
- Equipment replenishment on squad wipes – Aggressive play literally rewards you with more tools
The damage resistance is clutch. You’ll regularly survive encounters you’d otherwise lose because you tanked an extra bullet during your breach. It’s the difference between trading kills and winning the engagement outright.
Playing the CQB Breacher Effectively
Here’s how this loadout actually functions in real matches:
Map selection matters: This build is genuinely map-dependent. It excels on:
- Empire State (tons of interior spaces)
- Saint’s Quarter (tight streets and buildings)
- Any Breakthrough mode objectives with indoor capture points
On open maps like Ascension or larger Conquest modes? You’ll struggle. Know when to switch loadouts.
Entry sequence:
- Approach the objective/building with your squad
- Fire Breaching Launcher through the wall/door
- Wait 1 second for disorientation
- Throw Stun Grenade as follow-up
- Breach with Sledgehammer
- Clear with M433, switch to shotgun for immediate threats
- Keep moving—never stop inside doorways
Don’t work alone: This loadout amplifies squad play. Your breach creates opportunities for teammates to capitalize on disoriented enemies. Coordinate pushes so you’re not dying alone inside.
Movement is survival: The biggest mistake CQB players make is stopping to aim. In close quarters, keep moving while shooting. Strafe, jump, slide—anything to avoid becoming a stationary target. Master the combat roll mechanic for extra evasiveness.
Loadout #2: The Grenadier (Indirect Fire Support)
If you prefer staying slightly back from the frontline while still applying massive pressure, the Grenadier build transforms you into a destruction machine that enemies can’t safely ignore.
Primary Weapon: Flexible Choice
Unlike the Breacher, your weapon choice here is flexible based on personal preference. But since you’ll be operating at medium range, prioritize:
Top recommendations:
- SOR-556 Assault Rifle – Excellent mid-range stability and damage
- M277 Carbine – Our M277 loadout guide covers this in detail
- M4A1 – The classic M4A1 build still performs admirably
You want something accurate at 30-60 meters since you’ll be positioned away from direct combat, punishing enemies from safer angles.
Gadget 1: Assault Ladder
The Assault Ladder is criminally underrated. It lets you access:
- Rooftops and elevated positions enemies don’t expect
- Flanking angles that aren’t normally reachable
- Off-angle grenade launcher positions
- Escape routes when enemies push your position
Grenadier-specific usage: Set up your ladder to access a building’s second floor or rooftop, then rain grenades down on objectives below. Most players never look up, so you’ll get multiple eliminations before anyone realizes where the explosives are coming from.
I’ve held entire objectives by myself using this tactic—position on an unexpected roof, spam grenades at the capture point below, eliminate anyone who tries to approach. It’s incredibly effective and incredibly frustrating for enemies.
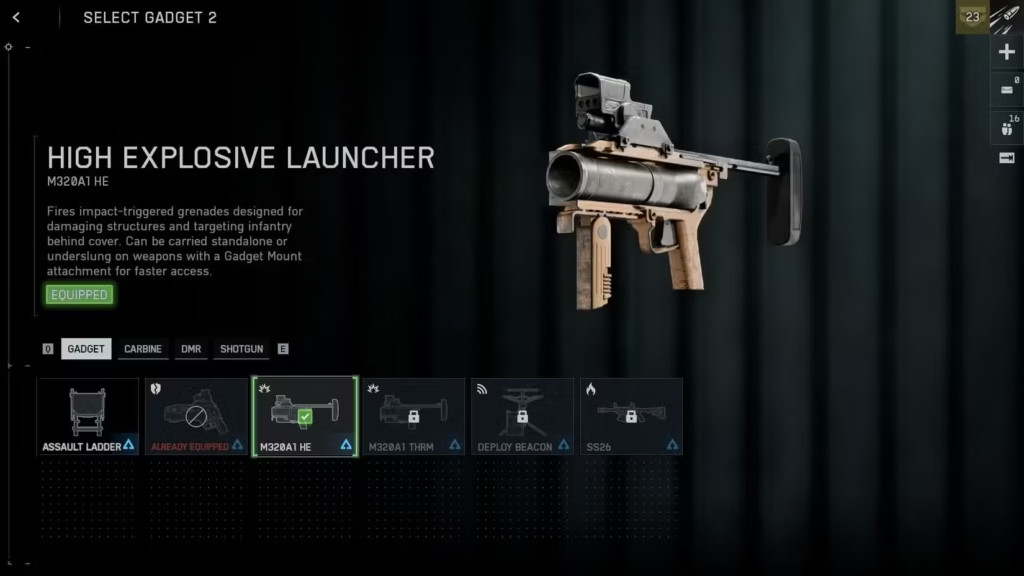
Gadget 2: M320A1 HE Launcher
This is your primary tool—a grenade launcher that excels at:
- Destroying enemy cover and fortifications
- Eliminating clustered enemies
- Area denial around objectives
- Flushing enemies out of defensive positions
Damage values:
- Direct impact + explosion = instant kill
- Near-miss explosion = 60-80 damage
- Destroys most walls and wooden structures in 1-2 hits
The reload is lengthy, so you can’t spam indefinitely. But each shot meaningfully impacts the battlefield state.
Advanced techniques:
- Arc your shots over buildings to hit enemies behind cover
- Shoot destructible walls first to expose enemies, then follow up with a second grenade
- Use the explosion radius to your advantage—near-misses still deal significant damage
- Target enemy spawn points and ammo crates for area denial
Grenade: Frag Grenade
Standard frags complement your launcher by giving you:
- Close-range panic options when enemies push you
- Additional area denial when your launcher is on cooldown
- Anti-vehicle chip damage (surprisingly useful)
- Equipment destruction capability
Cook your frags whenever possible to deny enemies time to escape. A well-cooked frag is nearly unavoidable.
Field Spec: Breacher
Yes, we’re using Breacher again even though this isn’t a breach-focused build. Why? The benefits still apply:
- Sprint speed after eliminations helps you reposition between grenade volleys
- Equipment replenishment keeps you stocked on explosives
- The damage resistance occasionally saves you when enemies locate your position
Alternative: Some players prefer running other Field Specs for different passive bonuses. Experiment based on your playstyle.
Advanced Grenadier Tactics
Positioning philosophy: You want to be close enough to reach objectives with grenades but far enough that enemies can’t immediately retaliate. Generally, this means:
- Second-floor positions overlooking objectives
- Rooftops with sight lines to capture points
- Behind friendly lines with clear arcs to enemy positions
Ammo management: Your biggest limitation is ammunition. Solutions:
- Position near Support players with ammo crates
- Relocate to ammo stations during lulls in combat
- Use your primary weapon more than you think—save grenades for critical moments
Target priority:
- Enemy clusters (multiple kills per grenade)
- Defensive fortifications protecting objectives
- Enemy support equipment (spawn beacons, ammo crates, etc.)
- Vehicles (as harassment—you won’t destroy them alone)
Counter-play awareness: Smart enemies will hunt you once they realize where the grenades are coming from. Watch your flanks, and always have an escape route planned. The Assault Ladder helps here—climb down and reposition when you’re compromised.
When to Upgrade: Thermobaric Grenade Launcher
The guide mentions eventually replacing the Assault Ladder with the Thermobaric Grenade Launcher. This is a late-game unlock that fundamentally changes your playstyle.
Thermobaric advantages:
- Larger explosion radius than standard HE grenades
- Creates fire zones that deal damage over time
- Excellent area denial—enemies can’t occupy burned areas
- Psychological impact (players panic when on fire)
The tradeoff: You lose your Assault Ladder mobility. Only make this swap once you’re comfortable with ground-level positioning and don’t need the elevation access as much.
Loadout #3: The Infiltrator (Objective Pressure Specialist)
This is the squad-focused loadout that transforms how your entire team approaches objectives. You’re not just capturing points—you’re creating persistent spawn pressure that makes objectives nearly impossible for enemies to retake.
Primary Weapon: Close-Medium Range Flexible
Since you’ll be on or near objectives constantly, you need a weapon that handles:
- Close-quarters interior fighting
- Medium-range approaches to objectives
- Sustained fire during defensive holds
Top choices:
- Assault rifles with good all-around stats
- Carbines for mobility
- Some players even run LMGs for defensive holds
The weapon matters less here than proper gadget usage. Pick something you’re comfortable with since you’ll be in constant combat.
Gadget 1: Deploy Beacon (THE CRITICAL TOOL)
The Deploy Beacon is the entire foundation of this loadout. It’s unlocked at Rank 23 after completing the Assault 1 challenge, which means you’ll need to grind a bit to access this playstyle.
What it does:
- Creates a spawn point for you and your squadmates
- Has limited spawns before it needs replacing
- Can be destroyed by enemies
- Allows your squad to maintain constant pressure on objectives
Why it’s game-changing: Normally when your squad gets wiped attacking an objective, you all spawn back at base and have to make the entire approach again. With a Deploy Beacon positioned correctly, your squad spawns right back into the fight, making it incredibly difficult for enemies to hold the position.
I’ve captured objectives that should be impossible by placing a Deploy Beacon in a hidden spot and just repeatedly spawning on it until we overwhelmed the defenders through sheer persistence.
Critical placement principles:
- Hide it obsessively – If enemies find your beacon, they’ll destroy it immediately
- Rooftops are ideal (hence the Assault Ladder)
- Dense foliage and shadowy corners work well
- Near objectives but not directly on them (enemies are more alert on the point itself)
- Never place beacons in high-traffic areas
Placement priority by map type:
- Conquest: Near contested flags, especially ones that constantly flip
- Breakthrough: Just behind the attackers’ line on the objective sector
- Rush: Near armed M-COM stations to enable defusal attempts
Gadget 2: Assault Ladder
The synergy with Deploy Beacon is obvious—use the ladder to reach hidden elevated positions where you can place your beacon.
Beacon + Ladder combinations:
- Access rooftops, place beacon in corners where it’s invisible from ground level
- Climb construction structures to place beacons on upper floors
- Reach building exteriors that overlook objectives
The ladder also gives you escape options when objectives get too hot. Climb up, reposition, come back down elsewhere.
Grenade: Frag Grenade
Standard frags remain your best choice because:
- Versatile in all situations
- Good damage against clustered enemies
- Can be cooked for guaranteed hits
- Useful for clearing rooms before spawning on your beacon
Nothing fancy here—frags just work.
Field Spec: Frontliner (SQUAD BUFF MACHINE)
This is what elevates the Infiltrator from “decent” to “absolutely cracked”:
Frontliner benefits:
- Squad-wide health regeneration buff – Your entire squad passively heals faster
- Adrenaline Injector effect for squadmates – Boosts combat effectiveness
- Increased personal health regeneration – You survive more engagements
The passive health regeneration is legitimately overpowered when stacked with the Deploy Beacon. Your squad can take damage, briefly disengage, heal quickly, and immediately re-engage—all while spawning directly on the objective thanks to your beacon.
It’s a force multiplier that turns a decent squad into an unstoppable objective-capturing machine.
Playing the Infiltrator Role
This loadout requires more coordination and game sense than the others, but the payoff is massive:
Phase 1 – Initial Infiltration:
- Push toward the objective with your squad
- As you approach, identify a hidden beacon placement spot
- Use Assault Ladder to access it if needed
- Place Deploy Beacon in the hidden location
- Communicate beacon placement to your squad
Phase 2 – Sustained Pressure:
- Fight on the objective, utilizing your health regeneration buff
- When you die, spawn on your beacon and rejoin the fight
- Your squad does the same, creating endless pressure
- Enemies get overwhelmed by the continuous spawns
Phase 3 – Beacon Maintenance:
- Monitor your beacon’s remaining spawns
- Replace it when depleted or if enemies discover it
- Relocate beacons if the objective situation changes
- Always have backup placement spots identified
Squad coordination tips:
- Use voice chat or text to inform teammates about beacon placement
- Remind squadmates to spawn on the beacon, not on you directly
- If you’re squad leader, set orders on the objective you’ve placed a beacon near
- Coordinate pushes—having all 4 squad members push simultaneously is more effective than trickling in
Defensive beacon usage: Don’t just use beacons offensively. If your team is defending an objective, place a beacon in a safe fallback position. If enemies capture the point, your squad can immediately spawn and counter-attack before they consolidate.
Loadout Comparison: When to Use Each Build
Here’s my quick reference for selecting loadouts:
Use CQB Breacher when:
- Playing on maps with heavy interior spaces
- Your team is struggling to break into fortified buildings
- Enemy team is stacking objectives with defenders
- Playing modes like Team Deathmatch or Domination on small maps
Use Grenadier when:
- You need area denial and cover destruction
- Enemy team is heavily fortified behind defenses
- Your team lacks indirect fire support
- Playing Breakthrough as attackers
- You want a safer, less aggressive playstyle
Use Infiltrator when:
- Playing objective-focused modes (Conquest, Breakthrough, Rush)
- You have a coordinated squad
- Your team struggles to maintain pressure on objectives
- You’ve unlocked the Deploy Beacon (Rank 23+)
Can’t decide? Start with Infiltrator if you have Deploy Beacon unlocked, or Grenadier if you don’t. Both are more forgiving than the CQB Breacher while still being highly effective.
General Assault Class Tips & Optimization
Beyond specific loadouts, here are universal Assault tactics:
Movement and Positioning
Stay aggressive but smart: Assault rewards forward momentum, but suicidal charges accomplish nothing. Push with purpose, use cover, and know when to fall back.
Master the mobility mechanics:
- Slide around corners for harder-to-hit angles
- Use combat rolls to dodge grenades and disengage
- Jump-shotting makes you harder to hit in close quarters
- Learn the crouch-spam rhythm for evasive dueling
Optimizing Your Performance
Settings matter: Your aim and movement responsiveness directly impact Assault effectiveness. Check our best settings guide for graphics and control optimization.
Level up efficiently: Complete Assault-specific challenges to unlock better equipment faster. Focus on challenges that align with your playstyle.
XP farming: Use XP boost strategies and XP boosters during grinding sessions to reach critical unlocks like Deploy Beacon sooner.
Cosmetic Completionism
If you care about progression beyond just performance:
- Unlock all camos through weapon mastery
- Collect character skins via challenges
- Hunt achievements and trophies for completion percentage
Map Knowledge Is Power
Understanding map layouts and rankings helps you:
- Identify optimal breach points before engaging
- Know which sight lines to avoid
- Predict enemy movement patterns
- Select appropriate loadouts for specific maps
Advanced Assault Strategies
Once you’ve mastered the basics:
Challenge Completion for Unlocks
Assault has several challenge tracks worth pursuing:
- Assault Class Challenges – Core progression
- Close Quarters Challenges – Perfect for Breacher players
- Deadeye Challenges – Precision elimination rewards
- Danger Close Challenges – Explosive-focused progression
Cross-Class Synergies
Assault plays best when supported by:
- Support players dropping ammo for your grenade spam
- Recon players using spotting mechanics to reveal enemies before you breach
- Engineers clearing vehicles so you can focus on infantry
Coordinate with teammates for maximum impact.
Campaign Practice
Use the single-player campaign to practice mechanics risk-free:
- Moving Mountains Mission
- Nile Guard Mission
- Night Raid Mission
- Operation Gladius
- No Sleep Mission
- The Rock Mission
Common Assault Mistakes to Avoid
I see these constantly in public matches:
Lone wolfing too hard: Even aggressive Assault players need squad support. You’re not invincible.
Ignoring gadgets: Players treat Assault like a pure gunfighter class and never use their utilities. Your gadgets define your impact.
Poor Deploy Beacon placement: Visible beacons get destroyed instantly, wasting your entire strategic advantage.
Overcommitting to lost fights: Know when to disengage. Trading 1-for-1 constantly doesn’t help your team.
Static positioning: Especially as Breacher—if you stop moving inside buildings, you die. Constant motion is survival.
Conclusion: Mastering Assault in BF6
The Assault class in Battlefield 6 rewards versatility, aggression, and smart gadget usage in equal measure. Whether you’re the first one through the door, providing explosive support from unexpected angles, or enabling your squad’s objective captures, you directly determine whether your team establishes battlefield dominance or gets bogged down in stalemates.
My personal recommendation? Start with the Grenadier build to learn positioning and indirect fire tactics. Once comfortable, graduate to Infiltrator (assuming you’ve unlocked Deploy Beacon) to understand objective flow. Finally, master CQB Breacher on appropriate maps to develop the mechanical skills and game sense that separate average Assault players from truly elite ones.
The beauty of Assault in BF6 is that all three playstyles are viable and necessary depending on the situation. Flexibility wins games.
For more Battlefield 6 guides, explore our content on all game modes, Field Specs, weapon playlists, and essential tips and tricks.
Now get out there and lead the charge.
Official Battlefield 6 Resources: