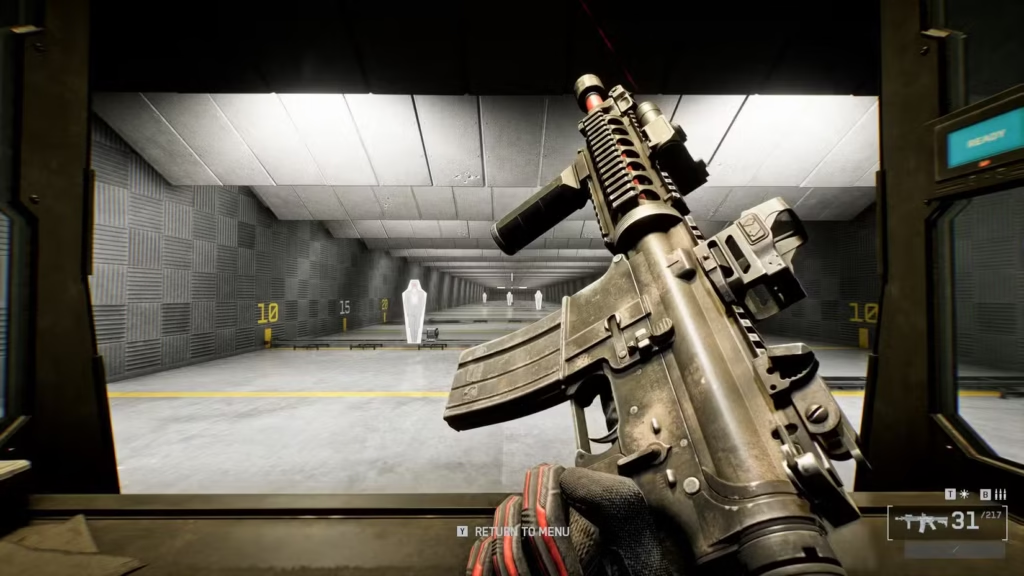
Looking for a weapon that absolutely shreds in close-quarters combat? The M4A1 Carbine might just be your new favorite gun in Battlefield 6. This versatile powerhouse sits in that sweet spot between assault rifles and SMGs, giving you the best of both worlds when the action gets up close and personal.
What makes the M4A1 special is its ability to handle multiple combat scenarios without feeling compromised. Whether you’re clearing buildings, pushing objectives, or catching enemies off-guard from unexpected angles, this carbine delivers consistent results. It’s forgiving enough for newer players while offering plenty of depth for veterans who understand its nuances.
Let’s dive into everything you need to know about mastering the M4A1, including the absolute best loadout configuration that’ll have you topping scoreboards.
Understanding the M4A1: Stats That Matter
Before we jump into attachments, you need to understand what you’re working with. The M4A1 isn’t just another rifle—it’s got a specific personality that influences how you should play.
M4A1 Core Statistics:
| Stat | Value |
|---|---|
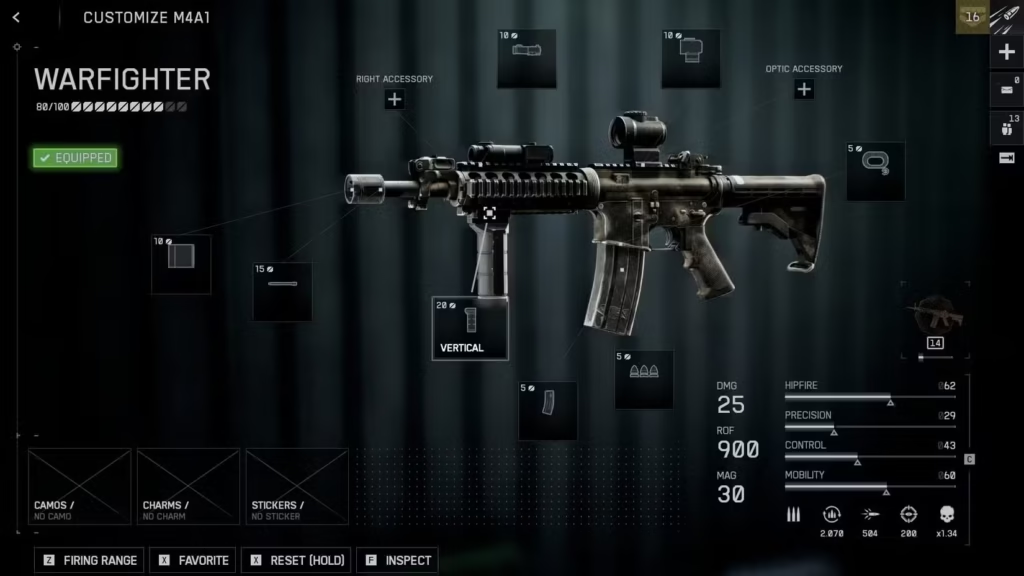
| Base Damage | 25 (drops off after 10m) |
| Fire Rate | 900 RPM |
| Magazine Size | 30 rounds |
| Hipfire Accuracy | 54 |
| Precision | 29 |
| Recoil Control | 43 |
| Mobility | 60 |
| ADS Speed | 200 ms |
| Reload Time | 2.2 seconds |
| Bullet Velocity | 504 m/s |
| Headshot Multiplier | 1.34× |
That 900 RPM fire rate is the star of the show here. It’s blazing fast, which means you can delete enemies before they even react in close quarters. However, that speed comes with a trade-off: recoil management becomes crucial, especially beyond 25 meters.
For more weapon comparisons and options, check out our complete weapons list guide.
Where the M4A1 Actually Excels (And Where It Doesn’t)
The M4A1 is what we call a “carbine,” which puts it right between assault rifles and submachine guns. It hits harder than SMGs at medium range but sprays faster than most assault rifles up close.
This gun absolutely dominates in:
- Building clearances and indoor combat
- Objective captures with tight corridors
- Aggressive flanking maneuvers
- The 0-50 meter engagement range
- Fast-paced game modes like Rush and Team Deathmatch
It struggles when:
- Fighting at 75+ meters
- Going toe-to-toe with dedicated long-range weapons
- Holding static, open-field positions
- You run out of ammo mid-fight (only 30 rounds)
The key to success with the M4A1 is understanding its effective range and playing accordingly. If you’re trying to counter-snipe someone 200 meters away, you’re using the wrong tool for the job. For those situations, check out our Range Finder guide for better long-range options.
Critical Damage Breakpoints You Must Know
Understanding exactly how many bullets it takes to kill at different ranges will transform your gameplay. Here’s what you’re working with:
Damage Profile:
- 0-10 meters: 4 body shots to kill (fastest TTK)
- 10-15 meters: 5 body shots to kill (still very competitive)
- 15+ meters: 6 body shots to kill (starts feeling inconsistent)
This damage drop-off is why positioning matters so much with the M4A1. Inside that magical 10-meter bubble, you’ll win almost every gunfight. Push beyond 15 meters, and you’re asking for trouble against players using actual assault rifles.
Pro insight: That 1.34x headshot multiplier isn’t game-changing, but landing one headshot in your burst can reduce your TTK significantly. At close range, mixing in headshots turns the M4A1 from “good” to “unstoppable.”
Maps like New Sobek City and Siege of Cairo are perfect for this weapon because they offer tons of tight corridors and close-range engagements. Want to know which maps suit your playstyle? Our all maps ranked guide breaks down the best weapons for each location.
The Best M4A1 Loadout for Close-Quarters Combat
After extensive testing and countless matches, here’s the loadout that maximizes the M4A1’s strengths while minimizing its weaknesses.
Optimal M4A1 CQB Configuration:
| Slot | Attachment | Why It Works |
|---|---|---|
| Muzzle | Linear Compensator | Controls horizontal recoil dramatically |
| Accessory | 5mw Red Laser | Invisible laser with huge hipfire boost |
| Foregrip | Ribbed Vertical | Complements compensator for stability |
| Barrel | 11.5″ Short Barrel | Faster handling, better hipfire |
| Magazine | 30-Round Fast Mag | Faster reloads without capacity loss |
| Ammo | Lightweight | Improved ADS movement speed |
| Ergonomics | Improved Mag Catch | Stacks with Fast Mag for even quicker reloads |
| Optic | Your preference | Red dot or holographic recommended |
What This Build Gives You:
✅ Elite hipfire accuracy – Laser-accurate without giving away your position
✅ Controlled recoil – Significantly reduced horizontal bounce
✅ Lightning-fast reloads – Get back in the fight faster
✅ Better mobility – Strafe faster while ADS
✅ Close-range dominance – Optimized for 0-25m combat
⚠️ Trade-offs:
- Slightly worse ADS accuracy while moving (minimal impact)
- Lower bullet velocity (only matters at range)
- Reveals position on minimap when firing (Linear Compensator drawback)
Breaking Down the Attachment Choices
Let’s talk about why each attachment makes this build so effective.
The 5mw Red Laser + Short Barrel Combo
This is the secret sauce. The 5mw Red Laser gives you SMG-level hipfire accuracy, but unlike other lasers, enemies can’t see it. This means you get the performance boost without telegraphing your position.
Pair that with the 11.5″ Short Barrel, and you’ve got a weapon that can reliably hipfire enemies within 10 meters. In chaotic close-quarters fights, this lets you start dealing damage before you even fully ADS, shaving precious milliseconds off your TTK.
When to hipfire vs. ADS:
- Hipfire under 8 meters or during surprise encounters
- ADS for anything beyond 10 meters or when you have time to aim
- Pre-ADS when rounding corners if you expect enemies
Linear Compensator + Ribbed Vertical Grip
The M4A1’s recoil pattern kicks hard upward and drifts right. It’s manageable, but at 900 RPM, those small deviations add up fast.
The Linear Compensator crushes horizontal recoil, which is the hardest type to manually control. Pair it with the Ribbed Vertical Grip, and you’ve got a laser beam… well, as close to a laser beam as this gun gets.
Important caveat: The Linear Compensator will 3D spot you when you fire. Enemies can see your position on their minimap. For close-range fights, this isn’t a huge deal—they already know where you are. But if you’re trying to pick off someone from 40+ meters, be ready to reposition immediately after engaging.
If you want to learn more about different playstyles and attachments, our best tips and tricks guide covers advanced tactics.
Fast Mag + Improved Mag Catch
Here’s a question: how many times have you died mid-reload with the M4A1? Probably a lot, right?
With only 30 rounds and that blistering fire rate, you’ll burn through mags FAST. The Fast Mag + Improved Mag Catch combination dramatically reduces your reload time, letting you get back in the action quicker.
In modes where you’re constantly pushing objectives or fighting multiple enemies, these attachments will save your life repeatedly. Consider this a mandatory pick for aggressive playstyles.
Want to maximize your effectiveness in specific game modes? Our all game modes guide helps you adapt your loadout to each situation.
How to Actually Play with This M4A1 Loadout
Having the right attachments is only half the battle. Here’s how to maximize your effectiveness:
Positioning and Engagement Distance
Stick to your optimal range: The M4A1 wants fights between 0-25 meters. Beyond that, you’re at a disadvantage. Use cover, buildings, and map geometry to force enemies into YOUR preferred range.
Be aggressive, but smart: This gun rewards forward momentum. Push objectives, flank enemies, and keep moving. Standing still in the open is a death sentence.
Know when to disengage: If someone starts pinging you from 60+ meters with an assault rifle, don’t challenge them. Reposition to a closer range or switch to a different lane entirely.
Recoil Control Techniques
Even with our attachments, the M4A1 still kicks. Here’s how to manage it:
For close range (0-15m):
- Commit to full auto bursts
- Pull down slightly and right to compensate
- Aim center mass and let the recoil ride up to headshots
For medium range (15-35m):
- Use controlled bursts of 5-8 rounds
- Pause briefly between bursts to reset recoil
- Aim for upper chest to account for upward kick
For long range (35m+):
- Honestly? Switch weapons or avoid the fight
- If you MUST engage, tap-fire single shots
- Aim slightly left to counter the rightward drift
Mastering recoil control takes practice. Hit up the firing range and experiment with different burst lengths until it becomes muscle memory. You can also optimize your experience with our settings optimization guide.
Best Classes and Synergies
The M4A1 works beautifully with the Assault Class, giving you access to medkits for sustained aggressive play. The ability to heal yourself while maintaining forward pressure makes you a nightmare for defensive teams.
Recommended Field Specs for this loadout:
- Faster sprint speed for aggressive flanking
- Reduced flinch when taking damage for better dueling
- Extra magazines for extended engagements
Learn more about optimizing your setup in our Field Specs complete guide.
Advanced Tips for M4A1 Mastery
Want to take your M4A1 game to the next level? Here are some advanced techniques:
The Pre-Fire Technique
Because of the M4A1’s high fire rate, pre-firing corners and doorways is incredibly effective. If you know an enemy is behind cover, start firing just before you clear the angle. With 900 RPM, you’ll hit them before they can react.
Warning: This burns through ammo fast, so only use it when you’re confident about enemy positions.
Movement Shooting
With the Lightweight ammo equipped, your ADS strafe speed is excellent. Use this to:
- Strafe unpredictably during 1v1s
- Peek and shoot around corners rapidly
- Make yourself a harder target while maintaining accuracy
This technique is especially powerful in open areas where cover is limited. Master this, and you’ll win fights you have no business winning.
Sound Whoring (Audio Cues)
The M4A1’s high fire rate makes it loud. Really loud. Smart players will use this:
- Listen for enemy M4A1 fire to gauge their position
- Count enemy shots to know when they’re reloading
- Use suppressors situationally (not in this build, but worth considering)
Environmental awareness separates good players from great ones.
Challenge Completion
If you’re working on specific objectives, the M4A1 excels at:
- Close Quarters Challenges – Obviously perfect for this
- Assault Class Challenges – Natural pairing
- Bullet Storm Challenges – That high ROF helps
Common Mistakes to Avoid
Even with the perfect loadout, players make these critical errors:
❌ Challenging long-range fights – You’ll lose to ARs and DMRs
❌ Standing still while shooting – Makes you an easy target
❌ Not managing ammo – 30 rounds disappear in 2 seconds
❌ Ignoring the minimap ping – Linear Compensator gives away your position
❌ Full auto at 40+ meters – Burst fire or tap-fire instead
Fix these habits, and your K/D will thank you.
M4A1 vs. Other Top-Tier Weapons
How does the M4A1 stack up against other popular choices?
vs. M277: The M277 is better at range with superior accuracy and damage profile. The M4A1 wins in close quarters with faster fire rate.
vs. SMGs: The M4A1 hits harder at 20+ meters but can’t quite match pure SMG hipfire and handling.
vs. Other Carbines: The M4A1 leans heavily into CQB with its high RPM, while other carbines might offer more versatility.
For a complete breakdown of all weapons and their strengths, visit our weapons list guide.
Alternative Loadouts Worth Trying
While our CQB build is optimal for most situations, here are some alternatives:
Stealth Flanker Build
- Muzzle: Suppressor
- Laser: None (to stay hidden)
- Focus: Stay off radar, sacrifice some stats for stealth
Balanced Hybrid Build
- Barrel: Standard length for better velocity
- Muzzle: Muzzle Brake for vertical recoil control
- Focus: More viable at 30-40 meters
Rush Mode Specialist
- Magazine: Extended Mag (if available)
- Focus: Maximum sustained fire for multi-kills
Experiment with these based on your preferred game mode and playstyle.
Best Maps for the M4A1
This carbine thrives on maps with:
- Lots of indoor areas and buildings
- Tight corridors and choke points
- Medium-sized engagement spaces
- Multiple flanking routes
Top 3 M4A1 Maps:
- New Sobek City – Perfect urban combat environment
- Siege of Cairo – Tons of building interiors
- Any Rush Mode Map – Close-quarters objective play
For detailed map strategies, check our maps ranked guide.
Leveling Up and Unlocking Attachments
Want to unlock everything for your M4A1 faster? Here’s what you need to know:
Fastest unlock methods:
- Focus on weapon-specific challenges
- Play objective modes for consistent XP
- Prioritize the attachments in this guide first
- Use Double XP events when available
Our XP farming and fast leveling guide has detailed strategies for maxing out weapons quickly.
Should You Main the M4A1?
The M4A1 is an absolute monster in the right hands and the right situations. If you love aggressive, in-your-face gameplay and thrive on close-quarters combat, this is your weapon.
You’ll love the M4A1 if you:
- Prefer fast-paced, aggressive playstyles
- Enjoy pushing objectives and clearing buildings
- Have good positioning and map knowledge
- Can manage recoil and burst fire effectively
Look elsewhere if you:
- Prefer long-range engagements
- Like holding static positions
- Want a more “easy mode” weapon
- Need more versatility across all ranges
The M4A1 isn’t the most versatile gun in Battlefield 6, but within its niche, it’s arguably the best. Master this loadout, learn the positioning, and you’ll be an unstoppable force in close-quarters combat.
Ready to dominate? Grab this loadout, queue into some Rush or Team Deathmatch, and start racking up kills. Just remember: play to your strengths, avoid long-range fights, and always be reloading.
Additional Resources
Get Battlefield 6:
Community & Discussion:
More Battlefield 6 Guides: