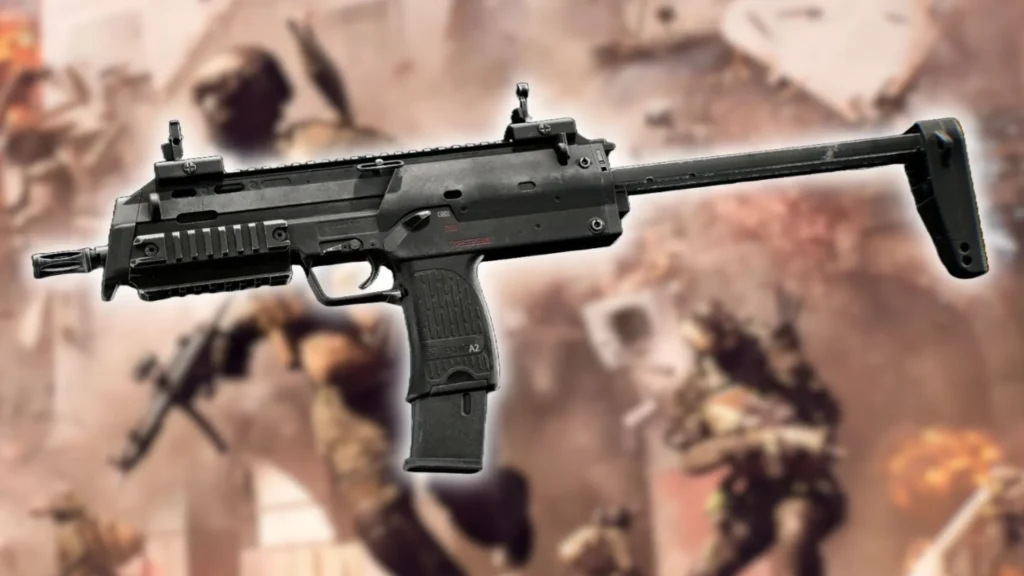
If you’re the type of player who lives for the chaos of close-quarters combat, the PW7A2 is about to become your new best friend in Battlefield 6. While the game offers plenty of weapons to experiment with, the PW7A2 stands out as one of the most reliable SMGs for players who prefer an aggressive, high-mobility playstyle.
I’ll be honest – when I first unlocked this weapon, I didn’t think much of it. But after grinding through its mastery levels and experimenting with different attachment combinations, I discovered that the PW7A2 transforms into an absolute monster that excels at flanking, rushing objectives, and winning those split-second gunfights where hipfire accuracy can mean the difference between a squad wipe and a respawn timer.
Whether you’re grinding through Conquest on massive maps or diving into the absolute mayhem of Close-Quarters Battle, this guide will show you exactly how to build the PW7A2 for maximum effectiveness.
Why the PW7A2 Deserves Your Attention
Before we dive into the builds, let’s talk about what makes this SMG special. The PW7A2 isn’t just another weapon in Battlefield 6’s extensive arsenal – it’s specifically designed for players who want to maintain constant pressure on the enemy team.
What sets it apart from other SMGs:
- Excellent hipfire potential that rewards aggressive movement
- Manageable recoil pattern that’s easy to learn and control
- Fast handling characteristics perfect for run-and-gun gameplay
- Versatile attachment options that can adapt to different situations
- Competitive time-to-kill in close to medium range engagements
The weapon really shines when you’re constantly on the move, clearing buildings, flanking enemy positions, or defending objectives with multiple angles. It’s not a weapon for sitting back and holding sightlines – it’s built for chaos, and that’s exactly where it thrives.
Understanding the Mastery System
Unlike some games where you unlock everything quickly, Battlefield 6’s weapon mastery system requires dedication. The PW7A2 has attachments spread across 34 mastery levels, which means you’ll need to put in serious time with this weapon to unlock its full potential.
The grind is real, but here’s why it’s worth it:
- Each mastery level unlocks new attachments and customization options
- You’ll naturally develop muscle memory for the weapon’s behavior
- By the time you hit Mastery 34, you’ll be a PW7A2 expert
- The progression gives you clear goals and steady improvement
Want to level up faster? Check out our XP farming and fast leveling guide to accelerate your mastery progression.
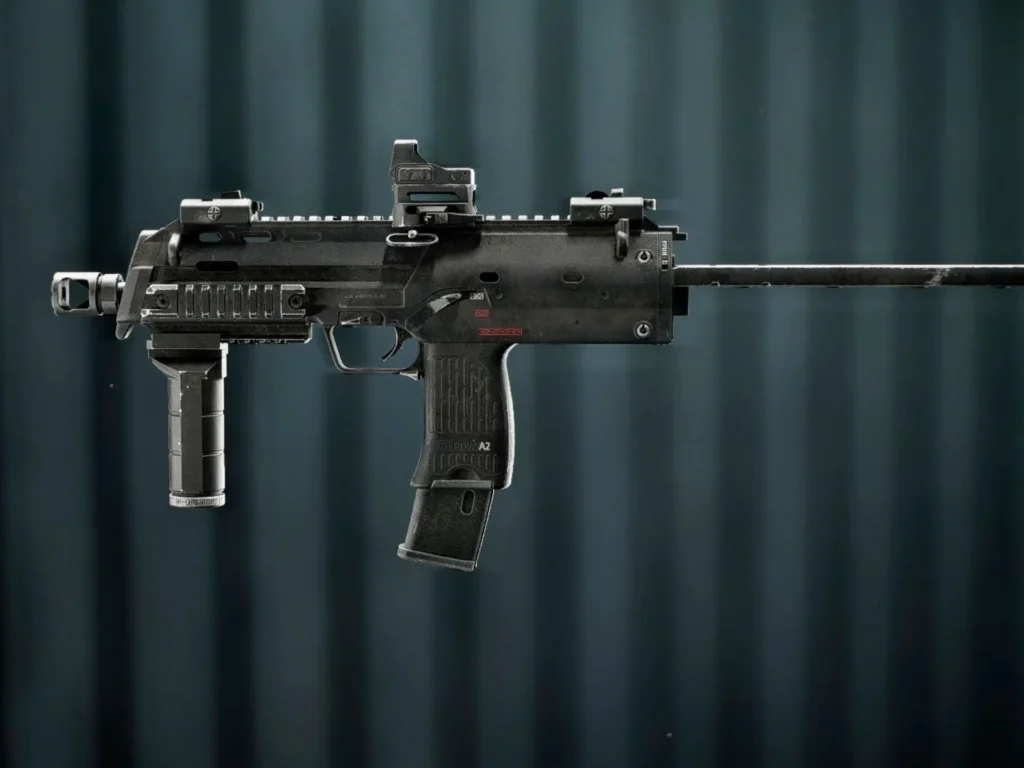
Best Low-Level PW7A2 Build (Mastery 1-9)
Starting out with any weapon in Battlefield 6 can feel limiting, but this early-game build turns the PW7A2 into a formidable close-quarters weapon even before you’ve unlocked the high-tier attachments.
Low-Level Build Breakdown
| Attachment Slot | Choice |
|---|---|
| Muzzle | Linear Comp Converter |
| Barrel | 180mm Standard Basic |
| Left Accessory | Flashlight |
| Right Accessory | 5 MW Red Laser |
| Underbarrel | Ribbed Vertical |
| Magazine | 30RND Mag |
| Ammunition | Standard FMJ |
| Scope | Mini Flex 1.00x |
| Optic Accessory | N/A |
Why This Build Works for Beginners
The Philosophy: This setup focuses on the fundamentals – recoil control, hipfire accuracy, and clean sight picture. These are the building blocks that’ll make you a better player regardless of what weapon you’re using.
Key Attachment Choices Explained:
Linear Comp Converter (Muzzle): This muzzle attachment is your first line of defense against recoil. It helps stabilize your shots, making those burst-fire engagements much more manageable. When you’re still learning the PW7A2’s recoil pattern, this attachment does a lot of the heavy lifting.
Flashlight + 5 MW Red Laser Combo: Here’s where the magic happens for aggressive players. These two accessories dramatically boost your hipfire accuracy, turning the PW7A2 into a weapon you can effectively fire without even aiming down sights.
Real scenario: You’re clearing a building in Close-Quarters Battle. An enemy appears around a corner. There’s no time to ADS. With this combo, your hipfire is accurate enough to secure the kill while you’re still moving. Without it? You’re probably watching the killcam.
Ribbed Vertical (Underbarrel): This grip tackles vertical recoil specifically. Combined with the Linear Comp, you’ve got a weapon that stays remarkably on-target even during extended firefights. For newer players still developing their recoil control skills, this attachment is invaluable.
Mini Flex 1.00x (Scope): The 1x magnification keeps things simple and effective. In close-quarters situations, you don’t need zoom – you need a clean sight picture that doesn’t obstruct your peripheral vision. This optic delivers exactly that.
The Trade-Off You Need to Know
Important: With this build, you’ll be 3D spotted when you fire. This means enemies can see your location on their HUD after you shoot. It’s the price you pay for not having a suppressor, which isn’t available at lower mastery levels.
How to work around this:
- Don’t stay in one spot after engaging enemies
- Use the combat roll to reposition quickly
- Take advantage of cover and break line of sight frequently
- Play more aggressively – if they know where you are, push forward and keep them reactive
The 30-round magazine is also worth mentioning. It’s enough for 1-2 kills per mag if you’re accurate, but you’ll need to be mindful of your ammo count during squad engagements. Reload discipline is crucial with this setup.
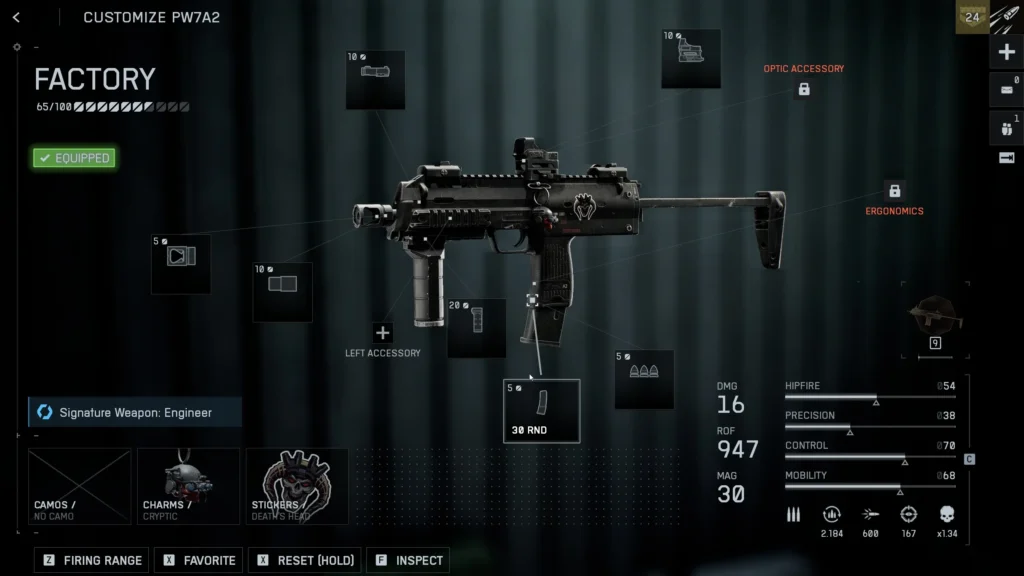
Best High-Level PW7A2 Build (Mastery 34)
Now we’re talking. Once you’ve reached Mastery 34, you unlock the attachments that turn the PW7A2 from a good SMG into an exceptional one. This build is optimized for aggressive players who want to dominate close to mid-range engagements while staying off the radar.
High-Level Build Breakdown
| Attachment Slot | Choice |
|---|---|
| Muzzle | Standard Suppressor |
| Barrel | 180mm Prototype Heavy |
| Underbarrel | Ribbed Vertical |
| Magazine | 40RND Magazine |
| Ammunition | Standard FMJ |
| Right Accessory | 5 MW Green Laser |
| Scope | Mini Flex 1.00x |
| Left Accessory | N/A |
| Optic Accessory | N/A |
Why This Build Is Game-Changing
This is the PW7A2 at its absolute peak. Every attachment choice here serves a specific purpose, and when combined, they create a weapon that excels at the run-and-gun playstyle like nothing else.
The Complete Analysis:
Standard Suppressor – Your Stealth Advantage
This is the game-changer. By reaching Mastery 34 and unlocking the suppressor, you eliminate the 3D spotting issue completely. Now when you fire, enemies don’t get that handy indicator showing your position on their HUD.
What this enables:
- Successful flanking maneuvers without giving away your position
- Multi-kill potential as enemies don’t immediately know where fire is coming from
- Ability to engage, relocate, and re-engage from a different angle
- Much more forgiving gameplay where one mistake doesn’t expose you to the entire enemy team
In game modes like Conquest where flanking is crucial to capturing objectives, this suppressor single-handedly elevates your effectiveness.
180mm Prototype Heavy Barrel – The Stability King
This barrel is all about weapon bloom reduction. For those unfamiliar, weapon bloom is the random bullet spread that increases as you fire. The Prototype Heavy barrel significantly reduces this, meaning your bullets go where you’re actually aiming, even during longer bursts.
Why this matters:
- More consistent damage output at medium range
- Ability to challenge enemies slightly outside typical SMG range
- Better performance when transitioning from hipfire to ADS
- Increased confidence in your weapon’s accuracy
Combined with the recoil control from the Ribbed Vertical grip, you’ve got a laser beam that maintains pinpoint accuracy from close to mid-range.
40RND Magazine – Never Run Dry
Upgrading from 30 to 40 rounds might not seem like a massive change, but in practice, it’s the difference between wiping a squad and dying during your reload.
Real combat scenarios where this matters:
- Defending an objective against multiple attackers
- Pushing through buildings with multiple enemies
- Squad-wipe potential without needing to reload mid-engagement
- More aggressive playstyle without constant ammo anxiety
The extra 10 rounds gives you breathing room. You can engage more targets before needing to reload, which is crucial when you’re playing aggressively and constantly in combat.
5 MW Green Laser – Hipfire Precision
The green laser upgrade provides even better hipfire accuracy than the red laser from the low-level build. Since the PW7A2 is designed for aggressive, mobile gameplay, having elite hipfire accuracy is non-negotiable.
When you’ll rely on this:
- Turning corners in close-quarters environments
- Engaging multiple targets in quick succession
- Fighting while moving and repositioning
- Those panic moments where ADS would get you killed
I’ve won countless firefights simply because my hipfire was accurate enough to secure kills while sliding, jumping, or sprinting around corners. This attachment makes that possible.
Combat Strategies: How to Dominate with the PW7A2
Having the perfect loadout is only half the equation. Understanding how to leverage the PW7A2’s strengths in actual combat is what separates good players from great ones.
Ideal Engagement Ranges
0-20 meters (Your comfort zone): This is where the PW7A2 absolutely dominates. Use aggressive movement, hipfire when necessary, and maintain constant pressure. Don’t give enemies time to react.
20-35 meters (Still effective): With the high-level build, you can challenge enemies at this range. Use controlled bursts, stay ADS, and leverage your reduced bloom for consistent hits.
35-50 meters (Possible but risky): You can engage here, but pick your fights carefully. If enemies are using assault rifles or LMGs, you’re at a disadvantage. Consider repositioning instead.
50+ meters (Avoid): This isn’t what the PW7A2 was built for. Reposition, flank, or disengage. Trying to challenge long-range weapons at distance is a losing battle.
Movement is Your Weapon
The PW7A2 pairs perfectly with aggressive movement. Here’s how to maximize this:
Constant repositioning: After securing kills, immediately move to a new position. The suppressor keeps you hidden, but good players will still figure out your general area. Stay unpredictable.
Use vertical space: Jump around corners, slide into rooms, use stairs and elevation changes. Your mobility combined with strong hipfire makes you deadly when enemies can’t predict your positioning.
The flank is king: With the suppressed build, you’re the perfect flanking weapon. Circle around enemy positions, attack from unexpected angles, and watch them scramble to respond.
Master the combat roll: Learn to use the combat roll mechanic to break enemy aim and dodge incoming fire. It’s saved my life countless times.
Map-Specific Considerations
Different maps in Battlefield 6 favor different playstyles:
Close-quarters maps: This is where the PW7A2 becomes S-tier. Push aggressively, clear buildings methodically, and use your hipfire advantage.
Mixed engagement maps: Stick to the close-quarters areas. Avoid open spaces and long sightlines. Use buildings, vehicles, and terrain to get close to enemies.
Long-range focused maps: Consider switching to a different weapon class, or play around objectives and capture points where combat naturally becomes close-quarters.
Pairing the PW7A2 with the Right Class
Your weapon choice should complement your class specialization. Here’s how the PW7A2 fits with different classes:
Assault Class: Perfect match. The PW7A2’s aggressive nature pairs beautifully with assault gadgets. Check our assault class best loadouts guide for complete builds.
Engineer Class: Works well when defending or attacking objectives. The PW7A2 lets you engage infantry threats while your gadgets handle vehicles. See our engineer class loadouts guide for ideas.
Support Class: Solid combo for aggressive support players. The PW7A2 keeps you alive while you’re dropping ammo and supporting your squad. More details in our support class guide.
Recon Class: Less ideal, but workable if you’re playing aggressive recon. The PW7A2 gives you close-quarters defense while your gadgets provide intel. Check our recon loadouts guide for more.
Alternative Attachment Considerations
While the builds above are optimized for most situations, sometimes you might want to experiment:
Optic choices: If you prefer slightly more zoom, try the RO-M 1.75x. However, I find the 1.00x is perfect for the PW7A2’s engagement ranges.
Magazine debate: Some players prefer the 30RND Fast Mag over the 40RND standard for faster reloads. It’s a valid choice if you’re extremely disciplined with ammo conservation.
Laser color: Red vs. green laser is mostly preference. Green is slightly better in bright environments, but the difference is minimal.
For more details on how different attachments work in Battlefield 6, check out our comprehensive attachment guide.
Mastery Progression Tips
Grinding to Mastery 34 takes time. Here’s how to make the process smoother:
Efficient Progression Methods
Play Close-Quarters Battle mode: These compact maps give you constant engagement opportunities, meaning more kills and faster mastery progression.
Focus on objective play: Kills around objectives give bonus points. Capturing and defending flags accelerates your progression significantly.
Use XP boosters: If you have XP boosters available, activate them when you have time for extended play sessions.
Complete weapon challenges: Pay attention to weapon-specific challenges. Completing these provides substantial XP towards mastery.
Squad up: Playing with a coordinated squad means more wins, more objectives captured, and ultimately faster progression.
Platform-Specific Considerations
Whether you’re playing on PlayStation, PC via Steam, Epic Games Store, or directly through EA’s platform, the PW7A2 performs consistently.
Controller players: The weapon’s manageable recoil makes it excellent for controllers. Consider adjusting your sensitivity to complement the aggressive playstyle.
Mouse and keyboard players: Take full advantage of the precision aiming. Your ability to snap to targets makes the PW7A2 even more lethal in close quarters.
For more input method discussion, check our controller vs. keyboard/mouse guide.
Common Mistakes to Avoid
After extensive time with the PW7A2, here are mistakes I see players make constantly:
Trying to challenge at range: The PW7A2 isn’t an assault rifle. Respect its engagement range and play to its strengths.
Staying static: This weapon rewards movement. If you’re standing still, you’re not using it correctly.
Forgetting to reload: With the aggressive playstyle this weapon encourages, it’s easy to push with a half-empty mag. Develop reload discipline.
Ignoring the minimap: Especially with the suppressed build, use your minimap to find flanking routes and identify isolated enemies.
Fighting in the open: You’re at a disadvantage in wide-open areas. Use cover, buildings, and terrain to your advantage.
How the PW7A2 Compares to Other SMGs
While this guide focuses on the PW7A2, it’s worth understanding where it sits among Battlefield 6’s other SMGs:
vs. SGX: The SGX is more forgiving for beginners and has slightly better control out of the box. The PW7A2 has a higher skill ceiling but rewards mastery with better performance.
vs. PW5A3: The PW5A3 offers different handling characteristics. The PW7A2 is generally more versatile for aggressive play.
For a complete breakdown of all SMGs, check our complete weapons list guide.
Final Thoughts: Is the PW7A2 Worth the Grind?
Absolutely. The journey to Mastery 34 might feel long, but the PW7A2 at full power is one of the most satisfying weapons in Battlefield 6. It rewards aggressive play, skilled movement, and smart positioning – all the things that make Battlefield combat exciting.
Who should main the PW7A2:
- Aggressive players who love run-and-gun gameplay
- Flankers who excel at reading enemy team positioning
- Objective-focused players who thrive in close-quarters chaos
- Anyone who values mobility and fast-paced action
Who might prefer other weapons:
- Players who prefer holding positions and playing defensively
- Long-range specialists who avoid close combat
- Those who want simpler, more straightforward weapons
The PW7A2 isn’t for everyone, but if aggressive SMG gameplay is your style, this weapon delivers everything you need. Start with the low-level build, grind through mastery, and watch as this weapon transforms into an unstoppable close-quarters powerhouse.
Want to discuss builds or share your PW7A2 experiences? Join the conversation on the Battlefield 6 subreddit where players are constantly sharing strategies and tips.
Now get out there, start grinding that mastery, and show everyone why the PW7A2 is the ultimate run-and-gun weapon. See you on the battlefield!
Looking for more weapon guides? Explore our complete collection of Battlefield 6 loadout guides, class builds, and gameplay tips to elevate your game