Let’s be real: vehicles don’t just influence matches in Battlefield 6—they straight-up decide them. A competent tank crew or skilled pilot can single-handedly shift the entire momentum of a game, turning what should be a close match into a one-sided steamroll. If you’ve jumped into a vehicle expecting instant domination only to get obliterated within minutes, chances are you’re running default equipment against players using optimized loadouts.
Here’s the thing most players don’t realize: vehicle customization matters as much as your driving/piloting skill. The difference between stock equipment and a fully optimized loadout is the difference between being a minor annoyance and being an unstoppable force that requires coordinated team effort to take down.
After extensive testing across every map and game mode, I’ve identified the absolute best loadouts for each major vehicle type. Whether you’re grinding armor on the ground or raining death from above, these builds will maximize your effectiveness and survivability.
Important note: As of the current version, transport vehicles and jets have fixed loadouts that cannot be customized. This guide covers the vehicles where your equipment choices actually matter: Main Battle Tanks, IFVs, Mobile AA, and Attack Helicopters.
Why Vehicle Loadouts Matter More Than You Think
Before we dive into specific builds, let’s talk about why optimization is critical:
Survivability scales exponentially: The right defensive equipment doesn’t just add a little extra health—it completely changes how many hits you can take and how long you stay in the fight. A tank with Projectile Intercept System can literally negate entire rocket volleys that would destroy a stock tank.
Role specialization wins games: Vehicles trying to do everything accomplish nothing. An IFV built for infantry suppression performs completely differently than one configured for tank hunting. Understanding your role and building for it is essential.
Gunner synergy multiplies effectiveness: Many players ignore the gunner seat equipment, but coordinated gunner-driver combos are what separate good vehicle crews from unstoppable ones. Your gunner isn’t just along for the ride—they’re a force multiplier when properly equipped.
Countermeasures change engagements: Active defense systems like flares, smoke, and intercept systems give you tactical options beyond “take damage and hope you survive.” They turn vehicle combat from a numbers game into a skill-based duel.
If you’re serious about vehicle play, understanding these loadouts is non-negotiable. Let’s break down each vehicle type.
Best Main Battle Tank Loadout
The MBT is the king of ground warfare—heavily armored, devastating firepower, and capable of pushing through entrenched positions when supported properly. But tanks are expensive assets that take forever to respawn, so you need to maximize every deployment.
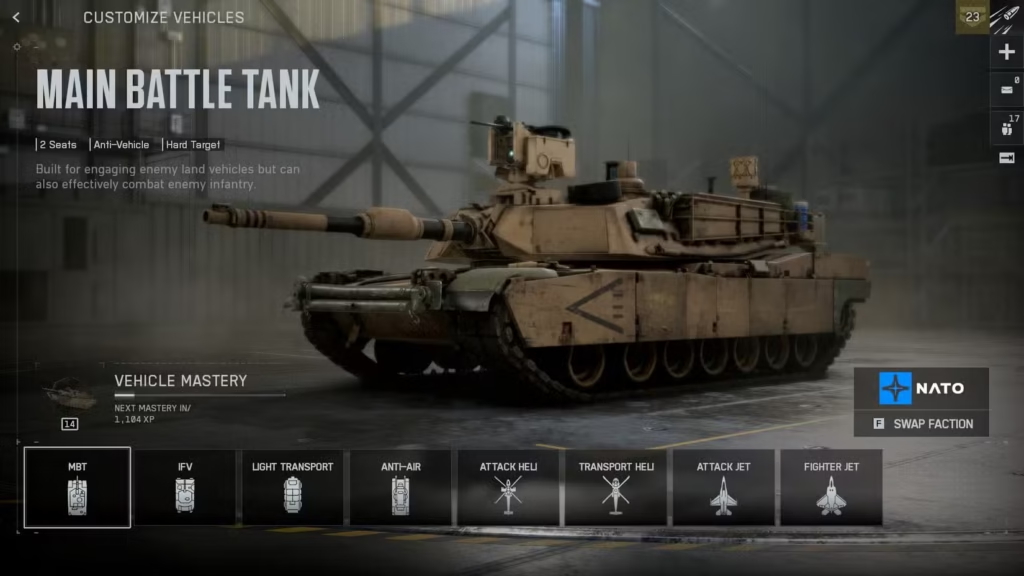
Main Weapon: High Explosive Shell
HE shells are your primary tool for infantry suppression and area denial.
Why HE shells dominate:
- One-shot kills against infantry in the blast radius
- Destroys cover and fortifications
- Effective against light vehicles and transport
- Splash damage handles grouped enemies efficiently
Your job as a tank isn’t just killing other tanks—it’s controlling space and enabling your infantry to advance. HE shells accomplish this better than any other main gun option.
Alternate Ammo: AP Shell
This is your tank-versus-tank ammunition. AP (Armor Piercing) shells deal significantly more damage to heavy armor.
When to switch to AP:
- Engaging enemy MBTs and IFVs
- Hitting rear or side armor for maximum damage
- Dueling other heavy vehicles
The key is actively switching between HE and AP based on the threat. Most players just leave it on HE and wonder why they lose tank duels—don’t be that player.
Secondary Weapon: Coaxial LMG
The coaxial LMG is perfect for:
- Finishing off wounded infantry
- Suppressing enemies without wasting main gun ammo
- Engaging targets too close for main gun effectiveness
- Destroying enemy equipment and gadgets
It’s not your primary damage source, but it gives you options when your main gun is on cooldown or you’re conserving shells.
Equipment 1: Projectile Intercept System (THE CRITICAL SURVIVAL TOOL)
This is non-negotiable for competitive tank play. The Projectile Intercept System is an active defense that destroys incoming rockets and tank shells before they hit you.
What it counters:
- Engineer rocket launchers
- Enemy tank shells
- Some vehicle-launched missiles
- Incoming explosive projectiles
The timing skill ceiling is high, but mastering it transforms you from a target into a fortress. Good tank drivers can survive 2-3x longer simply by intercepting critical shots.
Usage tip: Don’t panic-activate it. Watch for the rocket trail or tank muzzle flash, then activate intercept right before impact. It has a cooldown, so wasting it on a single rocket when three more are incoming gets you killed.
Upgrade: Reinforced Plating
The mobility penalty from Reinforced Plating is absolutely worth the survivability gain.
Benefits:
- Significantly reduced damage from all sources
- Survive additional rocket hits
- Better resistance to rear/side armor penetration
- More time for your Engineer support to repair you
The tradeoff: Slower acceleration and top speed. But here’s the thing—good tank positioning matters way more than speed. You shouldn’t be sprinting around the map anyway. You should be advancing deliberately with infantry support, using terrain for cover.
If you’re playing correctly, the speed reduction barely matters. The extra survivability is game-changing.
Gunner Weapon: HMG
The Heavy Machine Gun gives your gunner serious anti-infantry capability:
- High rate of fire
- Good damage at medium range
- Effective at suppressing enemies
- Can damage light vehicles
A competent gunner with an HMG protects your flanks and deals with infantry trying to approach with rocket launchers. This is your anti-Engineer defense.
Gunner Equipment: Mine Countermeasures
This passive system automatically detects and marks mines in your path, and can even destroy them preemptively.
Why it’s essential:
- Prevents instant destruction from mine traps
- Lets you push aggressively without constant paranoia
- Removes a major source of tank deaths
- Forces enemies to engage you directly rather than relying on passive traps
Without mine detection, you’re one careless advance away from losing a 2+ minute tank respawn. With it, you can push confidently through chokepoints that would otherwise be death traps.
Playing the MBT Effectively
Never solo tank: The #1 mistake I see is lone-wolf tankers. A tank without Engineer support dies quickly to focused anti-vehicle fire. Always have at least one Engineer behind you repairing. Two is even better.
Position near cover: Always have a route to break line-of-sight when you take heavy fire. Peek out, fire, retreat behind cover, let Engineers repair, repeat. Static tanks die.
Communicate with your gunner: If you’re running with a friend as gunner, coordinate target priorities. Driver handles armor threats, gunner focuses on infantry trying to flank.
Watch for laser designators: Recon players can paint you for guided missiles. If you get laser-painted, immediately pop smoke and relocate—you’re about to eat guided munitions.
Angle your armor: When engaging threats, angle your tank’s front armor at 30-45 degrees. This increases effective armor thickness and can cause shells to bounce. Never expose your side or rear armor unless absolutely necessary.
Best IFV Loadout (Infantry Fighting Vehicle)
IFVs are the Swiss Army knife of armored warfare—lighter than MBTs but faster, more versatile, and capable of serving as mobile spawn points for your squad. The key is understanding that IFVs excel at infantry suppression and harassment, not direct tank duels.
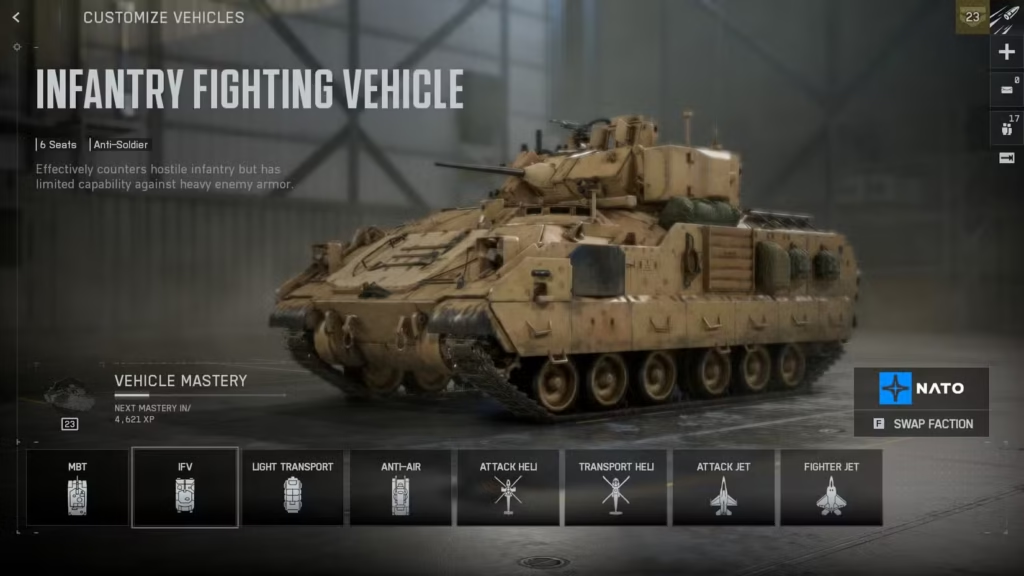
Primary Weapon: HE Shells
Forget trying to out-duel MBTs. Your role is infantry deletion and area control.
HE shells excel at:
- Clearing capture points of defending infantry
- Destroying enemy cover and fortifications
- Killing clustered soldiers with splash damage
- Supporting infantry pushes with suppressive fire
The rate of fire on IFV HE shells is faster than MBT shells, letting you carpet an area with explosions that make it impossible for enemies to hold positions.
Secondary Weapon: Lock Guided Missile
This gives you versatility beyond just infantry farming.
Lock Guided Missile applications:
- Harassing enemy armor (not killing, harassing)
- Shooting down helicopters and low-flying aircraft
- Destroying stationary targets at range
- Finishing wounded vehicles
Pro tip: Your gunner seat has a laser designator that dramatically improves these missiles. When your gunner laser-paints a target, your lock missiles deal bonus damage and track more effectively. Coordinate with your gunner for maximum effectiveness.
Equipment 1: Emergency Repair
IFVs can’t trade blows with MBTs, so you need a panic button for when you take heavy damage.
Emergency Repair:
- Instantly restores a chunk of health
- Has a cooldown (use strategically)
- Buys time to escape when caught out of position
- Lets you survive one extra rocket hit in critical moments
The key is activating it preemptively when you know you’re about to take more damage, not waiting until you’re at 10% health and already doomed.
Equipment 2: Counter-Fire Radar
This automatically spots anyone who damages your vehicle, revealing their position on the minimap.
Why it’s powerful:
- Instantly reveals Engineer locations after they fire rockets
- Lets you retaliate before they can reload
- Your teammates can see the spots too
- Predicts enemy AT positions before they fire again
Most Engineers using rocket launchers are predictable—they find a spot, fire, reload, fire again. Counter-Fire Radar lets you line up a shell right where they’re standing for an easy kill.
Upgrade: Reinforced Plating
Same reasoning as the MBT—survivability trumps mobility.
IFVs are already faster than tanks, so the speed penalty is even less noticeable. The extra armor lets you survive situations that would otherwise destroy you, especially when disengaging from bad situations.
Gunner: LMG
The standard LMG gives your gunner reliable infantry suppression without the HMG’s drawbacks. It’s accurate, has decent range, and doesn’t overheat as quickly.
Gunner responsibilities:
- Laser-painting targets for driver’s guided missiles
- Suppressing infantry during advances
- Watching for flanking Engineers
- Providing covering fire during retreats
A good IFV gunner is worth their weight in gold—they transform the vehicle from decent to dominant.
IFV Tactics and Playstyle
Hit-and-run is your doctrine: IFVs excel at striking, dealing damage, and retreating before enemies can coordinate a counter-response. Don’t sit still trading shots with MBTs—you’ll lose every time.
Mobile spawn point strategy: When attacking objectives, position your IFV near (but not on) the capture point so squadmates can spawn directly into the fight. Just make sure you have escape routes if overwhelmed.
Flanking over frontal assaults: Your speed advantage means you can take routes that MBTs can’t. Use mobility to hit enemies from unexpected angles, then relocate before they adapt.
Support infantry pushes: Your job isn’t racking up tank kills—it’s enabling your infantry to advance by suppressing defenders and destroying cover. A well-played IFV that goes 5-0 but enables three objective captures is more valuable than one that goes 15-3 chasing kills.
Know when to bail: IFVs respawn faster than MBTs, but they’re still valuable. If you’re disabled, on fire, or taking overwhelming damage with no Engineers nearby, bail out and live to fight another spawn. Don’t gift the enemy a free vehicle destruction.
Best Mobile Anti-Air Vehicle Loadout
Mobile AA vehicles have one job: deny enemy air superiority. They’re not designed for ground combat (though they can harass infantry in a pinch), so build entirely around countering aircraft.
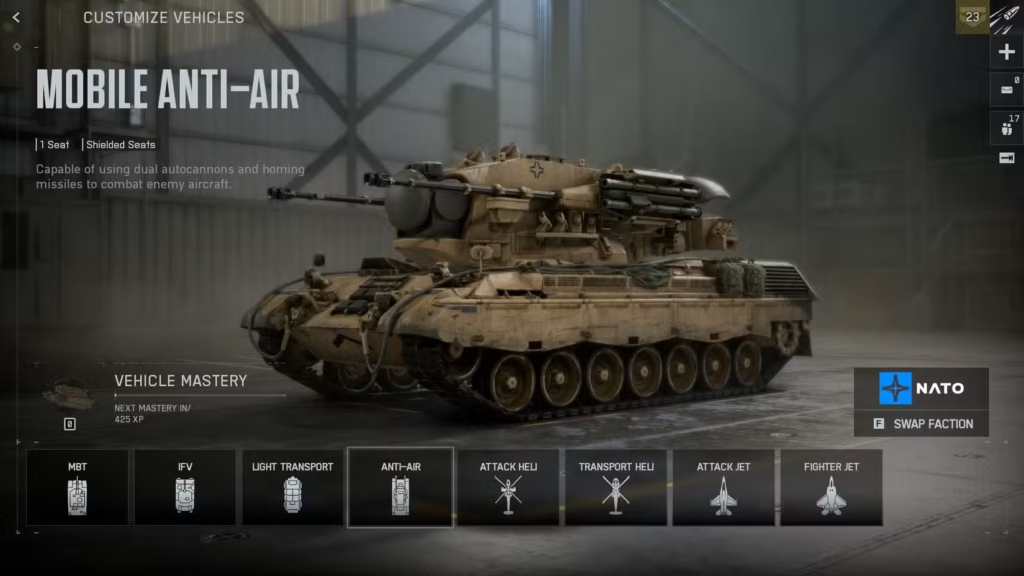
Primary Weapon: High Velocity AA Shells
These specialized rounds make hitting aircraft dramatically easier:
- Faster projectile velocity (less lead required)
- Better accuracy against moving targets
- Effective at longer ranges
- Still functional against infantry if needed
The difference between standard and high-velocity shells when targeting fast-moving jets is night and day. The increased projectile speed means your shells actually connect instead of sailing behind your target.
Equipment: Thermal Blocking Smoke
This is your survival tool against guided missiles.
How it works:
- Deploys smoke that breaks lock-on weapons
- Prevents enemy missiles from acquiring lock
- Forces enemies to use dumb-fire weapons
- Buys time to reposition
Helicopters with lock-on missiles and Engineers with guided launchers are your primary threats beyond aircraft. Thermal smoke makes you significantly harder to kill with lock-based weapons.
Upgrade: Enhanced Loading Systems
This increases your reload speed for both main gun and secondary weapons.
Why faster reloading matters:
- More sustained DPS against aircraft
- Less downtime between engagement windows
- Better at pressuring multiple aircraft
- Faster recovery if you miss your burst
Aircraft move fast and present limited windows of vulnerability. Enhanced loading lets you maximize damage during those brief windows.
Mobile AA Tactics
Positioning is everything: Park your AA vehicle where you have clear sight lines to common flight paths but aren’t exposed to ground threats. Rooftops (when accessible), elevated positions, and open areas work best.
Suppression over kills: Even if you don’t destroy aircraft, forcing them to retreat for repairs denies them battlefield presence. That’s a win.
Coordinate with team: Call out enemy aircraft positions. Your teammates can’t help if they don’t know where threats are coming from.
Don’t tunnel vision: Yes, your job is anti-air, but if an enemy tank rolls up, you need to either fight back or relocate. Don’t be so focused on the sky that you ignore ground threats.
Target priority:
- Attack helicopters (biggest threat to ground forces)
- Transport helicopters (full of enemy infantry)
- Jets (harder to hit but dangerous if left unchecked)
Reality check: Mobile AA isn’t glamorous. Your kill count will be low, and you won’t top the scoreboard. But controlling airspace is critical on vehicle-heavy maps. Accept the role or play something else.
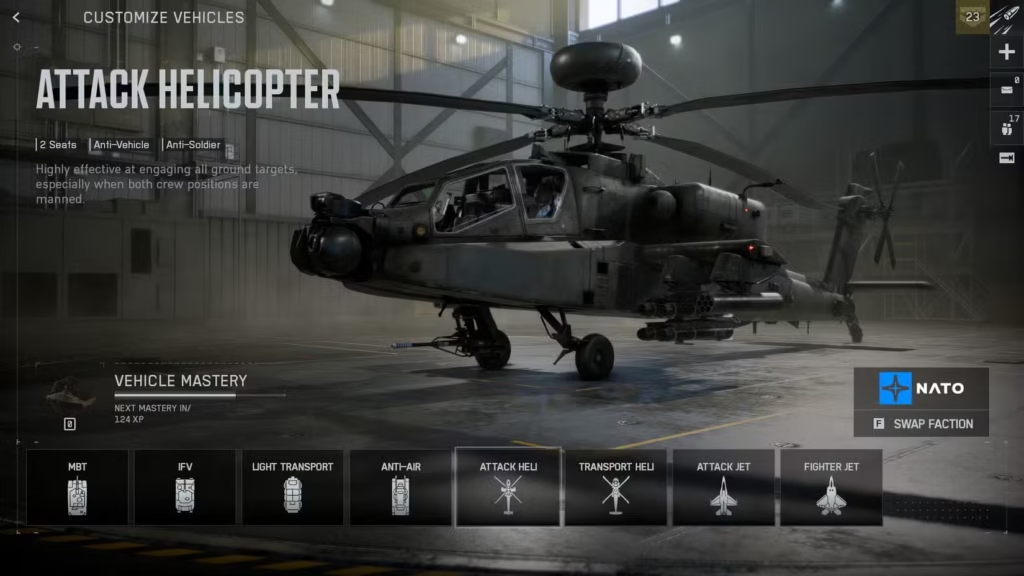
Best Attack Helicopter Loadout
Attack helicopters are the most mechanically demanding vehicles in BF6, but also potentially the most devastating. The skill ceiling is absurdly high—great pilots are borderline unkillable while deleting everything in sight.
Primary Weapon: Aim Guided Rockets or Heavy Rockets
Aim Guided Rockets (Default):
- Best all-around option for most pilots
- Good capacity for sustained engagements
- Effective against both infantry and vehicles
- Easier to use for newer pilots
Heavy Rockets:
- Significantly higher damage per rocket
- Better for tank hunting
- Lower maximum capacity (you’ll run out faster)
- Requires more precision
My recommendation: Start with Aim Guided Rockets until you’re comfortable with helicopter controls and positioning. Once you’ve mastered the basics, graduate to Heavy Rockets if you’re specifically hunting armor.
The big mistake I see: pilots using Heavy Rockets for infantry strafing, then running out of ammo mid-fight and accomplishing nothing. Use Heavy Rockets for their intended purpose—vehicle assassination.
Secondary Weapon: Aim Guided Missile
This is your precision tool for finishing off wounded targets or engaging threats at range.
Best uses:
- Destroying wounded vehicles trying to escape
- Engaging threats beyond your rocket range
- Hitting stationary targets with guaranteed damage
- Coordinating with gunner to focus-fire priority targets
Some pilots prefer TOW missiles for max single-target damage, but the Aim Guided Missile’s ease of use and reliability make it the better choice for most scenarios. TOW missiles require manual guidance that leaves you vulnerable.
Equipment: Emergency Repair
Same concept as IFVs—this is your “oh crap” button.
When to use it:
- After taking significant damage from AA fire
- When locked by multiple guided missiles
- If you’re disabled and need to escape
- Before making risky attack runs into defended areas
The cooldown is long, so don’t waste it on minor damage. Save it for situations where it’s the difference between survival and death.
Upgrade: Targeting Interference
This scrambles lock-based weapons trying to acquire you as a target.
What it counters:
- Engineer lock-on launchers
- Vehicle-based guided missiles
- Some aircraft missiles
- Lock-based AA systems
How it works: When enemies try to lock onto you, the lock takes significantly longer or fails entirely. This gives you critical extra seconds to break line-of-sight, deploy countermeasures, or eliminate the threat.
On open maps like Operation Firestorm where natural cover is limited, Targeting Interference is the difference between dominating the skies and getting swatted down constantly.
Advanced Helicopter Tactics
Never fly in straight lines: Predictable flight paths get you killed. Constantly vary altitude, speed, and direction. Make yourself as hard to hit as possible.
Use terrain for cover: Fly low around buildings, mountains, and structures to break lock-ons and create engagement windows. Pop up, fire, drop back down.
Coordinate with your gunner: Your gunner should be handling different threats than you. If you’re engaging armor, your gunner focuses on infantry and vice versa. Communication multiplies effectiveness.
Altitude management: High altitude makes you visible to everyone and easier to lock. Low altitude limits your visibility but makes you vulnerable to dumb-fire rockets and tank shells. Constantly adjust based on threats.
Know your threats:
- Mobile AA: Avoid or destroy immediately
- Lock-on Engineers: Use Targeting Interference and relocate
- MBTs: Stay mobile, they’re slow to track aircraft
- Enemy attack helicopters: Disengage unless you have advantage
Resupply discipline: Unlike ground vehicles, you can’t just “retreat to base” easily. Manage your ammo carefully and plan resupply runs during lulls in combat, not mid-engagement.
Reality of helicopter play: You WILL get shot down. Even the best pilots die regularly. The goal isn’t avoiding death—it’s maximizing impact before each death and staying alive long enough to be a genuine threat.
General Vehicle Combat Tips
Beyond specific loadouts, here are universal principles:
Crew Communication Matters
Voice chat with your gunner/crew transforms vehicle effectiveness. Coordinate target priority, call out threats, and plan maneuvers together. Random gunners are fine, but coordinated crews dominate.
Engineer Support is Non-Negotiable
For ground vehicles especially, having a dedicated Engineer repairing you is the difference between 30 seconds of impact and 5+ minutes of sustained pressure. Always communicate with Engineers and protect them while they repair you.
Map Knowledge Determines Positioning
Understanding map layouts helps you:
- Identify strong defensive positions
- Know where enemies will approach from
- Find routes that avoid heavy anti-vehicle fire
- Locate cover and escape routes
Objective Play Over K/D Chasing
A vehicle that goes 50-2 but never touches objectives is less valuable than one that goes 10-8 but enables three captures. Your job is winning rounds, not padding stats.
Learn From Deaths
Every time you die, ask: “What could I have done differently?” Positioning mistake? Poor target priority? Failed to retreat in time? Vehicle mastery comes from analyzing failures and adapting.
Optimize Your Settings
Vehicle combat responsiveness matters. Check our settings optimization guide for vehicle-specific sensitivity and control tweaks.
Complete Vehicle-Focused Challenges
Progress through vehicle challenges to unlock better equipment and attachments. Some loadout options require specific challenge completion.
Common Vehicle Mistakes to Avoid
These kill more vehicle crews than anything else:
Overextending without support: Pushing deep into enemy territory without infantry or Engineer support gets you surrounded and destroyed. Stay with your team.
Ignoring retreat signals: When you’re taking heavy damage, retreat immediately. Don’t try to “get one more kill” and lose a valuable vehicle.
Poor gunner selection: If your random gunner is incompetent, kick them and wait for someone better. A bad gunner is worse than no gunner.
Static positioning: Vehicles that sit still die quickly. Constant repositioning keeps enemies guessing and makes you harder to kill.
Tunnel vision: Focusing so hard on one target that you ignore bigger threats. Situational awareness wins vehicle combat.
Wasting active abilities: Using Emergency Repair when you’re at 80% health or popping Projectile Intercept when no threats are incoming wastes cooldowns you’ll desperately need later.
Vehicle Progression and Unlocks
Some equipment mentioned in these loadouts requires progression:
Level up through usage: The more you use a vehicle, the more options you unlock Complete vehicle challenges: Specific challenges unlock certain equipment Use XP boosters strategically during vehicle grinding sessions Check XP farming strategies to accelerate unlocks
For achievement hunters, vehicle-related challenges count toward overall completion.
Conclusion: Dominating Vehicle Warfare
Vehicle mastery in Battlefield 6 requires three elements: optimized loadouts, mechanical skill, and tactical awareness. The loadouts in this guide give you the optimization piece—they’re the mathematically best equipment combinations for each vehicle’s intended role.
But equipment is only one-third of the equation. You still need to develop the skills: aim prediction for moving targets, positioning sense, threat assessment, and cooldown management. And you need the awareness: map knowledge, team coordination, and knowing when to engage versus when to retreat.
Start with these loadouts as your foundation. Adapt based on your playstyle and the specific demands of each match. Some games you’ll need to focus more on anti-air, others on anti-armor. Flexibility separates competent vehicle players from dominant ones.
For more Battlefield 6 guides, explore our content on Assault class, Engineer class, Support class, Recon class, and essential tips.
Now get in that vehicle and show them how it’s done.
Official Battlefield 6 Resources: