The Engineer class in Battlefield 6 is way more versatile than just “the vehicle guy.” Sure, destroying tanks and keeping friendly armor alive is your bread and butter, but you’re also a master of area denial, equipment disruption, and tactical support that can completely swing the momentum of a match.
After dozens of hours fine-tuning Engineer builds across every map in BF6, I’ve learned that this class rewards smart gadget selection and positioning over raw firepower. Whether you’re hunting down enemy armor solo or babysitting a friendly tank, having the right loadout makes all the difference between being an MVP and respawning constantly.
Let’s break down the two most effective Engineer playstyles and the exact builds that’ll maximize your impact on the battlefield.
Understanding the Engineer’s Role in BF6
Before we dive into specific loadouts, here’s what makes Engineers indispensable in Battlefield 6:
Your core responsibilities:
- Vehicle destruction – You’re the primary counter to enemy armor and aircraft
- Area denial – Mines create no-go zones that force enemies to reroute or slow their advance
- Friendly vehicle support – Repairs and resupplies keep your team’s armor in the fight
- Equipment disruption – Your EOD Bot can safely destroy enemy gadgets and mines
- Cover destruction – Rocket launchers demolish fortifications that enemies hide behind
What’s really changed in BF6 is the Field Spec system. These powerful abilities add another layer to your toolkit, letting you specialize even further into anti-armor or support roles. Combined with the right gadget pairing, you can genuinely hard-counter entire enemy strategies.
One thing I’ve noticed: Engineers often get overlooked when players obsess over Assault or Recon classes, but a competent Engineer absolutely controls the pace of vehicle-heavy game modes. You decide whether that enemy tank push succeeds or gets blown to scrap metal.
Loadout #1: The Tank Hunter (Anti-Vehicle Specialist)
This is my go-to build when the enemy team is running heavy armor or dominating with air support. Your entire purpose becomes vehicle elimination—nothing else matters as much.
Primary Weapon
- Recommendation: Medium to long-range option (DMRs, LMGs, or Assault Rifles)
- Why not SMGs? We’ll get to this in detail below, but the short version: you’ll be engaging at distances where SMGs are useless
My personal pick: I run an LMG with moderate recoil control. The sustained fire helps suppress infantry while you reposition between rocket shots, and you’re not completely helpless at range. Check out our complete weapons guide for all available options.
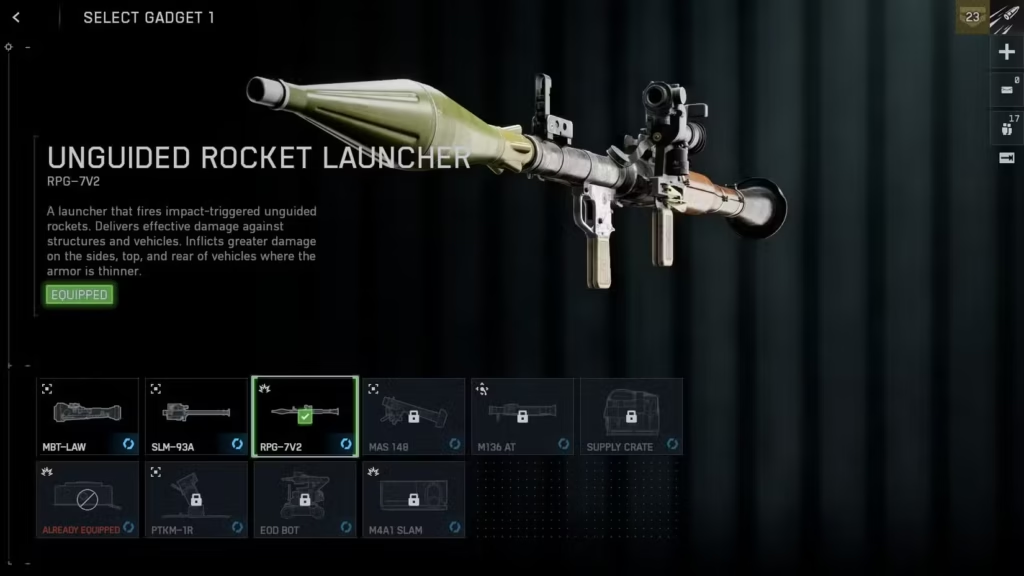
Gadget Slot 1: RPG-7V2 or SLM93A Spire
For ground vehicles – RPG-7V2: This dumb-fire rocket launcher is my default choice for several reasons:
- No lock-on requirement means you can fire immediately
- Manual aiming lets you hit weak points (rear and side armor take bonus damage)
- Works against infantry in fortified positions
- Enemies can’t get lock-on warnings to pop flares/smoke
The downside? You need to lead moving targets and account for drop. But honestly, after a few matches, the muscle memory kicks in. Landing a rear-armor shot on a tank for massive damage is incredibly satisfying.
Alternative – M136 AT Aim-Guided Launcher: If you’ve progressed far enough to unlock it, this guided launcher offers the best of both worlds. It’s later in the progression tree but worth the grind for the precision.
For aircraft – SLM93A Spire: Switch to this AA launcher when enemy helicopters and jets are dominating the skies. While it won’t one-shot aircraft, it forces pilots to retreat for repairs, denying them battlefield presence. Even just the lock-on warning makes skilled pilots scatter, which is valuable in itself.
Gadget Slot 2: AV Mines or Acoustic Sensor AV Mines
Standard AV Mines are perfect for:
- Narrow chokepoints on vehicle-heavy maps
- Roads leading to objectives
- Covering your team’s flanks during pushes
Place them just past hills or corners where tank drivers can’t see them until it’s too late. I’ve gotten so many kills from mines I placed five minutes earlier—pure passive damage.
Acoustic Sensor AV Mines are the underrated choice:
- Fire projectiles that hit vehicles from above (bypassing front armor)
- Can be placed off-road where drivers don’t expect them
- Harder for enemies to spot and destroy pre-emptively
Use these when you’re facing veteran tank players who actively watch for mine placements. The top-attack capability catches people off-guard.
Grenade: AV Grenades
These might seem redundant with your rocket launcher, but they’re clutch for:
- Finishing off wounded vehicles
- Hitting vehicles when you’re out of rockets
- Destroying enemy equipment clusters
- Quick damage without the rocket reload time
Don’t sleep on these—I’ve stolen countless vehicle kills with a well-placed AV grenade at the last second.
Field Spec: Anti-Armor
This Field Spec is specifically tuned for vehicle destruction:
- Increased explosive damage against vehicles
- Faster reload speeds for rocket launchers
- Enhanced target acquisition
The damage boost is noticeable. You’ll shave one or two rocket hits off most vehicle kills, which matters when every second counts in a tank duel.
Playing the Tank Hunter Role Effectively
Here’s how I actually play this loadout in Breakthrough or Conquest modes:
Positioning is everything: Don’t stand in the open trading shots with a tank. Use buildings, rocks, and terrain to peek-shoot. Fire your rocket, relocate, fire again. Static Engineers are dead Engineers.
Target priority:
- Enemy vehicles actively engaging your team
- Vehicles near objectives your team is trying to capture
- Transport vehicles bringing enemy reinforcements
- Aircraft harassing your team
Coordinate with Recon players: If someone on your team is using a Laser Designator, switch to the Glaive launcher. Laser-painted targets take bonus damage and can be hit at ridiculous ranges.
Don’t tunnel vision: Yes, you’re anti-vehicle, but if an enemy is right in front of you, shoot them with your gun. I see too many Engineers ignoring infantry threats while trying to reload rockets.
Loadout #2: Vehicle Support Crew
This build transforms you into the ultimate tank buddy. Your job is keeping friendly armor operational and combat-effective for as long as possible.
Primary Weapon
- Recommendation: Same as Tank Hunter—medium to long-range weapons
When you’re standing behind a tank repairing, you need to be able to defend yourself and your vehicle from infantry at distance. SMGs don’t cut it here (more on this below).
Gadget Slot 1: Any AT Rocket Launcher
Even as a support-focused Engineer, you need anti-vehicle capability for:
- Self-defense when enemy armor pushes your position
- Contributing damage when your friendly tank is engaging another vehicle
- Destroying equipment and fortifications
RPG-7V2 remains my pick for its reliability and instant-fire capability.
Gadget Slot 2: Vehicle Supply Crate or EOD Bot
Vehicle Supply Crate: This is the default choice for vehicle support. It:
- Restocks rockets and tank shells for nearby armor
- Has unlimited uses with a cooldown
- Keeps your tank in the fight longer without returning to base
Drop this near your tank whenever it’s safe, and friendly vehicles nearby will auto-resupply. The tank you’re supporting becomes significantly more dangerous with unlimited ammunition.
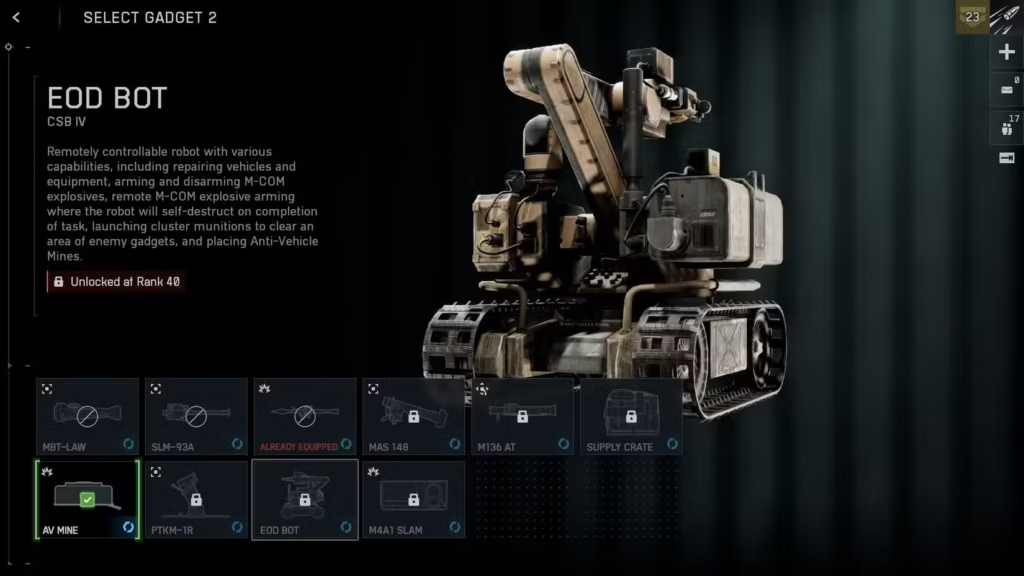
EOD Bot – The Alternative: This is my preferred choice when playing with a squad using voice communication. The EOD Bot is ridiculously versatile:
- Repair friendly vehicles remotely
- Plant mines in dangerous areas without risking yourself
- Destroy enemy equipment from safety
- Spot enemies while your bot scouts ahead
The ability to be in two places at once is game-changing. Park your bot near a friendly tank, then switch back to it whenever they need repairs while you’re across the map. Just coordinate with your team so they know the bot is there to help.
Pro tip: You can also use the bot to trigger enemy mines safely, clearing paths for your armor to advance.
Grenade: Mini Frag Grenades
These are superior to standard frags for support play:
- Longer throwing distance
- Carry more of them
- Slightly less damage, but you make up for it with volume
Spam these toward enemy positions to flush them out of cover. When paired with a Support player dropping ammo, you become a grenade-lobbing machine that denies entire areas to enemy infantry.
Ask Support players to drop ammo crates on top of your tank—you’ll have unlimited grenades and rockets.
Field Spec: Combat Engineer
This Field Spec enhances your support capabilities:
- Faster repair speed
- Thermal Overdrive ability for emergency repairs
- Improved equipment deployment
Thermal Overdrive is the clutch ability here—it dramatically speeds up your repair rate for a few seconds. Use it when your friendly tank is taking heavy fire and you need to out-heal the incoming damage. I’ve saved countless vehicles from certain death with perfectly-timed Thermal Overdrive activations.
Playing the Support Role Correctly
Here’s the reality of playing Vehicle Support Engineer: it’s not glamorous, but it wins games.
Stick with your tank: Find a competent tank driver and become their shadow. A good tanker with a dedicated Engineer is nearly unstoppable. You’ll keep them repaired while they handle threats.
Position smartly: Stand behind or beside your tank, using it as cover. Never stand directly behind the exhaust port where your silhouette is obvious to enemies.
Multi-task constantly:
- Repair when your tank takes damage
- Shoot at enemy infantry between repairs
- Drop supply crates during lulls in combat
- Toss grenades toward enemy positions
- Use your rocket launcher against enemy vehicles
Communication matters: Even without a mic, use the ping system to mark threats for your tank driver. Ping enemy infantry, vehicles, and equipment so they know what to prioritize.
Know when to retreat: If your tank is taking overwhelming fire, don’t die with it. Fall back, let the tank reposition or retreat, then reconnect and continue supporting from a safer position.
The SMG Question: Why Medium-Long Range Weapons?
This is the most common question I get about Engineer loadouts: “Why not use SMGs? They’re the Engineer’s class weapons!”
Here’s the honest truth—SMGs are terrible for vehicle-focused Engineer play.
The range problem: Tanks and IFVs operate at medium to long ranges in most engagements. They’re not parking right next to objectives—they’re sitting back where they have sightlines and can retreat if needed. If you’re supporting or hunting vehicles, you’ll be operating in these same ranges.
SMGs are effective at 10-25 meters max. Beyond that, your damage falloff and spread make you practically useless. Meanwhile, enemy infantry with ARs, DMRs, or LMGs will shred you before you even deal meaningful damage.
When SMGs DO work: If you’re playing a close-quarters focused map or staying near tight urban objectives, SMGs can be viable. Maps with lots of interior spaces favor SMG play. But for 70% of Engineer gameplay scenarios, you’re handicapping yourself with an SMG.
My recommendations by scenario:
- Vehicle-heavy maps: LMG or DMR
- Mixed engagement distances: Assault Rifle with good mid-range performance
- Close-quarters urban: SMG is fine here
- Open maps: DMR or even a carbine with range
For specific weapon builds, check our guides on the best M4A1 loadout and M277 loadout.
Advanced Engineer Tips & Tricks
After mastering the basics, here are some next-level strategies:
Mine Placement Psychology
Don’t just place mines randomly on roads. Think about:
- Post-combat zones: Place mines where wounded vehicles retreat to. They’re focused on escaping, not checking for mines
- Alternative routes: Everyone expects mines on the main road. Place them on the “safe” flanking routes
- Objective approaches: Just before objectives where tanks are accelerating to attack
Rocket Launcher Techniques
Leading moving targets: The RPG has travel time. For tanks moving perpendicular to you, aim about one tank-length ahead at medium range.
Top-attack angles: Hitting a tank from elevated positions deals bonus damage. Use hills and buildings to your advantage.
Shooting through cover: Your rockets can destroy thin walls and fences. Don’t assume an enemy behind cover is safe.
EOD Bot Mastery
- Scout ahead and spot enemies before your team pushes
- Place mines in dangerous areas you’d never survive reaching on foot
- Repair multiple vehicles by repositioning your bot between them
- Destroy enemy spawn beacons and equipment
Thermal Overdrive Timing
Don’t waste this ability. Save it for:
- Critical armor engagements where you need to out-repair incoming damage
- Emergency saves when your tank is below 25% health
- Tank-vs-tank duels where the extra repair speed determines the winner
Optimizing Your Engineer Performance
Want to maximize your effectiveness? Here’s what to focus on:
Optimize your settings: Frame rate and responsiveness matter when leading rocket shots. Our best settings guide covers graphics and control tweaks for Engineers.
Master recoil control: If you’re using LMGs or full-auto weapons at range, controlling recoil is essential. Learn how to minimize recoil for better accuracy during sustained fire.
Learn the maps: Understanding vehicle routes, chokepoints, and elevated positions on every map lets you pre-position mines and choose optimal firing positions.
Level up efficiently: Complete Engineer-specific challenges and focus on XP farming strategies to unlock better equipment faster.
Common Engineer Mistakes to Avoid
I see these constantly in public matches:
Standing in the open: You have rockets, not invincibility. Use cover aggressively.
Ignoring infantry: Tunnel-visioning on vehicles gets you killed by infantry you didn’t notice.
Poor mine placement: Dropping all three mines in the same spot wastes them. Spread them out to cover more area or create multiple hazards.
Repairing at full health: Don’t stand behind a tank spamming repair when it’s at 100%. You’re an easy target. Position defensively and watch for threats.
Abandoning your tank driver: If you’re playing Support Engineer and you leave your tank to chase kills, that tank becomes vulnerable. Commit to the role.
Conclusion: Mastering Engineer in BF6
The Engineer class is the backbone of vehicle warfare in Battlefield 6. Whether you’re the lone wolf Tank Hunter systematically destroying enemy armor or the devoted Support Crew keeping friendly vehicles in the fight, you directly impact whether your team wins or loses vehicle-focused matches.
My personal recommendation? Start with the Tank Hunter build to learn anti-vehicle mechanics and positioning. Once you’re comfortable destroying armor, switch to Vehicle Support to understand how tanks think and what they need from their Engineers.
Both playstyles are essential, and honestly, you should be ready to swap between them based on what your team needs in any given match. Flexibility is what separates good Engineers from great ones.
For more Battlefield 6 content, explore our guides on all game modes, field specs, campaign collectibles, and pro tips.
Now get out there and show those tanks who’s boss.
Official Battlefield 6 Resources: