Let’s be real—when you’re in the middle of a chaotic 64-player Battlefield match with explosions everywhere and helicopters screaming overhead, it’s easy to overlook some of the game’s deeper systems. Field Specs are one of those “hidden in plain sight” mechanics that many players ignore, which is a shame because they can completely transform how your class performs.
If you’ve been playing Battlefield 6 and wondering why some players seem to have an edge you can’t explain, there’s a good chance they’re using Field Specs effectively while you’re not. Let me break down exactly what they are, how they work, and which ones you should be running.
What Exactly Are Field Specs?
Think of Field Specs as subclass specializations that let you customize how your chosen class plays. They’re essentially bundles of passive abilities built around specific playstyles or tactical roles.
For example:
- Want your Recon to be a long-range death machine? There’s a Field Spec for that.
- Prefer turning your Assault into a close-quarters nightmare? Yep, there’s one for that too.
- Need your Engineer to be a tank-hunting specialist? You guessed it.
Each of the four classes in Battlefield 6 gets two Field Spec options, giving you 8 total specializations to choose from. The catch? Only one Field Spec can be active at a time per class, so you’ll need to pick the one that matches your intended playstyle for that match.
How Field Specs Actually Work (The Important Part)
Here’s where Field Specs get interesting—and where they differ from your standard class abilities.
They’re Earned, Not Given
Unlike your class’s built-in passive abilities (like the Assault class having faster weapon swap), Field Spec bonuses don’t activate at the start of the match. You have to earn them by accumulating Score during gameplay.
How to activate Field Specs faster:
- Get kills and assists
- Capture objectives
- Spot enemies for your team
- Resupply teammates
- Heal and revive squad members
- Deal damage to vehicles
- Assist in vehicle destruction
- Basically, play the objective and support your team
The better you perform, the faster your Field Spec comes online. If you’re struggling to get kills, don’t stress—supporting your team through spotting, healing, or resupplying still counts toward activation. This design encourages teamplay even if you’re having an off day with your aim.
They Reset Every Match
Here’s the kicker: Field Spec progress resets after every round. You’re not building toward some permanent power-up—each match starts you at zero, and you need to earn your bonuses fresh.
This keeps things balanced and prevents snowballing where players who start strong become unstoppable. It also means every match is a fresh opportunity to prove yourself and unlock your full potential.
Think of Them as “Momentum Perks”
If you’ve played Call of Duty’s scorestreak system or similar games, Field Specs work on a comparable principle. Perform well → unlock bonuses → perform even better. They reward good play and help you capitalize on momentum, but they won’t carry a terrible performance.
Every Field Spec in Battlefield 6 (And How to Use Them)
Let’s break down all eight Field Specs, what they do, and—more importantly—when you should actually use them.
🔴 Assault Field Specs
Assault players are the frontline fighters who push objectives and dominate infantry combat. Their Field Specs amplify either explosive resistance or aggressive pushing power.
Breacher (Default)
What it does:
- Takes less damage from explosives
- Improves effectiveness with incendiary shotguns
- Boosts grenade launcher damage/effectiveness
When to use it: Playing urban maps with tight corridors? Pushing heavily defended objectives? Breacher is your go-to. The explosive resistance is clutch when you’re pushing through grenade spam, and the improved incendiary/explosive weapons let you clear rooms more effectively.
This Field Spec basically says “I’m going through that doorway whether you like it or not.” If you’re working on close quarters challenges, this is probably your best friend.
Pro tip: Pair this with a shotgun and grenade launcher for maximum room-clearing chaos. You become a walking breach charge.
Frontliner (Unlocked through progression)
What it does:
- Reduces fall damage (jump off buildings more safely)
- Improves passive health regeneration (get back in the fight faster)
- Bonus: Squadmates who spawn on you or your Spawn Beacon temporarily get Adrenaline Injector effects
When to use it: Frontliner is all about sustainability and supporting your squad. The improved health regen keeps you in combat longer, and the fall damage reduction lets you take aggressive vertical routes without crippling yourself.
But the real MVP feature? That squad spawn buff. If you’re playing with a coordinated squad and frequently having teammates spawn on you for pushes, you’re essentially giving everyone a temporary combat stim. It’s insane for organized pushes on Breakthrough or Conquest.
Pro tip: Use this when you’re the squad’s anchor point. Place spawn beacons strategically and watch your team materialize with temporary buffs. Perfect for fast leveling strategies since you’ll rack up squad spawn bonuses.
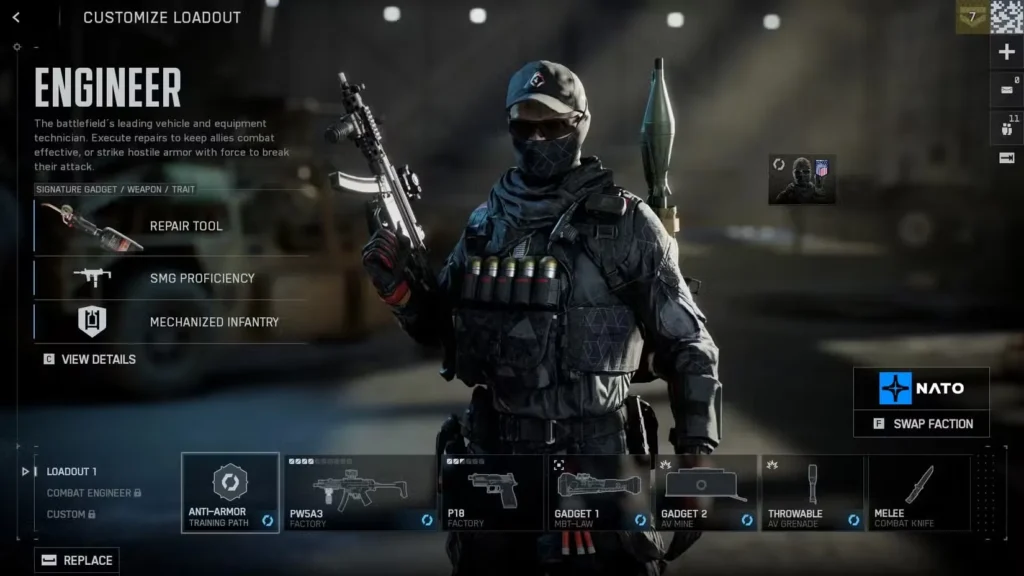
🔧 Engineer Field Specs
Engineers handle vehicles and anti-armor duties. Their Field Specs let them specialize in either destroying vehicles or keeping friendly ones operational.
Anti-Armour (Default)
What it does:
- Carry more rockets (extra ammo)
- Faster rocket reload speed
- Reduces repair effectiveness on vehicles you damage (they heal slower)
When to use it: See a lot of tanks, helicopters, or armored vehicles on the enemy team? Anti-Armour makes you the ultimate vehicle hunter. The extra rockets mean you can solo-destroy vehicles without running dry, and the faster reload lets you chain shots before they can retreat.
The repair debuff is sneaky powerful—it makes it harder for enemy Engineers to quickly patch up damaged vehicles, effectively extending your damage window.
Pro tip: Pair this with the complete weapons list to find the best anti-vehicle launcher for your playstyle. This Field Spec is essential on vehicle-heavy maps.
Combat Engineer (Unlocked through progression)
What it does:
- Drastically faster repair speed on friendly vehicles and gadgets
When to use it: Are you the dedicated support Engineer who keeps your team’s tank column alive? Combat Engineer is for you. The repair speed boost is substantial—you can keep friendly vehicles operational through sustained fire that would normally force a retreat.
This is less about getting kills and more about enabling your team’s vehicle players to dominate. If you’re running with a good tank crew or helicopter pilot, they’ll love you forever.
Honest take: This is the less flashy option, but in organized squads or when paired with competent vehicle players, it’s arguably more impactful than Anti-Armour. You won’t top the scoreboard, but you might just win the match.
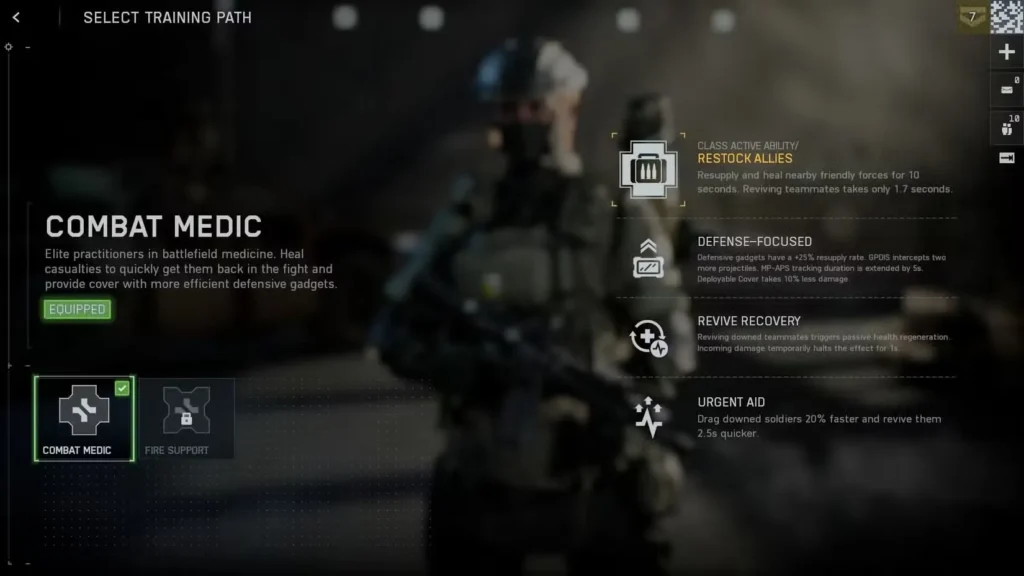
🏥 Support Field Specs
Support players keep the team alive and supplied. Their Field Specs focus on either medic duties or sustained firepower.
Combat Medic (Default)
What it does:
- Drag and revive teammates faster
- Improves effectiveness of defensive gadgets (shields, barriers, etc.)
When to use it: Playing modes with limited respawns like Rush or Breakthrough? Combat Medic is essential. The faster revive speed is clutch when you’re trying to pick up teammates under fire, and the drag mechanic lets you pull downed players to safety before reviving.
The improved defensive gadgets make you even better at holding positions, which synergizes perfectly with the Support class’s area-denial role.
Pro tip: This shines in coordinated squads where keeping everyone alive matters more than raw kills. Pair it with our best tips and tricks guide for maximum effectiveness.
Fire Support (Unlocked through progression)
What it does:
- Reduced cooldown on ammo bag resupply
- Better effectiveness when using mounted/stationary weapons
When to use it: Are you the player who sets up on a mounted MG and rains hell on enemies? Fire Support makes you better at sustained suppression and keeps your team constantly supplied with ammunition.
The ammo bag cooldown reduction means you can spam supply drops for your team, which is huge when everyone’s burning through explosives and rockets. The mounted weapon buff is situational but devastating when you find a good position.
Real talk: This is the more selfish of the two Support specs, but if you’re playing game modes with extended firefights, keeping your team supplied can be game-changing.
🎯 Recon Field Specs
Recon players excel at long-range combat and intelligence gathering. Their Field Specs turn them into either sniper gods or stealth operatives.
Sniper (Default)
What it does:
- Improved auto-spotting at long range
- Headshot kills with sniper rifles prevent enemy revives (instant death)
When to use it: If you’re planning to sit 300 meters back and dome people, Sniper is non-negotiable. The auto-spotting helps your entire team by marking enemies you see, and the revive-prevention on headshots is brutal—those enemies go straight to respawn with no chance for medics to save them.
This is the ultimate long-range power fantasy. You become the thing enemy teams fear most: a competent sniper who actually helps the team.
Pro tip: Combine this with Recon class challenges and Deadeye challenges for massive progression. Just please, actually play the objective while you’re sniping.
Spec Ops (Unlocked through progression)
What it does:
- Reduced footstep volume (harder to hear you coming)
- Harder for enemies to spot you (reduced detection)
When to use it: Want to play Recon aggressively with SMGs and spotting gadgets instead of camping with a sniper? Spec Ops is your jam. The quieter footsteps let you flank more effectively, and the reduced detection means enemies might not notice you in their peripheral vision or on their mini-map as quickly.
This turns Recon into more of a sneaky flanker or intel operative rather than a traditional sniper. It’s fantastic for combat roll tactics and getting behind enemy lines undetected.
Creative use: Pair this with spawn beacons placed deep in enemy territory. Your reduced detection helps you survive while your squad uses the beacon for sneaky flanks.
How to Pick the Right Field Spec
Still not sure which Field Spec to run? Here’s my quick decision tree:
Pick based on your role:
- Aggressive objective pusher? → Breacher (Assault) or Frontliner (Assault)
- Vehicle hunter? → Anti-Armour (Engineer)
- Vehicle support? → Combat Engineer (Engineer)
- Team medic? → Combat Medic (Support)
- Ammo supplier/suppression? → Fire Support (Support)
- Long-range sniper? → Sniper (Recon)
- Aggressive flanker? → Spec Ops (Recon)
Pick based on map type:
- Urban/tight maps → Breacher, Combat Medic, Spec Ops
- Open/vehicle-heavy maps → Anti-Armour, Combat Engineer, Sniper
- Mixed maps → Frontliner, Fire Support (flexible options)
Pick based on squad play:
- Playing solo? → Breacher, Anti-Armour, Sniper (self-sufficient specs)
- Coordinated squad? → Frontliner, Combat Engineer, Combat Medic (team-enabling specs)
Pro Tips for Maximizing Field Specs
1. Activate them ASAP Don’t just focus on kills—play the objective hard in the opening minutes. The faster you unlock your Field Spec, the more value you’ll get from it over the entire match.
2. Match your spec to your loadout Running incendiary shotguns? Use Breacher. Got repair tools equipped? Use Combat Engineer. Synergy matters.
3. Change specs between matches If the enemy team switches to a tank-heavy composition, swap to Anti-Armour. Adapt to what each match needs.
4. Don’t sleep on the unlock specs Frontliner, Combat Engineer, Fire Support, and Spec Ops are all unlocked through progression, but they’re not “better”—they’re just different. The default specs are perfectly viable.
5. Support play unlocks specs too Having a bad aim day? Focus on spotting, healing, and resupplying. You’ll still unlock your Field Spec and help your team win. Check out our map rankings guide to learn the best support positions.
Common Mistakes to Avoid
❌ Ignoring Field Specs entirely I see so many players who don’t even realize they’re missing out on significant bonuses. Don’t be that person.
❌ Using the wrong spec for your playstyle Running Sniper field spec but using an SMG up close? You’re literally getting zero benefit. Match your spec to your actual gameplay.
❌ Playing too passively to activate specs If you’re sitting in spawn or playing ultra-conservative, you’ll never unlock your Field Spec. You need to engage with the match.
❌ Forgetting they reset Don’t assume your previous match’s Field Spec carried over. Each match is fresh.
Final Thoughts: Small Details, Big Impact
Field Specs are the perfect example of Battlefield’s depth—they’re easy to overlook but meaningful when used correctly. They won’t carry bad play, but they’ll absolutely amplify good play and give you an edge in those close engagements.
The beauty of the system is that it rewards playing the objective and helping your team, not just chasing kills. Whether you’re grinding Danger Close challenges or just trying to win matches, understanding and using Field Specs will make you a more effective player.
Take some time to experiment with different specs and figure out which ones complement your playstyle. Once you find that sweet spot where your loadout, Field Spec, and tactics all align? That’s when Battlefield 6 clicks and you start feeling unstoppable.
Now get out there and put those Field Specs to work. Your team is counting on you.
Play Battlefield 6: Official EA Site | Steam | PlayStation Store | Epic Games Store
Community: Join the discussion on r/Battlefield6