Battlefield 6 has been a massive success since launch, bringing players back to the franchise’s large-scale warfare roots with stunning visuals and engaging gameplay. However, the game’s demanding nature has created a significant problem for many PC players: excessive CPU usage that causes stuttering, frame drops, and even system instability.
If you’re experiencing maxed-out CPU usage, poor frame times, or your cooling fans sound like a jet taking off during matches, you’re not alone. This issue has affected players across various hardware configurations, from mid-range systems to high-end rigs. The good news? There’s a proven fix that has worked for thousands of players since the Battlefield V days.
Let’s walk through the most effective solution step-by-step, along with additional optimization tips to get your game running smoothly.
The User.cfg Method: Proven CPU Fix
This fix works by manually configuring how Battlefield 6 distributes workload across your CPU cores and threads. Originally discovered by Reddit user TheHeavySoldier for Battlefield V, this same solution has proven highly effective for Battlefield 6’s CPU usage problems.
What this fix does:
- Tells the game exactly how many CPU cores and threads to utilize
- Prevents the game from overloading specific cores
- Balances workload distribution more efficiently
- Reduces unnecessary background thread activity
Step 1: Find Your CPU Specifications
Before creating the configuration file, you need to know your CPU’s exact core and thread count.
Method A: Using Task Manager (Quick Method)
- Press Ctrl + Shift + Esc to open Task Manager
- Click the Performance tab
- Select CPU from the left sidebar
- Look for:
- Cores: Physical processor cores
- Logical Processors: Total threads (also called virtual cores)
Example: AMD Ryzen 7 3700X shows 8 cores and 16 logical processors
Method B: Manufacturer Website (Intel Users – IMPORTANT)
For Intel CPUs, especially 12th gen and newer with Performance/Efficiency core architecture, Task Manager numbers can be misleading. Instead:
- Note your exact CPU model (from Task Manager or System Information)
- Search for your CPU on Intel’s official website
- Look for “Performance-core” count specifically
- Use the P-core count for your configuration
Why this matters: Intel’s hybrid architecture can confuse the game’s thread management. Using actual P-core counts prevents the game from improperly utilizing E-cores.
Step 2: Create the User.cfg File
Now that you have your CPU specifications, let’s create the configuration file.
Open Notepad (or any text editor) and copy this template:
Thread.ProcessorCount 6
Thread.MaxProcessorCount 6
Thread.MinFreeProcessorCount 0
Thread.JobThreadPriority 0
GstRender.Thread.MaxProcessorCount 12
Replace the numbers based on YOUR CPU:
- Replace both instances of 6 with your number of cores
- Replace 12 with your number of threads/logical processors
Real-world examples:
For AMD Ryzen 7 3700X (8 cores, 16 threads):
Thread.ProcessorCount 8
Thread.MaxProcessorCount 8
Thread.MinFreeProcessorCount 0
Thread.JobThreadPriority 0
GstRender.Thread.MaxProcessorCount 16
For Intel Core i5-12600K (6 P-cores, 12 threads):
Thread.ProcessorCount 6
Thread.MaxProcessorCount 6
Thread.MinFreeProcessorCount 0
Thread.JobThreadPriority 0
GstRender.Thread.MaxProcessorCount 12
For AMD Ryzen 5 5600X (6 cores, 12 threads):
Thread.ProcessorCount 6
Thread.MaxProcessorCount 6
Thread.MinFreeProcessorCount 0
Thread.JobThreadPriority 0
GstRender.Thread.MaxProcessorCount 12
Step 3: Save and Place the File
After entering your CPU-specific values:
- Click File > Save As in Notepad
- Change “Save as type” to All Files (critical step!)
- Name the file exactly: User.cfg (case-sensitive)
- Navigate to your Battlefield 6 installation folder
Finding your Battlefield 6 folder:
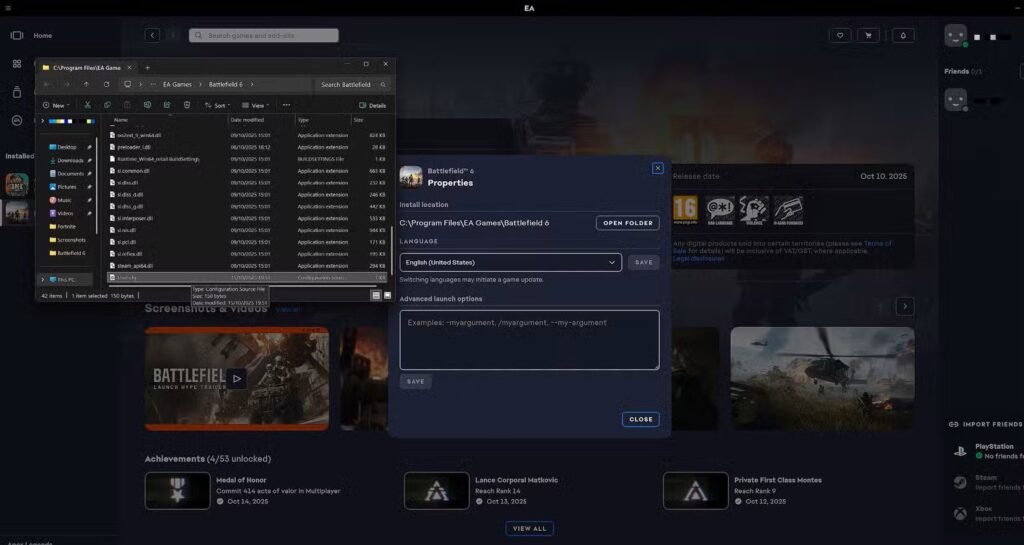
If you use EA App:
- Open EA App
- Find Battlefield 6 in your library
- Click the three dots menu
- Select Manage > View Properties
- Click Open Folder or Browse
If you use Steam:
- Open Steam library
- Right-click Battlefield 6
- Select Properties
- Go to Installed Files tab
- Click Browse Local Files
Save the User.cfg file directly in this root folder (the same folder containing the Battlefield 6 .exe file)
Step 4: Test and Verify
- Launch Battlefield 6 normally
- Load into a multiplayer match (performance issues are most noticeable here)
- Monitor your CPU usage using Task Manager or MSI Afterburner
What you should see:
- CPU usage should drop from 95-100% to 70-85% range
- More balanced load across all cores (no single core maxed)
- Smoother frame times with fewer stutters
- Lower CPU temperatures
If it doesn’t work:
- Double-check your core/thread numbers are correct
- Verify the file is named exactly “User.cfg” (not “User.cfg.txt”)
- Ensure the file is in the correct root folder
- Try restarting your PC before launching the game
Additional CPU Optimization Tips
The User.cfg fix is powerful, but combining it with other optimizations maximizes performance:
Graphics Settings Adjustments
CPU-intensive settings to lower:
Effects Quality: Medium or Low
- Particle effects and explosions hammer the CPU
- Minimal visual difference at Medium
Mesh Quality: Medium or High
- Higher settings increase CPU draw calls
- Balance with your specific hardware
Terrain Quality: Medium
- Reduces CPU load for terrain tessellation
- Still maintains decent visual quality
Post-Processing: Medium or Low
- Some effects are CPU-bound
- Lower settings free up processing power
Check our comprehensive Battlefield 6 settings optimization guide for complete graphics configuration recommendations.
Windows Power Settings
Ensure Windows isn’t throttling your CPU:
- Open Windows Settings
- Navigate to System > Power & Battery (Windows 11) or Power Options (Windows 10)
- Select High Performance or Ultimate Performance power plan
- Disable CPU power throttling
Background Applications
Close unnecessary programs before gaming:
- Browser tabs (especially Chrome, which is CPU-heavy)
- Discord overlay (disable or use browser version)
- RGB software (some utilities consume surprising CPU resources)
- Cloud sync services (OneDrive, Google Drive, Dropbox)
- Video capture software (unless actively recording)
BIOS/XMP Settings
If you haven’t already, enable XMP in your BIOS:
- Allows RAM to run at advertised speeds
- Battlefield 6 benefits enormously from fast memory
- See our XMP enabling guide for instructions
Driver Updates
Outdated or problematic drivers can cause CPU bottlenecks:
- GPU drivers: Update to latest from NVIDIA or AMD
- Chipset drivers: Download latest from motherboard manufacturer
- Windows updates: Ensure Windows is fully updated
Understanding Why This Fix Works
For those curious about the technical side, here’s what’s happening:
Battlefield 6, like previous Frostbite engine games, sometimes struggles with thread scheduling on modern multi-core CPUs. By default, the engine tries to dynamically manage workload distribution, but this can lead to:
- Thread contention: Multiple threads fighting for the same resources
- Core parking issues: Work concentrated on too few cores
- Inefficient scheduling: Wrong types of tasks assigned to wrong cores
The User.cfg file gives explicit instructions to the game engine about your hardware capabilities, bypassing problematic auto-detection. This manual configuration results in more predictable, stable performance.
Troubleshooting Common Issues
“My CPU usage is still high after the fix”
Try these additional steps:
- Lower graphics settings further, especially CPU-bound options
- Close absolutely all background applications
- Check for malware or crypto miners using system resources
- Verify your cooling solution is adequate (thermal throttling causes performance issues)
“The file isn’t doing anything”
Common mistakes:
- File extension is wrong (.txt instead of .cfg)
- File is in wrong folder (needs to be in root, not a subfolder)
- Numbers don’t match your actual CPU specs
- File has extra spaces or formatting errors
“Performance got worse”
This usually means incorrect values were entered:
- Double-check your core/thread count
- For Intel 12th gen+, ensure you used P-core count
- Try reducing the thread count by 2 if you have other applications running
“Game crashes on startup after adding User.cfg”
- Delete the User.cfg file
- Verify your syntax exactly matches the examples
- Don’t add extra lines or parameters
- Ensure no trailing spaces after numbers
Hardware-Specific Considerations
AMD Ryzen Users:
- Generally straightforward—use core/thread count from Task Manager
- Ryzen benefits significantly from fast RAM (3600MHz+)
- Ensure PBO (Precision Boost Overdrive) isn’t causing thermal issues
Intel Users (especially 12th/13th/14th gen):
- Use P-core count only for processor values
- E-cores aren’t optimal for gaming workloads
- Consider disabling E-cores in BIOS for pure gaming performance
Older CPUs (4-6 cores):
- This fix is especially helpful for older hardware
- Consider lowering graphics settings more aggressively
- May benefit from overclocking if thermal headroom exists
Performance Benchmarking
After applying fixes, benchmark to verify improvements:
In-game testing:
- Play on large-scale maps like those in Battlefield 6’s map rotation
- Monitor during heavy action sequences
- Check performance across different game modes
What to monitor:
- Average FPS (should increase)
- 1% and 0.1% lows (smoothness indicator)
- CPU usage percentage (should decrease)
- Core distribution (more balanced)
- Frame time consistency (fewer spikes)
Additional Performance Resources
While optimizing CPU usage, consider these related improvements:
- Master controller vs keyboard/mouse settings for your platform
- Fix packet loss issues that can feel like performance problems
- Optimize audio settings which can impact CPU load
- Level up efficiently with our XP farming guide
When to Contact Support
If you’ve tried everything and still experience severe CPU usage:
- Visit the official EA support page
- Check the Battlefield 6 subreddit for recent issues
- Verify your hardware meets minimum specifications
- Consider hardware issues (failing CPU cooler, thermal paste degradation)
Final Thoughts
High CPU usage in Battlefield 6 is frustrating, but the User.cfg method has proven remarkably effective for the majority of players experiencing this issue. The fix takes just a few minutes to implement and can transform your gaming experience from stuttery and unplayable to smooth and enjoyable.
Remember that Battlefield 6 is genuinely CPU-intensive by design—large-scale battles with 128 players, complex physics, and destructible environments all demand processing power. The goal isn’t necessarily to get CPU usage to 50%, but rather to eliminate stuttering, improve frame consistency, and reduce unnecessarily wasted processing cycles.
Battlefield 6 is available on Steam, PlayStation, and Epic Games Store. For PC players, taking the time to properly optimize your system pays dividends across all modes—from competitive multiplayer to immersive campaign missions.
Good luck, and enjoy the game without your CPU melting.