The Art of the Silent Kill in Battlefield 6
Battlefield 6 is absolutely crushing it right now—thousands of players are flooding into the game daily, and for good reason. Whether you’re commanding tanks in massive Conquest battles or getting up close and personal in Team Deathmatch, this entry has something for literally every playstyle.
But here’s the reality check: while casual play is fun, the real grind kicks in when you start chasing those weapon unlocks, exclusive camos, and Assignment rewards. And let me tell you, the Combat Expert 2 Assignment that requires 10 Takedowns in a single match is absolutely brutal if you don’t know what you’re doing.
I’ve seen players spend hours trying to complete this challenge, getting frustrated as their takedown attempts get interrupted or they simply can’t find the right opportunities. After grinding through this myself and helping squad members do the same, I’ve figured out the exact formula for making takedowns consistent and efficient.
Let’s break down everything you need to know about performing takedowns in Battlefield 6.
What Exactly Are Takedowns?
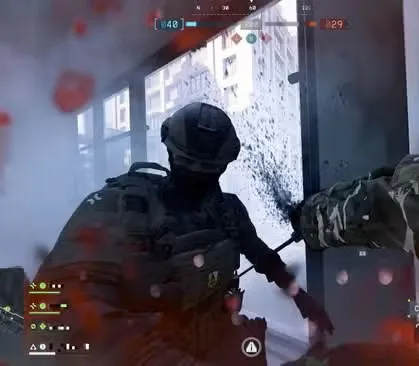
Takedowns aren’t just regular melee kills—they’re special stealth eliminations that have been a signature Battlefield feature for years. When you successfully execute a takedown, you’ll trigger a unique animation that instantly eliminates your target while also stealing their Dog Tag as a trophy.
The crucial difference? Takedowns completely prevent enemy revives. This makes them incredibly valuable in competitive play, especially in modes where medics are constantly bringing teammates back into the fight.
The Mechanics Behind Takedowns
Here’s how the system actually works:
Positioning Requirements:
- You must approach from behind or to the side of your target
- Frontal melee attacks will never trigger takedowns (just standard melee damage)
- The game will show a takedown prompt when positioned correctly
- Distance matters—you need to be extremely close
Execution Method:
- Hold the melee button (don’t just tap it)
- The specific button depends on your platform and controller vs keyboard/mouse setup
- Animation length varies by equipped melee weapon
- Once started, you’re locked into the animation until completion or interruption
Important Limitations:
- You’re completely vulnerable during the animation
- Other enemies can shoot and interrupt you mid-takedown
- Interrupted takedowns don’t count toward challenges
- Target is alerted if you fail the attempt
The animations in Battlefield 6 are actually pretty quick compared to older games (around 2-3 seconds), but that’s still an eternity when you’re exposed in a firefight.
Step-by-Step Takedown Tutorial
1. Identify Your Target
Look for enemies who are:
- Stationary (camping snipers are perfect)
- Focused on a different direction
- Isolated from their squad
- Engaged in combat with your teammates
- Reloading or healing
Pro Tip: Use spotting and pinging to track enemy positions before making your approach.
2. Approach Undetected
This is where most players fail. Here’s how to stay hidden:
- Crouch or go prone to reduce noise and visibility
- Use combat roll to quickly close distance when needed
- Stick to cover and avoid open sightlines
- Check your minimap constantly for enemy awareness indicators
- Time your approach when your target is distracted
3. Position Correctly
The game is pretty generous with takedown angles, but follow these guidelines:
- Optimal position: Directly behind within arm’s reach
- Acceptable position: 45-degree angle to either side
- Watch for the prompt: If you see it, you’re good to go
- Don’t panic: Take a split second to ensure proper positioning
4. Execute and Survive
Once you commit:
- Hold the melee button until the animation completes
- Watch your surroundings through peripheral vision
- Be ready to react if you get shot mid-animation
- Move immediately after completion—don’t admire your work

Best Game Modes for Farming Takedowns
After testing every mode extensively, here’s the definitive ranking:
Top-Tier Modes (Highly Recommended)
Team Deathmatch:
- Smaller maps with constant infantry action
- Players respawn in predictable patterns
- Less vehicle spam to worry about
- Perfect for the “10 takedowns in one match” challenge
Squad Deathmatch:
- Even more focused combat than Team Deathmatch
- Fewer players means easier stealth approaches
- Squad-based spawning creates flanking opportunities
- My personal favorite for takedown farming
Rush:
- Medium-sized maps with defined attack/defense lines
- Predictable enemy positions around objectives
- Defenders often camp in corners (easy targets)
- Good balance between chaos and opportunity
Decent Alternatives
Domination:
- Objective-focused gameplay creates distracted enemies
- Multiple control points for flanking routes
- Can work well if you know the map layouts
Avoid These Modes
Conquest:
- Maps are way too large and spread out
- Vehicle-heavy gameplay reduces infantry encounters
- Takes forever to find isolated targets
- Possible but extremely inefficient
Breakthrough:
- Too many players watching flanks
- Chokepoint combat makes stealth difficult
- High chance of interruption
Advanced Takedown Strategies
The Flanking Approach
This is your bread and butter. Here’s my proven method:
- Identify the enemy frontline on your minimap
- Circle wide around the combat zone using cover
- Approach from an unexpected angle (usually the far sides)
- Target distracted enemies first—those in ADS or shooting
- Work through targets systematically before they realize you’re there
I’ve gotten 4-5 consecutive takedowns using this method in Team Deathmatch. The key is patience and map awareness.
The Corner Camper
Perfect for Risk-averse players:
- Find a high-traffic corner or doorway near objectives
- Wait in crouch position just out of sight
- Listen for footsteps (use good audio settings)
- Strike when enemies pass without checking corners
- Relocate immediately after one or two kills
This works incredibly well on indoor maps. Check out War Tapes audio settings to maximize your sound awareness.
The Squad Follow
Use your team as bait:
- Follow behind your aggressive squadmates at medium distance
- Let them engage enemies first and draw attention
- Flank around while enemies are distracted shooting at your team
- Clean up with takedowns while targets focus forward
- Support your squad while farming your challenge
This method also helps you complete Savior and Payback kills simultaneously.
The Sniper Hunter
One of the most satisfying strategies:
- Identify enemy sniper positions (look for sniper glint)
- Use flanking routes to approach from behind or sides
- Crouch-walk the final approach to stay silent
- Execute the takedown while they’re scoped in
- Repeat (snipers often return to the same spot)
Snipers are the easiest takedown targets in the game—they’re stationary, focused on scopes, and usually alone.
Optimal Class and Loadout Setup
Best Classes for Takedowns
Recon Class:
- Motion sensors reveal enemy positions
- Spawn beacon lets you respawn behind enemy lines
- Perfect for stealth playstyle
- Check best Recon loadouts for optimal setups
Assault Class:
- Smoke grenades provide cover for approaches
- Fast movement speed for quick repositioning
- Good weapon versatility for after takedowns
- See Assault class best loadouts
Weapon Recommendations
You won’t be shooting much, but when you do:
- SMGs for close-range encounters (PW7A2 or SGX are excellent)
- Suppressed weapons to avoid revealing your position
- High mobility weapons for faster movement speed
- Check all weapon stats to optimize
Essential Equipment
- Smoke Grenades: Create cover for approaches
- Motion Sensors: Reveal enemy positions and facing directions
- C5/Claymores: Protect your flanks while hunting
- Spawn Beacon: Maintain positioning behind enemy lines
Combat Expert 2 Challenge Strategy
This is the big one: 10 Takedowns in a single match. Here’s your game plan:
Match Preparation
- Choose Squad Deathmatch or Team Deathmatch (mandatory)
- Equip a stealth-focused loadout with SMG and detection tools
- Join a server with longer match duration if possible
- Warm up with a practice match first
- Set realistic mini-goals (aim for 3-4 takedowns per phase)
In-Match Execution
Early Game (0-3 Takedowns):
- Learn the map flow and enemy spawn patterns
- Identify camping spots and high-traffic areas
- Get your first few “easy” takedowns on unaware players
- Don’t rush—establish your rhythm
Mid Game (4-7 Takedowns):
- Enemies may become more cautious
- Switch flanking routes if one becomes predictable
- Use Field Specs that enhance stealth
- Maintain aggressive positioning
Late Game (8-10 Takedowns):
- Push harder as the match timer counts down
- Accept slightly riskier takedown opportunities
- Focus on isolated targets for guaranteed success
- Don’t throw away progress on low-percentage attempts
What If You’re Struggling?
- Take a break and come back fresh
- Watch replays of your deaths to understand mistakes
- Switch lobbies if the skill level is too high
- Consider bot lobbies for practice (if challenge allows)
- Squad up with friends who can help create opportunities
Common Takedown Mistakes to Avoid
Tactical Errors
❌ Rushing the approach – Slow and steady wins the race ❌ Ignoring surroundings – Always check for nearby enemies before committing ❌ Wrong angle attacks – Wait for proper positioning or you’ll just regular melee ❌ Chasing runners – Let them go; find stationary targets instead ❌ Forgetting to hold the button – Tapping won’t trigger takedowns
Strategic Mistakes
❌ Playing wrong game modes – Conquest is terrible for this challenge ❌ Going solo – Use your squad as distractions ❌ Being too passive – Need to actively hunt targets ❌ Tilting after fails – Stay calm and patient ❌ Poor loadout choice – Mobility and stealth matter
Rewards and Why They’re Worth It
Completing Combat Expert 2 unlocks:
- Avalanche Fireteam Vedmak Engineer Skin
- Glacial Coyote Squad Engineer Skin
These are some legitimately cool character skins that show off your dedication. Plus, mastering takedowns makes you a better player overall—you’ll develop better map awareness, positioning sense, and patience.
The skills you learn farming this challenge directly translate to better performance in all classes and game modes.
Additional Challenge Synergies
While grinding takedowns, you can simultaneously work on:
- Close Quarters Challenges – Natural overlap with CQB modes
- Deadeye Challenges – If using precision weapons
- Unit Challenges – Many have complementary requirements
- Assault Class Challenges – If playing Assault role
Final Thoughts: Patience Pays Off
Takedowns in Battlefield 6 are an art form that separates the patient tacticians from the run-and-gun players. Yes, getting 10 in a single match is challenging, but it’s absolutely doable with the right approach and mindset.
The biggest lesson I learned grinding this challenge: slow down. Modern FPS games train us to sprint everywhere and engage constantly, but takedowns require a completely different mentality. Think like a predator—observe, position, strike, disappear.
Once you nail down the flanking patterns and learn to read enemy behavior, takedowns become almost second nature. You’ll find yourself naturally spotting opportunities in every match, even when you’re not specifically farming the challenge.
Now get out there and start collecting those Dog Tags. Your enemies won’t even know what hit them.
Need More Battlefield 6 Help?
- Optimize performance with our best settings guide
- Master movement with the Combat Roll guide
- Level up faster with XP farming strategies
- Complete all achievements and trophies
Get the game on Steam, PlayStation, or Epic Games Store. Join the discussion on r/Battlefield6.