Night Raid is where Battlefield 6’s campaign kicks things up a notch—not just in intensity, but in collectible count. While previous missions like Always Faithful, The Rock, and Operation Gladius each had three dog tags to find, Night Raid breaks the pattern with four collectibles hidden throughout the mission.
And the stakes are higher this time. Collecting all four dog tags unlocks the Urban Sprawl skin for Recon characters—a solid cosmetic reward that’s perfect for players who main the Recon class in multiplayer.
The mission itself is atmospheric and tense. You’re assisting the Egyptian army alongside Murphy and his team during a nighttime infiltration of Cairo. Your objectives: secure an informant and extract critical intel before everything goes sideways (spoiler: it absolutely goes sideways).
Here’s the catch: most of this mission is played with night vision active, which makes spotting collectibles significantly harder than in daylight missions. The green-tinted view can wash out those telltale glints that usually make dog tags easy to spot. But don’t worry—once you know exactly where to look, you’ll grab all four without breaking stride.
Collection Basics and Night Vision Tips
Standard collection controls apply:
- PC: Press E
- Xbox: Press X
- PlayStation: Press Square
Each dog tag still has that characteristic shine or glint, but night vision can make it less obvious. Here’s my advice:
Adjust Your Display Settings
Night vision missions benefit from properly calibrated brightness and contrast. If you’re struggling to see details, check our settings optimization guide to dial in your visuals.
Toggle Night Vision When Searching
If you’re in a safe area and hunting for a collectible, try toggling night vision on and off. Sometimes the glint is actually more visible in natural darkness, depending on the lighting conditions.
Take Your Time
Night Raid has plenty of moments where your squad pauses or waits for you. Don’t feel pressured to rush—exploration is part of the experience, and the AI won’t penalize you for taking an extra minute to search.
Listen to Environmental Cues
The mission has distinct audio cues (like squad dialogue or environmental sounds) that often signal when you’re entering an area with a collectible nearby.
Dog Tag #1: The Covered Painting
Location: Small room off the main room with the PC, behind double doors
How to Find It:
The first collectible doesn’t appear until you’re fairly deep into the mission—be patient. After navigating through sewers and streets, your team will cut the power to a compound, plunging the area into darkness (hence the night vision).
As you infiltrate the compound, a fire will break out, and your squad will move upstairs to continue the search. You’ll eventually raid a room with a closed door that contains:
- A desk
- A PC
- No informant (disappointingly)
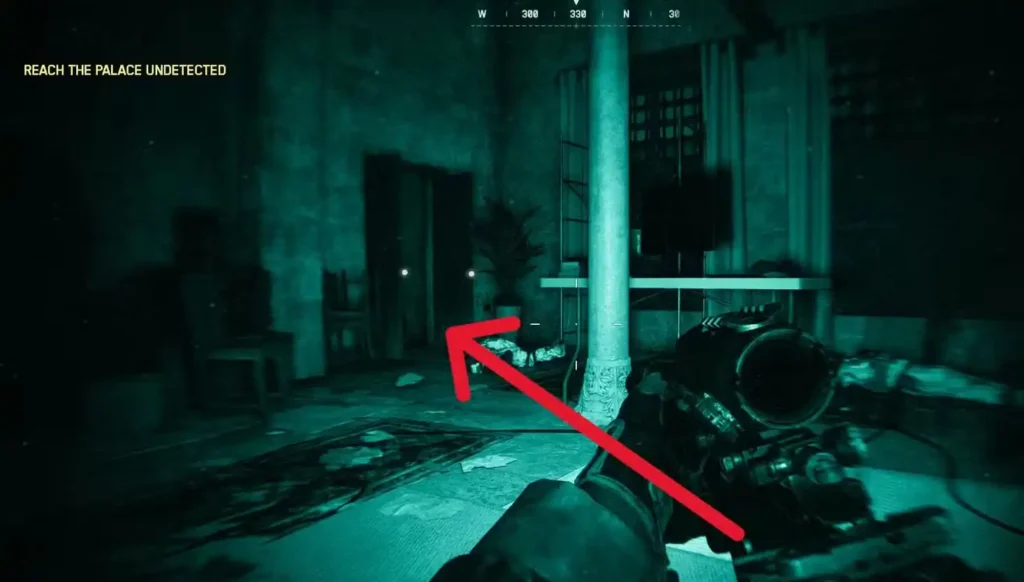
This isn’t where the collectible is—it’s next to this room. Look to the left of the PC and you’ll notice another small room with double doors that are already open. Enter this adjacent space.
Once inside, look at the wall straight ahead. You’ll see a covered painting (the kind where a cloth or sheet is draped over a frame). The first dog tag is hanging beneath this covered painting.
The double doors being already open is the game’s way of subtly guiding you here, but it’s easy to miss if you’re focused on clearing the next objective. Through night vision, the painting’s outline might be harder to discern, so look for the rectangular shape on the wall and the glint below it.
Tactical note: This area is relatively safe after you’ve cleared the room, so take your time searching. If you’re working on campaign challenges or trying to complete the mission stealthily, this is a good checkpoint to ensure you’ve grabbed the collectible before moving forward.
Dog Tag #2: The Football Pitch
Location: Right corner of the football pitch, on a graffiti-covered stone wall
How to Find It:
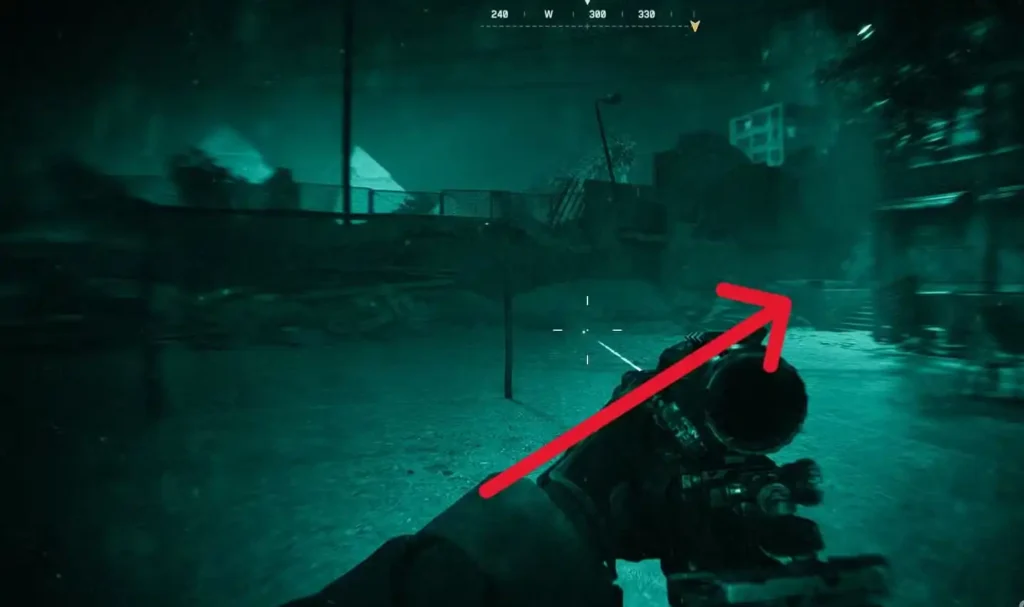
The second dog tag comes during a much more chaotic part of the mission—the escape sequence after things inevitably go wrong at the palace. You’ll fight through streets and eventually emerge onto a small football pitch (soccer field for American readers).
This area is immediately recognizable because:
- You can see pyramids in the background (classic Cairo skyline)
- Your squad will spot civilians who quickly flee the area
- There are goalposts on either end of the pitch
The collectible is in a specific corner of this area. Look toward the right corner, to the right of one of the goalposts, positioning yourself so the pyramids are visible in your line of sight.
You’re looking for a small stone wall covered in graffiti (the graffiti is pretty distinctive even through night vision). On top of this wall, you’ll see some bottles and other debris. The second dog tag is sitting right there among the bottles.
This one can be tricky because you’re typically in combat mode during this section, and the football pitch offers limited cover. My recommendation: clear any immediate threats first, then quickly scan the right corner before your squad moves out. The stone wall is low enough that you won’t miss it if you’re looking in the right direction.
Environmental detail: The graffiti and bottles suggest this wall served as a hangout spot for locals—maybe the same civilians who just fled. These small environmental storytelling touches are what make Battlefield campaigns memorable.
Dog Tag #3: The Clothing Shop Mannequin
Location: Under a mannequin wearing a white top in a small clothes shop
How to Find It:
The third collectible appears after one of Night Raid’s most intense sequences. You’ll survive an ambush while trying to reach the getaway vehicle, then continue fighting through narrow Cairo streets while being repeatedly harassed by a helicopter.
The environment becomes increasingly claustrophobic as you navigate tight alleyways with enemies appearing from multiple angles. Eventually, you’ll reach a moment where a squad member says “helo’s bugging out” while your team takes a breather in a small building. This dialogue is your audio cue that the collectible is nearby.
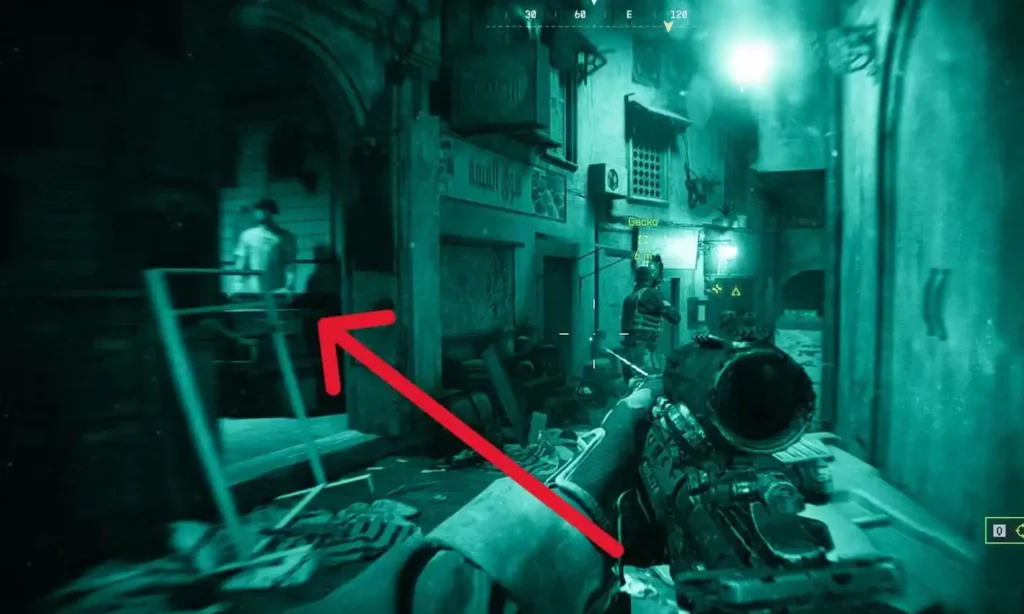
As you continue forward through a few more corners, start actively looking at storefronts on your left side. You’re searching for a small clothes shop that has:
- Flip-flops on display out front (visible even at night)
- A mannequin wearing a white top (the white is easier to spot through night vision)
Once you’ve identified this shop, look at the base of the mannequin. The third dog tag is sitting just underneath it.
The flip-flops are honestly the best landmark here—they’re usually arranged in a distinctive display that catches your eye. The white mannequin top also contrasts well against the darker surroundings, even with night vision active.
Combat consideration: You might still have hostiles in this area, so clear the immediate vicinity before stopping to grab the collectible. The narrow streets can funnel enemies toward you, so use that to your advantage. Check our close quarters combat guide for tips on dominating these tight urban environments.
Dog Tag #4: The Anti-Pax Poster
Location: Behind blue PC monitors, hanging from a knife stuck in a ‘No Pax’ poster
How to Find It:
The fourth and final dog tag is located near the mission’s climax, during one of the most dramatic moments. After Lopez is wounded and your team finds temporary shelter from the relentless helicopter attacks, you’ll need to defend your position.
First, fend off incoming infantry—this defensive sequence can get pretty hairy depending on your difficulty setting. Once you’ve cleared the area, you’ll need to find explosives to deal with that helicopter once and for all.
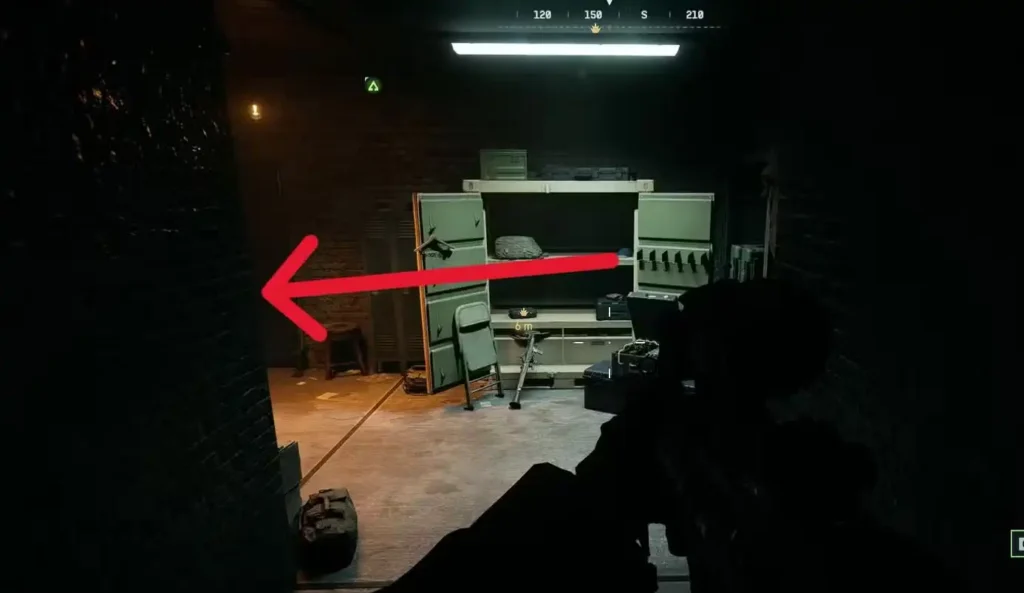
To reach the explosives, go through a closed door and descend some steps. In this lower area, you’ll find what you need, but don’t immediately grab the explosives and leave.
Look around for blue PC monitors in this space. Behind these monitors, on the wall, you’ll see a ‘No Pax’ poster—anti-Pax Armata propaganda that’s common throughout Cairo in this timeline.
The fourth dog tag is dramatically hanging from a knife that’s been stabbed into this poster. It’s a striking visual detail that adds character to the environment—someone clearly had strong feelings about Pax Armata.
This is your last chance to complete the collectible set for Night Raid, so make absolutely sure you grab it before triggering the next objective. The blue monitors are pretty distinctive even in low light, so use them as your landmark.
Story context: The knife-in-poster detail suggests this location might have been used by resistance fighters or Egyptian military personnel opposed to Pax Armata’s influence. It’s these small environmental storytelling moments that make exploring worthwhile beyond just collectible hunting.
Why Night Raid Is Great for Skill Development
Beyond collectibles, Night Raid offers excellent training for several multiplayer skills:
Night Vision Combat
While most multiplayer maps are well-lit, understanding how to fight in low-visibility conditions translates to dealing with smoke grenades, dust storms, or darker map sections. The skills you develop here apply to various game modes.
Urban Warfare
Cairo’s tight streets and multi-story buildings are perfect practice for urban map control. The lessons learned here apply directly to maps with similar layouts.
Squad Coordination
Night Raid emphasizes sticking with your squad and coordinating movements—essential skills for Support class players and anyone serious about team play.
Situational Awareness
The limited visibility forces you to rely more on audio cues and minimap awareness—skills that separate good players from great ones in competitive multiplayer.
The Urban Sprawl Recon Skin Reward
Collecting all four dog tags unlocks the Urban Sprawl skin for Recon characters. This is particularly valuable if you main Recon in multiplayer, as it adds visual variety to your character skin collection.
The Urban Sprawl aesthetic typically features:
- Urban camouflage patterns suitable for city maps
- Modern tactical gear appearance
- Color schemes that blend with concrete and metal environments
It’s a solid cosmetic that actually has practical benefits on urban-themed multiplayer maps. Plus, it’s a badge of honor showing you’ve completed Night Raid’s collectible hunt.
Mission Completion Strategies
If you’re tackling Night Raid for the first time or replaying for collectibles, consider these approaches:
Dedicated Collectible Run
Play on a lower difficulty and focus primarily on finding all four dog tags. This removes combat pressure and lets you thoroughly explore each area.
Combo Run
Stack collectible hunting with other objectives like:
- Recon class challenges if applicable
- Weapon mastery for specific loadouts
- Mission-specific achievements
Stealth Playthrough
Night Raid’s setting is perfect for stealth approaches. Combine collectible hunting with a low-profile playthrough to challenge yourself.
Challenge Expert Attempts
If you’re working toward completing missions without certain weapons or tactics, Night Raid offers interesting constraint possibilities given its night vision mechanics.
Additional Mission Resources
Want to maximize your Battlefield 6 campaign experience? Check out these related guides:
- No Sleep mission collectibles – The next mission in sequence
- Complete campaign missions guide – Full mission list and overview
- All character skins unlocks – Every cosmetic reward
- Field specs guide – Understanding progression systems
For multiplayer preparation:
- XP farming and fast leveling – Maximize progression
- Best tips, tricks, and settings – General improvement
- Combat roll guide – Advanced movement techniques
Frequently Asked Questions
Night Raid is a longer, more complex mission than previous chapters, so the developers added an extra dog tag to match the increased content.
Yes! Use mission select to replay Night Raid and grab any dog tags you missed without redoing the entire campaign.
Somewhat, yes. The green filter can reduce glint visibility, but once you know the exact locations, it’s not a significant obstacle.
Collectibles are saved immediately upon pickup. If you miss one, just replay the mission and grab the specific dog tag you’re missing.
If you play Recon regularly, absolutely. It’s a clean cosmetic that fits urban multiplayer maps well.
Final Thoughts
Night Raid stands out as one of Battlefield 6’s most atmospheric campaign missions. The nighttime Cairo setting, combined with the tension of infiltration and extraction, creates memorable moments that showcase what the franchise does best—large-scale military operations with cinematic flair.
The four dog tag collectibles are well-distributed throughout the mission, rewarding players who take time to explore rather than rushing through objectives. While night vision adds a layer of difficulty to spotting them, none of the collectibles are hidden in truly obscure locations once you know what landmarks to look for.
The Urban Sprawl Recon skin is a worthy reward for completionists, and the mission itself offers excellent practice for skills that translate directly to multiplayer success. Whether you’re hunting collectibles, working on challenges, or just experiencing the campaign, Night Raid delivers on multiple fronts.
The Battlefield 6 community on Reddit has additional tips and strategies if you’re stuck, and the game is available across multiple platforms for anyone who hasn’t jumped in yet.
Now gear up, activate that night vision, and get ready to infiltrate Cairo. Those four dog tags and that Recon skin are waiting for you.
Play Battlefield 6 on: Steam | PlayStation | Epic Games Store | Official EA Site