If you’ve been struggling to land those satisfying long-range headshots in Battlefield 6, chances are you’re sleeping on one of the sniper’s most powerful tools: the Range Finder. This underrated attachment doesn’t get nearly enough love, but once you understand how it works, your sniping game will level up dramatically.
Here’s the thing—Battlefield 6 uses realistic bullet physics, meaning gravity affects every shot you take. That bullet drop becomes brutal at longer distances, and guessing your target’s range is basically asking to miss. The Range Finder eliminates the guesswork entirely, giving you precise distance measurements so you can adjust your aim accordingly.
Let’s break down everything you need to know about this game-changing tool.
What Exactly Does the Range Finder Do?
The Range Finder is pretty straightforward: it tells you the exact distance to your target. Sounds simple, right? But here’s why it matters.
When you’re firing at enemies 200+ meters away, even a small miscalculation means your bullet either falls short or sails over their head. The Range Finder automatically adjusts your rifle’s zeroing distance (the range at which your scope is calibrated), so your crosshair actually points where your bullet will land.
Key benefits:
- Instant distance measurements to any surface or target
- Automatic scope zeroing based on target distance
- Eliminates guesswork on bullet drop compensation
- Essential for extreme long-range engagements (200m+)
It’s worth noting that most Battlefield 6 maps favor medium-range combat, but on wide-open maps like Operation Firestorm and Mirak Valley, the Range Finder becomes absolutely essential. Learn more about maximizing your performance across all game modes in Battlefield 6.
How to Activate the Range Finder: Controls & Keybinds
Getting your Range Finder working is easy once you know the controls. It uses the same button as your fire mode selector (single fire, burst, full-auto).
Default Controls:
PC (Mouse & Keyboard):
- Press and hold B to activate Range Finder
Console (Controller):
- Press and hold D-Pad Down to activate Range Finder
How It Works Step-by-Step:
- Equip a sniper rifle with a Range Finder attachment
- Aim at your target through your scope
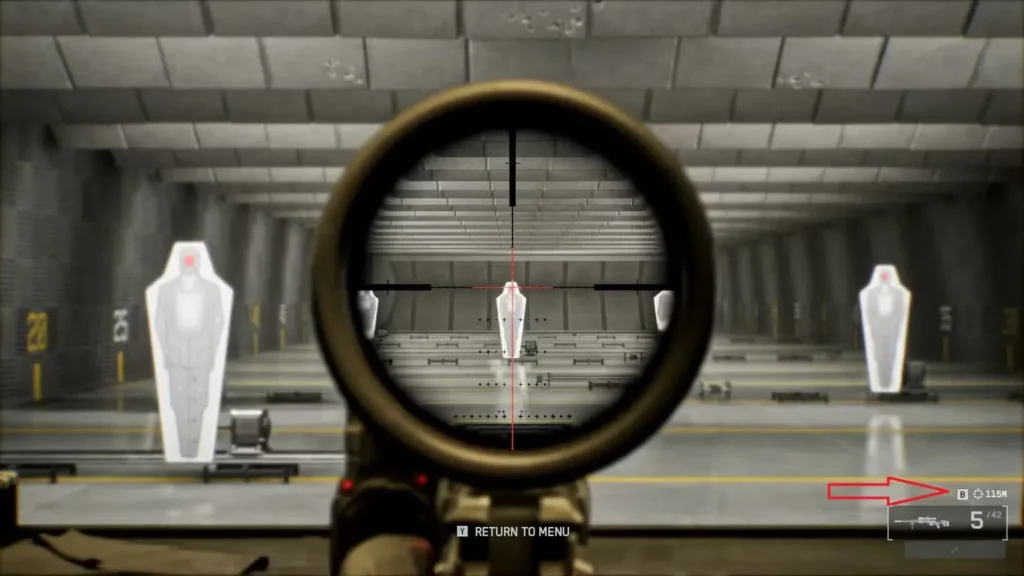
- Hold the Range Finder button (B on PC, D-Pad Down on console)
- Watch the zeroing distance indicator above your ammo counter update
- Release the button and take your shot with adjusted aim
The zeroing distance indicator will change to match your target’s exact distance. This means your scope is now calibrated for that specific range—no manual adjustment needed.
Pro tip: If you don’t like the default keybinds, you can customize them in your settings for better optimization. Some players prefer binding the Range Finder to a mouse button for quicker access during intense firefights.
Important: Minimum Zeroing Distance Explained
Here’s something the game doesn’t tell you: rifles have a minimum zeroing distance of 100 meters.
What does this mean? If you try using your Range Finder on a target closer than 100m, you’ll get weird readings that don’t quite make sense. The system isn’t designed for close-range measurements, so stick to using it for mid-to-long-distance targets.
For close-quarters situations, check out our guide on Close Quarters Challenges to learn better tactics for those engagements.
When Should You Actually Use the Range Finder?
Not every situation calls for the Range Finder. Here’s when it becomes your best friend:
Best situations for Range Finder:
- Stationary targets at 150+ meters
- Sniping from elevated positions overlooking objectives
- Counter-sniping enemy recon players
- Large, open maps with long sightlines
- When completing Deadeye Challenges that require precision
Skip the Range Finder when:
- Enemies are moving erratically
- You’re in fast-paced close combat
- Targets are under 100 meters away
- You need to quick-scope multiple targets rapidly
The Range Finder works best against stationary or slow-moving targets. If your enemy is bunny-hopping all over the place, you’re better off relying on instinct and experience rather than taking the time to range them.
If you’re running the Recon Class, mastering the Range Finder should be at the top of your priority list.
Troubleshooting: Range Finder Not Working?
We’ve noticed some quirks with the Range Finder that feel like bugs. If your Range Finder suddenly stops working mid-match, you’re not alone.
Common fixes:
Try these solutions if your Range Finder isn’t responding:
- Switch to a different weapon, then switch back
- Change your class in the deploy menu and redeploy
- Quit to the main menu and reload your match
- Test your setup in the firing range first
- Verify your keybinds haven’t been accidentally changed
During our testing, we experienced a frustrating situation where the Range Finder simply refused to cooperate during an actual match. After backing out to the main menu and testing the same rifle in the practice range, it suddenly started working again. This suggests there might be some server-side issues or bugs that cause it to glitch out temporarily.
If you’re consistently having problems, make sure you’re running the latest version of the game and check if your settings are properly optimized.
Alternative Method: Using the Ping System for Distance
Don’t have a Range Finder equipped? No problem. There’s a clever workaround that veteran players use.
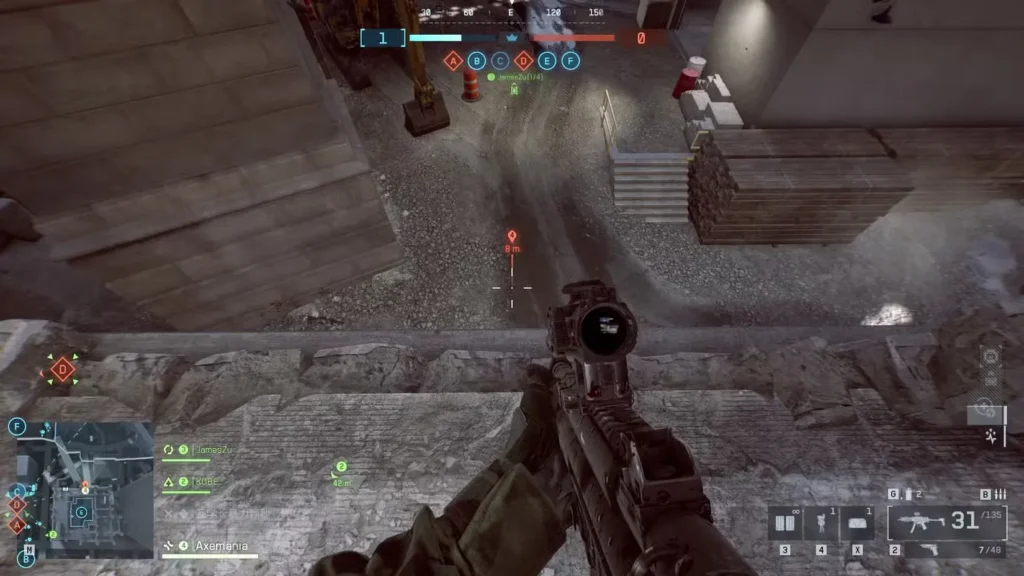
The ping distance trick:
- Aim near your target (not directly at them)
- Ping the terrain, rock, or building near them
- Check the distance that appears on the ping marker
- Manually adjust your scope’s zeroing or compensate for bullet drop
This method isn’t as precise as the Range Finder, but it gives you a ballpark estimate that’s good enough for most situations. The catch? You can’t ping enemy players directly to see their distance—the 3D Spotting system doesn’t reveal that information.
This technique is especially useful if you’re using a different scope setup that doesn’t support the Range Finder attachment, or if you’re running a different loadout build that prioritizes other gadgets.
Best Maps for Range Finder Usage
While the Range Finder can be used anywhere, it truly shines on specific maps:
Top Maps for Sniping:
- Operation Firestorm – Massive open desert with 300+ meter sightlines
- Mirak Valley – Perfect elevated positions for overwatch
- Any large Conquest map – Longer engagement distances
On tighter maps with buildings and close quarters, you’re better off focusing on aggressive recon tactics. Check out our complete maps ranking guide to learn the best approach for each location.
Final Thoughts: Should You Always Use a Range Finder?
The Range Finder is one of those attachments that separates decent snipers from truly great ones. While it won’t magically make you a headshot machine, it removes one of the biggest variables in long-distance shooting: distance calculation.
Our recommendation: If you’re serious about the Recon class and enjoy holding down long sightlines, absolutely make the Range Finder part of your standard loadout. For aggressive scouts who like to stay mobile, you might prefer other scope attachments that offer faster ADS times.
Want to level up faster while mastering these techniques? Check out our XP farming and fast leveling guide. And if you’re working through specific objectives, our guides on Assault Class Challenges and Bullet Storm Challenges will help you progress faster.
Master the Range Finder, and those 300-meter headshots will go from impossible to routine. Happy hunting!
Additional Resources
- Official Game Info: Battlefield 6 on EA
- Get the Game: Steam | PlayStation | Epic Games
- Community: Battlefield 6 Reddit
For more Battlefield 6 guides and tips, explore our complete weapons list, learn about Field Specs, and master advanced techniques like the Combat Roll.