Battlefield 6‘s campaign missions pack more than just explosive set pieces and intense firefights—they hide collectibles that reward thorough exploration. The second mission, “The Rock,” takes you on a thrilling infiltration of Gibraltar’s coastal defenses, and tucked throughout this mission are 3 Dog Tag collectibles waiting to be discovered.
Here’s the thing about collectibles in Battlefield campaigns: they’re easy to miss if you’re just blasting through objectives. I completely overlooked two of these Dog Tags on my first playthrough because I was too focused on landing headshots with the sniper rifle. Don’t make my mistake—this guide ensures you grab all three in one run.
What You’ll Earn:
Collecting all 3 Dog Tags in “The Rock” unlocks the “Danger Ahead” Player Card Background, a cosmetic reward that shows off your completionist dedication. While it’s not as substantial as the character skins you’ll unlock in later campaign missions, it’s still a nice trophy for your efforts.
Let’s dive into the exact locations, complete with context clues so you’ll never wonder if you’re in the right spot.
Mission Context: What Is ‘The Rock’?
Before we hunt collectibles, let’s set the stage.
Mission Overview:
“The Rock” is Battlefield 6’s second campaign mission, putting you in the boots of an elite NATO operator conducting a high-stakes insertion into Gibraltar. Your objective? Neutralize the massive coastal artillery guns that are shredding NATO naval forces attempting to approach the strategic peninsula.
Gameplay Highlights:
- Tactical parachute insertion under cover of darkness
- Long-range sniper engagements against Pax Armata defenders
- Infiltration through Gibraltar’s underground tunnels and historical war museums
- Close-quarters combat clearing fortified positions
- Dramatic finale destroying anti-aircraft artillery
This mission showcases Battlefield 6’s strength: blending large-scale warfare with intimate tactical moments. The Dog Tags are scattered throughout, rewarding players who take time to explore between firefights.
Previous Mission Collectibles:
If you missed collectibles in the first mission “Always Faithful,” don’t worry—you can replay any campaign mission from the main menu. That mission also introduces core mechanics like the Laser Designator gadget that become essential in multiplayer.
How to Collect Dog Tags (Controls & Mechanics)
Before we locate them, here’s what you need to know about the collection process.
Pickup Controls
- PC: Press E
- Xbox: Press X
- PlayStation: Press Square
Simple enough, but timing matters—you need to be close and facing the collectible directly.
Visual Identification
Dog Tags aren’t difficult to spot if you’re paying attention:
✨ They shine/glint with a subtle light effect
✨ They’re usually on elevated surfaces (boxes, desks, ledges)
✨ They appear as small metallic objects distinct from environmental clutter
Pro Tip: If you’re struggling to spot collectibles, adjusting your visual settings can help. Increasing brightness slightly and ensuring ambient occlusion isn’t too aggressive makes collectibles pop more against darker backgrounds.
What Dog Tags Display
Upon collection, you’ll see:
- Soldier’s name (typically a nod to military history or developer easter eggs)
- Date of birth (adds narrative context)
- Collection confirmation (progress toward the mission’s total)
These aren’t just random collectibles—they represent fallen soldiers, adding gravitas to what could have been generic pick-ups. DICE deserves credit for this storytelling detail.
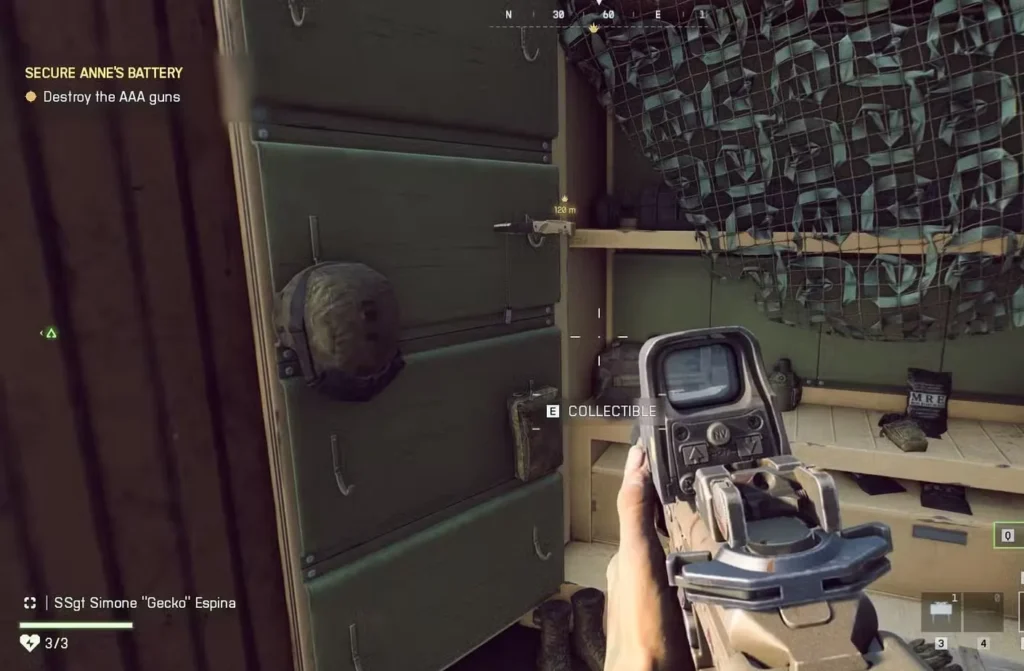
Dog Tag #1: Starting Area Coastal Gun
Location: Mission start, immediately after parachute landing
Difficulty: Easy (you literally land next to it)
Missable Factor: High (most players run forward with their squad)
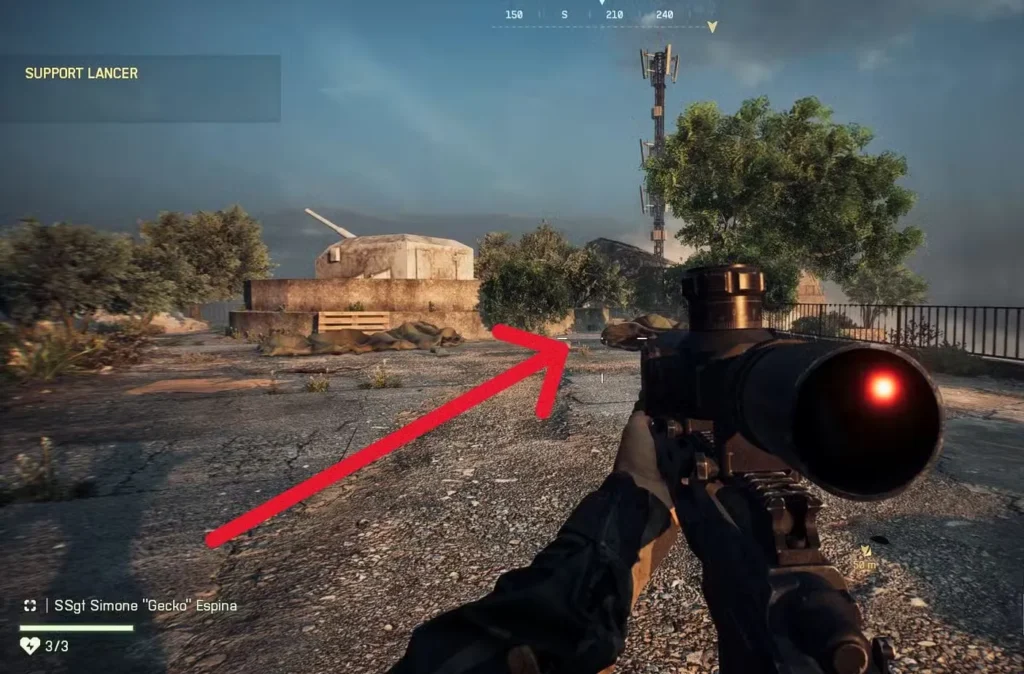
Detailed Location Guide
Step-by-Step:
- Complete your parachute insertion and land on Gibraltar’s elevated terrain
- DO NOT immediately follow your squad leader (this is where most players miss it)
- Turn 180 degrees from where your squad is heading
- Look for the large coastal artillery gun behind you (massive naval cannon)
- Move toward the right side of the gun emplacement
- Look for concrete fortification blocks near the gun’s base
- Spot a small black equipment box positioned by the concrete
- The Dog Tag sits on top of this box, glinting in the low light
Visual Landmark: The coastal gun is impossible to miss—it’s the dominant structure at the mission start. The black box is military-style equipment storage, the kind you’d expect to find at an artillery position.
Why Players Miss This:
Your squad leader immediately starts moving forward, creating urgency to follow. The game’s pacing encourages forward momentum, so most players never turn around. Resist that impulse for 15 seconds and this collectible is yours.
Tactical Note:
There are no enemies in the immediate starting area, so you have complete freedom to explore safely. Take your time, grab the Dog Tag, and then proceed with the mission.
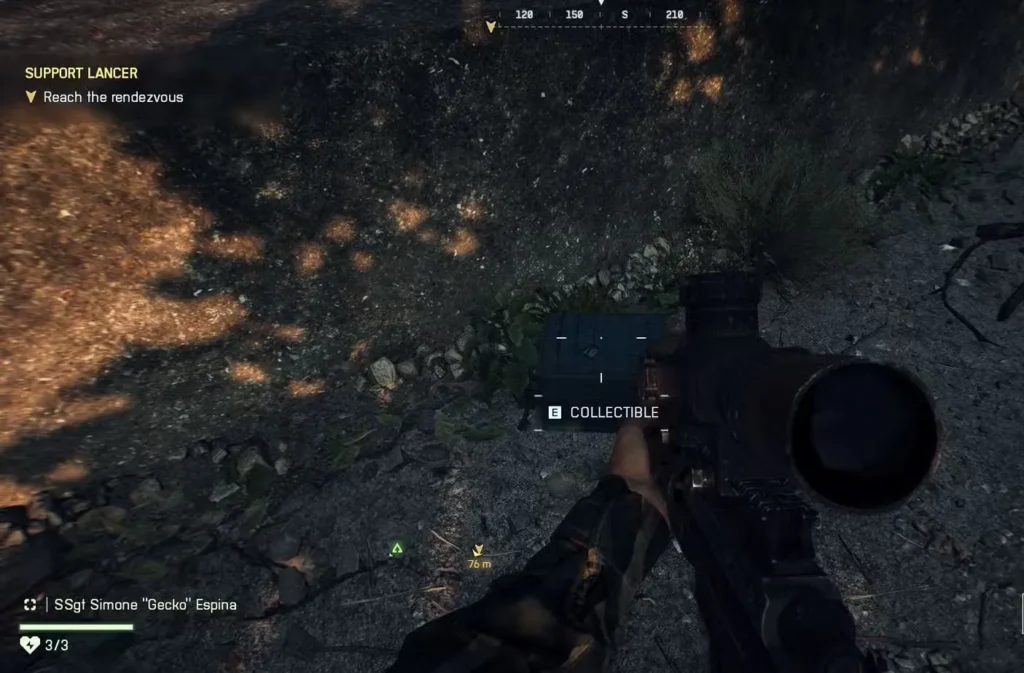
Dog Tag #2: Underground War Museum
Location: Mid-mission, inside Gibraltar’s underground museum section
Difficulty: Medium (requires specific route deviation)
Missable Factor: Very High (off the main path behind a roped-off area)

Detailed Location Guide
Mission Context:
Much later in “The Rock,” you and your squad leader infiltrate Gibraltar’s underground tunnel network, which has been converted into a historical war museum. This section provides atmospheric storytelling about the location’s military significance through World War II exhibits.
Step-by-Step:
- Progress until you enter the underground museum (unmistakable—mannequins, displays, historical artifacts)
- Walk past the aircraft display on your left (World War II era plane)
- Descend the short flight of stairs with your squad leader
- Look immediately to your left after reaching the bottom
- Spot the mannequin seated at a desk (appears to be a radio operator or signals intelligence personnel)
- Jump over the rope barrier that blocks access to the display
- Examine the desk where the mannequin is positioned
- The Dog Tag rests on the desk, representing a Second World War soldier
Visual Landmarks:
- WWII aircraft on left before stairs
- Short staircase descent (only 4-5 steps)
- Mannequin at desk immediately visible after stairs
- Rope barrier clearly marking “exhibit” area
- Period-appropriate desk with radio equipment props
Bonus Achievement Opportunity:
While in the museum section, you can unlock an Achievement/Trophy by destroying 10 mannequins during the ensuing firefight.
How to Trigger:
- The museum section becomes a combat zone shortly after collecting this Dog Tag
- Use firearms, melee, or explosives to destroy mannequins
- Look for at least one fuel canister that can be detonated for multi-mannequin destruction
- Achievement/Trophy pops after the 10th mannequin is destroyed
This is a fun easter egg that adds levity to an otherwise intense mission. If you’re working toward 100% completion, don’t skip this.
Why Players Miss This:
The rope barrier creates a psychological “do not enter” signal. Most players assume museum exhibits are purely decorative background elements, not interactive areas containing collectibles. The squad leader also continues forward, creating pressure to keep moving.
Pro Tip: If you’re struggling with any combat sections on higher difficulties (especially the museum firefight), check our best settings guide to optimize your aim sensitivity and visual clarity. Settings can make a surprising difference in campaign combat effectiveness.
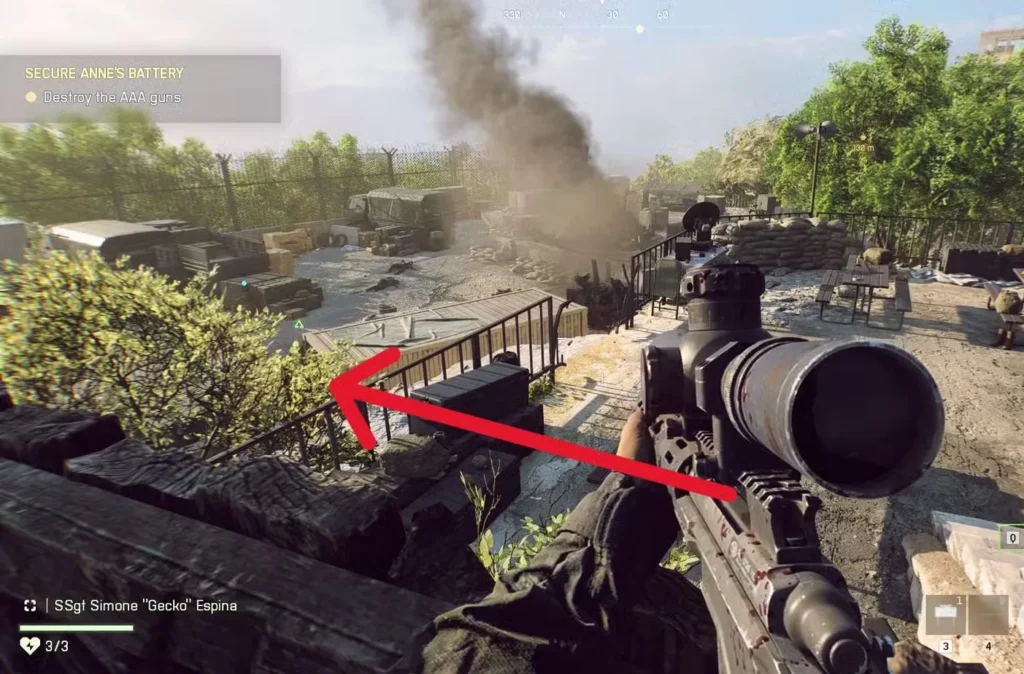
Dog Tag #3: Shipping Container Near Final AAA Gun
Location: Near mission’s end, during the final defensive clearing operation
Difficulty: Medium-High (combat-heavy area, easy to rush past)
Missable Factor: High (players focused on combat, not exploration)
Detailed Location Guide
Mission Context:
You’re approaching the mission’s climax—clearing out the last remaining Pax Armata defenders before your squad can destroy the final anti-aircraft artillery gun. This is a heated combat section with elevated sniper positions and numerous hostiles.
Step-by-Step:
- Progress to the final combat arena (open area with multiple enemy positions)
- Clear most opposition from your elevated vantage point (you’ll naturally have high ground as you approach)
- From your elevated position, look down toward the combat area
- Identify a light brown/tan shipping container (standard 20-foot cargo container)
- Focus on the western end of this container (the end facing away from your approach direction)
- Move down to the container once the area is relatively secure
- Look for several items clustered at the container’s west end, including:
- Combat knife/dagger stuck in the container wall
- Military equipment scattered around
- The Dog Tag hangs from the embedded dagger
Visual Landmarks:
- Light brown shipping container (distinctive color against environment)
- Elevated approach angle (you’re looking DOWN at the container initially)
- Dagger visibly stuck in container wall (unique visual marker)
- Western end specifically (opposite from your approach)
- Final AAA gun visible in the background
Combat Considerations:
This is an active combat zone, so tactical considerations matter:
Recommended Approach:
- Clear enemies from distance first (use your sniper rifle from elevation)
- Eliminate immediate threats around the container area
- Create a brief safe window to collect the Dog Tag
- Grab the collectible quickly and return to cover
Don’t get tunnel vision on the collectible while enemies are still active. If you’re taking fire, finish the combat encounter first, then backtrack for the Dog Tag.
Why Players Miss This:
Reason #1: Combat Intensity
The final sections of “The Rock” are action-packed. Players are focused on survival and objective completion, not scouring for collectibles.
Reason #2: Forward Momentum
Once you clear this area, the mission pushes you forward toward the climactic finale. There’s no natural reason to examine shipping containers in the heat of battle.
Reason #3: Container Positioning
The Dog Tag is on the western end, which may be the far side depending on your approach angle. Players naturally look at faces of containers they approach from, not the opposite sides.
Pro Tip: If you’re grinding through the campaign for rewards and working toward unlocking content for multiplayer classes, remember that Danger Close challenges in multiplayer have similarities to explosive gameplay moments in the campaign. Practice makes perfect across both modes.
Rewards: What You Get for All 3 Dog Tags
Unlocked Reward:
“Danger Ahead” Player Card Background
What Is This Reward?
Player Card Backgrounds are cosmetic elements that customize your profile appearance in:
- Multiplayer lobbies
- End-of-round scoreboards
- Player profile displays
- Social menu interactions
Visual Style:
Based on the name “Danger Ahead,” expect Gibraltar-themed imagery, possibly incorporating coastal artillery, warning symbols, or mission-specific iconography. It’s not a game-changing reward, but it’s a badge of honor showing you explored thoroughly.
Comparing Campaign Rewards
“The Rock” (Mission 2):
✅ Danger Ahead Player Card Background (collectibles reward)
Later Missions:
🎨 Character skins unlock in missions 4, 5, 8, and 9 (significantly better rewards)
Translation: If you’re primarily interested in unlocking character cosmetics through the campaign, the truly premium rewards come later. However, completionists will still want the Danger Ahead background for 100% campaign completion.
Is It Worth the Effort?
For Completionists: Absolutely. It takes less than 5 minutes of extra time across an entire mission playthrough.
For Casual Players: If you’re only doing one campaign run, you might skip collectible hunting and focus on enjoying the story.
For Unlock Grinders: Moderate value. Player Card Backgrounds are nice, but the real campaign value is in those later character skin unlocks.
Replaying Missions for Missed Collectibles
Missed a Dog Tag on your first playthrough? No problem.
How to Replay Campaign Missions
- Return to Main Menu
- Select Campaign
- Choose Mission Select
- Pick “The Rock”
- Collectibles carry over upon replay completion
Important Notes:
✅ You don’t lose progress on other missions
✅ Difficulty can be changed for easier collectible runs
✅ Only the specific mission needs completion again, not the entire campaign
✅ Dog Tags are permanently unlocked once collected (even if you quit mid-mission after grabbing them)
Speed Run Strategy:
If you’re replaying purely for collectibles:
- Set difficulty to Easy
- Sprint past non-essential combat encounters
- Focus exclusively on reaching collectible locations
- Quit to menu after collecting the third Dog Tag (progress saves immediately)
This minimizes replay time—you can grab all three Dog Tags in under 20 minutes with this approach.
Achievement/Trophy Hunters: Museum Mannequins
Since we’re in “The Rock,” let’s cover the related achievement.
“Museum Mayhem” (Unofficial Name)
Requirement: Destroy 10 mannequins during the underground museum firefight
Type: Mission-specific achievement/trophy
Difficulty: Easy (with awareness)
How to Complete:
Method 1: Systematic Shooting
- During the museum firefight, deliberately target mannequins between killing enemies
- Pistol or rifle fire works—mannequins break after 2-3 hits
- Track your count mentally (no UI counter)
Method 2: Explosive Efficiency
- Locate fuel canisters in the museum area (at least one confirmed)
- Position yourself so multiple mannequins are near the canister
- Shoot the canister for multi-mannequin destruction
- Clean up remaining mannequins with firearms
Method 3: Grenade Spam
- If you have grenades available, toss them into mannequin-dense areas
- Explosive radius typically destroys 2-4 mannequins per grenade
Why This Matters:
Combining Dog Tag #2 collection with this achievement makes the museum section incredibly efficient. You’re already exploring off-path for the collectible—might as well grab the achievement simultaneously.
“The Rock” Mission Tips for Higher Difficulties
If you’re attempting the mission on Veteran or Hardcore difficulty, collectible hunting becomes riskier.
General Survival Tips
Sniper Sections:
- Prioritize headshots for instant kills (body shots alert enemies on higher difficulties)
- Use terrain defilade to break line of sight after shots
- Maintain distance—Gibraltar’s elevation favors long-range engagement
Close Quarters Combat:
- The museum firefight is particularly deadly on higher difficulties
- Use cover aggressively—expose only when firing
- Flashbangs and grenades are your friends in confined spaces
Final Push:
- The shipping container area (Dog Tag #3 location) has overwhelming enemy numbers on Hardcore
- Clear from elevation systematically before descending
- Don’t rush for the collectible while under fire
Settings Optimization:
If you’re struggling, your gameplay settings might need adjustment:
- Lower mouse/controller sensitivity for steadier sniper aim
- Increase FOV to 100-110 for better peripheral awareness in close quarters
- Enable hit markers to confirm kills in chaotic firefights
- Boost dialogue volume to hear tactical callouts clearly
The campaign is surprisingly challenging on higher difficulties—optimized settings legitimately improve your chances.
Connecting Campaign to Multiplayer
“The Rock” isn’t just a standalone mission—it teaches mechanics relevant to multiplayer.
Skills That Transfer
Long-Range Engagement:
The sniper-focused gameplay in “The Rock” directly prepares you for Recon Class challenges in multiplayer, particularly Deadeye challenges requiring precision long-range eliminations.
Objective-Based Combat:
Clearing enemy positions before advancing mirrors Conquest and Breakthrough game modes. Practice here, dominate in all game modes.
Equipment Familiarization:
Weapons and gadgets used in “The Rock” are available in multiplayer. Campaign time is essentially free practice without K/D consequences.
Map Awareness:
While Gibraltar isn’t a multiplayer map, the tactical thinking—using elevation, identifying choke points, recognizing cover—applies to every map in multiplayer.
Complete Campaign Collectibles Roadmap
“The Rock” is just one piece of the collectibles puzzle.
Full Campaign Collectibles Overview
Mission 1: “Always Faithful”
- 3 Dog Tags (separate guide available)
- Introduces collectible mechanics
Mission 2: “The Rock” (this guide)
- 3 Dog Tags
- Rewards: Danger Ahead Player Card Background
- Bonus: Mannequin destruction achievement
Missions 3-9:
- Additional collectibles throughout
- Missions 4, 5, 8, and 9 reward character skins (high priority)
Why Full Completion Matters:
Beyond cosmetic rewards, full campaign completion:
- Unlocks “Campaign Veteran” achievements/trophies
- Provides substantial XP for multiplayer progression
- Teaches mechanics for every class (campaign forces diverse gameplay)
- Grants premium cosmetics without grinding multiplayer challenges
If you’re serious about maximizing your account’s cosmetic collection, campaign completion is non-negotiable. It’s the fastest route to several exclusive character skins that multiplayer-only players won’t have.
Community Resources & Discussion
Want to discuss strategies or show off your collectibles?
Official Platforms:
- EA Battlefield 6 Hub – Official updates and patch notes
- Steam Community Discussions – PC player strategy sharing
- Battlefield 6 Subreddit – Active community for tips and guides
Console-Specific:
- PlayStation Store Page – PS5-specific discussion
- Epic Games Community – Alternative PC platform community
The Reddit community particularly excels at collectible location help. If you’re stuck, posting a screenshot usually gets quick responses from veteran players.
Quick Reference Checklist
Use this for your collectible run:
Pre-Mission:
- ☐ Set difficulty to Easy (if replaying for collectibles only)
- ☐ Review all three locations
- ☐ Prepare for museum mannequin achievement
Dog Tag #1:
- ☐ Land from parachute insertion
- ☐ Turn 180 degrees (DON’T follow squad immediately)
- ☐ Locate coastal gun on right side
- ☐ Find black box near concrete
- ☐ Collect Dog Tag
Dog Tag #2:
- ☐ Enter underground museum
- ☐ Pass aircraft on left
- ☐ Descend short stairs
- ☐ Look left for mannequin at desk
- ☐ Jump rope barrier
- ☐ Collect Dog Tag from desk
- ☐ Bonus: Destroy 10 mannequins during firefight
Dog Tag #3:
- ☐ Reach final combat area (near last AAA gun)
- ☐ Clear enemies from elevated position
- ☐ Look down for light brown shipping container
- ☐ Move to western end of container
- ☐ Find dagger stuck in wall
- ☐ Collect Dog Tag hanging from dagger
Post-Mission:
- ☐ Verify “Danger Ahead” Player Card Background unlocked
- ☐ Check achievements/trophies for museum challenge
- ☐ Continue to next mission or replay for missed collectibles
Why Collectibles Matter
Look, I get it—some players just want to shoot things and complete objectives. Collectibles can feel like arbitrary padding.
But here’s the thing: Battlefield 6’s campaign collectibles serve a purpose beyond just rewarding exploration. They force you to slow down and appreciate the environmental storytelling DICE crafted. The Dog Tags aren’t random—they represent soldiers who fought in these locations throughout history.
The museum section, in particular, is a love letter to Gibraltar’s actual military significance. The Dog Tag there connects you to real historical context, even in a fictional near-future conflict.
Plus, from a purely practical standpoint, the 10-15 minutes spent grabbing collectibles across the entire campaign unlocks cosmetics that would take hours of multiplayer grinding to achieve otherwise. That’s efficient progression.
So grab those Dog Tags, earn that Player Card Background, and move forward knowing you didn’t miss anything “The Rock” had to offer.
What’s Next?
Continue Your Campaign Journey:
- Progress to Mission 3 and beyond
- Focus on missions 4, 5, 8, and 9 for character skin rewards
- Complete all collectibles for 100% campaign achievement
Apply Campaign Skills to Multiplayer:
- Use sniper practice for Recon mastery
- Apply tactical thinking to Assault Class challenges
- Master explosive gameplay for Danger Close challenges
Optimize Your Overall Experience:
- Review complete weapons list for best campaign loadouts
- Check XP farming strategies for efficient leveling
- Master combat roll mechanics for campaign survival
The battlefield awaits, soldier. Now go collect those Dog Tags.