The Ashes of the Damned main quest represents one of the most ambitious Easter eggs in Black Ops 7 Zombies history. This isn’t your typical run-and-gun zombie experience—you’re looking at multiple map-wide objectives, complex puzzle sequences, and a genuinely challenging boss encounter that demands preparation and coordination.
After completing this Easter egg multiple times, I can tell you upfront: come prepared. You’ll need strong weapons, full perks, and ideally a coordinated team. Solo players can absolutely complete this, but expect the difficulty to spike considerably during defense sequences and the final boss fight.
This guide covers every single step in chronological order, including all puzzle solutions, key locations, and strategic tips to help you reach that completion cutscene without wasting rounds or getting stuck.
Before starting, make sure you’re familiar with:
- Basic Zombies mechanics and strategies
- Perk locations across the map
- Wall buy locations for backup weapons
- How to fully upgrade Ol’ Tessie
Step 1: Activate Power at All Three Locations
Your first major objective is getting the power online across the map. This opens up Pack-a-Punch and essential areas for later steps.
What You Need to Do:
Unlock Ol’ Tessie First:
- Head to the Server Room at Janus Towers Plaza (spawn area)
- Melee the metal floor grate to reveal T.E.D.D.’s Head
- Pick up T.E.D.D.’s Head and take it to the disabled truck outside
- Interact with the truck to activate Ol’ Tessie
Activate the Power Pumps:
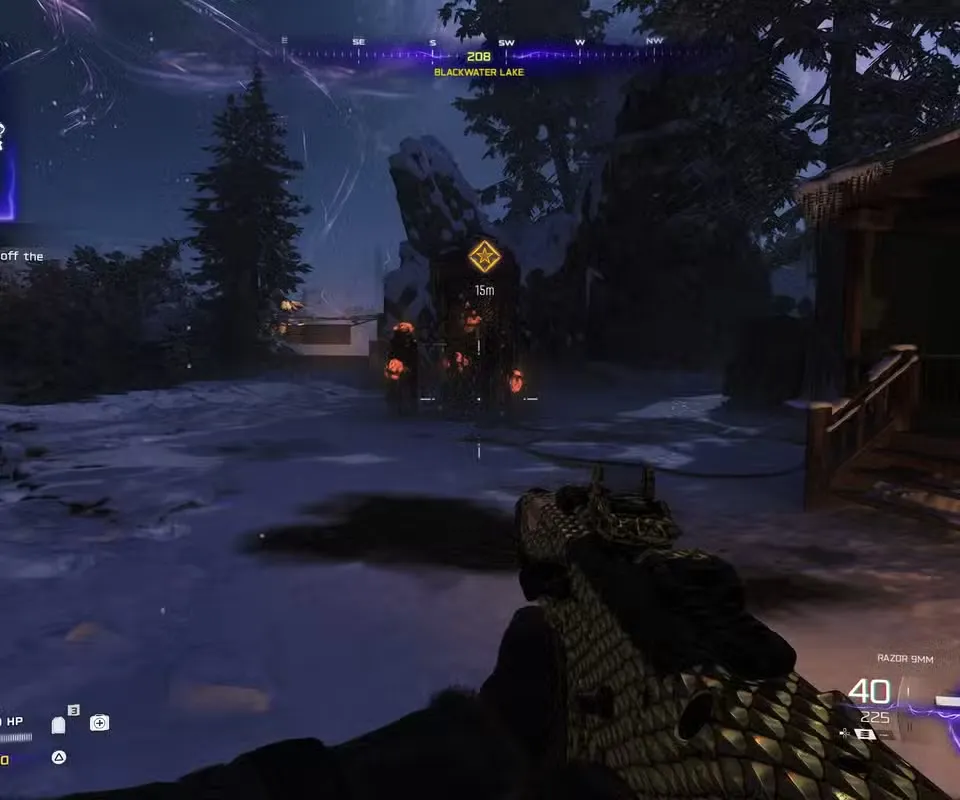
- Drive Ol’ Tessie through either the west gate (toward Blackwater Lake) or east gate (toward Vandorn Farm)
- At each location, find the Power Pump and shoot the glowing fungus within the time limit
- Complete both initial Power Pumps, which opens the path to Ashwood
- Drive to Ashwood Bridge and complete the third Power Pump
Reward: Access to Ashwood’s Blacksmith Garage where you can Pack-a-Punch Ol’ Tessie and upgrade weapons throughout your run.
Efficiency tip: Don’t stress about which gate to take first. You’ll need to backtrack anyway, so pick whichever side you’re more comfortable with. I typically go Vandorn Farm first since the layout is easier to navigate early on.
Step 2: Get the Abomination Heads Upgrade for Ol’ Tessie
This upgrade transforms Ol’ Tessie from basic transport into an offensive weapon—essential for multiple steps ahead.
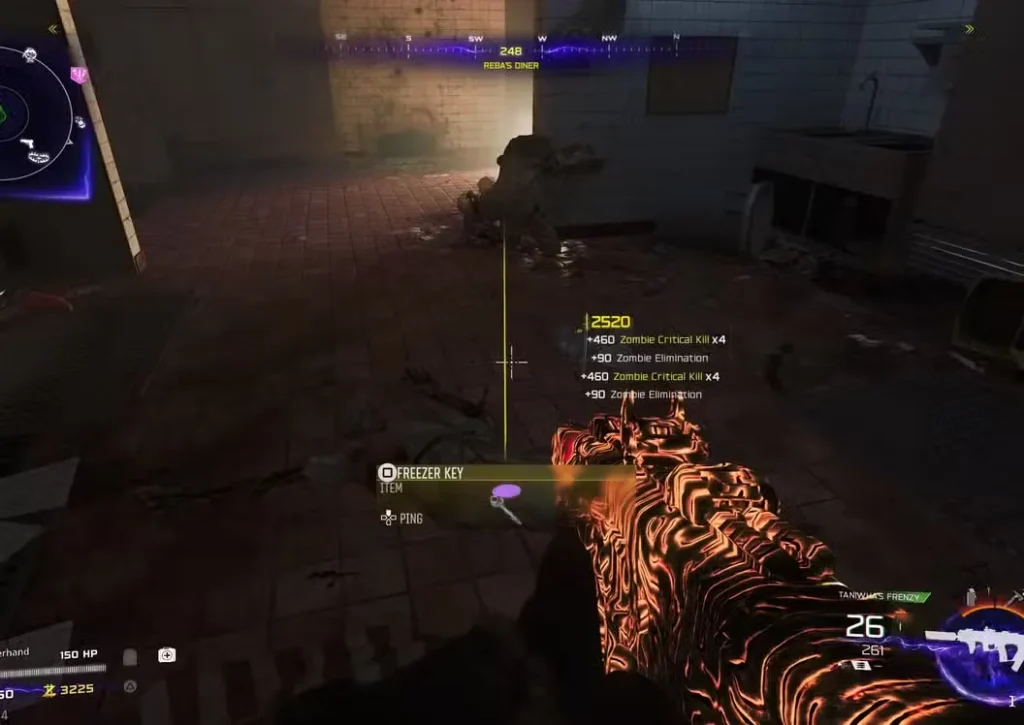
Location: Reba’s Diner at Exit 115
Step-by-Step Process:
- Drive Ol’ Tessie southwest from Ashwood to reach Exit 115
- Purchase the door to enter Reba’s Diner
- Wait for Round 5 or later—the Cook zombie (special enemy) will spawn inside
- Kill the Cook and collect the Freezer Key
- Use the key on the freezer door (southwest wall of the diner)
- Grab the Abomination Carcass from inside the freezer
- Return to Ashwood’s Blacksmith Garage
- Interact with the workbench to install the upgrade on Ol’ Tessie
What This Gives You:
- Beam attack (R1/RB) that instantly kills zombies in your path
- Essential for collecting specific items in later steps
- Makes traveling between zones significantly safer
This upgrade isn’t optional—you absolutely need it to progress the Easter egg. The beam attack becomes critical for collecting Serum parts and completing specific kill requirements.
Step 3: Unlock the Necrofluid Gauntlet Wonder Weapon
The Necrofluid Gauntlet is the backbone of this entire Easter egg. You’ll use it for puzzle solutions, key collection, and boss damage. We have a detailed Necrofluid Gauntlet guide available, but here’s the condensed version:
Quick Necrofluid Gauntlet Walkthrough
Part 1: Free Klaus
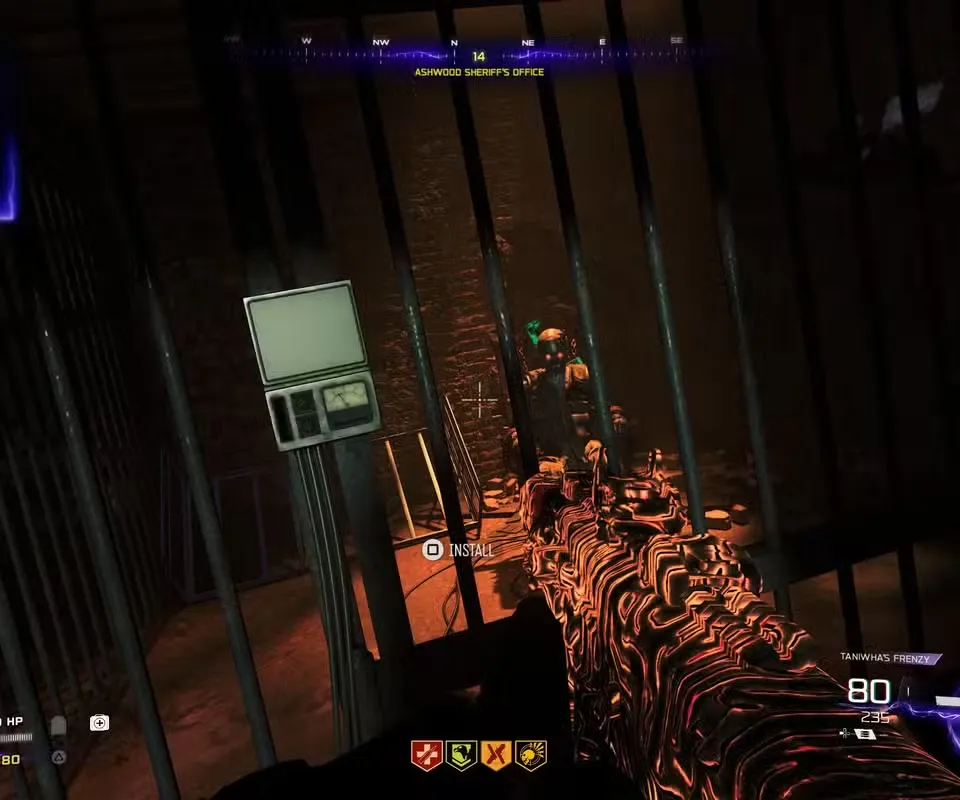
- Open Ashwood Sheriff’s Office (left of Vulture Aid perk)
- Find Klaus trapped in a cell
- On Round 8+, head toward Blackwater Lake from Janus Towers Plaza
- Kill the Uber Klaus enemy that spawns and collect the Stabilizer Chip
- Return to Klaus’ cell and use the Stabilizer Chip on the terminal
- Throw 2-4 Stun Grenades inside the cell to wake Klaus up
Part 2: Scan at Zarya Cosmodrome
- Travel to Zarya Cosmodrome with Klaus following you
- Enter the Support Systems area (down the stairs)
- Ping (L1) the console next to the locked cabinet—Klaus activates a green button
- Press the green button and stand in the red scanning circle
- Look up at the camera while killing any attacking zombies
- Use Monkey Bombs to make this easier during the scan
Part 3: Power Up the Aether Barrel
- Collect the Aether Barrel from the now-unlocked cabinet
- Place it in Ashwood’s Power Pump, then Blackwater Lake’s, then Vandorn Farm’s (in that order)
- With the charged barrel on your back, interact with the box in Vandorn Farm’s Barn Cellar
Part 4: Symbol Puzzle
- Use Jump Pads at Vandorn Farm and Janus Towers Plaza
- Look at the roofs of the Barn, Silo, and Farmhouse to see three symbols
- Memorize these symbols
- Return to the Barn Cellar box
- Interact with each face of the box until your three symbols appear
- Interact with the eyes on the back of the box to receive the Necrofluid Gauntlet
Part 5: Final Activation
- Shoot the green orbs that appear in the Cellar with the Necrofluid Gauntlet
- Reload to recall the spikes and explode the orbs
Critical mechanic: The Necrofluid Gauntlet shoots projectiles that stick to surfaces. Reloading pulls them back, dealing damage and triggering effects. You’ll also heal when reloading after firing, which becomes crucial during lockdown sequences.
Step 4: Collect All Six Serum Components
Now comes the scavenger hunt. These six items are scattered across the map, and some require specific methods to obtain. You can collect these in any order, though I recommend saving the Mysterious Limb for last since it requires Round 16+.
Serum Part #1: Widow’s Lantern

Location: Blackwater Lake and Vandorn Farm
How to Get:
- Enter the Cabin at Blackwater Lake
- Go to the kitchen and open the bottom cupboards by the sink (south side)
- Collect the Jar of Spores
- Drive to Vandorn Farm and find the dead horse near the fence by a destroyed car
- Interact with the fungus-covered horse carcass
- Progress through 3 complete rounds
- Return and collect the fully grown Widow’s Lantern
Planning tip: Start this step as early as possible since you need to wait three rounds. Grab the Jar of Spores and plant it on the horse, then focus on other objectives while it grows.
Serum Part #2: Human Bones
Location: Vandorn Farm Barn
What You Need:
- Combat Axe (free from Reba’s Diner at Exit 115)
- Molotov Cocktail (free outside Ashwood garage)
How to Get:
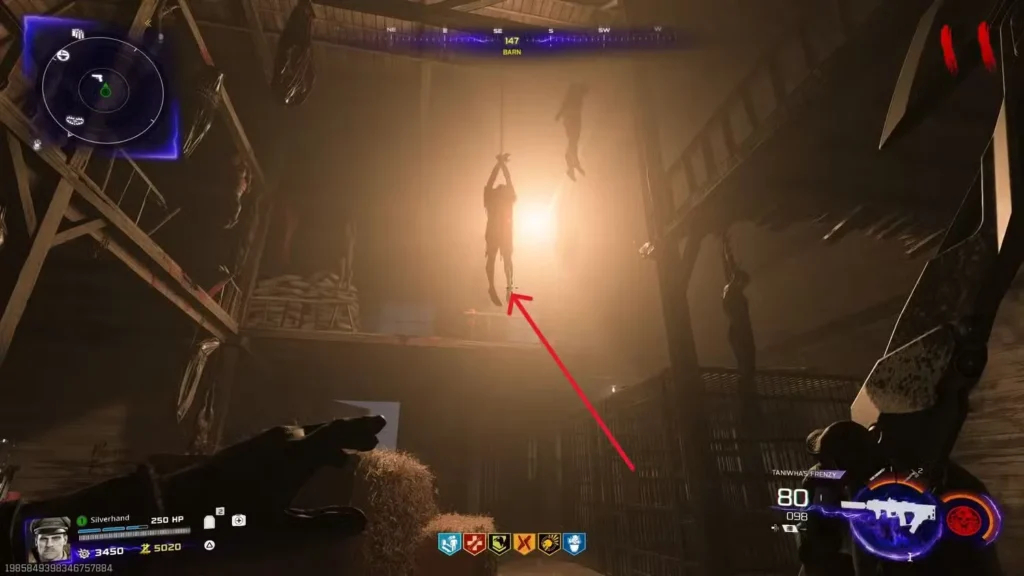
- Enter the Barn at Vandorn Farm
- Find the hanging corpse in the center (note the two legs and rope-bound wrists)
- Throw a Combat Axe at the corpse’s right foot
- The foot drops to the ground
- Throw a Molotov at the dropped foot
- After burning, collect the Human Bones
Serum Part #3: Ravager Eyes
Location: Vandorn Farm (outside the Barn)

How to Get:
- Wait for a Ravager to spawn (four-legged running enemy)
- Lure the Ravager to the Saw Blade Trap outside the Barn
- Activate the trap to kill the Ravager
- Collect the Ravager Eyes from the corpse
Enemy tip: Ravagers run on all fours and are pretty distinctive. If you’re having trouble spawning one, progress a few rounds—they become more common as difficulty increases.
Serum Part #4: Hoard Husk Chunks
Location: Any road between main zones (Dark Aether areas)
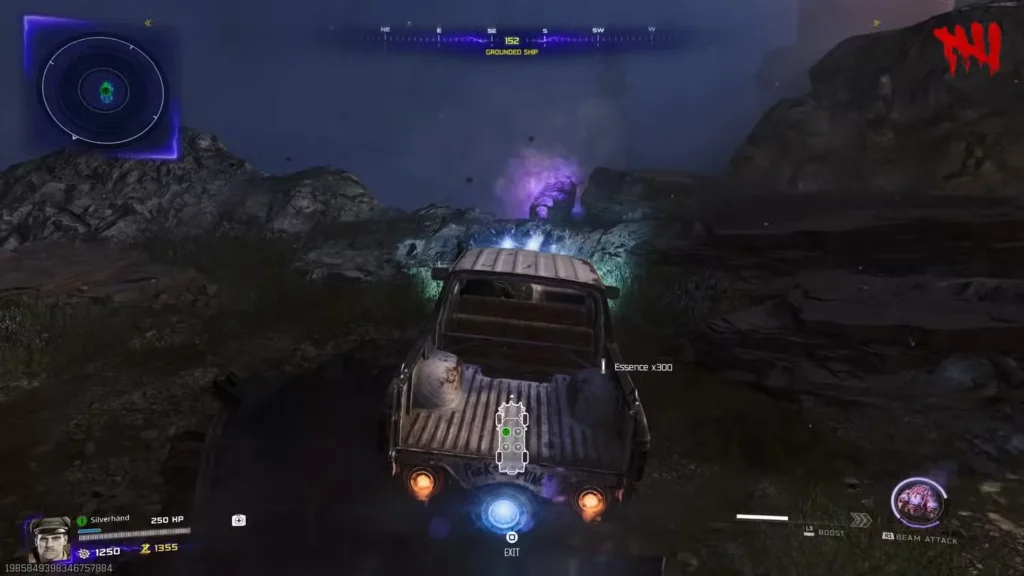
What You Need: Ol’ Tessie with Abomination Heads upgrade
How to Get:
- Drive Ol’ Tessie into any foggy road between locations
- Look for glowing purple plants (NOT green or orange ones)
- These purple plants are slightly out of bounds
- Use Ol’ Tessie’s Beam Attack (R1/RB) to shoot the purple plant
- The plant explodes and drops Hoard Husk Chunks
Search tip: Purple plants can spawn in any of the connecting roads. If you don’t see one immediately, try a different route. They’re fairly common once you know what to look for.
Serum Part #5: Powder of the Forgotten
Location: Zarya Cosmodrome and Ashwood Tailor Shop

What You Need: Necrofluid Gauntlet and Wisp Tea perk
How to Get:
- Purchase Wisp Tea perk at Zarya Cosmodrome
- Travel to Ashwood and locate the Tailor Shop (east side, right of Vulture Aid)
- Deal damage to enemies to activate Wisp Tea
- Once active, stand by the mirror inside the Tailor Shop
- Wisp Tea will damage the mirror automatically
- Shoot the damaged mirror with the Necrofluid Gauntlet to shatter it
- Collect the Powder of the Forgotten
Serum Part #6: Mysterious Limb
Location: Anywhere on the map (Round 16+ only)

What You Need: Ol’ Tessie with Abomination Heads upgrade
How to Get:
- Wait until Round 16 or later for Zursa (zombie bear elite enemy) to spawn
- Damage Zursa with weapons to weaken him
- Important: The killing blow MUST come from Ol’ Tessie’s Beam Attack
- Collect the Mysterious Limb from Zursa’s corpse
Critical note: You can soften up Zursa with bullets, explosives, or anything else—just make absolutely sure the final hit comes from the beam. If regular weapons finish him, he won’t drop the limb.
Step 5: Solve the Serum Puzzle at Yuri’s Lab
With all six components collected, it’s time for some chemistry. This puzzle uses Pigpen cipher translations, but I’ll save you the decoding work.
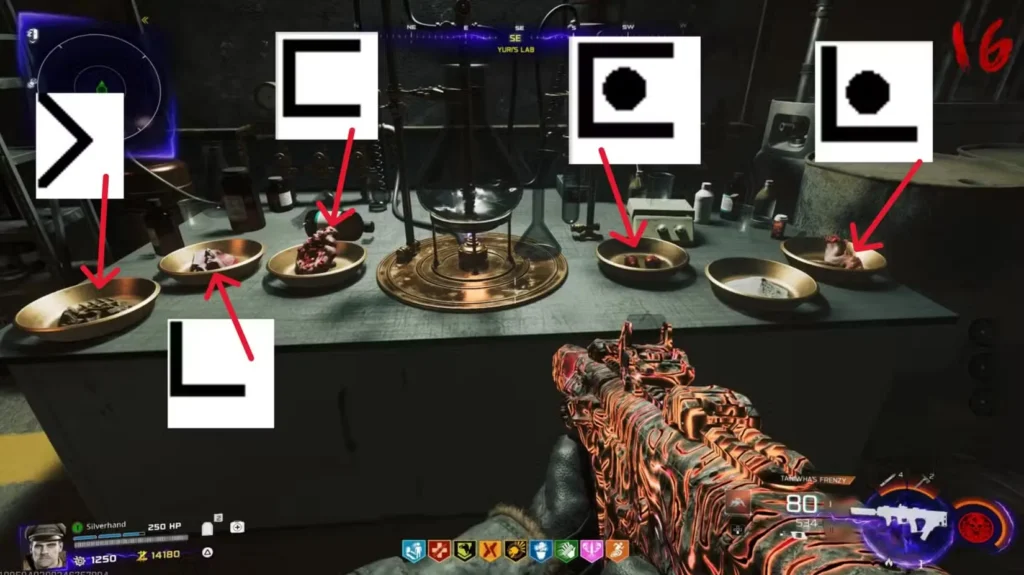
Location: Yuri’s Lab (southwest area of Zarya Cosmodrome)
Understanding the Puzzle
On the table in Yuri’s Lab, you’ll find six bowls containing different ingredients:
- Bowl 1: Human Bones (symbol: >)
- Bowl 2: Hoard Husk Chunks (symbol: L)
- Bowl 3: Widow’s Lantern (symbol: C)
- Bowl 4: Ravager Eyes (symbol: C.)
- Bowl 5: Powder of the Forgotten (trigger only—don’t use as ingredient)
- Bowl 6: Mysterious Limb (symbol: L.)
Solving the Puzzle
- Interact with Bowl 5 (Powder) to begin—smoke fills the room
- After the smoke clears, the chalkboard reveals three coded symbols
- Each symbol corresponds to one of the ingredients listed above
- Look at the first character of each line to identify which ingredient
- Interact with the three ingredients shown on your chalkboard, in order
- If correct, the smoke turns red
- Interact with the red smoke to add your blood (costs some health)
Example: If your chalkboard shows symbols translating to “L”, “C.”, and “>” in that order, you’d interact with Bowl 2, Bowl 4, then Bowl 1.
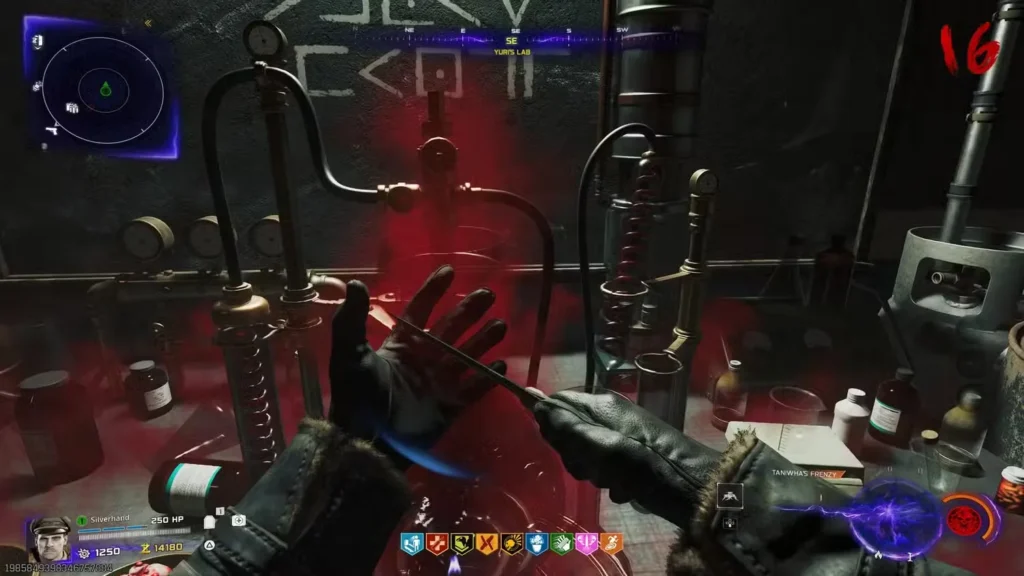
The Lockdown Sequence
After adding blood, the room locks down and zombies flood in. Here’s what you need to know:
Critical rules:
- Your health does NOT regenerate naturally during this fight
- You must kill every zombie to proceed
- The Necrofluid Gauntlet is your best friend here
Survival strategy:
- Use the Necrofluid Gauntlet primarily—firing then reloading heals you
- Train zombies around the room’s perimeter before engaging
- Don’t panic if health gets low—land shots and reload for healing
- Consider using Field Upgrades like Frenzied Guard for emergencies
After clearing the lockdown, the world state changes dramatically. Ashwood now features a floating clock tower by the bridge and a locked chest appears in Rabbit Alley—both crucial for the next step.
Step 6: Find Three Keys and Unlock the Rabbit Alley Chest
This step sends you on a scavenger hunt across the Dark Aether roads. Each key is hard to spot, has three possible spawn locations, and gives you a nasty debuff when picked up.

Key Collection Mechanics
How to collect keys:
- Locate the key’s glowing glint (color-coded: green, yellow, or red)
- Shoot the key with the Necrofluid Gauntlet
- Reload to pull the key down
- Drive back to Ashwood immediately—debuffs make foot travel dangerous
- Interact with the locked chest in Rabbit Alley to deposit the key
Essential gear for this step:
- Fully upgraded Ol’ Tessie (absolutely critical)
- Kazimir grenades for crowd control
- Full armor plates
- Pack-a-Punched weapons for emergencies
Terrapin Key (Green Key)
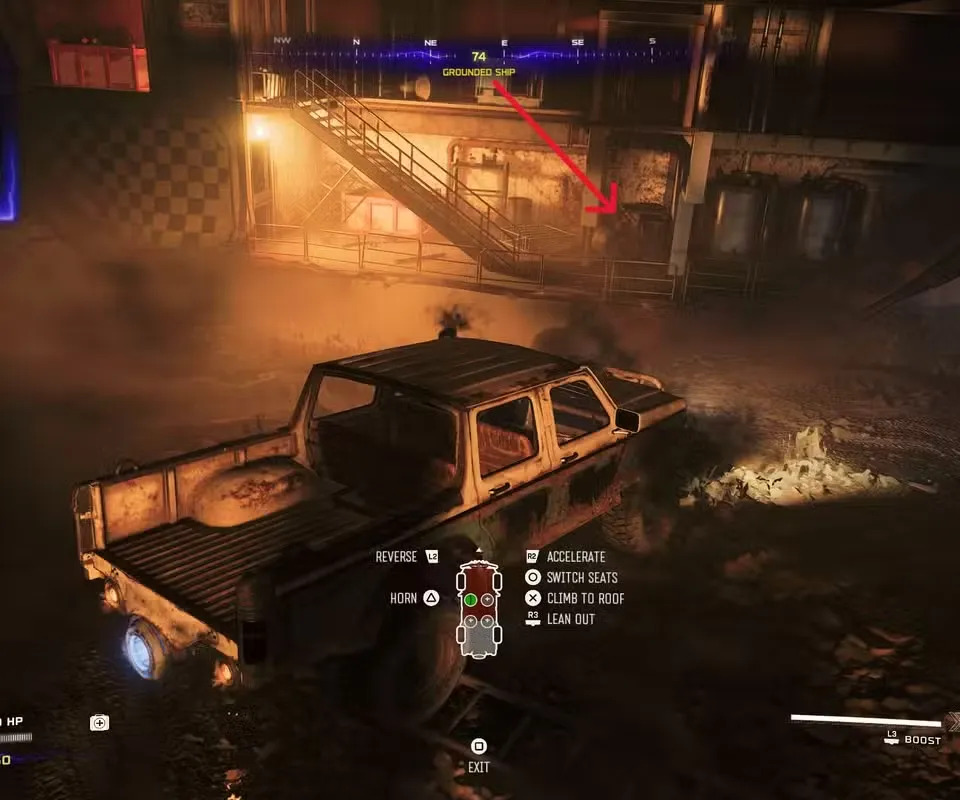
Location: Grounded Ship (road between Ashwood and Vandorn Farm)
Debuff: Disables sprint when held
Three Possible Spawns:
- Underneath the ship: Face east and look between two barrels slightly out of bounds
- Inside the ship: Southeast window area, between crates
- On the ship: Inside the northwest blue shipping container that’s partially open
Collection tip: The no-sprint debuff makes this key particularly dangerous on foot. Get back into Ol’ Tessie the instant you grab it.
Bruin Key (Yellow Key)
Location: Crashed Rocket (road between Ashwood and Zarya Cosmodrome)
Debuff: Forces you to equip knife only (can’t use guns)
Three Possible Spawns:
- East cliff: Just after leaving Ashwood, near the burning vehicle
- Crashed pylon: On the beams when facing southeast
- Array tower: On top of the southwest array building near Zarya Cosmodrome
Collection tip: The knife-only debuff is brutal. Have Ol’ Tessie positioned for a quick escape before grabbing this key. If you get surrounded, melee your way to the vehicle or prepare to go down.
Nightbird Key (Red Key)
Location: Orda Graveyard (road between Ashwood and Exit 115)
Debuff: Massive health loss + no health regeneration
Three Possible Spawns:
- Ground T-Rex skull: At the back of the skull in the south area (just after leaving Ashwood)
- Cliff T-Rex skull: Inside the mouth of the skull in the west area (hardest to see—spam shoot with Necrofluid if checking)
- Near Exit 115: Behind Project Janus trucks at the northeast section
Collection tip: Save this key for last if doing a methodical run. The no-regen health is the most punishing debuff, especially if you’re already weakened. Get into Ol’ Tessie immediately after pickup.
Post-Collection Cutscene
After depositing all three keys into the Rabbit Alley chest, a mid-quest cutscene automatically triggers. When it ends, you’ll find the DG-2 Turret Barrel waiting for you.
Final upgrade: Take the DG-2 Turret Barrel to Ashwood’s Blacksmith Garage and install it on Ol’ Tessie. This completes your vehicle’s full upgrade path and unlocks abilities needed for upcoming steps.
Step 7: Free Three Souls at Exit 115
This step involves some timing and can only be attempted every other round when lightning appears. It’s tricky at first but becomes routine once you understand the pattern.
Activating Astral Mode
- Drive to Ashwood in Ol’ Tessie
- Aim the DG-2 Turret at the floating clock tower
- Fire at the clock—it chimes and glows
- Switch to Necrofluid Gauntlet and shoot the glowing clock
- Reload to absorb the energy and turn purple (astral mode)
- Drive immediately to Exit 115
Understanding the Lightning Phase
Critical timing info:
- Lightning strikes appear at Exit 115 every 2 rounds
- If you arrive and see NO lightning on rooftops, skip this step for now
- Return to Step 8 or Step 9 and come back next lightning phase
- Any souls you’ve already freed stay freed—you don’t have to repeat them
When lightning IS active:
- Shoot the southwest clock on the Service Station Rooftop with Necrofluid Gauntlet (in purple mode)
- You now have 60 seconds to activate and guide souls
- Each soul must reach their specific colored lightning strike
Strategy recommendation: Do one soul per lightning phase when learning. Yes, it takes longer, but the 60-second timer is tight when you’re figuring out the routes. Freed souls stay freed even if time expires.
Soul #1: The Trucker
How to activate:
- Ram Ol’ Tessie into the back of the truck at Reba’s Diner
- The soul enters a dead trucker zombie
- Guide this zombie to the southwest rooftop (pink lightning)
Guiding tip: Don’t kill the zombie—just lead it. Fire shots near it or use melee to “push” its pathing toward the lightning. Getting on the rooftop can be tricky; use the natural map flow to guide it up.
Soul #2: The Waitress
What you need: Melee Macchiato perk
How to activate:
- Purchase Melee Macchiato if you don’t have it
- Enter Reba’s Diner
- Melee the cash register
- The Waitress zombie appears
- Guide her to the Diner Rooftop (purple lightning)
Soul #3: The Mechanic
What you need: Klaus (summon available at multiple stations)
How to activate:
- Go to McDougal’s Service Station (where Deadshot Daiquiri is located)
- Use a Klaus Summon station
- Ping/L1 Klaus to position him by the dead mechanic (next to elevated car, opposite the Armor wall-buy)
- The Mechanic zombie wakes up
- Guide him to the Service Station Rooftop (orange lightning)
Klaus tip: If Klaus isn’t following commands well, try repositioning yourself. Sometimes the ping system needs a clear line of sight to the target location.
Once all three souls successfully reach their lightning strikes, this objective completes. You’ll notice the map state continues to evolve as you progress through these major steps.
Step 8: Complete the Vandorn Farm Ritual
This ritual defense can get hectic fast. Come prepared with equipment and understand the layout before starting.
Charging Yourself with Purple Energy
- Return to Ashwood
- Shoot the clock tower with Ol’ Tessie’s DG-2 Turret
- Shoot the charged clock with Necrofluid Gauntlet and reload
- You’re now glowing purple (astral mode)
Activating the Father
- Drive to Vandorn Farm Farmhouse
- Find the clock on the southwest wall and note the time displayed
- Around the dining table, you’ll see corpses sitting at positions
- Each position corresponds to a Roman numeral etched on the floor
- Stand on the Roman numeral matching the clock time
- The father’s head rotates toward you
- When his eyes glow red, shoot him with the purple-charged Necrofluid Gauntlet
Example: If the clock reads midnight (12:00), stand on XII (12 in Roman numerals), which is behind the father’s position.
Collecting Four Ritual Items
You need to gather family belongings from around Vandorn Farm:
Item #1: Tasty-Face Teddy Bear
- Location: Farmhouse upstairs
- Look at the southeast cabinet beside Stamin-Up perk (or check near the bed)
- Interact to collect
Item #2: Pa’s Pigsticker
- Location: Garage at Vandorn Farm
- Find the workbench on the north wall
- Interact to collect
Item #3: Junior’s Fun-Face
- Location: Barn upstairs
- East wall area by the hay barrels
- Interact to collect
Item #4: Ma’s Chalice
- Location: Cellar beneath the Barn
- Northwest wall inside a bathtub
- Interact to collect
The Ritual Defense
After collecting all four items, glowing circles appear in Vandorn Farm’s central courtyard area.
How it works:
- Interact with each circle to place the four ritual items
- After placing the last item, interact with it again to begin the defense
- You must protect the items for 60 seconds
- Zombies spawn and attack ONLY the ritual items (not you)
- If any item is destroyed, you fail and must retry next round
Survival strategy:
Best equipment for this:
- Kazimir grenades (pulls zombies away from items)
- Frenzied Guard field upgrade (forces zombies to target you instead)
- Saw Blade Trap at Vandorn Farm (position zombies near it)
- Lethal equipment for crowd control
Defensive positioning:
- Stand between the items and incoming zombie spawns
- Use the Saw Blade Trap aggressively—it’s free and effective
- Throw Kazimirs when hordes cluster around items
- Activate Frenzied Guard if items start taking heavy damage
- Keep moving to manage different approach angles
Pro tip: The zombies completely ignore you during this defense unless you use Frenzied Guard. Use this to your advantage—position yourself to intercept zombies before they reach the items rather than fighting near the ritual circles.
Step 9: Launch the Zarya Cosmodrome Rocket
This puzzle combines shooting accuracy with cipher decoding. The good news? I’ve already solved all possible combinations for you.
Slowing Down the Array Towers
- Charge yourself purple at the Ashwood clock tower (same process as before)
- Drive to Zarya Cosmodrome
- Notice the array towers spinning extremely fast
- Shoot one array tower with the Necrofluid Gauntlet
- Return to Ashwood and charge purple again
- Go back to Zarya Cosmodrome and shoot the second array tower
- Both towers now spin noticeably slower
Decoding the Launch Sequence
Head to the Control Room (found near Wisp Tea perk) and examine two computer terminals on the north wall. They flash different shapes that translate to words using Pigpen cipher.
The terminals show 6 symbols total (3 per screen), but you only need the first symbol from each side to identify the word.
All Possible Words and Their Number Sequences:
- Engine (□□): 04-13-06-08-13-04
- Launch (Ln): 11-00-20-13-02-07
- Rocket (□>): 17-14-02-10-04-19
- Weapon (V□): 22-04-00-15-14-13
How the translation works: Each word is converted to numbers using the alphabet (A=00, B=01, C=02… Z=25).
Inputting the Launch Code
- Approach the northwest terminals in the Control Room
- You’ll see six number input stations arranged left to right
- Each station cycles through numbers 00-25
- Enter your decoded numbers in order from left to right
- When the correct number appears on screen, shoot the red button to lock it in
- Critical: If you shoot the wrong number, you must restart entirely next round
- After entering all six numbers correctly, the rocket launches
Input strategy:
- Take your time—there’s no timer on this step
- Write down your six-number sequence before starting
- Call out numbers if playing with a team
- Double-check each number before shooting the red button
- If you mess up, don’t panic—just wait until next round and try again
The rocket launch triggers the map’s final major transformation, preparing you for the closing steps.
Step 10: Solve the Projector Puzzle at Blackwater Lake
You can only attempt this step after completing Steps 7, 8, and 9. All three previous objectives must be done before Blackwater Lake becomes active.
Activating the Projector
- Return to Ashwood and charge yourself purple at the clock tower
- Drive Ol’ Tessie to Blackwater Lake
- Find the wisp at the west platform (near Mystery Box spawn)
- Interact with the wisp
- Enter the Cabin and locate the projector in the theater room
- Shoot the projector to begin the sequence
What happens: The projector displays images one at a time showing different locations around Blackwater Lake. You need to memorize the order these images appear.
Finding and Shooting Film Reels
After memorizing the sequence, you must shoot film reels at the actual locations shown, in the exact order they appeared on screen.
The Four Possible Locations:
Front of the Cabin:
- Go upstairs in the Cabin
- Look at the east wall near the gramophone
- The reel is on the shelf to the left of the gramophone
- Shoot it with any weapon
Back of the Cabin:
- Stand with your back to the pyramid
- Face southeast and look below the exterior stairs
- The reel hangs underneath the stairs below the railing
- Shoot it with any weapon
Toolshed:
- Enter the Toolshed at Blackwater Lake
- Check the east wall
- The reel sits on the top shelf
- Shoot it with any weapon
Fishing Hut:
- Enter the Fishing Hut
- Look up at the rafters near the front door
- The reel hangs from the first set of rafters
- Shoot it with any weapon
Completing the sequence correctly triggers an audio cue. If you don’t hear anything after shooting all four reels, you got the order wrong—check the projector again next round.
Summoning Klaus for the Boss Fight
- Head upstairs in the Cabin to the Speed Cola room
- Find the lockbox by the bed with a glowing wisp
- Interact with the box
- Go to the Blackwater Lake docks and use the Klaus Summon station
- Bring Klaus back upstairs to the lockbox
- Ping/L1 Klaus near the box—he’ll move to the docks
- Go to the docks and interact with Klaus
- Vote to initiate the boss fight
Pre-boss checklist before voting yes:
- All perks purchased (especially Juggernog and Quick Revive)
- Weapons fully Pack-a-Punched with best ammo mods
- Full armor plates with manual application enabled
- Gobblegums equipped and ready
- Field Upgrades charged
- Ol’ Tessie fully upgraded and nearby
- Full Salvage for equipment purchases during the fight
Step 11: Collect Wisps While Driving Ol’ Tessie
This is essentially a timed driving challenge through multiple Dark Aether roads. Speed and accuracy are both important.
Starting the sequence:
- Make sure Ol’ Tessie is at Blackwater Lake and ready to go
- Confirm your route: Monolith Forest → Janus Towers Plaza → Vandorn Farm → Ashwood → back to Blackwater Lake
- Speak to Klaus at the docks to begin
- Sprint back to Ol’ Tessie immediately
The Wisp Collection Route
You need to drive through 12 orange wisps total—3 in each of the following roads:
Leg 1: Blackwater Lake to Janus Towers Plaza (Monolith Forest)
- 3 wisps spawn one at a time
- Each wisp shows the next location with a white guiding wisp
- Drive through the orange wisp as soon as it appears
Leg 2: Janus Towers Plaza to Vandorn Farm (Collapsed Tower)
- 3 more wisps along this route
- Follow the white indicator wisp to the next orange target
- Keep momentum—don’t slow down unnecessarily
Leg 3: Vandorn Farm to Ashwood (Grounded Ship)
- 3 wisps through this central road
- Use Ol’ Tessie’s boost if zombies are blocking your path
- Speed is important but accuracy is more important
Leg 4: Ashwood to Blackwater Lake (Lost Cabins)
- Final 3 wisps
- After collecting the last wisp in Lost Cabins, you automatically teleport to the boss room
Critical mechanics:
- You’re on an invisible timer—wisps spawn slowly but you can’t waste time
- Hit wisps as soon as they appear
- Avoid taking damage to Ol’ Tessie when possible
- If you fail, you can retry next round with Klaus
Driving tips:
- Use the boost (L3) to clear zombies and increase speed
- The white guiding wisp always flies toward the next orange wisp location
- Don’t overshoot—orange wisps have small hitboxes
- If you miss a wisp, quickly reverse rather than continuing forward
Successfully collecting all 12 wisps teleports you directly into the boss arena. There’s no turning back now.
Step 12: Defeat Veytharion – The Final Boss Fight
Congratulations on making it this far. Veytharion is a genuinely tough boss that punishes mistakes and rewards preparation. This massive flesh monstrosity combines ranged attacks, zombie spawns, and devastating missiles into one brutal encounter.
Understanding Veytharion’s Attack Patterns
Laser Attacks:
- Veytharion fires tracking lasers from multiple mouths
- Keep moving to avoid sustained damage
- Ol’ Tessie provides some protection but can still take damage
Spinning Attack:
- Boss rapidly spins, hitting anything nearby
- Stay at medium range during this phase
- Good opportunity to reposition
Zombie Spawns:
- Regular zombies spit out periodically
- Clear them quickly or they’ll overwhelm you
- Use DG-2 Turret or Necrofluid Gauntlet for efficient clearing
Missile Barrage (Most Dangerous):
- Veytharion fires red-marked missiles
- These can instantly destroy Ol’ Tessie or down players
- Watch for red targeting indicators and dodge immediately
- This attack deals the most damage—prioritize avoiding it above all else
Optimal Damage Strategy
Primary Method: Ramming with Ol’ Tessie
- Drive directly into Veytharion repeatedly using boost (L3)
- Ramming deals consistent, reliable damage
- Clears zombies off your vehicle simultaneously
- Most effective during vulnerable phases
Secondary Method: DG-2 Turret
- If you have a teammate, have them use the turret
- Aim for Veytharion’s open mouths (glowing weak points)
- Target the underneath carriage on the body
- Deals excellent damage when hitting weak spots
Tertiary Method: Necrofluid Gauntlet
- Effective when dismounted from Ol’ Tessie
- Aim for glowing body parts
- Remember: reload after firing to trigger explosion damage
- Use this when Veytharion is stationary
The Immune Phase Mechanic
Periodically, Veytharion becomes completely immune to damage. Here’s how to break through:
Step-by-step process:
- Veytharion’s body glows and stops taking damage
- Ram Veytharion with Ol’ Tessie during immune phase
- A beam of light drops from the boss
- Drive through the beam to absorb it (Ol’ Tessie glows)
- Ram Veytharion again while imbued with the light beam
- Immune phase ends—continue normal damage
Immune phase tips:
- Don’t panic and waste ammo during immunity
- The beam of light is clearly visible—don’t miss it
- You have limited time to grab the beam and ram again
- If you miss the timing, the immune phase may extend
Survival Strategy for Solo and Team Play
Solo Strategy:
- Stay in Ol’ Tessie for 90% of the fight
- Ram constantly while avoiding red missiles
- Use the arena’s space to create distance when overwhelmed
- Keep Ol’ Tessie healthy—drive through any healing opportunities
- Save Self-Revives for missile hits or mistakes
Team Strategy (2-4 Players):
- Designate one player as primary driver
- Other players use DG-2 Turret or provide covering fire from turret seat
- Non-drivers can focus on clearing zombie spawns
- Communicate missile warnings immediately
- Revive downed teammates quickly but safely
Essential tips for both:
- Watch for red missiles constantly—they’re the #1 killer
- Keep moving in circular patterns around the arena
- Use Ol’ Tessie’s boost to escape bad situations
- Don’t get greedy with damage—survival first
- If Ol’ Tessie is destroyed, you can still complete the fight on foot (much harder)
Equipment and Loadout Recommendations
Best Wonder Weapon: Necrofluid Gauntlet (you already have it)
Best Regular Weapons:
- High-damage LMGs or assault rifles
- Fully Pack-a-Punched with Brain Rot or Dead Wire ammo mods
- Backup weapon with high magazine capacity
Essential Perks:
- Juggernog (extra health is mandatory)
- Quick Revive (solo) or Speed Cola (team)
- Stamina-Up for movement speed
- Death Perception for weak point visibility
Best Field Upgrades:
- Frenzied Guard (draws aggro during emergencies)
- Healing Aura (team healing)
- Energy Mine (zombie crowd control)
Equipment:
- Kazimir grenades for zombie control
- Semtex or Thermite for sustained damage
- Monkey Bombs for distraction during revives
What Happens When You Win
After depleting Veytharion’s health bar completely, the boss dies and a cutscene plays showing your victory and the Easter egg’s conclusion.
Post-victory choices:
When the cutscene ends, you’ll see two options:
- Exit: Ends your game and returns you to menu
- Continue: Keeps you in the match
Important: Select “Continue” instead of “Exit” to unlock additional content.
Unlocking Cursed Mode
After choosing Continue, head to the west area of Blackwater Lake and look for the Mysterious Object. Interact with it to activate Cursed Mode.
What is Cursed Mode?
- New difficulty modifier for future runs
- Allows collection of Relics
- Increases challenge and rewards
- Necessary for additional prestige unlocks
Essential Tips for Easter Egg Success
After multiple completions, here are the most important lessons:
Preparation is everything:
- Don’t start the Easter egg unprepared. Get your loadout squared away first.
- Have at least 2-3 Self-Revives before Step 11
- Stock up on equipment and armor before boss fight
- Level up weapons beforehand so Pack-a-Punch is more effective
Round management:
- Don’t rush—there’s no round limit for completion
- Use early rounds for setup (perks, Pack-a-Punch, armor)
- The Widow’s Lantern requires 3 rounds of waiting—start it early
- Zursa doesn’t spawn until Round 16—plan accordingly
Common mistakes to avoid:
- Forgetting to charge yourself purple before steps requiring astral mode
- Not having Ol’ Tessie nearby when you need quick escapes
- Attempting the Vandorn Farm ritual without proper crowd control equipment
- Missing the beam of light during Veytharion’s immune phase
- Shooting wrong numbers in the rocket launch sequence
Team coordination:
- Assign roles: driver, turret gunner, support
- Communicate key locations and debuffs during key collection
- Split up Serum part collection to save time
- Practice the wisp driving route before starting it
- Have a designated caller for missile warnings during boss fight
Solo player advice:
- This Easter egg is absolutely doable solo, but expect longer completion times
- Focus on high-survivability perk builds
- Use Frenzied Guard during defense sections
- Take extra care during the key collection step
- Don’t be discouraged if the boss fight takes multiple attempts
Rewards and Why It’s Worth Completing
Completing the Ashes of the Damned main quest rewards you with:
Immediate rewards:
- Completion cutscene and story progression
- Access to Cursed Mode (Relic collection system)
- Achievement/Trophy unlock
- Bragging rights in the community
Long-term benefits:
- Experience with advanced zombie mechanics
- Better understanding of map layout and flow
- Practice with Wonder Weapons and vehicle combat
- Foundation for speedrunning strategies
The real value comes from mastering the map. Once you’ve completed the Easter egg once, subsequent runs become significantly easier. You’ll know spawns, optimal routes, and puzzle solutions by heart.
Final Thoughts
The Ashes of the Damned main Easter egg is ambitious, complex, and genuinely rewarding when completed. Unlike some zombie quests that feel tedious, this one maintains momentum throughout with varied objectives and a satisfying finale.
The Veytharion boss fight alone makes the journey worthwhile—it’s legitimately challenging without feeling unfair (as long as you respect those red missiles). The integration of Ol’ Tessie into so many steps gives the Easter egg a unique identity compared to other Black Ops zombie maps.
If you’re stuck on any particular step, don’t hesitate to reference specific sections of this guide. Some steps like the key collection or projector puzzle can be tricky the first time through, but they become second nature once you understand the mechanics.
For more Black Ops 7 Zombies content, check out our guides on campaign mission walkthroughs, best weapon builds, and augment optimization. Good luck, and may your runs be smooth!
Quick Reference Checklist
Use this checklist to track your progress:
- Step 1: Activate all three Power Pumps (Blackwater Lake, Vandorn Farm, Ashwood)
- Step 2: Get Abomination Heads upgrade at Exit 115
- Step 3: Complete Necrofluid Gauntlet quest
- Step 4: Collect all 6 Serum parts (start Widow’s Lantern early!)
- Step 5: Solve Serum puzzle at Yuri’s Lab and survive lockdown
- Step 6: Find three keys and unlock Rabbit Alley chest
- Step 6.5: Install DG-2 Turret on Ol’ Tessie
- Step 7: Free three souls at Exit 115 (only during lightning rounds)
- Step 8: Complete Vandorn Farm ritual defense
- Step 9: Launch Zarya Cosmodrome rocket
- Step 10: Solve projector puzzle at Blackwater Lake
- Step 11: Collect 12 wisps while driving Ol’ Tessie
- Step 12: Defeat Veytharion boss fight
- Post-completion: Select Continue and activate Cursed Mode
External Resources: