Best Mule Kick Augments in Black Ops 7 Zombies – Complete Build Guide
Discover the best Mule Kick augments in Black Ops 7 Zombies. Learn which major and minor augments to equip for maximum effectiveness in high rounds and Easter eggs.
Mule Kick is back in Black Ops 7 Zombies, and honestly? It’s better than ever. After sitting out the previous game, this classic perk returns with a vengeance thanks to the new augment system that transforms it from a simple “carry an extra weapon” perk into a genuine game-changer.
If you remember Mule Kick from earlier Call of Duty Zombies games, you might be skeptical about its usefulness. But trust me – with the right augment combination, Mule Kick becomes an essential part of your best Zombies loadout. Let’s break down exactly which augments you need and why they’ll make your high-round runs significantly easier.
Advertisement
What Is Mule Kick in Black Ops 7 Zombies?
For those new to the franchise, Mule Kick is a perk that allows you to carry a third weapon instead of the standard two. While this might sound straightforward, the tactical flexibility of having three weapons at your disposal – maybe a close-range destroyer, a long-range precision tool, and a wonder weapon – makes survival significantly easier.
The augment system takes this basic concept and supercharges it with additional benefits that extend far beyond just weapon carrying capacity. When properly configured, Mule Kick becomes a utility powerhouse that enhances your entire equipment setup.
Advertisement
Best Mule Kick Augments for Black Ops 7 Zombies
After extensive testing across different maps and playstyles, here’s the optimal augment setup for Mule Kick:
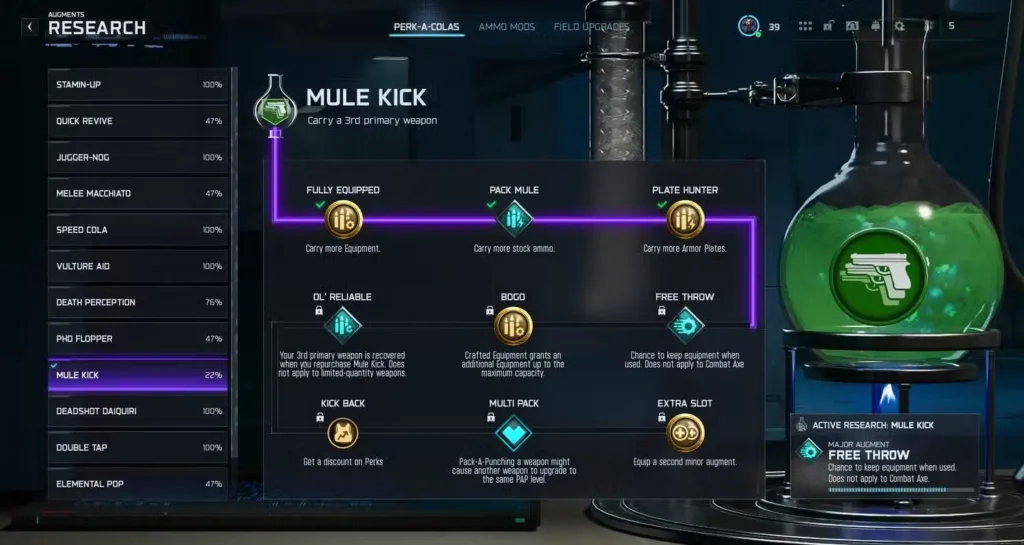
| Augment Name | Augment Type | Effect |
|---|---|---|
| Free Throw | Major | Chance to keep equipment when used (excluding Combat Axe) |
| Plate Hunter | Minor | Carry additional Armor Plates |
| Fully Equipped | Minor (Extra Slot) | Carry more Lethal and Tactical Equipment |
This combination transforms Mule Kick from a weapon perk into a complete survival toolkit. Let’s dive into why each augment earns its spot.
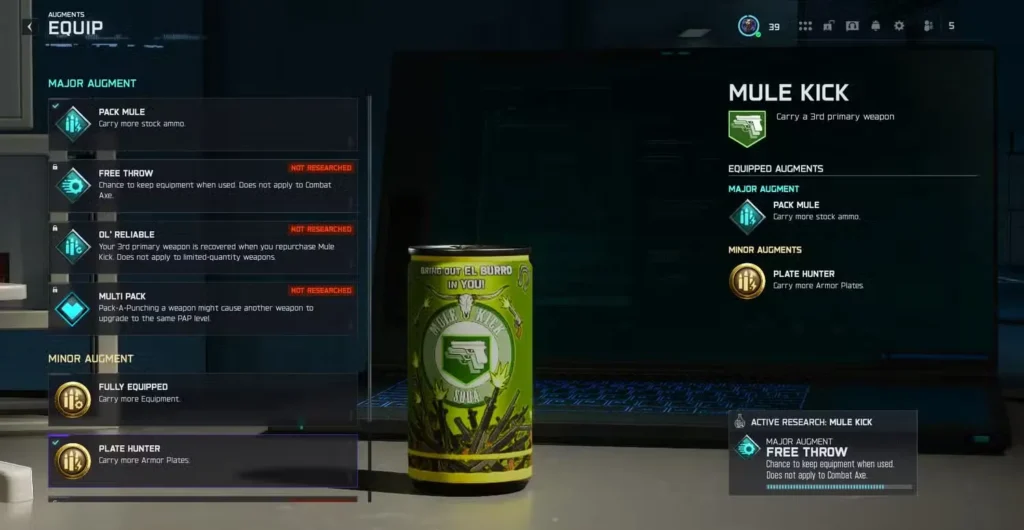
Best Major Augment for Mule Kick: Free Throw
Free Throw is the undisputed champion for your Mule Kick major augment slot, and it’s not even close.
Why Free Throw Is Essential
Free Throw gives you a chance to keep your equipment after using it. This means when you throw that Kazimir to clear a horde, use a Monkey Bomb to distract zombies, or pop a Stim to heal up – there’s a solid chance you’ll still have it in your inventory afterward.
The practical benefits are massive:
For Easter Egg Hunts: Equipment is crucial for complex Easter egg steps. Running out at a critical moment can ruin an entire attempt. Free Throw essentially gives you extra attempts without constantly returning to the Crafting Table.
For High Rounds: Once you’re past round 30, every resource counts. Free Throw can save you thousands of essence over the course of a match by reducing equipment consumption.
Advertisement
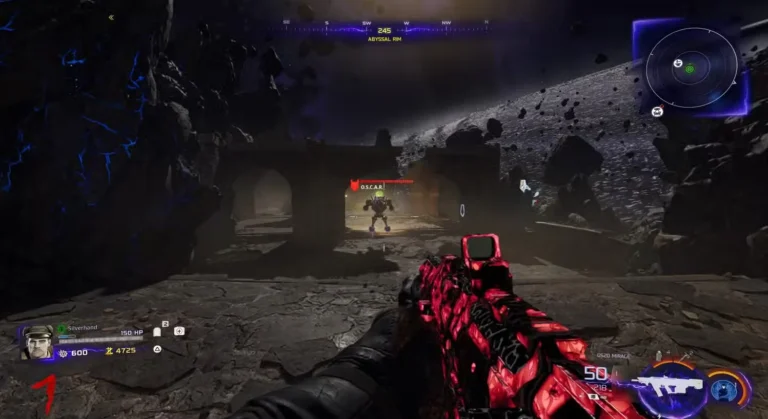
For Boss Fights: Whether you’re facing OSCAR or tackling the main Easter egg boss, having extra equipment chances is invaluable.
How Free Throw Works
The proc rate on Free Throw is generous enough that you’ll notice it frequently, but not so high that equipment becomes infinite. This creates a satisfying risk-reward dynamic where you need to be strategic about equipment usage while benefiting from occasional free returns.
Note: Free Throw does NOT work with the Combat Axe. This is the only equipment excluded from the augment’s effect.
Best First Minor Augment for Mule Kick: Plate Hunter
For your primary minor augment slot, Plate Hunter is the clear winner for most playstyles.
Why Plate Hunter Dominates
Plate Hunter allows you to carry 4 armor plates instead of the standard 3. Now, before you think “that’s just one extra plate,” let me explain why this matters so much in practice.
The High Round Problem: In higher rounds (40+), zombies deal devastating damage. A single hit can completely shred one armor plate. Having that fourth plate means you have an extra buffer between staying alive and going down.
The Action Economy: Running to armor plate stations or crafting plates takes time and pulls you away from training zombies or completing objectives. That extra plate means fewer risky runs to replenish your defenses.
The Panic Button: That fourth plate is your safety net. When things go wrong – and they will – having that extra layer of protection can save your run.
Advertisement
Plate Hunter vs. Other Minor Augments
Some players might consider other minor augments like:
- Trigger Happy: Faster weapon swap speed (situational at best)
- Quick Fingers: Faster reload with third weapon (only applies to one gun)
But Plate Hunter’s universal defensive benefit outweighs these niche advantages. Armor keeps you alive regardless of what weapons you’re using or what situation you’re in.
Best Second Minor Augment for Mule Kick: Fully Equipped
Once you hit 100% research on Mule Kick, you unlock an extra minor augment slot. This is where Fully Equipped comes into play and completes your ultimate Mule Kick setup.
The Power of Fully Equipped
Fully Equipped lets you carry one additional piece of both Tactical and Lethal equipment. This means:
- 2x Combat Axes instead of 1
- 2x Monkey Bombs instead of 1
- 2x Kazimirs instead of 1
- 2x any tactical equipment instead of 1
Why This Matters
The synergy between Fully Equipped and Free Throw is where the magic happens. You’re carrying more equipment, and you have a chance to keep it when used. This combination creates a resource abundance that fundamentally changes how you can play.
Example Scenario: You’re training zombies on Ashes of the Damned. With two Monkey Bombs and Free Throw active, you can:
- Throw first Monkey Bomb (might proc Free Throw)
- If not, you still have a second one
- By the time you need a third, you’ve had time to safely craft more
- The constant availability reduces stress and improves gameplay flow
This is especially crucial during Easter egg completion where equipment timing can make or break your attempt.
How to Unlock Mule Kick Augments
Before you can run these optimal augments, you need to unlock and research them. Here’s how the system works:
Research Requirements
- Use Mule Kick regularly in matches to gain research progress
- Complete challenges associated with the perk
- Reach 100% research to unlock the extra minor augment slot
- Unlock specific augments through the augment research system
Check out our complete perk augments guide for detailed research requirements and unlock strategies.
Alternative Mule Kick Augment Builds
While the Free Throw + Plate Hunter + Fully Equipped combo is optimal for most situations, here are alternative builds for specific playstyles:
Advertisement
Solo High Round Build
- Major: Free Throw (essential for resource management)
- Minor 1: Plate Hunter (survival is paramount solo)
- Minor 2: Fully Equipped (equipment versatility)
This is actually the same build – it’s that universally good.
Speed Run / Easter Egg Build
- Major: Free Throw (equipment efficiency for steps)
- Minor 1: Fully Equipped (more equipment for puzzle steps)
- Minor 2: Plate Hunter (defensive backup)
For Easter eggs, you might prioritize Fully Equipped as your first minor since equipment usage is often more critical than armor in the early-to-mid rounds when you’re completing steps.
Casual / Learning Build
- Major: Free Throw (forgiving resource management)
- Minor 1: Plate Hunter (extra forgiveness for mistakes)
- Minor 2: Trigger Happy (faster weapon swapping helps newer players)
Even for casual players, the main build is still superior, but Trigger Happy can help if you’re still learning weapon management.
Mule Kick Augment Synergies
Mule Kick’s augments work exceptionally well with other perk augments and gameplay systems:
Best Perk Combinations
Juggernog + Mule Kick: The health boost from Juggernog combined with extra armor plates creates incredible survivability.
Speed Cola + Mule Kick: Faster reload speeds across three weapons keeps your DPS high, especially useful for camo grinding.
Elemental Pop + Mule Kick: Random ammo mod effects across three weapons increases proc frequency and damage variety.
Best Equipment Synergies
With Fully Equipped and Free Throw, certain equipment becomes significantly more powerful:
Kazimir Grenades: These are expensive to craft but incredibly effective. Free Throw makes them economically viable for regular use.
Monkey Bombs: Essential for training zombies, having two with Free Throw proc chances means you rarely run out.
Advertisement
Combat Axes: While Free Throw doesn’t work on these, carrying two means more critical kills before needing to retrieve them.
Advanced Tips for Mule Kick Users
Weapon Loadout Strategy
With three weapon slots, here’s an optimal loadout structure:
- Slot 1: Primary high-DPS weapon (best weapons guide)
- Slot 2: Crowd control or ammo-efficient weapon
- Slot 3: Wonder weapon or specialist tool
This gives you flexibility for any situation while maximizing the perk’s value.
Resource Management
Even with Free Throw, don’t get reckless with equipment:
- Save high-value equipment (Kazimirs) for emergencies or objectives
- Use basic equipment (Decoys, Stims) more liberally
- Always keep one “panic button” equipment in reserve
- Craft equipment when you have downtime, not when you desperately need it
Map-Specific Considerations
Ashes of the Damned: The map’s tight corridors make Monkey Bombs incredibly valuable. Fully Equipped + Free Throw shines here.
Astra Malorum: With OSCAR roaming, having extra armor plates from Plate Hunter is crucial.
Liberty Falls: More open spaces mean equipment is less critical, but Free Throw still provides value during Easter egg steps.
Common Mistakes to Avoid
Mistake #1: Neglecting Research Don’t sleep on getting Mule Kick to 100% research. That extra minor augment slot is game-changing.
Mistake #2: Wrong Augment Priority Some players prioritize weapon-related augments over survival augments. Plate Hunter and Fully Equipped provide more consistent value than situational weapon buffs.
Mistake #3: Overreliance on Free Throw Free Throw is amazing, but it’s not guaranteed. Always maintain a crafting strategy as your baseline.
Advertisement
Mistake #4: Ignoring the Third Weapon If you’re running Mule Kick, actively use all three weapons. Don’t let that third slot become a paperweight.
Mistake #5: Poor Equipment Selection With Fully Equipped, your equipment choices matter more. Refer to our best lethal equipment and best tactical equipment guides.
Mule Kick in Different Game Modes
Survival Mode
Mule Kick excels in standard survival where high rounds are the goal. The augment setup remains the same, and the extended playtime means more opportunities for Free Throw to save resources.
Easter Egg Hunts
For Easter eggs, Mule Kick is borderline essential. Equipment-heavy steps become much more manageable with Fully Equipped and Free Throw reducing the pressure on resource management.
Cursed Mode
When running Cursed Mode with Relics, Mule Kick’s defensive benefits from Plate Hunter become even more critical as challenges intensify.
Frequently Asked Questions About Mule Kick Augments
What happens if you lose Mule Kick after downing?
When you go down in Black Ops 7 Zombies, you lose your third weapon and need to repurchase Mule Kick. However, your augment selections remain configured, so you don’t need to reselect them. This makes getting back into the fight faster once you’ve bought the perk again.
Is Mule Kick worth it without augments?
Base Mule Kick (just the third weapon slot) is decent but not essential. The augments – especially Free Throw and Fully Equipped – are what elevate it to top-tier status. We strongly recommend researching the perk and unlocking augments before making it a permanent part of your loadout.
Does Free Throw work with field upgrades?
No, Free Throw only works with Lethal and Tactical equipment. Field Upgrades operate on cooldown timers rather than consumable uses, so they’re not affected by this augment.
Can you carry different equipment types with Fully Equipped?
Fully Equipped gives you one extra slot for Lethal equipment and one extra slot for Tactical equipment. You still need to choose which specific equipment fills those slots – you can’t mix and match multiple types. For example, you could carry 2x Monkey Bombs (tactical) and 2x Kazimirs (lethal), but not 1x Monkey Bomb and 1x Decoy as your two tactical slots.
Final Thoughts on Mule Kick Augments
Mule Kick has evolved from a situational perk to a must-have thanks to the augment system in Black Ops 7 Zombies. The combination of Free Throw, Plate Hunter, and Fully Equipped creates a synergistic setup that benefits every aspect of your gameplay – from survival to resource management to objective completion.
Whether you’re grinding weapon camos, pushing for high rounds, or completing challenging Easter eggs, this augment setup will serve you well. The beauty of this build is its universal applicability – it works for solo players, teams, beginners, and veterans alike.
If you’re new to Black Ops 7 Zombies, check out our beginner tips and tricks guide to get started. For experienced players looking to optimize further, explore our guides on best field upgrade augments and best ammo mod augments.
Stay connected with the community through the official Call of Duty website, Black Ops 7 subreddit, and COD Community Discord for the latest strategies and updates.
Now get out there and make Mule Kick kick harder than ever before!
Related Guides:
- All Perk Locations in Astra Malorum
- All Perk Locations in Ashes of the Damned
- Best Perk Augments Complete Guide
- How to Unlock Augments and Research
- Best Slot 1 Perks for Multiplayer
Advertisement