The Necrofluid Gauntlet is Ashes of the Damned’s signature Wonder Weapon—and after unlocking it across multiple runs, I can confidently say it’s one of the most unique and powerful Wonder Weapons in Black Ops Zombies history. The overheal mechanic alone makes it game-changing for high-round survival, but the multi-step unlock process can be daunting for first-time attempts.
This guide will walk you through every step of acquiring the Necrofluid Gauntlet for free via the easter egg quest, including detailed strategies for the challenging scanning phase, symbol location tips, and comprehensive usage instructions once you’ve obtained it.
Necrofluid Gauntlet Overview
Weapon Type: Wonder Weapon (Gauntlet/Melee Hybrid)
Unlock Method: Multi-step easter egg quest
Alternative Method: Mystery Box (RNG-based, not recommended)
Pack-a-Punch: Yes (Tier 1-3 upgrades available)
Difficulty: Medium-Hard (requires map knowledge and combat skill)
Why You Want This Weapon
Unique capabilities:
- 🩸 Overheal mechanic – Exceed maximum health (350+ HP possible)
- ⚡ Spike recall system – Retrieve projectiles for piercing damage
- 👊 Melee alternative – Claw attack replaces weapon butt
- 🔥 High crowd control – Effective against hordes and Elite Enemies
- 📦 Pack-a-Punch compatible – Upgrades to Tier 3 for increased power
Strategic value:
The overheal mechanic fundamentally changes survival strategy. Instead of constantly managing health regeneration, you can maintain 350+ HP indefinitely by using the recall mechanic. This transforms high-round gameplay by giving you enormous survivability cushions.
For easter egg hunters and high-round specialists, the Necrofluid Gauntlet isn’t optional—it’s essential.
Prerequisites: What You Need Before Starting
1. Map Progression Requirements
Must complete before attempting:
- ✅ Unlock Server Room and activate Ol’ Tessie
- ✅ Progress to Vandorn Farm, Blackwater Lake, and Ashwood
- ✅ Complete all three Power Pump activations
- ✅ Install Pack-a-Punch on Ol’ Tessie (recommended but not mandatory)
If you haven’t completed standard map progression, follow our complete Ashes of the Damned walkthrough first.
2. Recommended Round Window
Optimal attempt: Round 12-20
Why this timing:
- Early enough to benefit from Wonder Weapon for remainder of match
- Late enough to have necessary equipment and resources
- Balanced zombie difficulty during challenging steps
- Sufficient Salvage accumulated for crafting requirements
Can you rush it earlier? Technically yes, but the Uber Klaus fight and scanning phase become significantly harder without proper preparation.
3. Required Resources & Loadout
Minimum preparation:
Weapons:
- Primary: Pack-a-Punch Tier 1+ weapon
- Ammo Mod: Napalm Burst (Uber Klaus weakness—500 Salvage)
- Backup weapon: High fire rate for scanning phase
Defensive Setup:
- Armor: Tier 2 minimum (Tier 3 strongly recommended)
- Perks: Jugger-Nog (mandatory), Quick Revive (solo), Speed Cola (helpful)
Resources:
- Salvage: 1,500+ (Stun Grenades, equipment, Ammo Mods)
- Essence: 10,000+ for purchases and emergency needs
Equipment:
- Tactical: Cymbal Monkeys or Decoys (scanning phase—mandatory)
- Field Upgrade: Frenzied Guard or Energy Mine (scanning support)
Critical: Don’t attempt the scanning phase without Cymbal Monkeys or Decoys. You will fail repeatedly.
Complete Step-by-Step Guide
Step 1: Activate All Three Power Pumps
Objective: Turn on power at Vandorn Farm, Blackwater Lake, and Ashwood
This step integrates with standard map progression, so you’ll likely complete it naturally.
Power Pump Activation Process (Same at All Locations)
1. Locate the Power Pump at each area
2. Shoot all orange bulbs infected on the pump within 30 seconds
3. Destroy the final bulb that appears on top of the pump
4. Find and flip the Power Switch inside nearby building
Location-Specific Details
Vandorn Farm (East from Spawn):
- Power Pump: North side of farm
- Power Switch: Upstairs in the Barn (1,750 Essence to open)
- Timing: Typically completed Round 3-7
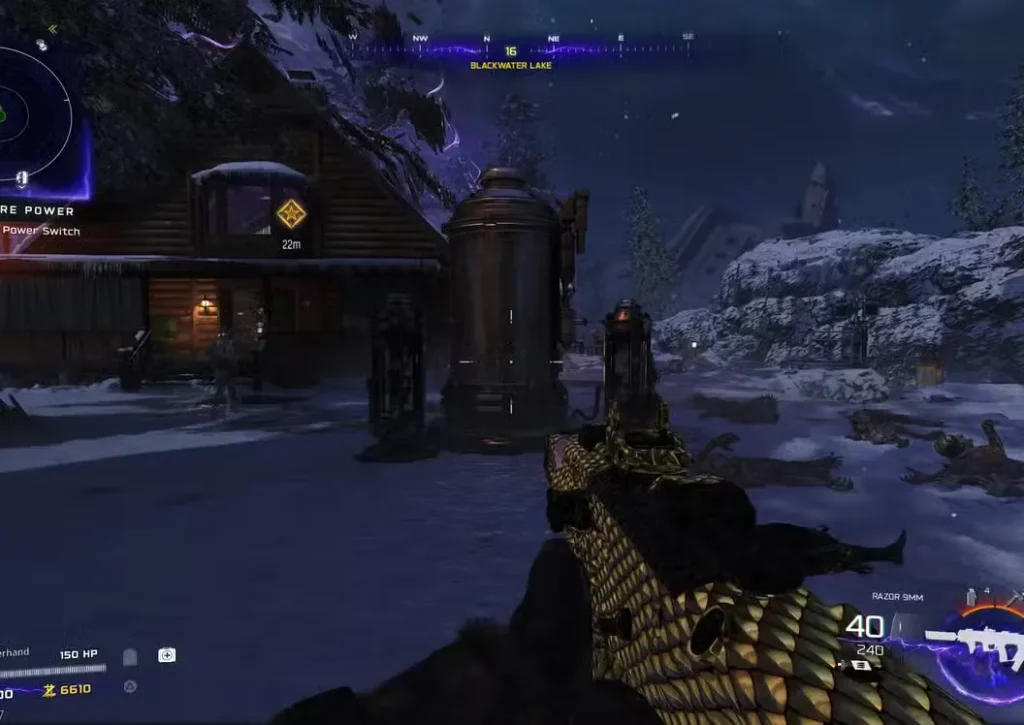
Blackwater Lake (West from Spawn):
- Power Pump: Near the lake shoreline
- Power Switch: Upstairs in the Cabin (1,750 Essence to open)
- Timing: Typically completed Round 12-14
Ashwood (South from Vandorn Farm):
- Power Pump: Ashwood Bridge area (accessed via east zipline)
- Power Switch: Near the bridge after zipline ascent
- Timing: Typically completed Round 7-10
- Bonus: Enables Pack-a-Punch installation on Ol’ Tessie
Pro tip: Complete Ashwood power activation first among the three, as it unlocks Pack-a-Punch which you’ll need for upgrading weapons before the Uber Klaus fight.
For detailed power activation strategies, see our complete walkthrough.
Step 2: Free Klaus from Ashwood Sheriff’s Office
Objective: Defeat Uber Klaus and activate Klaus as your companion
This step is identical to the Klaus unlock process detailed in our dedicated guide. Here’s the condensed version:
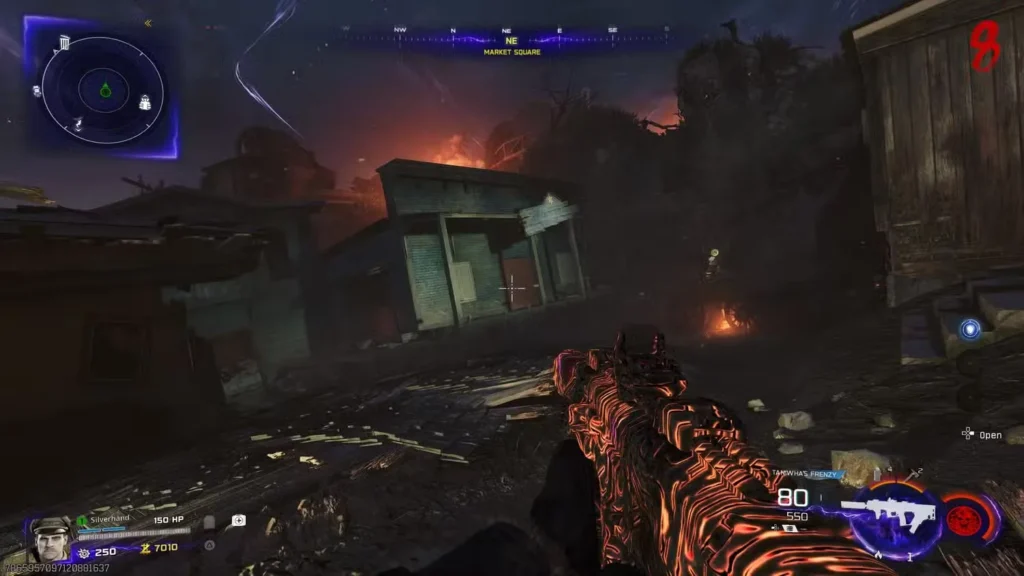
2A: Locate Klaus in Sheriff’s Office
Location: Ashwood Sheriff’s Office (upper Ashwood, Market Square area)
Navigation:
- Take east zipline up from lower Ashwood
- Navigate to Market Square
- Find building left of Vulture Aid Perk
- Purchase door (1,000-1,750 Essence)
- Confirm Klaus is imprisoned in cell
2B: Trigger and Defeat Uber Klaus Boss Fight
Boss location: Janus Towers Plaza (spawn area), west toward Blackwater Lake gate
Preparation checklist:
- ✅ Pack-a-Punch weapon equipped
- ✅ Napalm Burst Ammo Mod active
- ✅ Tier 2+ Armor equipped
- ✅ Jugger-Nog Perk purchased
- ✅ Field Upgrade ready for emergency
Combat strategy:
- Approach western gate area near Blackwater Lake entrance
- Uber Klaus emerges from crate automatically
- Target shoulder pylons (glowing weak spots)
- Activate Napalm Burst for bonus damage
- Maintain distance while shooting weak points
- Defeat Uber Klaus and collect Stabilizer Chip
For detailed Uber Klaus combat tactics, see our complete Klaus guide.
2C: Install Stabilizer Chip and Activate Klaus
Return to Ashwood Sheriff’s Office:
- Approach Klaus’s jail cell
- Interact with terminal on left side of cell
- Install Stabilizer Chip
- Read message: “Update Requires Restart”
Craft Stun Grenades:
- Go to any Crafting Table (Ashwood has one nearby)
- Craft 4-5 Stun Grenades (250 Salvage each)
Activate Klaus:
- Stand in front of jail cell bars
- Throw 3+ Stun Grenades INTO the cell (must land inside)
- Verify stars appear above Klaus’s head (successful stuns)
- Klaus powers up and exits cell
- Klaus joins you as active companion
Klaus commands:
- Up D-Pad: Position Klaus at targeted location
- L1/LB: Klaus stomp attack (AoE damage)
Why Klaus matters for Wonder Weapon quest:
Klaus is mandatory for Step 3’s scanning phase. He types on the computer to activate the scanner—you cannot proceed without him.
Step 3: Complete Scanner Progress to Get Aether Barrel
Objective: Use Klaus to activate scanner, then complete 60-second scanning challenge
This is the most challenging step of the Wonder Weapon quest.
3A: Navigate to Zarya Cosmodrome
Location: Southeast road from Ashwood
Navigation:
- Drive Ol’ Tessie from Ashwood southeast
- Pass through connecting areas
- Arrive at Zarya Cosmodrome entrance
- Park and proceed on foot
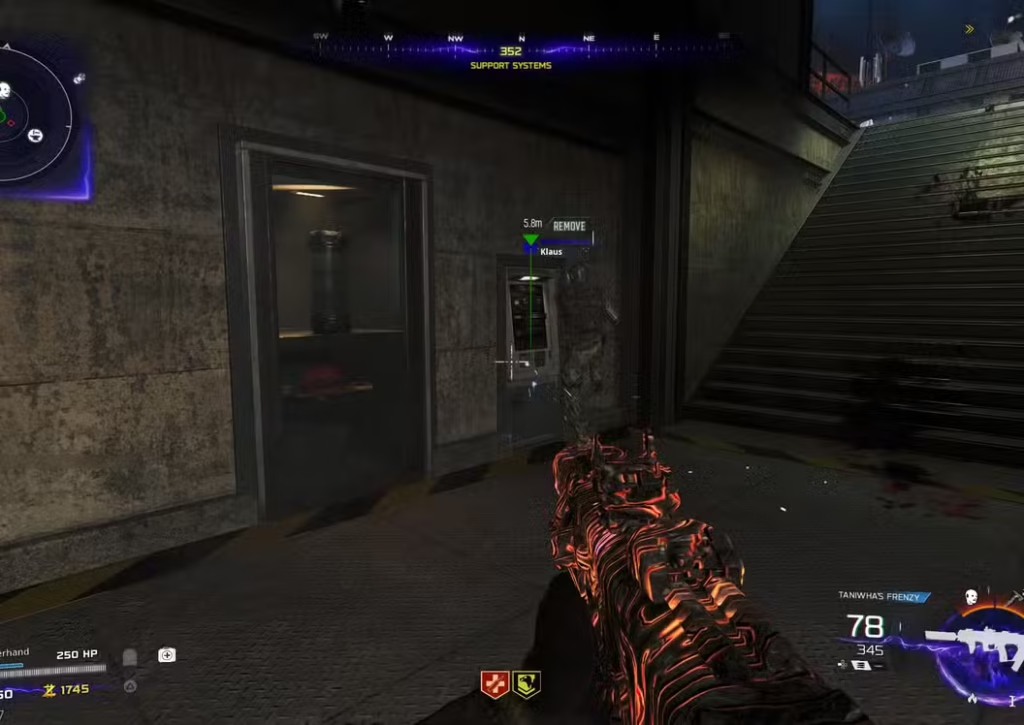
3B: Locate Support Systems Room
Room location: Downstairs from Wisp Tea Perk Machine
Navigation within Cosmodrome:
- Enter Zarya Cosmodrome main area
- Locate Wisp Tea Perk Machine
- Find stairs opposite the Perk Machine
- Descend stairs to Support Systems room
- Look for northwest wall with locked canister
3C: Activate Scanner with Klaus
At the locked canister:
- Look at computer screen beside the canister
- Command Klaus (Up D-Pad) to approach the computer
- Klaus begins typing on the keyboard
- Green button activates on the console
Important: Klaus must be with you. If he flew away to recharge, recall him with L1/LB before entering this room.
3D: Complete the 60-Second Scanning Challenge
Challenge mechanics:
- Objective: Stand on red circle and look at scanner for 60 seconds
- Success: Progress bar fills completely
- Failure: Must retry next round
Critical requirements:
✅ Stand on red circle in front of locked canister
✅ Look up at scanner camera (red light)
✅ Maintain eye contact with scanner (progress only counts when looking)
❌ Getting hit stops progress (damage interrupts scanning)
❌ Leaving circle stops progress
❌ Looking away stops progress
❌ Aether Shroud does NOT work (you remain visible to scanner)
The problem:
Zombies spawn infinitely during the 60 seconds. They will attack you constantly, interrupting your scan progress.
Strategy for Completing Scanning Phase
Method 1 – Cymbal Monkeys/Decoys (Recommended):
Equipment needed:
- 3-4 Cymbal Monkeys or Decoys
- Fast-firing weapon for cleanup
Execution:
- Activate green button to start scan
- Immediately throw Cymbal Monkey/Decoy away from red circle
- Step on red circle and look at scanner
- Zombies ignore you while distracted by equipment
- When first equipment expires, throw second one
- Continue cycling equipment until 60 seconds complete
Why this works:
Zombies prioritize Cymbal Monkeys and Decoys over you, giving you uninterrupted scanning time. You can stand safely and complete the progress bar.
Method 2 – Frenzied Guard Field Upgrade:
Requirements:
- Frenzied Guard Field Upgrade equipped
- Tier 3 Armor
- Fast-firing weapon
Execution:
- Activate Frenzied Guard before starting scan
- Start scanning while Frenzied Guard is active
- Armor absorbs all damage (health protected)
- Kill zombies to restore armor during scan
- Complete before Frenzied Guard expires
Risk: If Frenzied Guard ends before 60 seconds, you’re vulnerable. Backup Cymbal Monkeys recommended.
Method 3 – Energy Mine Field Upgrade:
Requirements:
- Energy Mine Field Upgrade
- Placement strategy
Execution:
- Place Energy Mine near red circle (not on it)
- Start scanning
- Energy Mine kills zombies as they approach
- May need 2-3 mines depending on zombie density
Risk: Energy Mine might not kill fast enough in later rounds. Best for Round 15-20 attempts.
Method 4 – Klaus + Squad Support:
Requirements:
- Klaus active and positioned well
- Teammates managing zombies
Execution:
- Position Klaus near red circle
- Teammates train zombies away from scanning area
- Klaus provides covering fire
- Complete scan with reduced pressure
Best for: Squad play where coordination is possible.
What Happens on Success
Upon completing 60-second scan:
- Locked canister opens
- Aether Barrel appears inside
- Pick up Aether Barrel from canister
Visual confirmation: The Aether Barrel is a glowing, cylindrical device clearly visible inside the now-open canister.
Troubleshooting Scanning Phase
“My progress keeps resetting”
You’re getting hit by zombies. Use Cymbal Monkeys/Decoys to distract them.
“I’m standing on circle but no progress”
You must look at the red scanner light above. Progress only counts when actively looking at it.
“Aether Shroud isn’t helping”
Aether Shroud makes you invisible to zombies but NOT to the scanner. The scanning camera still needs to see you for progress.
“I failed—what now?”
Progress to the next round and try again. The green button will be available for another attempt.
Step 4: Deliver Aether Barrel to Three Power Pumps
Objective: Drive Aether Barrel to Ashwood, Blackwater Lake, and Vandorn Farm Power Pumps
With Aether Barrel in hand, it’s time for a timed delivery sequence.

4A: First Stop – Ashwood Bridge Power Pump
Route:
- Pick up Aether Barrel from Support Systems canister
- Drive Ol’ Tessie northeast back to Ashwood
- Navigate to Ashwood Bridge (where you activated power earlier)
- Find empty slot in center of Power Pump structure
- Place Aether Barrel in the slot
What happens:
The Power Pump begins processing the Aether Barrel with a “Refined Energy Extraction” progress bar.
Critical: As soon as the bar fills, immediately pick the Aether Barrel back up. Don’t wait around—you need to move quickly.
4B: Second Stop – Blackwater Lake Power Pump
Route:
- Pick up Aether Barrel from Ashwood
- Drive Ol’ Tessie west toward Blackwater Lake
- Navigate to Blackwater Lake Power Pump
- Place Aether Barrel in empty slot
- Wait for Refined Energy Extraction to complete
Timing considerations:
The extraction process takes approximately 15-20 seconds per location. Zombies will spawn during this—manage them with Klaus or by training away from the pump.
4C: Third Stop – Vandorn Farm Power Pump
Route:
- Pick up Aether Barrel from Blackwater Lake
- Drive Ol’ Tessie through Janus Towers Plaza
- Head east to Vandorn Farm
- Navigate to Vandorn Farm Power Pump (north side of farm)
- Place Aether Barrel in empty slot
- Wait for final Refined Energy Extraction
Upon completion: The Aether Barrel is now fully charged with refined energy from all three Power Pumps.
4D: Final Delivery – Kortifex Box in Barn Cellar
Location: Vandorn Farm Barn, Cellar (downstairs)
Navigation:
- Pick up fully charged Aether Barrel
- Enter Vandorn Farm Barn (same building with Power Switch upstairs)
- Descend to Cellar (downstairs section)
- Locate mysterious cube/box (Kortifex Box)
- Place Aether Barrel near the box
Visual cue: The Kortifex Box is a distinctive cube-shaped artifact with glowing elements. Impossible to miss in the Cellar.
Step 5: Find Farm Symbols and Enter Them into Kortifex Box
Objective: Discover three red symbols via Jump Pad, then configure Kortifex Box
This step combines aerial observation with puzzle-solving.
5A: Activate Janus Towers Plaza Jump Pad
Jump Pad location: Janus Towers Plaza (spawn area)
What to look for:
A vertical Jump Pad that launches you into the air toward Vandorn Farm. This becomes available after power activation and progression.
How to use:
- Navigate to Janus Towers Plaza
- Locate Jump Pad (glowing launch platform)
- Step onto Jump Pad to activate
- Launch into air toward Vandorn Farm
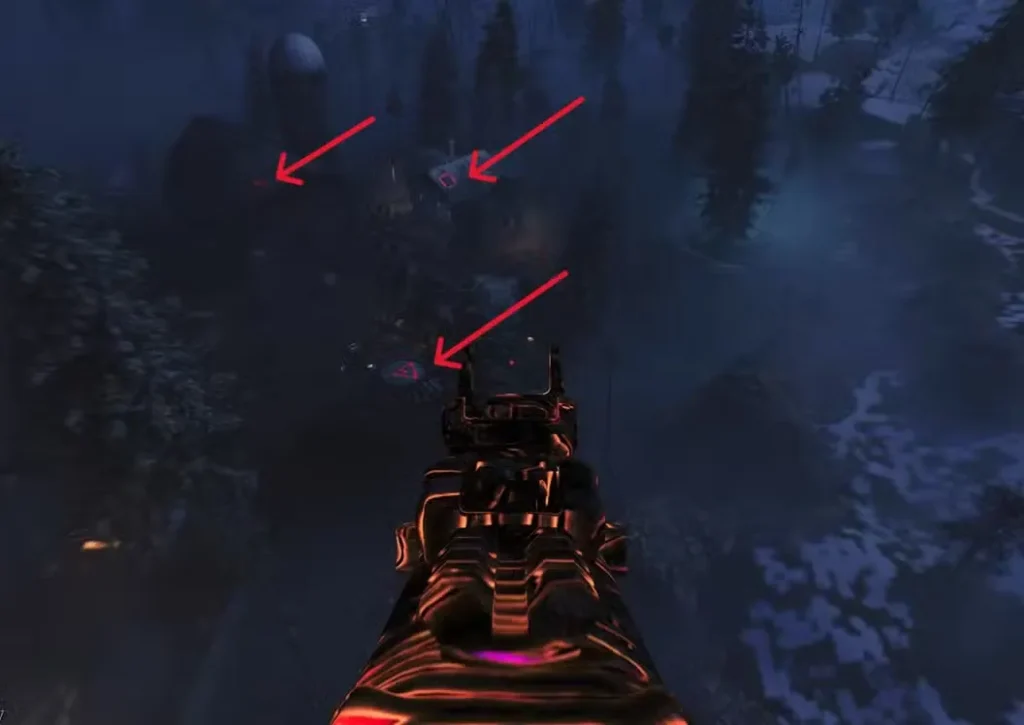
5B: Observe Red Symbols During Flight
Critical moment: While airborne from Jump Pad to Vandorn Farm, look at the farm buildings below.
Three symbol locations:
- Barn roof – Red symbol visible on rooftop
- Silo roof – Red symbol visible on silo structure
- House roof – Red symbol visible on house rooftop
What to do:
- Memorize the symbols as you fly over
- Note their shapes (symbols vary per game—randomized)
- Take screenshot if needed (helpful for complex symbols)
Common symbols:
Variations of geometric shapes, runes, or arcane markings. Each game has three unique symbols randomly selected.
Pro tip: If you miss the symbols during your first Jump Pad use, simply use it again. The symbols remain static throughout your match—they won’t change.
5C: Configure Kortifex Box with Correct Symbols
Return to Barn Cellar at Vandorn Farm:
Box mechanics:
- The Kortifex Box has four interactive sides
- Each side cycles through different symbol options
- You must match your three observed symbols to three sides
- The fourth side (back) has an eye symbol for activation
Configuration process:
- Approach Kortifex Box in Cellar
- Interact with first side to cycle through symbols
- Stop on your first observed symbol (Barn roof symbol, for example)
- Move to second side and repeat
- Stop on your second observed symbol (Silo roof symbol)
- Move to third side and repeat
- Stop on your third observed symbol (House roof symbol)
Visual confirmation:
When a symbol matches one you observed, it should look identical. Take your time cycling through options—rushing leads to mistakes.
5D: Activate the Eye Symbol
Final step:
- Verify all three sides display correct symbols
- Navigate to back side of box (fourth side)
- Look for eye symbol on this side
- Interact with eye to unlock box
What happens:
- Box opens dramatically
- Necrofluid Gauntlet appears inside
- Green glow emanates from the box
Victory moment: You can now pick up the Necrofluid Gauntlet!
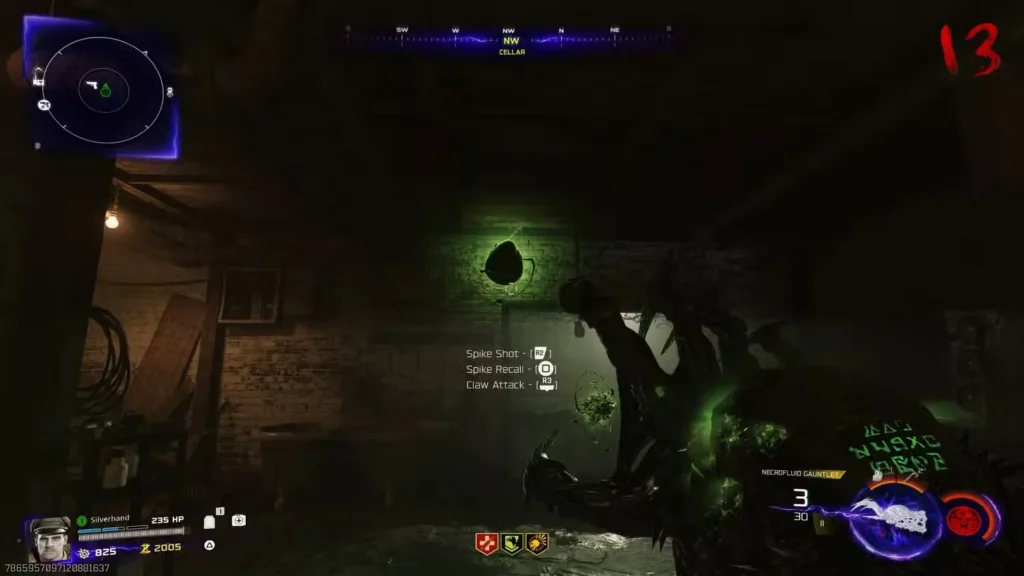
Step 6: Acquire Necrofluid Gauntlet and Destroy Green Orbs
Objective: Pick up Wonder Weapon and complete final combat phase
6A: Pick Up Necrofluid Gauntlet
At the opened Kortifex Box:
- Approach the Necrofluid Gauntlet
- Pick it up (automatic when approached)
- Necrofluid Gauntlet equips as active weapon
Immediate changes:
- Circle around box glows green
- Purple-eyed zombies spawn (special variants)
- Green orbs appear throughout Cellar
6B: Destroy All Green Orbs
Objective: Use Necrofluid Gauntlet to eliminate glowing green orbs in Cellar
Combat mechanics:
- Shoot green orbs with Spike Shot (R2/RT/Left-Click)
- Spikes embed in orbs temporarily
- Recall spikes with reload button (Square/X/R)
- Orbs destroyed when spikes recalled through them
Orb locations:
Scattered throughout the Cellar—walls, corners, ceiling areas. Methodically check all angles.
Fighting purple-eyed zombies:
These special zombies are tougher than normal variants. Use your Necrofluid Gauntlet’s attacks:
- Spike Shot for ranged damage
- Spike Recall for piercing multi-kills
- Claw Attack for melee (R3/V)
Completion indicator:
Once all green orbs are destroyed, the Wonder Weapon quest is complete. The Necrofluid Gauntlet is permanently yours for the remainder of the match.
How to Use the Necrofluid Gauntlet
Understanding the weapon’s mechanics is crucial for maximizing its potential.
Attack Types Breakdown
1. Spike Shot (R2/RT/Left-Click) – Primary Fire
Function: Fires spike projectiles at enemies
Mechanics:
- Spikes embed in targets on impact
- Deals immediate damage
- Multiple spikes can be embedded simultaneously
- Spikes remain until recalled
Best use: Initial engagement damage, setting up for recall combos
2. Spike Recall (Square/X/R) – Reload Button
Function: Recalls all embedded spikes back to you
Mechanics:
- Spikes return through their trajectory path
- Pierces through all zombies along recall path
- Each pierced zombie takes damage
- YOU GET OVERHEALED for each zombie damaged
Overheal explained:
Standard max health: ~250 HP with Jugger-Nog
Necrofluid overheal cap: 350+ HP possible
Every zombie damaged by recalled spikes grants health, exceeding your normal maximum. This creates a massive survivability cushion.
Best use:
- Shoot spikes into horde center
- Let zombies group around embedded spikes
- Recall spikes through entire group
- Gain massive overheal + eliminate horde
Strategic application:
This is the Necrofluid Gauntlet’s defining feature. Proper spike recall usage makes you nearly unkillable in high rounds.
3. Claw Attack (R3/V) – Melee Button
Function: Replaces weapon butt with claw swipe
Mechanics:
- Slow swing speed
- Decent damage per hit
- Close-range only
Best use: Emergency melee when out of spike ammo or in extreme close quarters
Limitation: Slow attack speed makes this your last resort option.
Combat Strategy Guide
Optimal engagement sequence:
Step 1 – Initial Spike Deployment:
- Fire 3-5 spikes into approaching horde
- Aim for center mass of zombie group
- Don’t worry about precision—volume matters
Step 2 – Positioning:
- Create distance between you and spiked zombies
- Let additional zombies group around embedded spikes
- More zombies = more overheal on recall
Step 3 – Spike Recall:
- Press reload to recall all spikes
- Spikes pierce through returning path
- Gain overheal for each damaged zombie
- Repeat process
Advanced technique – Spike Bouncing:
- Shoot spikes at angles (walls, floors)
- Spikes embed in surfaces
- Recall pulls spikes through unexpected trajectories
- Catches zombies off-guard from multiple angles
Pack-a-Punch Upgrades
Upgrading capability: Tier 1 → Tier 2 → Tier 3
How to upgrade:
- Drive Ol’ Tessie to access Pack-a-Punch (installed on truck bed)
- Interact with Pack-a-Punch machine
- Pay Essence for upgrade tier
- Necrofluid Gauntlet receives stat boosts
Upgrade benefits:
- Increased spike damage
- Improved overheal effectiveness
- Enhanced claw attack damage
- Better crowd control potential
Recommendation: Upgrade to Tier 2 minimum for high-round viability (Round 30+). Tier 3 for Round 40+ attempts.
Strategic Applications
High-Round Survival (Round 30+)
Why Necrofluid Gauntlet dominates:
- Overheal negates most damage taken
- Infinite ammunition (spike recall system)
- Effective crowd control at all ranges
- No reload downtime in traditional sense
Best practices:
- Maintain 350 HP constantly through recall usage
- Combine with Jugger-Nog for maximum survivability
- Use training spots to group zombies before recall
- Pair with Klaus for additional fire support
Easter Egg Hunts
Necrofluid advantages:
- Overheal provides safety during objective completion
- Crowd control allows focus on puzzles
- Effective against boss encounters
- Never runs out of ammunition
Boss encounters:
The Zursa bears and other Elite Enemies take significant damage from recalled spikes. Embed multiple spikes, position strategically, and recall for burst damage.
Solo vs. Squad Play
Solo (Maximum Value):
The overheal mechanic compensates for lack of revive support. You can tank hits that would normally down you, making aggressive plays safer.
Squad (Still Excellent):
- Share crowd control duties
- One player with Necrofluid frees others for different roles
- Overheal prevents unnecessary downs that waste time
Team composition: Only one player needs Necrofluid Gauntlet. Others can run best multiplayer weapons or Scorestreaks for balanced firepower.
Common Mistakes to Avoid
❌ Skipping Cymbal Monkeys for scanning phase
You will fail repeatedly. Bring distraction equipment.
❌ Not memorizing symbols correctly
Take your time during Jump Pad flight. Screenshot if needed.
❌ Forgetting to recall spikes
The overheal is the weapon’s superpower—use it constantly.
❌ Attempting without proper preparation
Uber Klaus fight and scanning phase punish undergeared players.
❌ Ignoring Pack-a-Punch upgrades
Base Necrofluid is good; Pack-a-Punched is amazing.
❌ Using claw attack as primary
It’s slow and weak compared to spike mechanics.
Alternative Method: Mystery Box
RNG-based unlock:
The Necrofluid Gauntlet can appear in the Mystery Box, but this is entirely luck-dependent.
Why this method is not recommended:
- Costs 950 Essence per spin
- No guaranteed acquisition
- Could waste 10,000+ Essence trying
- Time-intensive with no promise of success
When to try Mystery Box:
- You’ve already completed quest once and want faster access in future matches
- You’re feeling lucky and have excess Essence
- You’re struggling with scanning phase and want alternative path
Reality: The quest method guarantees the Wonder Weapon. Mystery Box is gambling.
Frequently Asked Questions
Q: Can multiple players get Necrofluid Gauntlet?
A: Yes, but only via Mystery Box RNG after the first player completes the quest. Quest method awards one gauntlet per match.
Q: What if I go down with Necrofluid Gauntlet?
A: Solo: You lose it and must retrieve from your death location. Squad: Drops at death spot for anyone to pick up.
Q: Does overheal decay over time?
A: No. Your overheal remains until you take damage. You can maintain 350+ HP indefinitely.
Q: Can I trade Necrofluid for different weapon?
A: Yes, but you’d lose the Wonder Weapon. Not recommended unless getting from Mystery Box again.
Q: Is Necrofluid required for main Easter Egg?
A: Not strictly required but highly recommended for boss encounters and survival.
Q: How many spikes can I have embedded simultaneously?
A: Effectively unlimited during normal gameplay. The game doesn’t appear to cap embedded spike count.
Quick Reference: Necrofluid Gauntlet Quest Checklist
Step 1 – Power Activation:
- ☐ Activate Vandorn Farm Power Pump
- ☐ Activate Blackwater Lake Power Pump
- ☐ Activate Ashwood Power Pump
Step 2 – Klaus Quest:
- ☐ Locate Klaus in Ashwood Sheriff’s Office
- ☐ Defeat Uber Klaus at spawn (collect Stabilizer Chip)
- ☐ Install Stabilizer Chip in jail cell terminal
- ☐ Craft 4-5 Stun Grenades (250 Salvage each)
- ☐ Throw Stun Grenades into Klaus’s cell (3+ successful)
- ☐ Klaus activates and joins as companion
Step 3 – Scanner Challenge:
- ☐ Navigate to Zarya Cosmodrome
- ☐ Enter Support Systems room (downstairs from Wisp Tea)
- ☐ Command Klaus to activate computer
- ☐ Craft Cymbal Monkeys/Decoys (essential)
- ☐ Complete 60-second scanning challenge
- ☐ Collect Aether Barrel from canister
Step 4 – Aether Barrel Delivery:
- ☐ Place Aether Barrel at Ashwood Power Pump
- ☐ Wait for Refined Energy Extraction, pick up
- ☐ Place Aether Barrel at Blackwater Lake Power Pump
- ☐ Wait for extraction, pick up
- ☐ Place Aether Barrel at Vandorn Farm Power Pump
- ☐ Wait for extraction, pick up
- ☐ Deliver Aether Barrel to Kortifex Box in Barn Cellar
Step 5 – Symbol Puzzle:
- ☐ Use Jump Pad at Janus Towers Plaza
- ☐ Observe three red symbols on farm buildings during flight
- ☐ Memorize symbols (Barn roof, Silo roof, House roof)
- ☐ Return to Kortifex Box in Barn Cellar
- ☐ Configure three sides of box to match observed symbols
- ☐ Interact with eye symbol on back of box
Step 6 – Final Combat:
- ☐ Pick up Necrofluid Gauntlet from opened box
- ☐ Destroy all green orbs in Cellar using spike recall
- ☐ Defeat purple-eyed zombie variants
- ☐ Quest complete—Wonder Weapon acquired!
Post-Acquisition:
- ☐ Pack-a-Punch to Tier 2+ for maximum effectiveness
- ☐ Practice spike recall for overheal mastery
Expand Your Zombies Knowledge
Ashes of the Damned guides:
- Complete Map Walkthrough
- How to Free Klaus
- Pack-a-Punch Setup Guide
- All Perk Locations
- Best Training Spots Ranked
Combat & optimization:
- How to Kill Zursa Bears
- Best Field Upgrades Tier List
- Best Scorestreaks Tier List
- Best Lethal Equipment
- Best Tactical Equipment
Resource farming:
Easter eggs & secrets:
General Zombies:
Multiplayer loadouts:
Join the Black Ops 7 community on Reddit or Discord to share your Necrofluid Gauntlet strategies and high-round achievements.
For official updates and Wonder Weapon guides, visit the Call of Duty: Black Ops 7 website or check the Wikipedia page.
Advanced Tips for Mastering Necrofluid Gauntlet
Optimal Spike Placement Strategy
Geometric positioning:
Don’t just shoot spikes randomly. Place them strategically:
Wall bounces:
Shoot spikes into walls at angles. When recalled, they’ll pull through zombies from unexpected directions, maximizing pierce damage and overheal.
Floor embeddings:
Aim low to embed spikes in the ground. Zombies naturally converge over these points, creating perfect recall setups.
Elevation advantages:
From elevated positions, embed spikes in zombies below. Recall pulls spikes upward through entire groups.
Overheal Management
Maintaining maximum HP:
- Never let overheal drop below 300 HP
- Recall spikes every 10-15 seconds as maintenance
- Even small zombie groups restore significant health
Strategic overhealing before risky plays:
- Before reviving downed teammates (squad)
- Before completing objectives under pressure
- Before engaging Elite Enemies or bosses
Overheal as armor:
Think of your overheal as a second health bar. With 350 HP total (250 base + 100 overheal), you can tank 2-3 extra hits that would normally down you.
Combining with Other Tools
Necrofluid + Klaus synergy:
- Klaus handles crowd control while you focus spike placement
- Position Klaus near spike embed locations for overlapping damage
- Klaus never kills final zombie—perfect for overheal farming between rounds
Necrofluid + Field Upgrades:
- Aether Shroud: Embed spikes while invisible, recall after exiting stealth
- Frenzied Guard: Tank damage while embedding multiple spikes aggressively
- Energy Mine: Distract zombies while setting up spike positions
Necrofluid + Perks:
- PhD Flopper: Eliminates self-damage risk from explosive combos
- Speed Cola: Faster spike recall animation (minimal but noticeable)
- Deadshot Daiquiri: More accurate spike placement at distance
Training Route Optimization
Best training spots with Necrofluid:
Vandorn Farm (Best Overall):
- Open layout allows spike spread across wide areas
- Easy to group zombies before recall
- Multiple elevation points for creative spike placement
Exit 115 (Runner-Up):
- Long sightlines for distance spike embedding
- Wide avenues for training large hordes
- Recall through stretched zombie trains maximizes pierce damage
Ashwood Market Square (Close-Quarters):
- Tight spaces force zombie grouping naturally
- Short recall distances ensure rapid overheal cycles
- Good for practicing spike bouncing off walls
For detailed training strategies, see our best training spots guide.
Boss Fight Applications
Zursa Bears (Elite Enemies):
- Embed 5-6 spikes into Zursa’s body
- Create distance while Zursa pursues
- Recall spikes through Zursa for burst damage
- Overheal yourself while damaging boss simultaneously
Multiple Elite Enemy encounters:
- Embed spikes in multiple targets
- Position between them
- Single recall damages all embedded targets
- Massive overheal from multi-target recall
Ammunition Conservation (Regular Weapons)
Why Necrofluid enables ammo conservation:
- Use Necrofluid for crowd control (infinite ammo via recall)
- Save Pack-a-Punched weapon ammo for Elite Enemies
- Never need to hit Mystery Box for ammo refills
- Wall buy ammo spending reduced dramatically
Strategic weapon swapping:
- Primary weapon: Necrofluid Gauntlet (crowds, general use)
- Secondary weapon: Pack-a-Punch Tier 3 (bosses, emergencies)
- Swap based on threat level for resource optimization
Speedrun Strategy: Fastest Wonder Weapon Acquisition
For experienced players attempting rapid unlocks:
Optimal route (Round 12-14 completion possible):
Rounds 1-3: Rush Server Room, activate Ol’ Tessie, drive to Vandorn Farm power
Rounds 4-6: Farm Essence, reach Ashwood, activate power, install Pack-a-Punch
Rounds 7-9: Pack-a-Punch weapon, grab Napalm Burst, purchase Jugger-Nog
Round 10: Defeat Uber Klaus, activate Klaus
Round 11: Complete scanner challenge (with Cymbal Monkeys ready)
Round 12: Aether Barrel delivery circuit
Round 13: Symbol observation and Kortifex Box puzzle
Round 14: Final combat phase, Wonder Weapon acquired
Key optimization:
- Skip non-essential Perk purchases initially
- Minimize door purchases (only critical path)
- Craft Cymbal Monkeys during Round 10 downtime
- Use Klaus immediately after activation for scanner step
Risk vs. reward:
Early acquisition means extended Wonder Weapon usage throughout match, but requires precision execution with minimal safety nets.
Necrofluid Gauntlet vs. Other Wonder Weapons
For players familiar with other Black Ops Wonder Weapons:
vs. Ray Gun (Classic):
- Necrofluid: Better crowd control, overheal utility, no self-damage risk
- Ray Gun: Higher single-target burst damage, simpler mechanics
vs. Wunderwaffe (Lightning Series):
- Necrofluid: Safer to use (no chain damage to self), infinite ammo via recall
- Wunderwaffe: Chain lightning hits more targets simultaneously
vs. Thundergun (Black Ops 1):
- Necrofluid: More versatile combat applications, overheal provides survivability
- Thundergun: Better instant crowd clearing, limited ammo
Necrofluid’s unique advantages:
- Overheal mechanic doesn’t exist in other Wonder Weapons
- Infinite ammunition through recall system
- Multi-dimensional combat (spike placement strategy adds skill ceiling)
- No self-damage risk unlike explosive Wonder Weapons
Final Thoughts
The Necrofluid Gauntlet represents the pinnacle of Ashes of the Damned’s arsenal. The multi-step unlock quest is challenging but entirely manageable with proper preparation—especially the scanner phase, which becomes trivial with Cymbal Monkeys or Decoys.
Once acquired, the overheal mechanic fundamentally changes how you approach high-round survival. Instead of playing defensively and avoiding damage, you can play aggressively while maintaining 350+ HP through strategic spike recall. This transforms Zombies from “stay alive at all costs” to “manage overheal while maximizing eliminations.”
The learning curve is real—new players will struggle with spike placement optimization and recall timing. But master these mechanics, and you’ll understand why the Necrofluid Gauntlet is considered one of the best Wonder Weapons in Black Ops Zombies history.
Key takeaways:
- Don’t skip Cymbal Monkeys for scanner phase
- Memorize symbols carefully during Jump Pad flight
- Practice spike recall constantly—overheal is everything
- Pack-a-Punch to Tier 2+ for high-round viability
- Combine with Klaus for maximum effectiveness
Load into Ashes of the Damned, follow this guide step-by-step, and claim your Necrofluid Gauntlet. Your high-round survival odds just increased exponentially.