If you’ve jumped into Dragon Quest 1 HD-2D Remake expecting to spam healing potions mid-battle like most modern RPGs, you’re in for a surprise. The game uses a classic assignment system that can trip up newcomers—I know it confused me at first! Here’s everything you need to know about accessing and using items when you’re face-to-face with dangerous monsters.
The Core Problem: Why Can’t I Use My Items in Battle?
Here’s the thing that catches most players off-guard: you cannot directly access items stored in your bags during combat. That Medicinal Herb you just bought? It’s useless in battle unless you’ve specifically assigned it to your Hero beforehand.
This might seem frustrating at first, but it’s actually a strategic design choice that forces you to plan ahead. Think of it as the difference between having items in your backpack versus having them in your quick-access belt pouches. Only what’s readily available can be used when a Slime is attacking your face.
Step-by-Step: Assigning Items for Combat Use
Let me walk you through the exact process of making items accessible during battles. It’s simpler than it sounds once you understand the system.
The Assignment Process:
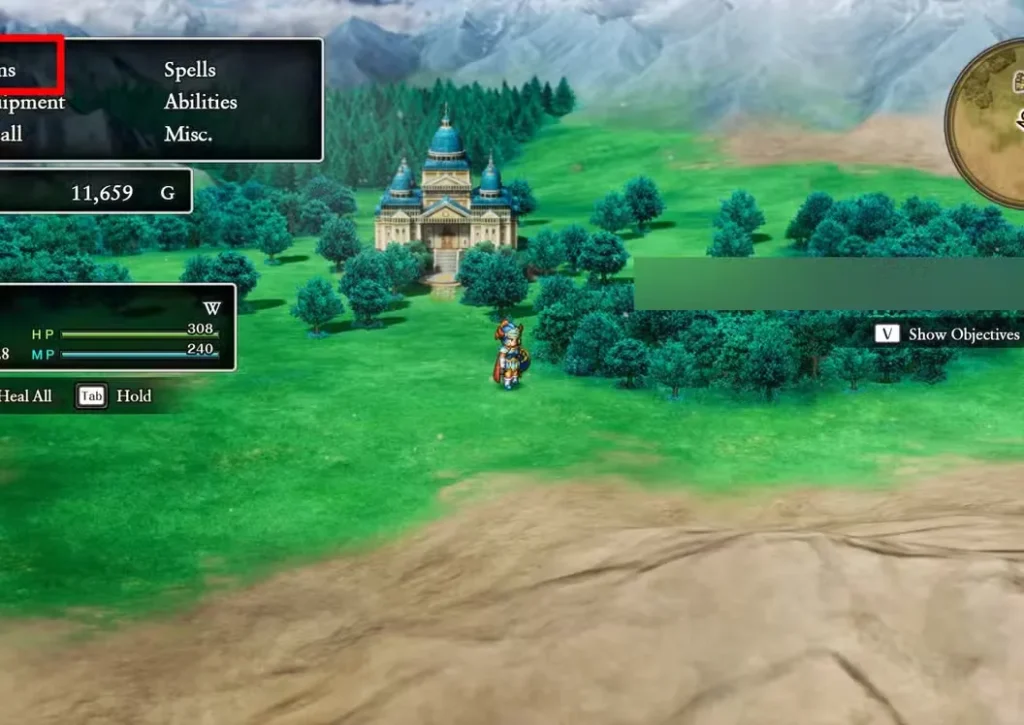
1. Access Your Item Bag:
- Open the main menu (usually Triangle/Y button)
- Select “Items” from the menu options
- Navigate to the “Item Bag” tab
2. Select Your Desired Item:
- Scroll through your bag inventory
- Highlight the item you want available in combat
- Common choices include Medicinal Herbs, Chimaera Wings, or Antidotal Herbs
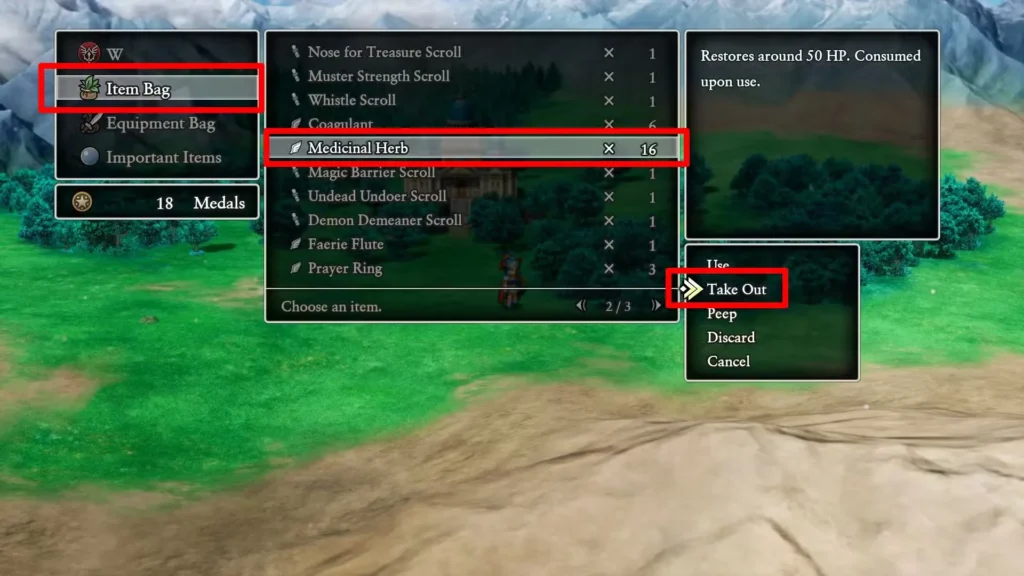
3. Take It Out:
- Press the action button on your selected item
- Choose “Take Out” from the options
- Select how many you want to assign (if you have multiple)
- Confirm your selection
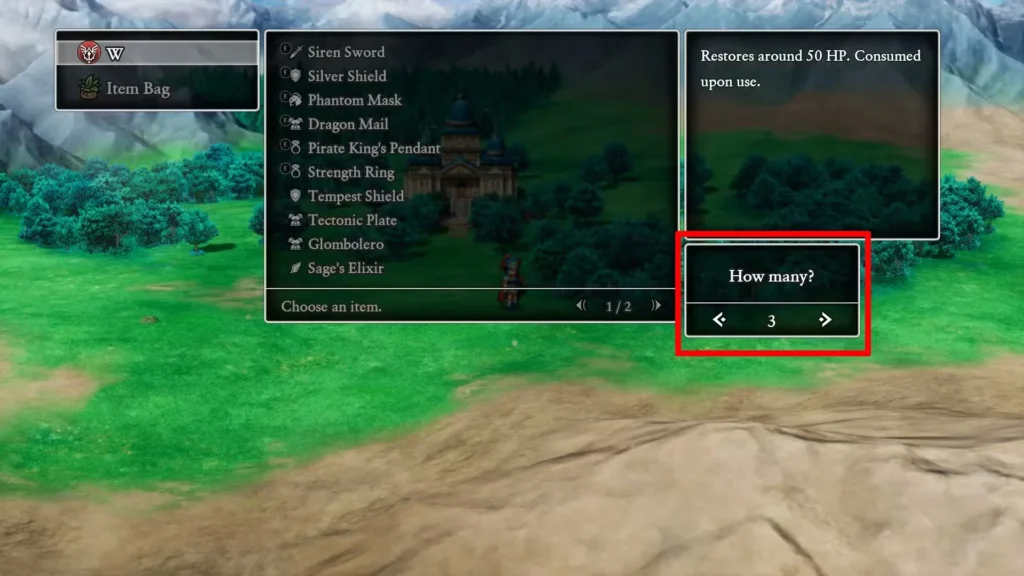
Boom! That item is now assigned to your Hero and ready for battle use.
The 20-Item Limit: What You Need to Know
Here’s a critical limitation that will affect your strategy: your Hero can only carry 20 items maximum at any given time—and this includes equipped gear.
Breaking Down the Math:
A fully-equipped Hero typically wears:
- 1 Weapon
- 1 Shield
- 1 Armor piece
- 1 Helmet
- 1 Accessory
- 1 Additional equipment slot
That’s 6 slots consumed by equipment alone, leaving you with only 14 remaining slots for consumable items and spare gear.
Smart Inventory Management Tips:
Prioritize these essentials for combat:
- Medicinal Herbs (your primary healing source)
- Antidotal Herbs (poison is deadly in this game)
- Magic Water (MP restoration is crucial for spellcasters)
- Chimaera Wings (emergency escapes from dangerous areas)
What to leave in storage:
- Quest items that aren’t immediately needed
- Duplicate equipment you’re not using
- Collectibles and materials
Think of your 14 available slots as precious real estate. Every item should earn its place based on your current adventure needs.
Actually Using Items During Battle
Once you’ve got items properly assigned, using them in combat is refreshingly straightforward:
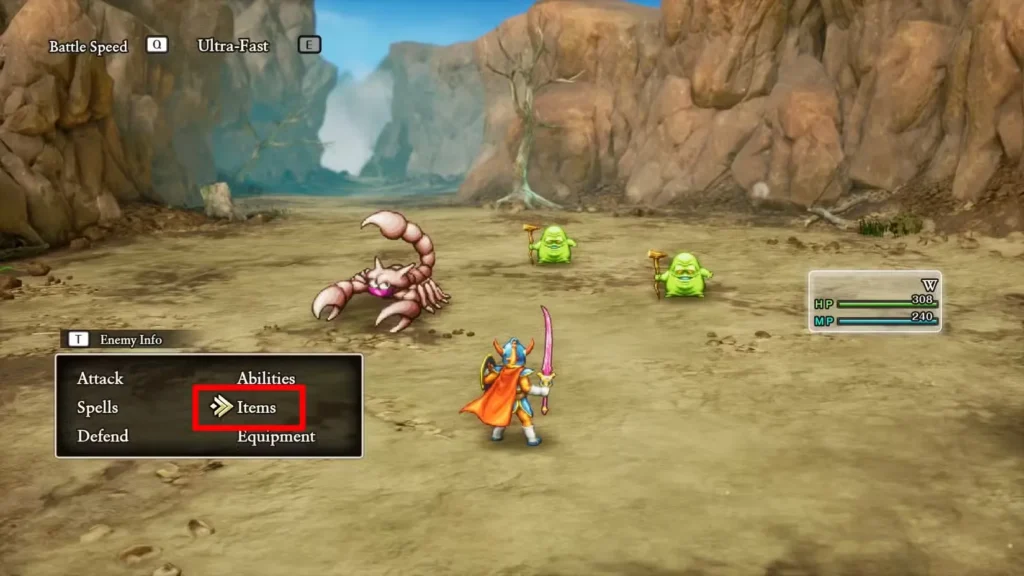
During any battle:
- When it’s the Hero’s turn, select “Items” from the battle menu
- Browse your assigned items
- Choose the item you want to use
- Confirm the target (if applicable)
Important Combat Item Mechanics:
⚡ Using an item consumes your entire turn – You won’t attack, defend, or cast spells that round. Choose wisely!
💙 Items don’t cost MP – Unlike spells, items are free to use (though they’re consumed permanently)
🛡️ Status effects matter – Some items can cure poison, paralysis, or sleep, while others provide defensive buffs
Tactical consideration: Sometimes it’s better to use a Medicinal Herb and heal 30-40 HP than to waste a turn healing with magic that costs valuable MP. Items can be more efficient in the early game when MP is scarce.
Clearing Out Your Assigned Items
Finished exploring a dungeon and want to reorganize? Here’s how to send assigned items back into storage:
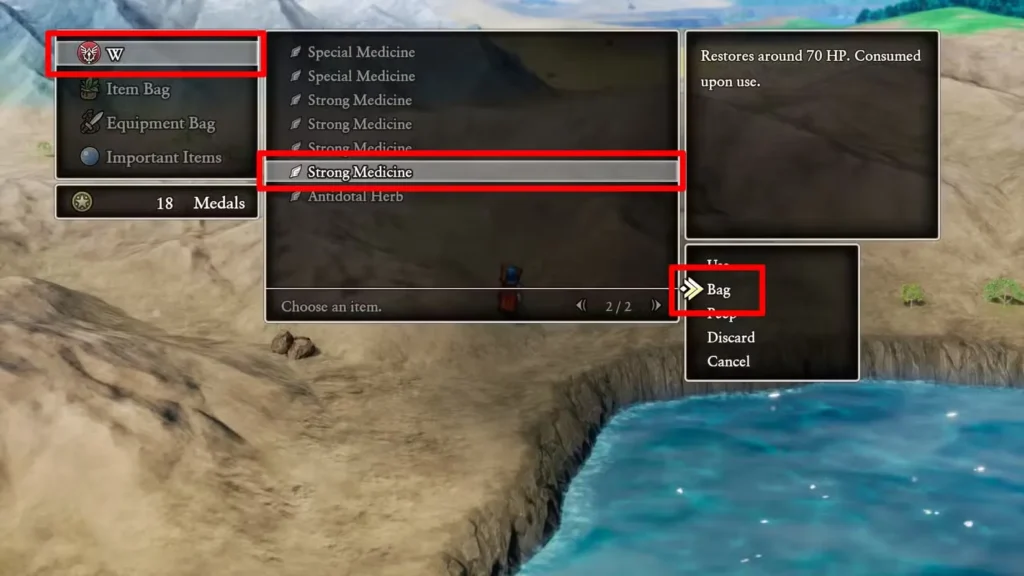
The Return Process:
- Open the menu and select “Items”
- Choose the Hero from the character list
- Find the item you want to store
- Select it and choose “Bag”
- Confirm the transfer
The item moves back into your Item Bag, freeing up space for something else. I do this regularly after dungeon runs to make room for new loot or different consumables for the next area.
Pro Strategy: Equipment as Combat Items
Here’s something many players miss: certain equipment pieces can be used as items during battle, providing unique effects beyond their passive stats.
Equipment That Functions as Items:
Faerie Foil – One of the best examples. When used as an item in battle, it casts a defensive buff on your Hero. You get both the weapon’s attack power AND a usable combat ability!
How to identify usable equipment:
- Check the in-game item description carefully
- Look for text like “Can be used in battle” or “Use: [Effect]”
- Equipment with combat-use abilities typically mention this explicitly
Using Equipment in Combat:
Step 1: Make sure it’s equipped or assigned
- If you want to USE equipment, it must be either equipped to the Hero or assigned to their inventory
- Find equipment in the “Equipment Bag” tab (separate from Item Bag)
- Use the same “Take Out” process as regular items
Step 2: Access it during battle
- Select “Items” during your Hero’s turn
- The usable equipment will appear in your item list
- Choose it just like any consumable item
Important note: Using equipment as an item does NOT unequip it. You keep the stat bonuses while also getting the one-time effect. It’s essentially a bonus ability that refreshes after each battle.
Common Mistakes to Avoid
After watching friends struggle with this system, here are the most frequent errors:
❌ Buying items but forgetting to assign them – Your gold is wasted if herbs sit in your bag during a boss fight
❌ Over-equipping exploration items – You don’t need 8 Chimaera Wings assigned. Two or three is plenty.
❌ Ignoring the 20-item limit – Trying to carry every possible item means you’re constantly managing inventory mid-adventure
❌ Not checking equipment descriptions – You might miss powerful combat-use abilities on gear you already own
✅ The smart approach: Before entering a new dungeon or challenging area, spend 2 minutes organizing your assigned items. Future you will be grateful when a tough boss fight requires quick healing access.
Recommended Combat Loadouts
Based on my playthrough experience, here are loadouts that work for different stages:
Early Game (Levels 1-5):
- 6 Medicinal Herbs
- 3 Antidotal Herbs
- 2 Chimaera Wings
- 3 open slots for equipment/loot
Mid Game (Levels 6-12):
- 4 Medicinal Herbs
- 4 Magic Water
- 2 Antidotal Herbs
- 2 Chimaera Wings
- 2 open slots
Late Game (Levels 13+):
- 2 Medicinal Herbs (backup healing)
- 6 Magic Water (MP management is crucial)
- 2 World Dew (full HP restoration)
- 2 Yggdrasil Leaves (resurrection items)
- 2 open slots
Adjust these based on your playstyle, but notice how the focus shifts from basic healing to MP management as you gain access to better spells.
Why This System Actually Works
I’ll be honest—when I first encountered this assignment system, it felt needlessly complicated compared to modern RPGs where you access everything instantly. But after playing through the game, I actually appreciate it.
The benefits:
- Forces strategic planning before dungeons
- Makes inventory management meaningful
- Creates risk/reward decisions (do I bring more healing or more MP items?)
- Prevents battles from becoming “scroll through 50 items” menus
It’s a relic of old-school RPG design, but it serves a purpose. You’re rewarded for preparation and punished for rushing into danger unprepared—exactly what classic Dragon Quest is all about.
Final Thoughts: Master the System Early
The item assignment system in Dragon Quest 1 HD-2D Remake isn’t complicated once you understand it, but it CAN be punishing if you ignore it. My advice? Spend the first hour of gameplay really understanding how assignment works. Practice moving items in and out of your active inventory until it becomes second nature.
Trust me, there’s nothing worse than facing a tough enemy, desperately needing a Medicinal Herb, and realizing you left them all in your bag back in town. Learn from my mistakes!
Want more Dragon Quest 1 & 2 HD-2D tips? Check out our complete review covering everything you need to know about these classic remakes.
Did this guide help you master combat items? Got your own inventory management tips? Drop them in the comments below!
Steam: Play