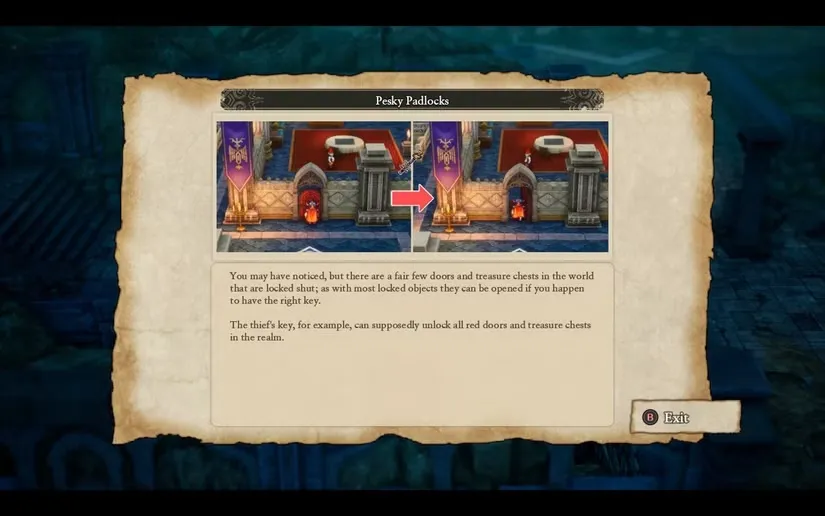
Within your first hour of playing Dragon Quest 1 HD-2D Remake, you’ll start encountering mysterious red doors and chests that refuse to open no matter how many times you press the interact button. It’s frustrating seeing treasure you can’t access, especially when you’re desperate for better equipment in those early levels.
The good news? You’ll eventually unlock the ability to open these crimson barriers, and the loot behind them is absolutely worth the wait. After meticulously exploring every corner of Alefgard and documenting each red door and chest location, I’ve put together this complete guide to help you maximize your treasure hunting efficiency.
Let’s dive into how to get the Thief’s Key and where to find every single piece of red-locked treasure in the game.
What Are Red Doors & Chests?
Before we get into the specifics, let’s clarify what we’re dealing with:
Red Doors:
- Block access to buildings, rooms, or dungeon areas
- Often hide valuable items, NPCs, or alternative paths
- Require the Thief’s Key to unlock
- Once opened, they stay open permanently
Red Chests:
- Contain powerful equipment, rare items, or important consumables
- Found in towns, dungeons, and secret locations
- Also require the Thief’s Key
- Can only be opened once (contents are removed after looting)
Visual identification: Both red doors and chests have a distinctive crimson/burgundy color that clearly differentiates them from blue and green locked variants you’ll encounter later. If it’s red, you need the Thief’s Key—period.
How to Get the Thief’s Key (Unlocking Red Doors & Chests)
Unlike some RPGs where keys are hidden in obscure side quests or require tedious fetch chains, Dragon Quest 1 hands you the Thief’s Key through natural story progression. You literally cannot miss it if you’re following the main quest.
Step-by-Step: Earning the Thief’s Key
1. Visit the Shrine of Rain
- This happens relatively early in the main story
- Complete the objectives inside this dungeon
- The shrine is essential to progression, so you’ll be directed here
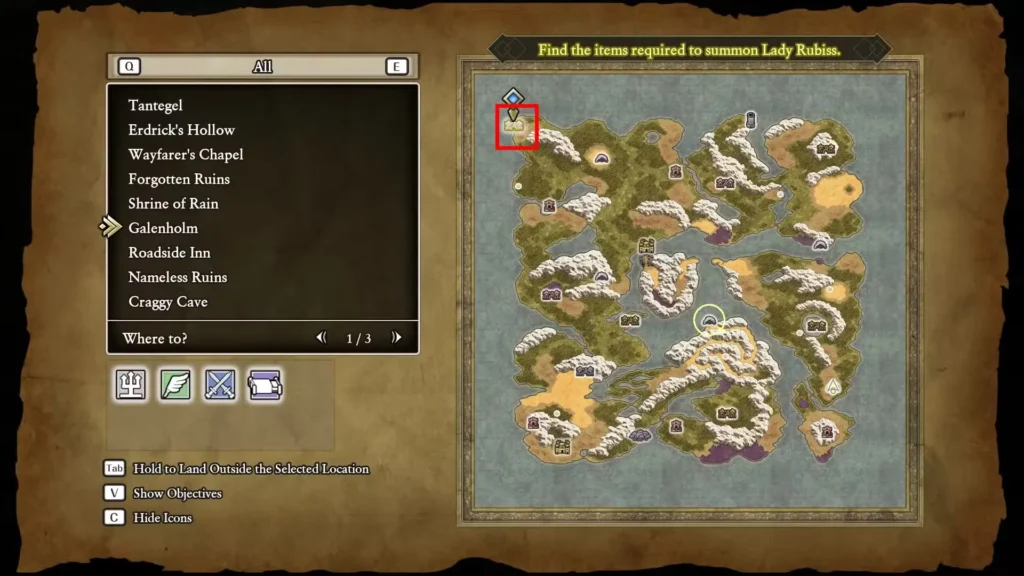
2. Travel to Galenholm
- After the Shrine of Rain, you’ll be sent to this coastal town
- Gather information and prepare for the next leg of your journey
3. Stop at the Roadside Inn
- A small waypoint between major locations
- Stock up on supplies if needed
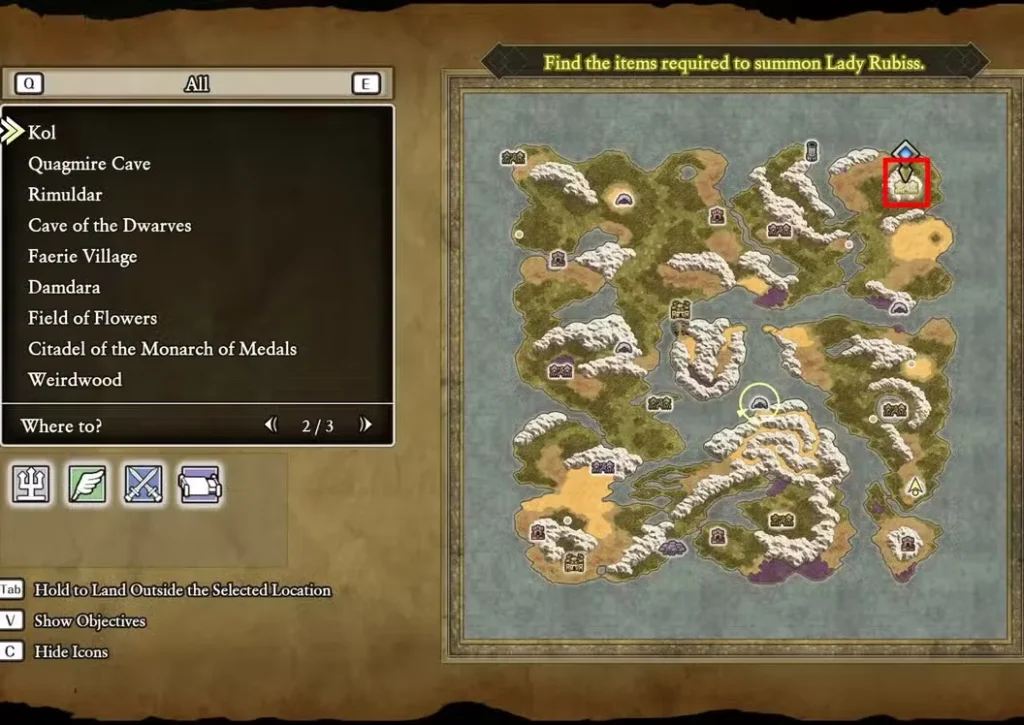
4. Explore Craggy Cave
- This is where the magic happens
- Navigate through this dungeon to its conclusion
- At the end of Craggy Cave, you’ll automatically receive the Thief’s Key
Timeline: Most players obtain the Thief’s Key roughly 4-6 hours into the game, depending on exploration habits and grinding frequency. It’s positioned perfectly—early enough that you won’t forget about those red doors, but late enough that the rewards feel meaningful.
Pro tip: Once you get the Thief’s Key, don’t immediately rush forward with the story. Instead, backtrack to all the red doors and chests you’ve encountered. The equipment and items inside will significantly boost your power for upcoming challenges.
Why the Thief’s Key Matters (Beyond Just Unlocking Stuff)
The Thief’s Key isn’t just a convenience item—it’s a gateway to power spikes that can dramatically improve your adventure:
What you gain access to:
- 🛡️ Better equipment – Armor and weapons significantly above what shops offer at this stage
- 💍 Stat-boosting items – Seeds that permanently increase your stats
- 📜 Important scrolls – Special abilities you can’t learn through leveling (check our complete scrolls guide)
- 💰 Valuable consumables – Rare items that would cost significant gold to purchase
- 🗺️ New areas – Some red doors block entire dungeon sections or town districts
Strategic importance: The game’s difficulty curve assumes you’ll collect these red-locked treasures. Skipping them can leave you under-equipped for mid-game challenges, forcing excessive grinding to compensate.
Complete Red Door & Chest Locations (Every Treasure Mapped)
Now that you’ve got the Thief’s Key, let’s systematically loot every red door and chest in Alefgard. I’ve organized these by location to help you plan efficient treasure runs.
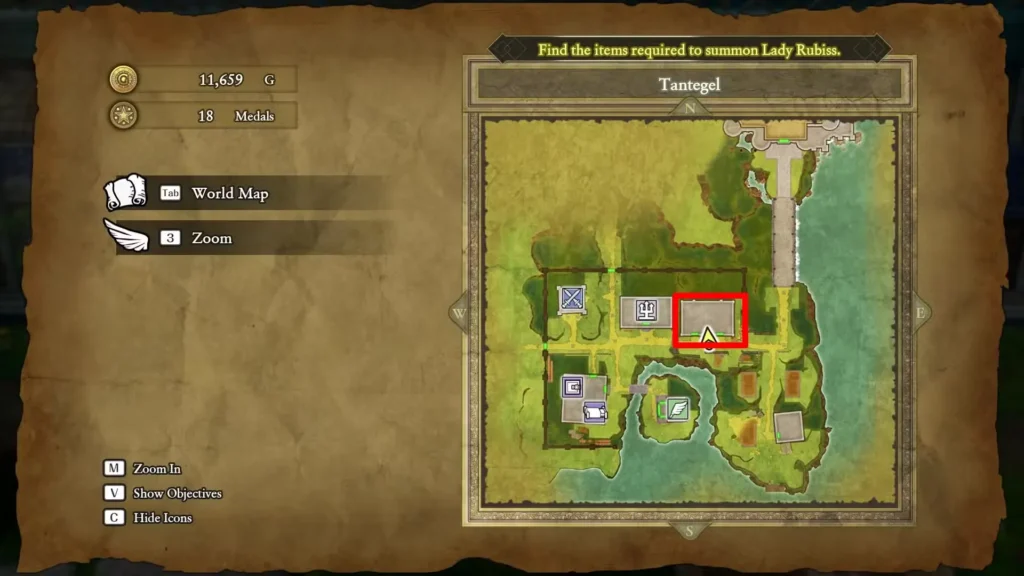
Tantegel (Starting Town)
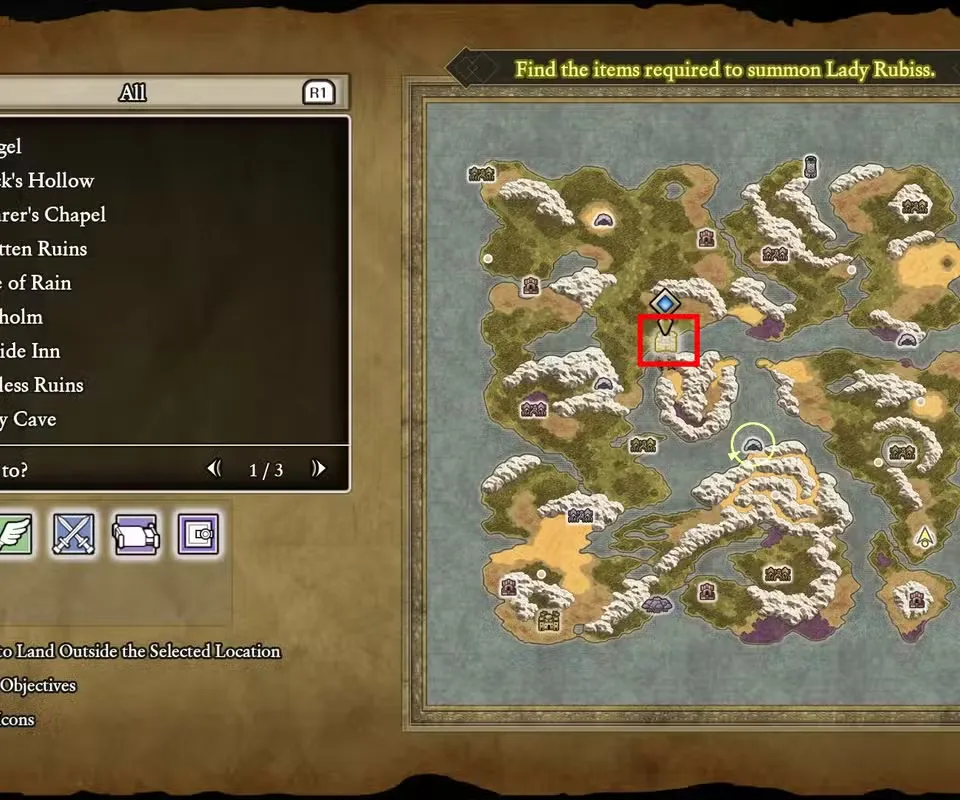
Red Doors: 2 | Red Chests: 0
Building Location: Northeast corner of Tantegel
- First Red Door: Entrance to the building
- Second Red Door: Inside the building, leading to upper floor area
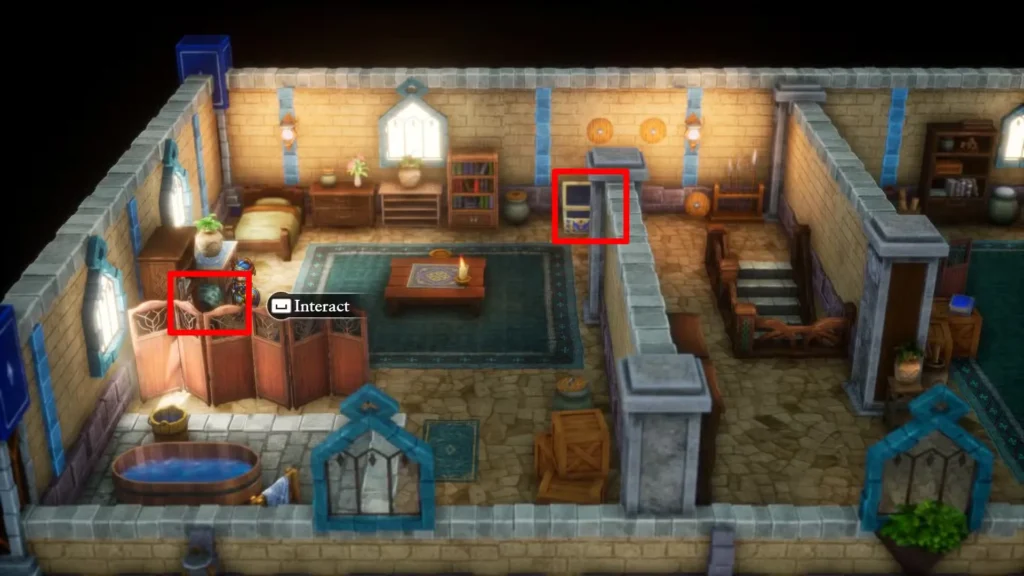
What’s Inside:
- Interact with the pot near the wizard to obtain a Seed of Life
- Permanently increases your maximum HP by 2-5 points
- Why it matters: Early HP boosts are incredibly valuable for survivability
Additional Rewards:
- Green chest upstairs (requires Magic Key—come back later)
- Blue chest upstairs (requires Blue Key—return after obtaining it)
Strategy note: The Seed of Life is the real prize here. Use it immediately for the permanent HP boost. Don’t hoard seeds thinking you’ll need them later—the sooner you use them, the longer you benefit from the increased stats.
Galenholm (Coastal Town)
Red Doors: 1 | Red Chests: 1
Building Location: Northern edge of town
First Red Door (Main Entrance):
- Opens to a dock area with water access
- Leads to multiple pathways and connections
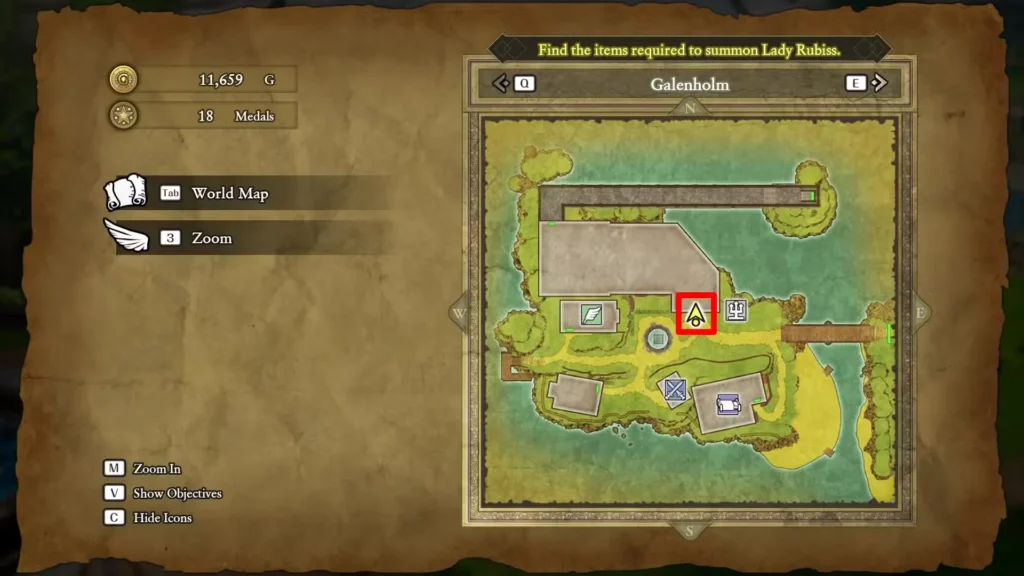
Red Chest Location:
- Right end of the dock beyond the red door
- Contains Arriviste’s Vest
- Mid-game armor piece with solid defensive stats
- When to equip: Immediately if it’s better than your current chest armor

Additional Features Behind the Red Door:
Blue Door:
- Located in the room beyond the red door
- Requires Blue Key (obtained later in the game)
- Come back after getting that key for more treasure
Path to Grave of Galen:
- Secret connection to this important dungeon
- Inside you’ll find:
- Mini Medal (collect 10 for powerful rewards)
- Whistle scroll (attracts nearby monsters)
- Additional treasures and exploration opportunities
Exploration tip: Galenholm’s red door area is surprisingly expansive. Don’t just grab the chest and leave—thoroughly explore to find the path to Grave of Galen. It’s easy to miss if you’re rushing.
Kol (Western Settlement)
Red Doors: 1 | Red Chests: 0
Building Location: Western side of Kol
What’s Inside:
- Royal Guard NPC you can speak with for information
- Pot containing Seed of Luck
- Permanently increases your Luck stat
- Why it matters: Luck affects critical hit rates and rare item drops
Is it worth visiting? Absolutely. The Seed of Luck might seem minor, but Luck is one of the harder stats to boost naturally. Every permanent stat increase compounds over the course of your adventure, making you progressively stronger without grinding levels.
Lore bonus: The Royal Guard provides interesting dialogue that adds context to the game’s story. If you’re invested in Dragon Quest’s world-building, don’t skip talking to NPCs behind locked doors.
Cave of the Dwarves (Complex Dungeon)
Red Doors: 2 | Red Chests: 2 (requires Blue Key)
This dungeon has multiple red-locked areas across different floors, making it one of the most treasure-rich locations in the game.
First Red Door (B1 – Left Side):
Location: Upon entering Cave of the Dwarves, head up and to the left
What it unlocks:
- Stairs descending to B2
- Access to a treasure-filled lower section
Treasures on B2 (Bottom-Left Corner):
- Barrels containing:
- Oaken Club (weapon)
- Ten Ton Toupee (helmet with great defense)
- Fur Vest (body armor)

Additional B2 Treasure:
- Climb stairs on the right side of B2
- Follow the path to a chest containing Ice Shield
- Excellent defensive equipment with elemental resistance
Second Red Door (B1 – Main Path):
- Unlocks access to the rest of the dungeon
- Essential for story progression through this area
Blue Key Section (B3 – Requires Later Access):
Important: You’ll need the Blue Key first, which comes later in the game
Location: B3, blue door in the top-right corner
Red Chests Behind the Blue Door:
- Strength Ring – Boosts attack power
- Tectonic Plate – Exceptional body armor with high defense
Strategy for Cave of the Dwarves:
- First visit with Thief’s Key: Clear the left red door path for immediate equipment upgrades
- Use the second red door to progress the dungeon normally
- Return after obtaining Blue Key to loot the B3 red chests
Pro tip: The Ice Shield from B2 is particularly valuable against fire-breathing enemies you’ll encounter in mid-to-late game dungeons. Don’t skip it!
Citadel of the Monarch of Medals (Special Location)
Red Doors: 0 | Red Chests: 2
This location is the home of the Mini Medal collection system, but it also houses valuable red chests.

Red Chest #1:
- Contains Phial of Sage’s Elixir
- Rare consumable that fully restores HP and MP
- Strategic use: Save for emergency situations or challenging boss fights
Red Chest #2:
- Contains Reheal Scroll
- Gradually restores HP over time (6 MP to cast)
- When to use: Extended battles where passive regeneration helps resource management
Additional Chests:
- Blue chest (requires Blue Key)
- Green chest (requires Magic Key)
- Plan to return multiple times as you collect different keys
Why this location matters: The Citadel serves as your Mini Medal exchange hub. Collecting 10 Mini Medals unlocks the powerful Wild Side scroll, which lets you act twice per turn. Between the red chests and the medal system, this is one of the most rewarding locations to thoroughly explore.
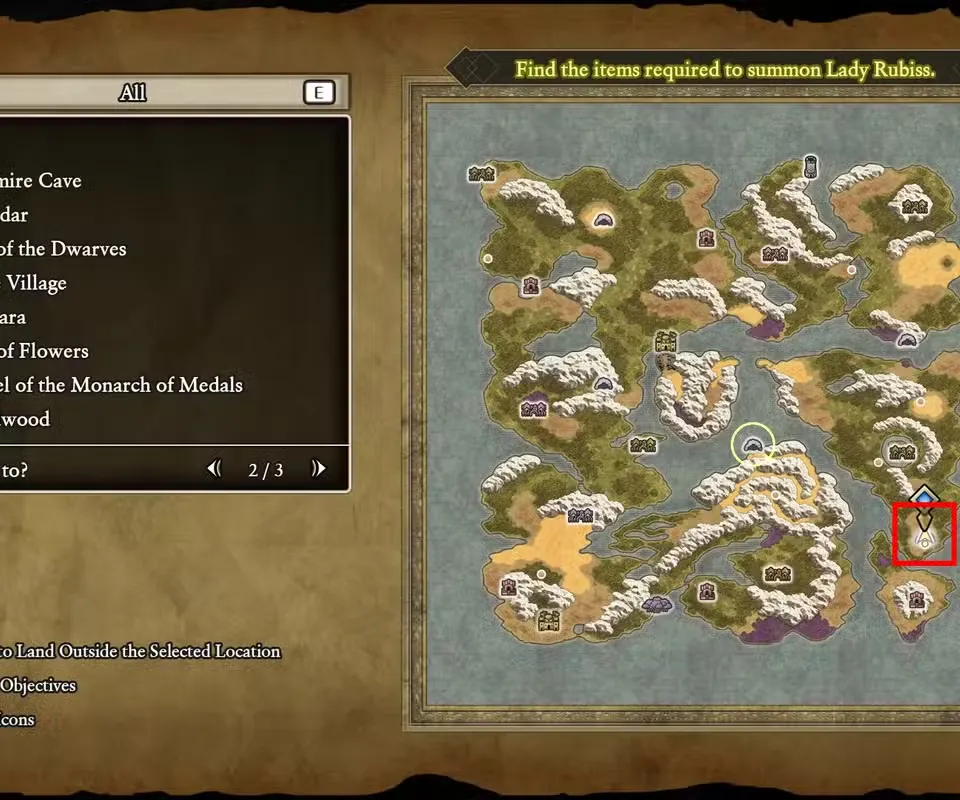
Secret Spot (Weeping Isle Desert Path)
Red Doors: 0 | Red Chests: 1
Location: Hidden in the winding desert path leading to Weeping Isle
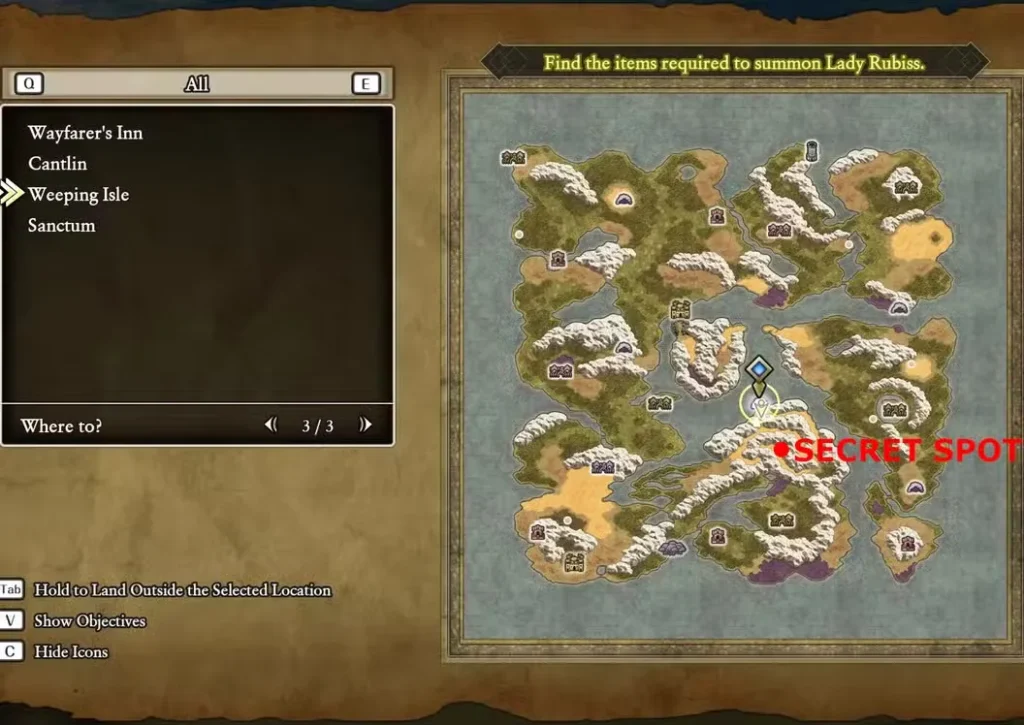
Finding the Secret Spot:
- Not marked on your initial map
- Look for unusual rock formations or environmental cues
- Easy to miss if you’re rushing through the desert
Red Chest Contents:
- Strength Ring
- Permanently boosts attack power when equipped
- Stackable: Works in conjunction with other attack-boosting equipment
Exploration tip: The desert leading to Weeping Isle is deliberately maze-like. If you’re having trouble finding this secret spot, try systematically exploring every “dead end” path. The secret entrance is tucked away in what appears to be an impassable area.
Is it worth the search? The Strength Ring is excellent for physical damage dealers (which your Hero certainly is). The attack boost will accelerate battle clear times throughout the mid and late game, making this treasure hunt worthwhile.
Treasure Hunting Strategy: Optimal Red Chest Route
Once you’ve obtained the Thief’s Key from Craggy Cave, here’s the most efficient route to collect everything:
Phase 1: Quick Town Sweep (30 minutes)
- Tantegel – Grab Seed of Life (northeast building)
- Kol – Collect Seed of Luck (west building)
- Galenholm – Loot Arriviste’s Vest from dock chest
Phase 2: Dungeon Haul (45-60 minutes) 4. Cave of the Dwarves – Clear both red door sections for equipment 5. Citadel of the Monarch of Medals – Both red chests for consumables and scroll
Phase 3: Secret Hunting (15-20 minutes) 6. Desert Secret Spot – Strength Ring hunt near Weeping Isle path
Phase 4: Return Later 7. Galenholm – Explore path to Grave of Galen for Mini Medal and Whistle scroll 8. Revisit locations with Blue/Green chests once you have those keys
Time commitment: Roughly 2-2.5 hours to fully clear all red-locked content if done efficiently. The equipment and stat boosts gained will save you significantly more time by reducing grinding needs.
Red vs. Blue vs. Green: Understanding the Key System
Dragon Quest 1 HD-2D Remake features three types of locked doors and chests, each requiring different keys:
Red (Thief’s Key):
- ✅ Obtained early through story (Craggy Cave)
- ✅ Opens mid-game equipment and treasures
- ✅ Most numerous locked doors/chests in the game
Blue (Blue Key):
- Obtained later in the main quest
- Opens high-tier equipment and rare items
- Often blocks the best treasure rooms
Green (Magic Key):
- Obtained latest in the progression
- Opens end-game treasures and final doors
- Usually guards the most powerful equipment
Progressive system: The game intentionally gates treasures behind different keys to ensure you’re not overwhelmed with overpowered gear too early. Each key unlocks rewards appropriate for your current progression stage.
Backtracking recommendation: Keep a mental (or physical) note of blue and green locked doors you encounter while hunting red chests. You’ll want to revisit these locations as you obtain additional keys. For efficient travel between these locations, master the fast travel system with our Zoom guide.
What to Do With Your Red Chest Loot
Now that you’ve collected everything, let’s talk about optimal usage:
Equipment Priorities:
Immediately Equip:
- Ice Shield (Cave of the Dwarves) – Best shield for its tier
- Tectonic Plate (Cave of the Dwarves B3) – Top-tier body armor
- Strength Ring (Secret Spot or Cave B3) – Attack boost is always good
- Arriviste’s Vest (Galenholm) – If better than current chest armor
Sell or Store:
- Duplicate equipment from barrels if you’ve already found better
- Oaken Club if you have superior weapons
Consumable Management:
Use Immediately:
- Seed of Life (permanent +2-5 HP)
- Seed of Luck (permanent Luck increase)
Save for Boss Fights:
- Phial of Sage’s Elixir (full HP/MP restoration)
Assign to Active Inventory:
- Reheal Scroll (for extended battles)
- Learn how to properly manage combat items with our detailed guide
Scrolls to Master:
Reheal Scroll:
- Costs 6 MP
- Gradual HP regeneration over several turns
- Best used at the start of long boss fights
- Pairs well with defensive buffs for sustained battles
Want to maximize your scroll collection? Check out our complete guide to all Special Scrolls and skills for even more abilities.
Common Red Door & Chest Mistakes
Avoid these pitfalls I encountered during my playthrough:
❌ Rushing past Tantegel’s northeast building – The Seed of Life is easy to miss if you just grab the chests upstairs
❌ Not exploring beyond Galenholm’s red door – The path to Grave of Galen is hidden but contains valuable items
❌ Skipping Cave of the Dwarves’ left path – The Ice Shield and equipment barrels are easily missed if you only follow the main route
❌ Forgetting about the desert Secret Spot – This hidden location isn’t marked clearly and requires deliberate searching
❌ Not returning to locations after getting Blue/Green Keys – Many areas have multiple chest types—plan revisits
❌ Hoarding Seeds instead of using them – Permanent stat boosts compound over time; use them immediately!
✅ Smart approach: Systematically clear each location, use stat-boosting items right away, and keep notes on blue/green locked doors for future visits.
When to Hunt Red Treasures vs. Progressing the Story
The million-gold question: Should you immediately backtrack for red treasures after getting the Thief’s Key, or continue with the main story?
My recommendation: Immediate backtracking for essentials
Here’s why:
- Power spike: The equipment from red chests provides significant stat boosts
- Stat seeds: Permanent increases that benefit you for the entire game
- Challenge curve: Upcoming story sections assume you’ve collected this gear
- Efficiency: Fast travel with Zoom (unlocked at Level 13) makes revisiting locations quick
Suggested approach:
- Get the Thief’s Key from Craggy Cave
- Immediately backtrack for town red chests (quick, easy access)
- Clear Cave of the Dwarves red door sections (you’re already there)
- Continue main story with better equipment
- Return for Secret Spot and other locations when convenient
Exception: If you’re over-leveled and destroying enemies easily, you can delay treasure hunting. But most players will benefit from the immediate equipment upgrades.
Red Chest Rewards: Are They Worth It?
Let’s be honest about value:
High-Value Red Treasures:
- ⭐⭐⭐⭐⭐ Seed of Life (Tantegel) – Permanent HP is always valuable
- ⭐⭐⭐⭐⭐ Ice Shield (Cave of Dwarves) – Best shield at this progression point
- ⭐⭐⭐⭐⭐ Tectonic Plate (Cave B3) – Exceptional armor
- ⭐⭐⭐⭐ Strength Ring (Secret Spot) – Attack boost accelerates battles
- ⭐⭐⭐⭐ Reheal Scroll (Citadel) – Useful utility ability
Medium-Value Red Treasures:
- ⭐⭐⭐ Arriviste’s Vest (Galenholm) – Decent armor but not game-changing
- ⭐⭐⭐ Phial of Sage’s Elixir (Citadel) – Good consumable but limited to one use
- ⭐⭐⭐ Seed of Luck (Kol) – Helpful but Luck is less impactful than HP
Situational-Value:
- ⭐⭐ Ten Ton Toupee (Cave Barrels) – Good helmet but might find better soon
- ⭐⭐ Oaken Club (Cave Barrels) – Weapon that’s likely outclassed by this point
The verdict: Even the “medium-value” items are worth collecting because there’s no penalty for opening red chests and doors. The worst-case scenario is getting equipment you’ll replace soon—but you might need it for tough battles in the meantime.
Advanced Treasure Hunting Tips
After hunting down every locked treasure in the game, here are pro strategies:
🗺️ Map Everything:
- Keep mental or physical notes of locked door/chest locations
- Mark which key type (red/blue/green) is needed
- Revisit systematically as you obtain new keys
⏱️ Timing Your Expeditions:
- Best time to hunt red treasures: Immediately after getting Thief’s Key
- Second sweep: After obtaining Blue Key for Cave of Dwarves B3
- Final sweep: After Magic Key for any remaining green locks
💰 Sell Duplicate Equipment:
- Red chest equipment you don’t need can be sold for gold
- Fund better purchases from shops
- Don’t hoard inferior gear “just in case”
🎯 Prioritize Permanent Boosts:
- Seeds > Equipment (stats last forever, equipment gets replaced)
- Scrolls > Consumables (reusable abilities vs. one-time items)
📍 Secret Locations:
- Examine suspicious terrain features for hidden entrances
- Dead-end paths sometimes hide secret areas
- The desert near Weeping Isle is notorious for hidden spots
Final Preparation: Red Treasures and Your Quest
Before you venture into the final stages of Dragon Quest 1 HD-2D Remake, ensuring you’ve collected all red-locked treasures gives you a significant edge:
Combat advantages:
- Better defensive stats = less damage taken = fewer healing items needed
- Strength Ring = faster battle clear times = more efficient grinding
- Reheal scroll = extended dungeon runs without returning to inns
Resource efficiency:
- Stat seeds = permanent power without grinding
- Equipment from red chests = gold saved that can buy consumables
- Scrolls = expanded tactical options for difficult encounters
Completion rewards:
- Multiple Mini Medals behind red doors count toward your 10-medal goal
- Wild Side scroll (from 10 medals) is one of the game’s best abilities
- Thorough exploration reveals lore and NPC dialogue
For comprehensive preparation, also review our complete game review and strategy guide covering all aspects of your adventure.
Conclusion: Unlock Every Red Door, Claim Every Red Chest
The Thief’s Key opens more than just doors in Dragon Quest 1 HD-2D Remake—it unlocks power spikes, permanent stat boosts, and valuable equipment that will serve you well into the late game. While the key itself is impossible to miss through normal story progression, the treasures it unlocks are easy to overlook if you rush past locations too quickly.
My final advice: When you obtain the Thief’s Key from Craggy Cave, resist the urge to immediately continue the story. Spend 2-3 hours systematically revisiting every town and dungeon to claim your red-locked rewards. The Seeds alone provide permanent benefits that compound throughout your entire adventure, and the equipment will make upcoming challenges significantly more manageable.
Now get out there, turn that Thief’s Key, and claim the treasures that rightfully belong to the Hero of Alefgard!
Playing on Steam? Let us know which red chest treasure was your favorite! Found any secret locations we missed? Drop them in the comments!
More Dragon Quest 1 HD-2D Remake Guides: