Understanding Weirdwood’s Role in Dragon Quest 1
Weirdwood is one of the more notorious locations in Dragon Quest I HD-2D Remake—and for good reason. This mystical forest serves as a mandatory obstacle on your path to gathering the items needed for crafting the remaining sigils, which are essential for progressing through the main story.
What makes Weirdwood particularly challenging is its maze-like structure and the tough boss fight waiting inside. Many players find themselves wandering in circles, unsure how to trigger the key event that allows passage through the area.
Important prerequisite: You can only access and navigate Weirdwood after rescuing Princess Gwaelin and obtaining the Princess’s Necklace during the main storyline. This happens naturally as you progress, so if you haven’t reached this point yet, continue following the main quest.
The Weirdwood Puzzle: How to Navigate Successfully
The core mechanic of Weirdwood is deceptively simple but easy to mess up: you need to trigger a specific cutscene where Princess Gwaelin contacts your hero telepathically. While you could theoretically wander around until you stumble upon it, that approach wastes time and can be frustrating.
Here’s the reliable method to consistently trigger the cutscene:
Step-by-Step Navigation Guide
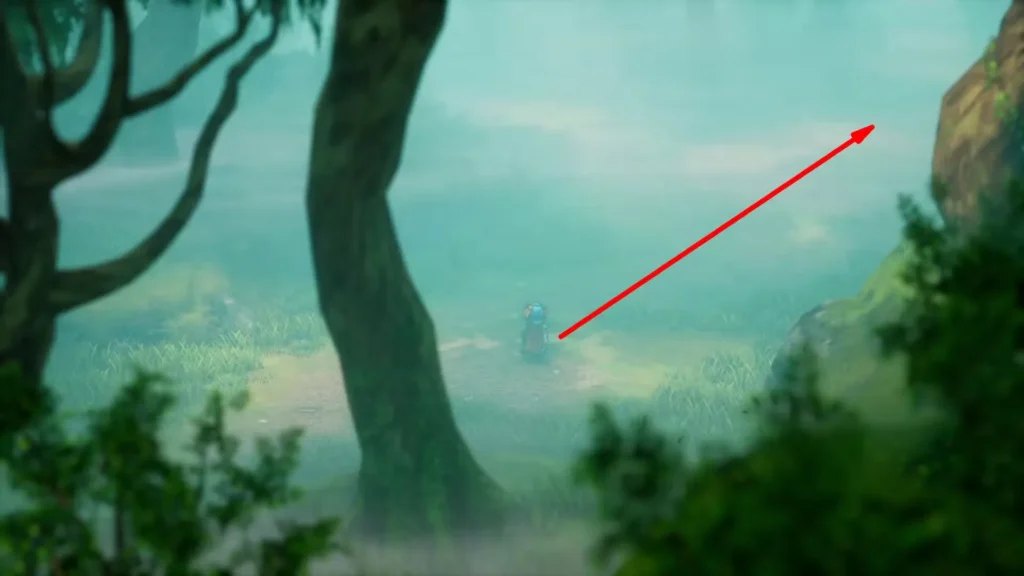
First Loop:
- Enter Weirdwood from the entrance
- Walk upward and take the left path at the fork
- Use the first path on the right to continue moving upward
- Go right at the next fork you encounter
- Take the first path on the left to continue upward, veering toward the right side
- Keep following this path until you hit a loading zone—this will transport you back to the beginning of Weirdwood
Second Loop: 7. Repeat steps 2–4 exactly as before
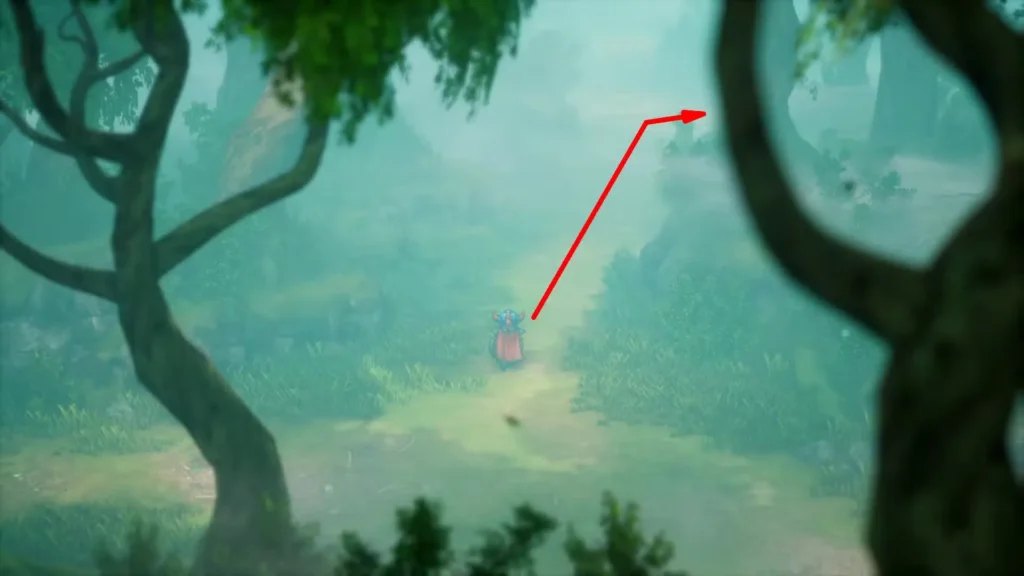
Third Loop: 8. Repeat steps 2–4 one more time
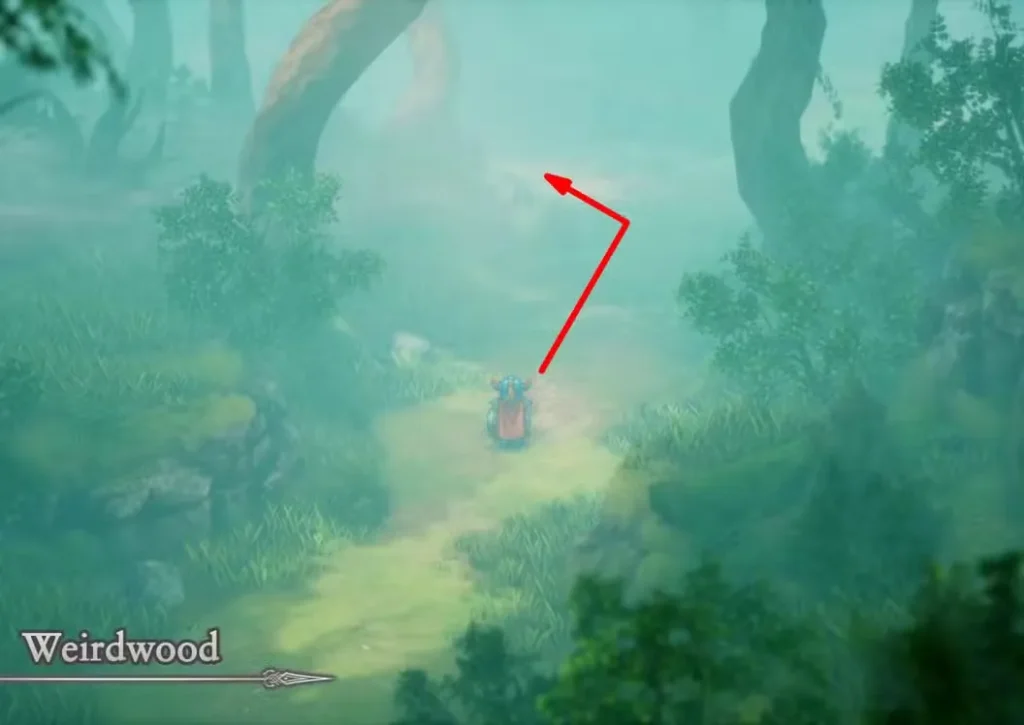
After completing this sequence three times total, you’ll trigger the cutscene with Princess Gwaelin. This unlocks the path forward through Weirdwood.
Why This Works
Weirdwood operates on a “loop counter” system. The game tracks how many times you’ve followed the correct path through the forest. Once you’ve completed the pattern three times, it recognizes your persistence and triggers the story event. Think of it like proving your determination to proceed.
Pro tip: If you get lost or think you messed up, just exit Weirdwood entirely and start fresh. It’s better to reset than to wander aimlessly hoping you’re on the right track.
Preparing for the Mirages Boss Fight
Once you’ve triggered the cutscene with Princess Gwaelin, you can follow the path upward to face three Mirages. This fight is legitimately challenging—probably one of the tougher encounters at this stage of the game.
Recommended Level & Stats
Minimum Level: 25+
I cannot stress this enough: do NOT attempt this fight below Level 25. Even at that level, you’ll need solid preparation and some tactical awareness. If you’re struggling at Level 25, consider grinding a bit more in nearby areas until you hit Level 26 or 27.
At Level 25, your HP should be hovering around 120-140, which gives you the buffer you need to survive the Mirages’ attacks while executing your strategy.
Essential Equipment
Before entering the fight, make sure you’ve upgraded your gear as much as possible. Here are the key items you should have equipped:
Critical Equipment Pieces:
- Tempest Shield – Found in a blue chest in Faerie Village (requires Thief’s Key)
- Phantom Mask – Located in a blue chest at the Citadel of the Monarch of Medals
- Tectonic Plate – Beyond the blue door in Cave of the Dwarves, B3 floor
These three items significantly boost your defensive capabilities, which is crucial since you’ll be tanking hits from three enemies at once.
Why defense matters here: The Mirages hit hard, and you need to survive long enough to execute your offensive strategy. Better armor means fewer healing items consumed, which means more turns spent dealing damage.
Required Inventory Items
Stock up on these supplies before entering Weirdwood:
- Antidotal Herbs (at least 5-10) – The Mirages can poison you, and fighting while envenomated is a death sentence
- Special Medicine – Your primary healing item (heals around 75-100 HP)
- Strong Medicine – Backup healing option
- Magic Water (optional) – For MP restoration if you run low
Don’t skimp on healing items. You can always sell excess supplies later, but running out mid-fight means certain defeat.
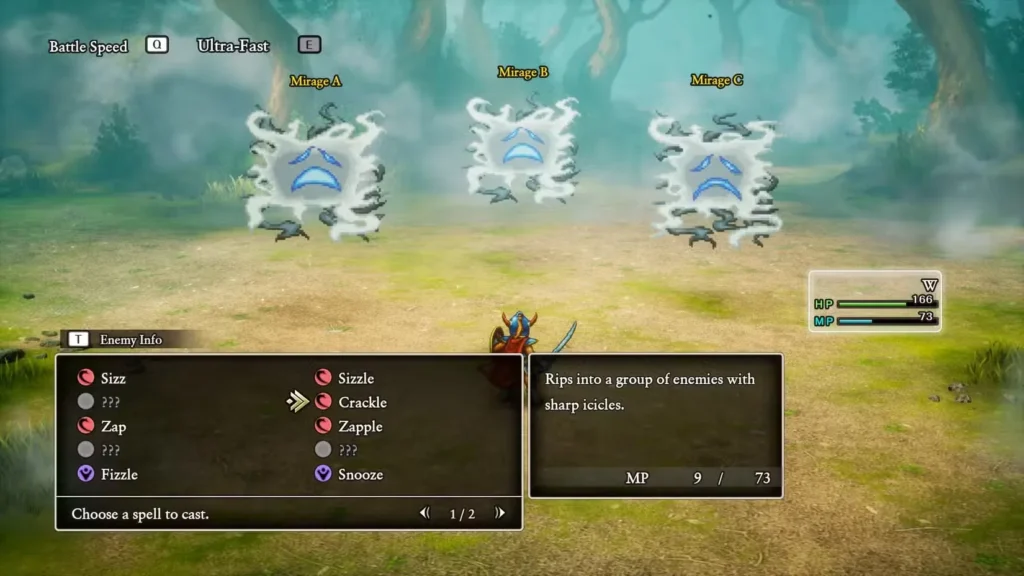
Learn the Crackle Spell
This is non-negotiable. Crackle is your primary damage source for this fight.
Where to get Crackle: In Faerie Village, there’s a chest inside one of the buildings containing a Crackle scroll. Use it to learn the spell before challenging the Mirages.
Crackle deals solid AOE (area of effect) damage to all enemies, which is exactly what you need when facing three Mirages simultaneously. Single-target spells won’t cut it for this encounter.
If you’re interested in collecting other powerful spells, check out our complete guide to special scrolls and skills for more locations.
The Mirages Boss Fight Strategy
Now for the actual battle tactics. This fight requires a specific approach to maximize your chances of success.
The Core Strategy
Your goal is to kill all three Mirages simultaneously using Crackle. Why? Because if you kill them one at a time, the surviving Mirages will call for reinforcements, turning a manageable 3v1 fight into a potentially endless slog against backup enemies.
At Level 25, dealing with reinforcements is extremely difficult and often leads to defeat. Simultaneous elimination prevents this mechanic entirely.
Turn-by-Turn Decision Tree
Follow this priority system on every turn:
Priority 1 – Are you poisoned?
- YES: Use an Antidotal Herb immediately
- NO: Continue to Priority 2
Priority 2 – Is your HP below 120?
- YES: Use a healing item (Special or Strong Medicine)
- NO: Continue to Priority 3
Priority 3 – Can you cast spells (enough MP)?
- YES: Cast Crackle
- NO: Use the Defending Champion ability
Understanding Defending Champion
The Defending Champion ability is your MP-conservation tool. When you can’t afford to cast Crackle but don’t need healing, using this defensive ability lets you maintain HP without burning through mana.
This is crucial because Crackle costs MP, and you need to cast it multiple times to bring down all three Mirages. Managing your MP pool is just as important as managing your health.
What to Do If Mirages Don’t Die Simultaneously
Despite your best efforts, you might not eliminate all three Mirages on the same turn. If this happens:
Don’t panic. Keep fighting.
Continue using the same priority system: heal when necessary, cure poison immediately, and cast Crackle whenever safe. You may be able to burn through the reinforcements with a combination of Crackle casts and standard attacks.
If you die: Dragon Quest 1 HD-2D Remake lets you initiate a rematch. You’ll lose some gold, but you can try again immediately. Use what you learned from the failed attempt to adjust your tactics.
Sometimes winning this fight requires multiple attempts to get the timing right. That’s normal, especially if you’re at the minimum recommended level.
Additional Combat Tips
Here are some finer points that can make the difference between victory and defeat:
Track your MP carefully: Before the fight starts, note your maximum MP. Make sure you have enough for at least 3-4 Crackle casts. If you’re running low, consider using Magic Water or grinding a bit more to level up (which restores your MP).
Poison is your biggest threat: The moment you see that poison status effect, drop everything and cure it. Poison damage stacks up fast and will drain your HP faster than you can heal.
Don’t be greedy with damage: It’s tempting to cast Crackle every turn, but if your HP is at 125 and you just took a big hit, heal first. Dead heroes cast zero spells.
The first few turns are critical: Focus on getting into a rhythm with your decision tree. Once you’ve established a pattern—cast Crackle, heal when needed, defend when safe—the fight becomes much more manageable.
Save before entering: This should go without saying, but make sure you save before triggering the Mirages fight. If things go sideways, you can reload without losing significant progress.
Why This Fight Is Challenging
The Mirages encounter is designed to test whether you’ve been properly exploring, gathering equipment, and understanding Dragon Quest 1’s combat systems. It’s a skill check that ensures you’re ready for the later portions of the game.
The combination of multiple enemies, the reinforcement mechanic, and the poison status creates a genuinely difficult scenario. But with the right preparation and tactical approach, it’s absolutely beatable.
This fight also teaches you important lessons about resource management and prioritization—skills that will serve you well in the tougher encounters ahead.
After Defeating the Mirages
Once you’ve cleared the Mirages, you can proceed through Weirdwood to access the areas beyond. This opens up new locations and brings you closer to gathering the sigils needed for the main quest.
The sense of accomplishment from beating this boss is real. It’s a significant milestone in your journey through Alefgard, and overcoming it proves you’re mastering the game’s mechanics.
If you’re working through other optional content, consider checking out the Zalen questline for additional rewards and storyline content, or explore fast travel options to make navigating Alefgard more efficient.
Final Thoughts
Weirdwood and the Mirages fight represent a significant challenge in Dragon Quest I & II HD-2D Remake. The navigation puzzle tests your patience, while the boss fight tests your preparation and tactical thinking.
The key takeaways:
- Loop through Weirdwood three times following the specific path
- Don’t attempt the Mirages below Level 25
- Get the Tempest Shield, Phantom Mask, and Tectonic Plate before fighting
- Learn Crackle and stock up on healing items and Antidotal Herbs
- Use the priority system: cure poison → heal if low → cast Crackle or defend
- Aim to kill all three simultaneously to prevent reinforcements
With proper preparation and the strategy outlined here, you’ll get through Weirdwood and defeat those Mirages. It might take a couple attempts, but victory is absolutely within reach.
Good luck, hero—Alefgard’s fate depends on your success!