Complete walkthrough for The Cable Guy quest in Dying Light: The Beast. Learn how to restore power to the substation with combat tips, locations, and step-by-step instructions.
Stuck trying to figure out how to restore power in “The Cable Guy” quest? You’re not alone. This seemingly straightforward mission becomes confusing the moment you reach the electrical substation and realize the power source isn’t where you’d expect it to be.
After helping countless players through this quest, I’ve learned that the main stumbling block isn’t the combat (though those spitter zombies are annoying) – it’s understanding the power connection sequence. The game doesn’t clearly explain where to find the cable or how the electrical system works, leaving many players wandering around the substation area wondering what they’re missing.
This quest represents a perfect example of Dying Light: The Beast’s environmental puzzle design – the solution is logical once you understand it, but getting there requires careful observation and a bit of platforming skill. Let me walk you through the entire process so you can restore power efficiently and move on to the next challenge.
Quest Overview and Prerequisites
Quest Name: The Cable Guy
Availability: After completing the power plant restoration
Location: Electrical substation (marked on map)
Estimated Time: 15-20 minutes
Difficulty: Moderate (combat + light platforming)
What You’ll Need
Before heading out, make sure you’re prepared:
- Combat gear – Reliable weapons for zombie clearing
- Molotov cocktails – Essential for the hammer-wielding bruiser
- Lockpicks – At least 1-2 for the substation access
- Basic platforming skills – You’ll need to climb and jump between structures
Pro Tip: If you’re short on Molotovs, check our crafting guides for efficient resource gathering before starting this quest.
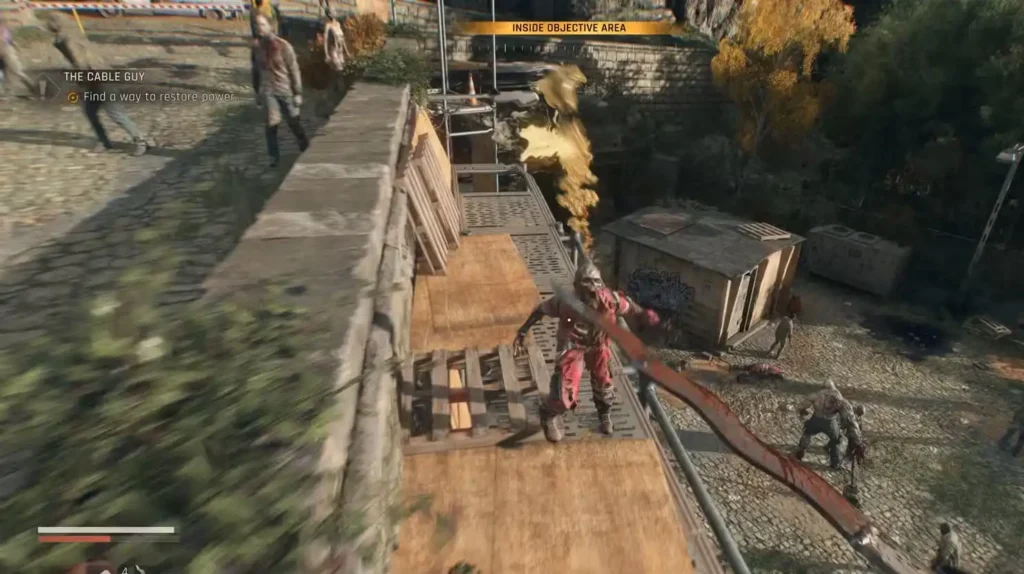
Phase 1: Clearing the Substation Area
Understanding the Combat Layout
When you arrive at the electrical substation, you’ll immediately notice it’s heavily infested with zombies. The area design is intentionally challenging – enemies are positioned to force you into tactical thinking rather than mindless rushing.
Enemy Breakdown:
- Spitter zombies in red suits – Priority targets (ranged attackers)
- Standard biters – Mobile threats that swarm your position
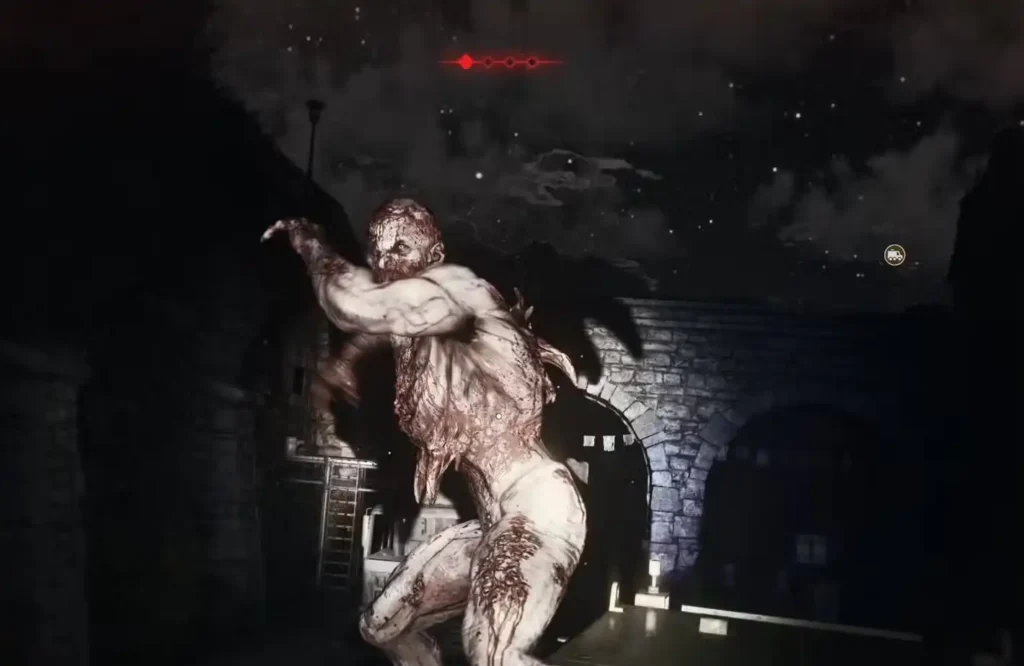
- Hammer bruiser – High-damage mini-boss requiring special tactics
- Miscellaneous infected – Cleanup targets after primary threats
Optimal Combat Strategy
Step 1: Ranged Elimination Start by taking out the spitter zombies from a distance. These red-suited enemies are your biggest threat because they can hit you while you’re dealing with other zombies. Use your hunting bow or thrown weapons to eliminate them before they can establish firing positions.
Step 2: Elevation Advantage Jump onto the small substation building in the center of the area. This elevated position gives you several advantages:
- Defensive positioning – Zombies must climb to reach you
- Attack timing control – You choose when and how to engage
- Escape routes – Multiple directions to retreat if overwhelmed
- Visibility – Better view of remaining threats
Step 3: Hammer Bruiser Tactics The large zombie with the hammer requires special attention. Here’s the most efficient approach:
Molotov Strategy:
- Throw Molotovs from your elevated position
- Aim for the ground near his feet (easier to hit than direct strikes)
- Fire damage over time eliminates him without close combat risks
- Keep your distance – his hammer has surprising reach
Alternative Method (if no Molotovs):
- Use hit-and-run tactics from the building
- Jump down, strike, immediately climb back up
- Repeat until eliminated (much slower but doable)
Step 4: Cleanup Phase With the major threats eliminated, clean up any remaining zombies using your preferred melee weapons. The area should now be secure for exploration and puzzle-solving.
Phase 2: Accessing the Substation Building
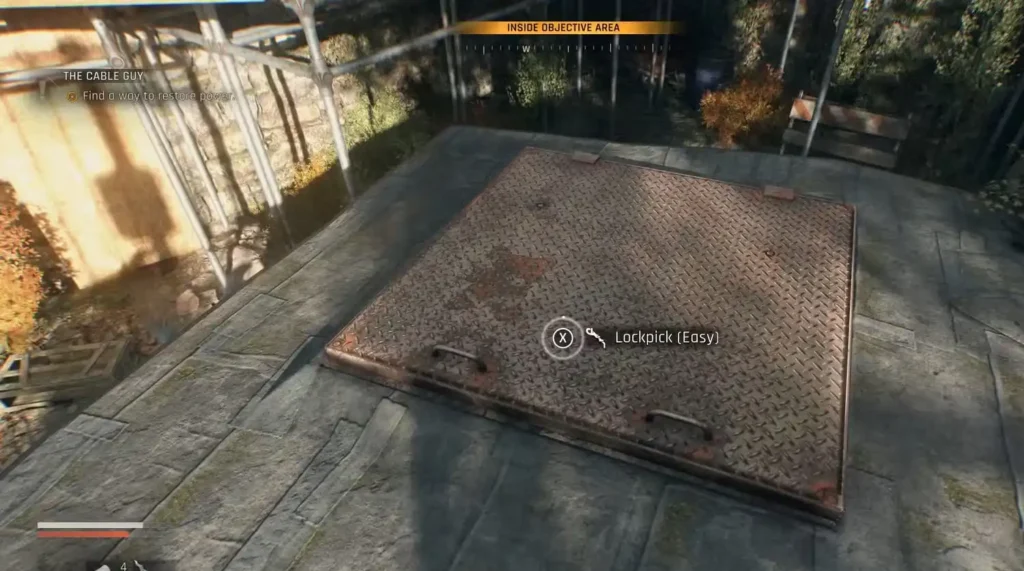
Lockpicking the Roof Access
Look for the roof hatch on top of the small substation building. This is your entry point to the internal systems.
Lockpicking Details:
- Difficulty: Easy (shouldn’t require multiple attempts)
- Backup plan: Craft additional lockpicks if needed using the crafting menu
- Location: Center of the roof on the small building
Common Mistake: Many players look for ground-level entrances first. The roof access is the intended and only way into the substation control room.
Interior Loot and Exploration
Once inside the substation, you’ll find several valuable items:
Notable Loot:
- Flame common tip mod craftplan – Useful for weapon modifications
- Reinforced camp axe – Solid early-game weapon upgrade
- Container with miscellaneous valuables – Extra resources for your journey
Strategic Note: This isn’t just a quest location – it’s a resource opportunity. Don’t rush through without thoroughly searching the interior.
Phase 3: Finding and Connecting the Power Cable
Locating the Power Source
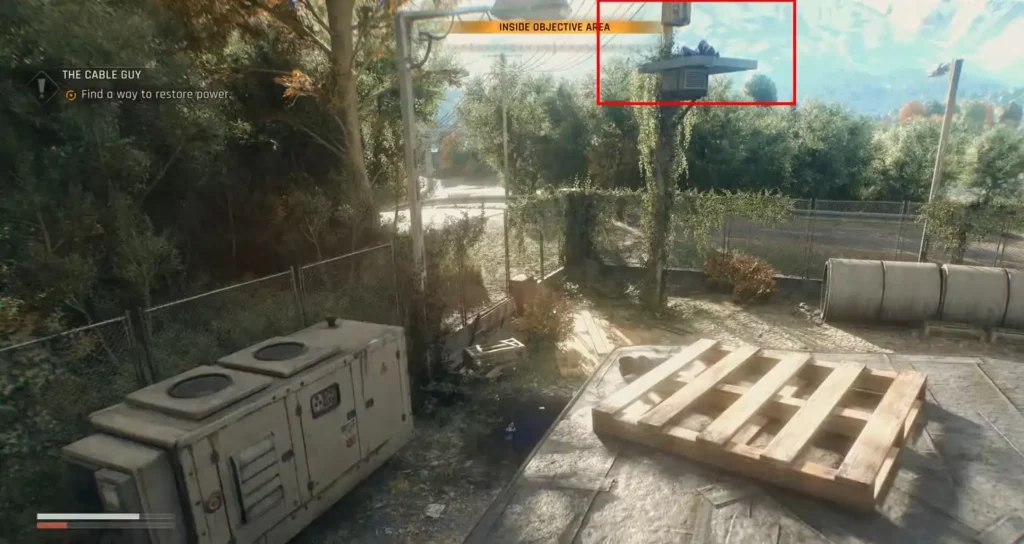
Here’s where most players get confused. The power cable isn’t inside the substation building – it’s on an electrical pylon in the southeast corner of the area.
Visual Identification:
- Look for a tall electrical pylon with power lines
- Small metal platform visible at the top
- Located in the southeast corner of the substation compound
The Platforming Challenge
Getting to the cable requires a specific climbing sequence that isn’t immediately obvious.
Step-by-Step Climbing Route:
- Start at the generator – Find the generator-looking machine near the pylon
- Jump to the streetlight – Use the generator as a stepping stone
- Climb the streetlight post – Shimmy up to reach the top
- Jump to the electrical pylon – Careful timing required for this leap
- Access the platform – Retrieve the power cable from the top
Platforming Tips:
- Take your time – Rushing leads to missed jumps and fall damage
- Check your stamina – Don’t attempt jumps when stamina is low
- Use camera angles – Adjust your view to see landing spots clearly
- Practice the sequence – If you fall, learn from the mistake before trying again
Completing the Power Connection
With the cable in hand, return to the substation building:
- Jump back to the substation roof – Reverse your climbing route
- Drop through the roof hatch – Enter the interior space
- Locate the connection point – North wall, directly below the entrance hatch
- Connect the cable – Interact with the machine to complete the circuit
Connection Details: The machine you need is impossible to miss – it’s the only interactive electrical equipment on the north wall, positioned directly below where you enter from the roof.
Advanced Tips and Strategies
Resource Optimization
Before Starting:
- Complete our lockpicking guide if you’re struggling with locks
- Stock up on throwing weapons using our resource farming tips
- Consider bringing backup healing items for the combat phase
Combat Efficiency
Time-Saving Approach:
- Clear all enemies before attempting the platforming sequence
- Use ranged weapons to avoid unnecessary risks
- Save Molotovs specifically for the hammer bruiser
Safety First:
- Never attempt the climbing sequence with low health
- Clear the area completely before focusing on puzzle elements
- Keep escape routes in mind during combat
Integration with Overall Progression
This quest fits perfectly into the early-game power restoration storyline. The rewards and experience gained here contribute to:
- Character progression through XP rewards
- Equipment upgrades via the loot obtained
- Skill development through varied gameplay challenges
- Story advancement toward more complex missions
For comprehensive progression planning, check our complete quest list and beginner survival strategies.
Common Pitfalls and Solutions
The Platform Confusion
Problem: Players spend excessive time looking for the cable in the wrong places Solution: Always check the southeast corner pylon first – the cable is never hidden or hard to spot once you know where to look
Combat Overwhelm
Problem: Getting swarmed while trying to fight all enemies simultaneously
Solution: Use elevation and prioritize threats systematically rather than engaging everything at once
Platforming Frustration
Problem: Repeatedly failing the climbing sequence due to impatience Solution: Practice each jump individually and ensure full stamina before attempting difficult leaps
Quest Rewards and Follow-Up
Immediate Benefits
- Quest completion XP – Solid progression boost
- Flame tip mod craftplan – Valuable weapon enhancement option
- Reinforced camp axe – Reliable weapon upgrade
- Area unlocked – Substation area becomes a safe, cleared zone
Strategic Value
Completing “The Cable Guy” efficiently demonstrates mastery of Dying Light: The Beast’s core gameplay pillars:
- Combat management – Tactical enemy elimination
- Environmental puzzles – Understanding spatial relationships
- Resource utilization – Efficient use of tools and consumables
- Risk assessment – Knowing when to fight vs. when to avoid danger
Connection to Broader Gameplay
This quest serves as excellent preparation for more complex missions that combine:
- Multi-phase objectives
- Combat and puzzle elements
- Platforming challenges
- Resource management requirements
For advanced strategies and upcoming challenges, explore our guides on XP farming and skill prioritization.
The Bottom Line
“The Cable Guy” quest perfectly exemplifies Dying Light: The Beast’s approach to mission design – combining action, puzzle-solving, and exploration into a cohesive challenge. The key to success lies in systematic approach: clear the threats first, explore thoroughly, then tackle the technical objective with patience and planning.
The confusion many players experience stems from expecting a straightforward “flip the switch” mission, when the game actually requires environmental awareness and problem-solving skills. Once you understand that the power source is external to the building itself, the solution becomes elegant and logical.
Remember: Take your time with both the combat and platforming elements. This quest rewards careful preparation and methodical execution over rushed attempts. Master these fundamentals here, and you’ll be well-prepared for the increasingly complex challenges that lie ahead.
Ready to restore power and advance the story? Gear up, head to the substation, and follow this guide step-by-step. The lights will be back on before you know it.
📥 Download Dying Light: The Beast:
- Official Website
- Steam
- PlayStation
- Xbox
🎮 Enhance Your Playthrough: