Stuck at the dead elevator in Little Nightmares 3 Chapter 2? Our complete guide shows you exactly where to find both batteries, dodge the creepy worker, and power up the lift to continue your escape.
Finding the Batteries to Power the Elevator in Chapter 2
If you’ve been exploring the industrial nightmare of Chapter 2 (also called the Necropolis area), you’ve probably hit that moment where Low and Alone discover a completely dead elevator with two empty battery sockets staring back at them. No power, no progress—classic Little Nightmares puzzle design.
The good news? Both batteries are hidden nearby in this creepy factory floor, and with a little teamwork (or smart AI companion work if you’re playing solo), you’ll have that elevator humming in no time. This puzzle requires precise timing, stealth, and coordination, so let’s break down exactly where each battery is hiding and how to grab them safely.
Quick Overview:
- First Battery Location: Inside the freezer room past the spinning fan
- Second Battery Location: Behind the storeroom where a worker is stocking shelves
- Key Items Needed: Alone’s wrench for breaking glass
- Difficulty: Medium (requires timing and stealth)
Battery #1: Navigating the Freezer and Hook System
Getting to the Freezer Room
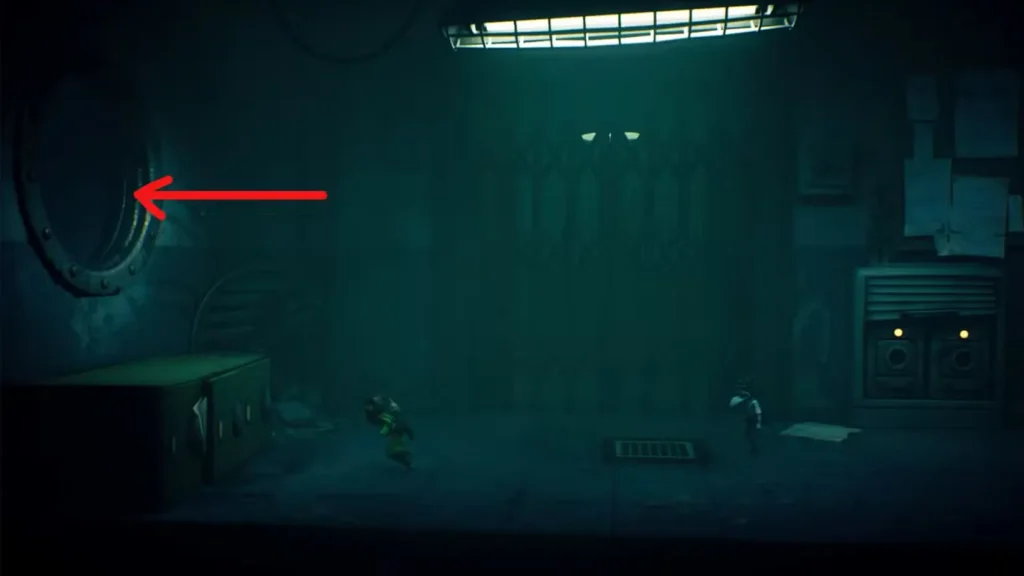
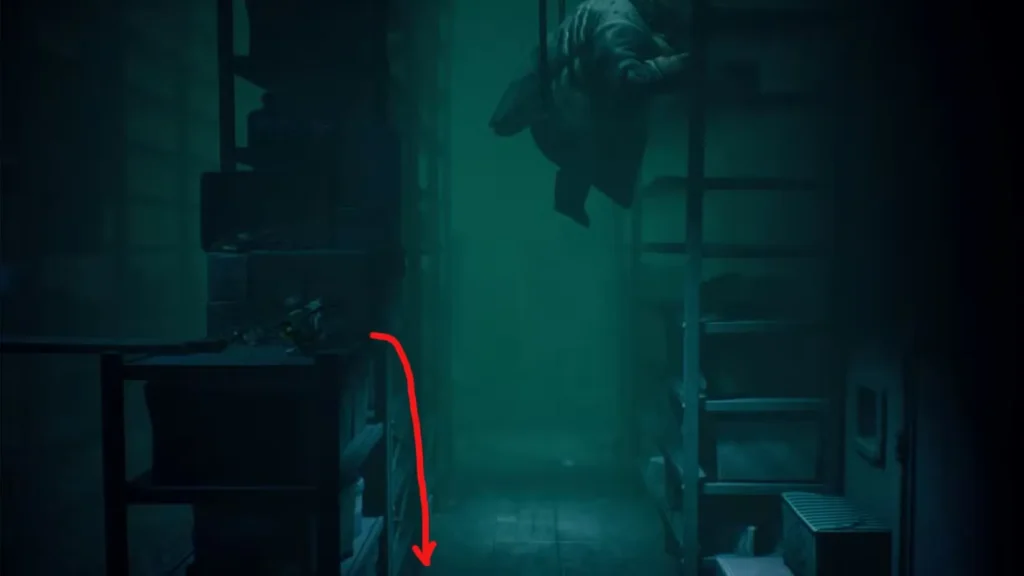
Starting from that broken elevator with the empty sockets, turn left and look for a circular window. It’s pretty obvious once you spot it—just jump through to land inside a massive industrial pipe. The atmosphere here really nails that cold, abandoned factory vibe that Little Nightmares does so well.
Keep moving in the same direction through the pipe until you emerge into what looks like a freezer room. You’ll immediately notice the problem: there’s a spinning fan blocking your path to the next area. This is where the co-op mechanics (or AI partner coordination) become essential.
The Hook Conveyor Puzzle
Here’s how to solve this tricky section:

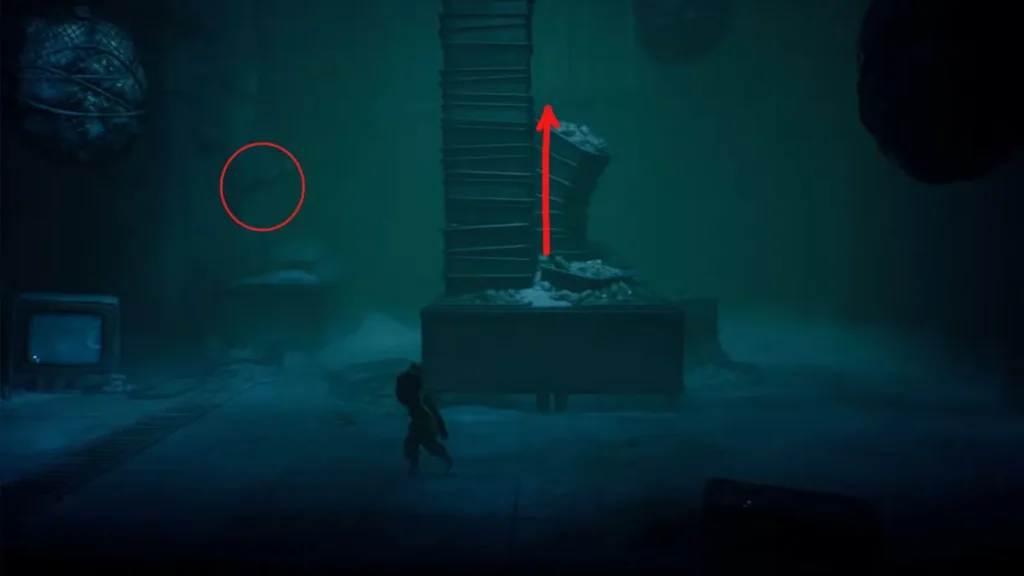
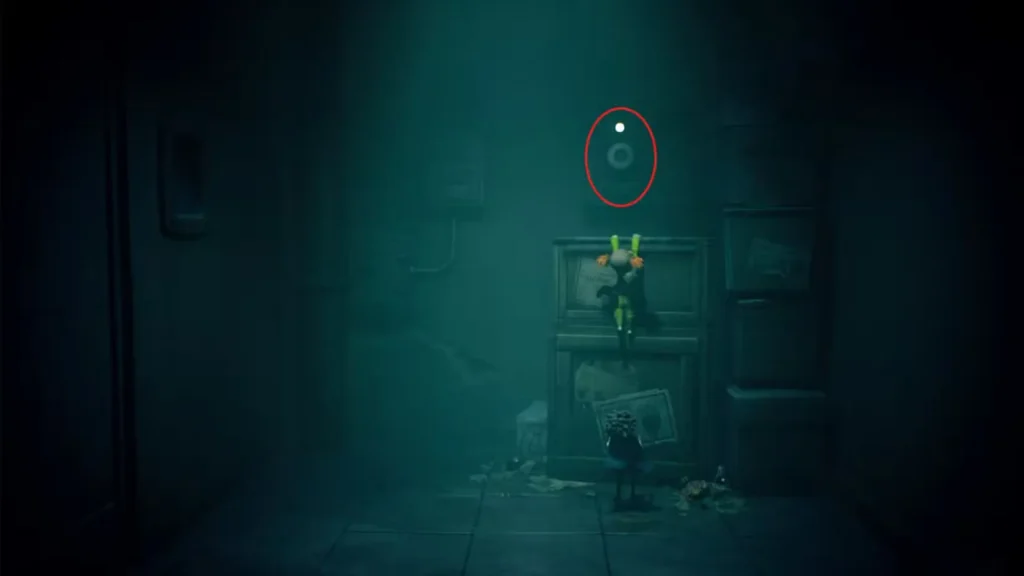
Step 1: One player climbs up the stack of plates piled in the center of the room. Meanwhile, the other player needs to jump up onto the left counter where you’ll find a lever mounted on the wall.
Step 2: The player at the lever pulls it, which activates an overhead conveyor system with hooks dangling from the ceiling. Timing is everything here—watch the hooks move along their track.
Step 3: When a hook swings into the perfect position, jump and grab onto it. Your character will hang on as the hook carries them across the room, over the dangerous fan, and into the next area. It might take a couple of tries to nail the timing, but once you get the rhythm, it’s straightforward.
Pro Tip: If you’re playing solo, the AI companion usually handles their part pretty well, but in co-op, communicate with your partner about when to pull that lever. A mistimed jump means starting over.
Grabbing the First Battery
Once you’re safely in the next room, you’ll spot the first battery sitting in a socket—and here’s the clever part: that battery is actually powering the fan that was blocking you. Pull it out of the socket, and the fan stops spinning immediately.
Now comes the return journey:
- Throw the battery back through the now-safe fan opening
- Follow it back through yourself
- Pick up the battery and carry it all the way back to the elevator
- Slot it into one of the empty sockets
One down, one to go. If you’re curious about how much more of the game you have left after this chapter, check out our complete chapter list and playtime guide.
Battery #2: The Creepy Storeroom Worker
Breaking Into the Storeroom
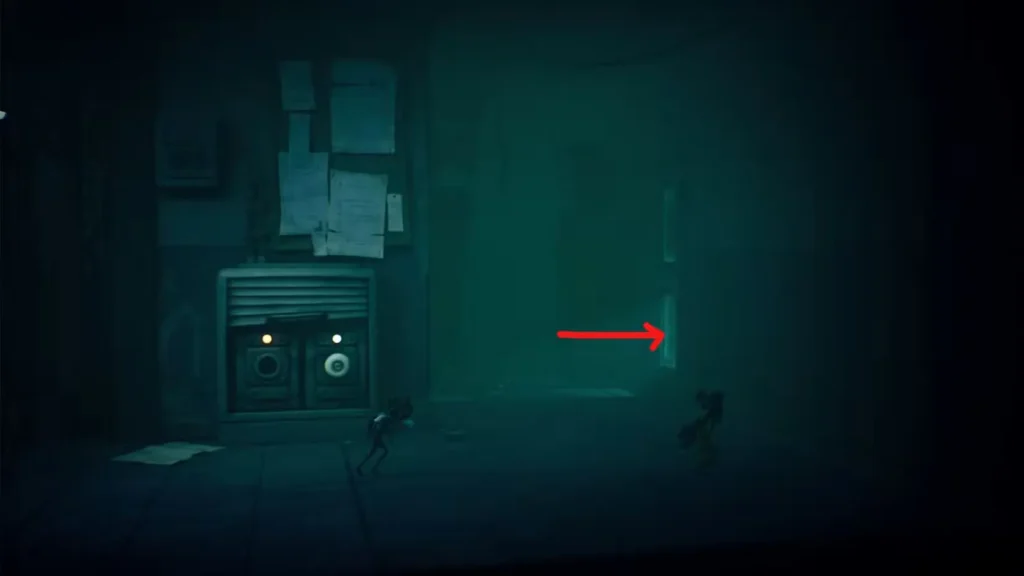
Head back to the elevator area, but this time go right instead of left. You’ll come to a door with glass panels—this is where Alone’s wrench becomes crucial. If you’re controlling Alone (or your partner is), use the wrench to smash the lower glass panel in the door. This creates an opening just big enough to crawl through.
Not sure about the differences between Low and Alone? Our character comparison guide breaks down their unique abilities.
Sneaking Past the Worker
Once inside, you enter what might be one of the creepiest encounters in Chapter 2—a storeroom where a tall, lanky worker is mechanically stocking shelves, moving up and down with unsettling regularity.
Here’s your stealth strategy:
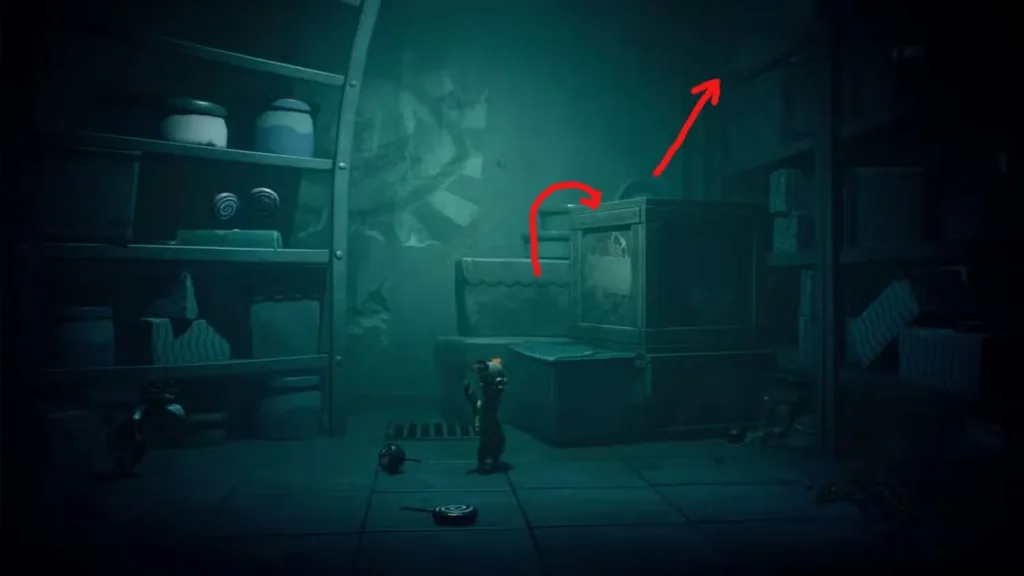
Climb the boxes: Use the stacked boxes as platforms to reach the highest shelf level, then carefully cross the wooden planks.
Stay crouched: This is critical—make sure you’re crouching as you move. The worker moves in a predictable pattern, going up and down between shelf levels.
Wait for the opening: Watch the worker’s pattern carefully. When they move up to stock the higher shelves, that’s your window. Drop down to the boxes below and quickly slip through the small gap on the right side.
Coordinate with your partner: Whether you’re playing co-op with a friend or relying on AI, both characters need to make it through. Low will boost Alone up to the top box where the second battery is located.
The Worker’s “Accident”
Here’s where things get darkly satisfying (in true Little Nightmares fashion). Once you grab that second battery and exit through the newly opened door, you’ll discover that the worker has had a fatal “accident” and is now lying on the ground. Dark humor aside, this actually helps you—the threat is neutralized.
Getting the Battery Back to the Elevator
The final stretch requires some careful maneuvering:
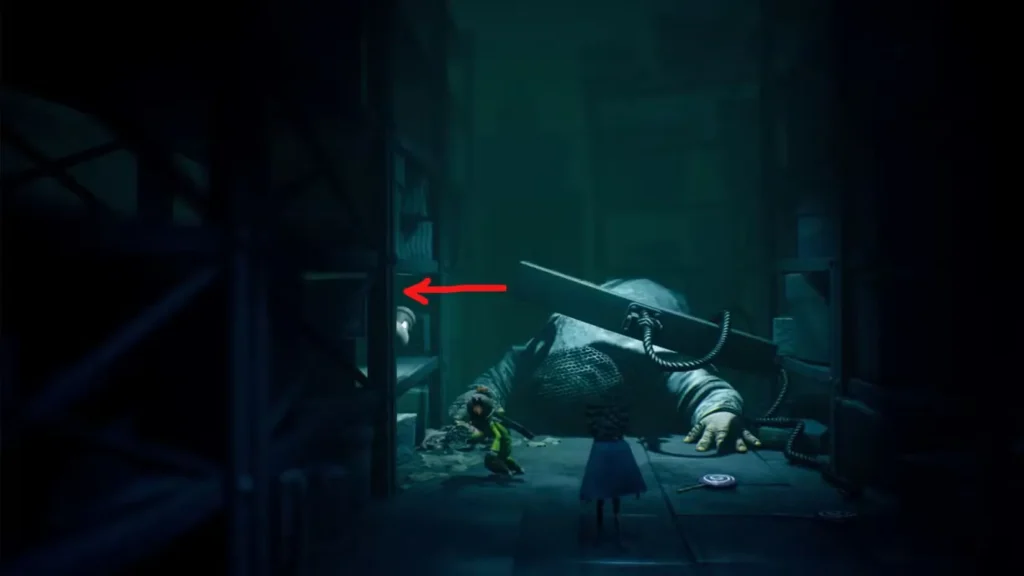
- Throw the battery over the shelf to the left (you can’t carry it through tight spaces)
- Jump over the shelf yourself to retrieve it
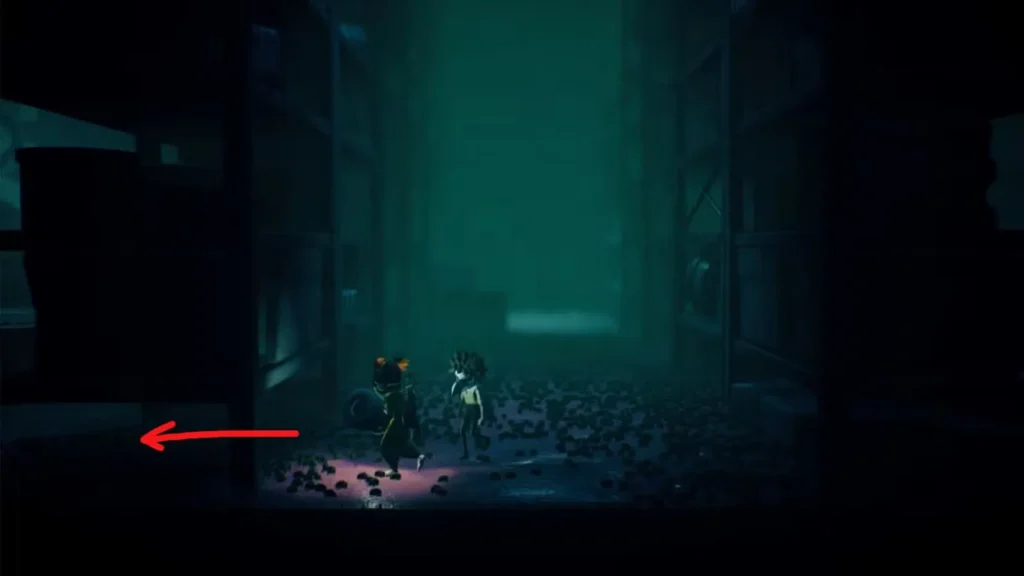
- Walk toward the cluster of bugs—they’ll scatter out of your way
- Crawl under the lower shelf on the left side
- Return to the elevator and place the battery in the second empty socket
Elevator Activated: What’s Next?
With both batteries installed, the elevator springs to life, and you’re free to continue deeper into Chapter 2’s industrial horrors. The Necropolis has plenty more challenges waiting, including some tricky puzzles in the later chapters.
Struggling with other Chapter 2 puzzles? Our Necropolis Chapter 1 walkthrough covers the earlier sections, and when you reach Chapter 3’s Carnevale, we’ve got you covered with guides for the radio puzzle and button puzzle.
Key Takeaways
- Battery puzzles require teamwork: Whether solo or co-op, coordinate movements carefully
- Timing is crucial: The hook conveyor and worker stealth sections demand patience
- Use Alone’s wrench: Essential for breaking into the storeroom
- Watch enemy patterns: The worker moves predictably—learn the rhythm before making your move
- Throw batteries strategically: You can’t always carry them through tight spaces

The battery puzzle is a perfect example of Little Nightmares 3‘s design philosophy—mixing environmental puzzles, stealth mechanics, and co-op coordination into one creepy, satisfying challenge. Once you’ve powered up that elevator, you’re one step closer to escaping this nightmare factory.
Official Game Resources
Happy exploring, and watch out for those workers—they’re creepier than they look!