Pump-Action Shotgun Breakdown – Why to Avoid in PUBG Mobile 2026
D-Tier Shotgun – 12 Gauge – Ground Loot – Pump-Action Only – Replace ASAP
Overview
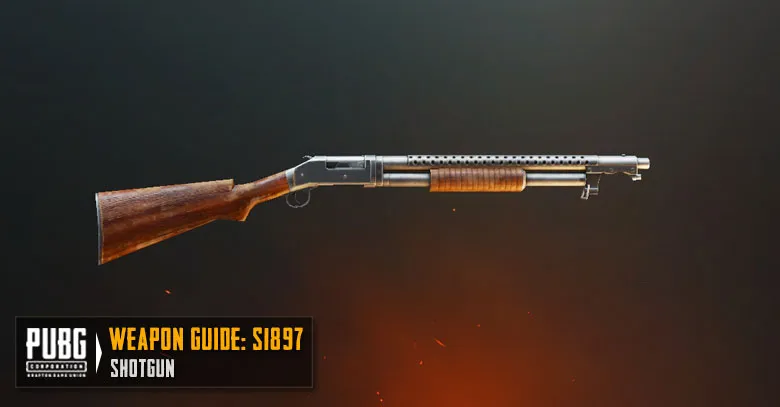
The S1897 is a D-Tier pump-action shotgun in PUBG Mobile 2026. Based on the Winchester Model 1897 Trench Gun, it fires 9 pellets of 12 Gauge per shot from a 5-round tube magazine. Each pellet deals 26 damage, giving a theoretical maximum of 234 raw damage per full-connect shot — which sounds devastating until you realise the 0.75-second pump delay between shots and the 4-second empty reload make it one of the slowest weapons in the entire game.
The core problem with the S1897 in the 2026 meta is structural: pump-action mechanics require every shot to be a near-perfect hit. A missed shot at 0-10m means 0.75 seconds of vulnerability — more than enough for an opponent with any other weapon to finish you. The S686 fires two shells near-simultaneously. The S12K fires as fast as you can tap. The DBS (S-Tier) fires two shells and holds more. The S1897 cannot compete with any of these on any metric that matters in 2026 combat.
D-Tier Summary: The S1897 is not a bad shotgun in isolation — its per-shot damage floor is among the highest available. But PUBG Mobile combat speed in 2026 punishes any weapon with a 0.75s inter-shot delay at CQC. It is the only shotgun in the game that demands near-zero miss tolerance to function at all. Pick it up only if nothing else is available, fire one shot, and replace it at the earliest opportunity.
Weapon Statistics (2026)
Core Stats
The Real Numbers: Per-Armour Damage
Figures represent full 9-pellet connect at close range (0-10m), approximate values with armour mitigation
The Spread Problem: These are full-connect numbers. Pellet spread means that at 10m+ without a Choke, typically only 5-7 of 9 pellets hit — reducing effective damage by 20-45%. Against Level 2+ armour, a partial hit does not down the target, and 0.75 seconds later the opponent shoots back.
Limited Positives
- + 234 raw damage per shot (full 9-pellet connect)
- + 1-shot KO vs unarmoured targets at 0-5m
- + Can equip both Choke AND Duckbill (unique muzzle options)
- + Common ground loot on every map
- + Minimal recoil – easy to aim the single shot
Why It Is D-Tier
- – 0.75s pump delay — slowest fire rate of any viable weapon
- – 4-second full reload — catastrophic in any firefight
- – Zero tolerance for misses — one miss = death
- – Pellet spread reduces effective damage at 10m+
- – Level 2+ armour frequently survives first shot
- – Outclassed by S686, S12K, and DBS in all scenarios
- – Only 2 attachment slots — no foregrip or scope options
- – 2026 SMGs and ARs out-TTK it in almost every scenario
Why the 2026 Meta Kills the S1897
The 0.75-Second Vulnerability Window
After every single shot the S1897 forces a 0.75-second pump animation before you can fire again. In that window: an M416 fires 8-9 bullets (~320-360 damage), a Vector fires 14 bullets (~430 damage), and even a slow UMP45 fires 8 bullets (~312 damage). You cannot dodge, you cannot peek, and you cannot cancel the animation early.
The 2026 meta has increasingly fast weapons — SMGs with 0.047-0.067s fire rates, ARs at 0.086s. Against any of these, missing even one S1897 shot is a binary loss condition. This was always the weakness, but the meta’s speed has widened the gap further in 2026.
The Empty Reload Disaster
The S1897 uses a tube-feed reload that loads one shell at a time. Emptying all 5 rounds takes 4 full seconds to reload from empty — without Bullet Loops. With Bullet Loops, it drops to 2.9 seconds. Both are death sentences in any active engagement.
The tactical reload (not fully empty) is 1.2 seconds — but this requires awareness and pre-planning that most players cannot execute under fire. Any experienced opponent knows to close the gap during your reload animation.
The Armour Problem
By round 2-3 of any match, the majority of alive players have Level 2 vest and helmet. Against Level 2 armour, the S1897 needs a near-perfect pellet hit to down in 2 shots. Against Level 3, that goes to 3 shots — 2.25 seconds of shooting time at minimum, assuming perfect accuracy every time.
This is the fundamental design contradiction of the S1897 in the mid-to-late game: it needs perfect aim to function but rewards perfect aim with a slower kill than any AR or SMG would achieve in the same scenario.
Attachments (If You Have to Use It)
Only 2 Slots: Muzzle (Choke or Duckbill) + Stock (SG Bullet Loops)
Unique Muzzle Feature: The S1897 is one of the only shotguns that can equip either Choke OR Duckbill — the S686 can only use Choke. This gives you a choice based on your intended playstyle — but either way, the pump-action delay remains the hard ceiling on performance.
If You Have No Other Option: Survival Tips
1. Fight Only at 0-5 Metres
The only range where a full pellet connect is reliable. Doorways, tight corridors, and point-blank ambushes. At 10m+, spread means partial hits — and partial hits against armoured targets do not down.
2. Never Allow a Second Fight Round
The S1897 is only viable when one shot ends the fight. Pre-fire from cover — let the enemy walk into your aim rather than engaging first. If your first shot does not knock, retreat behind hard cover immediately. Do not attempt a second shot while exposed.
3. Tactical Reload After Every Shot
The 1.2-second tactical reload (reload with ammo remaining) is vastly faster than the 4-second empty reload. After every shot, whether it connects or not, reload one shell immediately behind cover. Never fight from an empty tube.
4. Use It Alongside a Secondary Weapon
Pair the S1897 with any AR or SMG as your primary slot. The S1897 is an ambush opener, not a sustained fight weapon. Fire one shot, switch immediately to your AR to finish if needed. Never rely on the S1897 to close a fight that required more than one shell.
5. Target Unarmoured Players Only
The only scenario where the S1897 is confidently reliable: early drop against enemies with no armour at 0-5m. Even then, once they have Level 2 armour — which happens within 2-3 minutes on most maps — you must switch to a different weapon or accept a severe disadvantage.
S1897 vs All Shotguns
| Weapon | Tier | Dmg/Pellet | Fire Rate | Mag Size | Action Type | Spawn |
|---|---|---|---|---|---|---|
| DBS | S | 26 | Very Fast | 14 | Semi-Auto (2 shells) | Airdrop |
| S12K | C | 24 | Semi-Auto | 5 (10 ext) | Semi-Automatic | Ground Loot |
| S686 | D | 26 | 2-shot burst | 2 | Break-Action | Ground Loot |
| S1897 | D | 26 | 0.75s delay | 5 | Pump-Action | Ground Loot |
Shotgun Verdict: The S1897 and S686 are both D-Tier — the S686 for its 2-round mag and long reload, the S1897 for its pump delay. The S12K (C-Tier) is the best ground-loot shotgun — semi-automatic fire with a 5-10 round magazine makes it significantly more forgiving. The DBS (S-Tier airdrop) is in a different class entirely. If you are on a map where you must use a shotgun, S12K > S686 > S1897 for the current meta.
Better Alternatives to Pick Up Instead
Semi-auto fire, same 12 Gauge ammo — your ammo stash transfers. No pump delay. 10-round extended mag means you can miss shots and still win the fight. A direct straight swap from the S1897 that immediately improves your odds.
A bare M416 with zero attachments beats the S1897 in every fight beyond 10m. An AR gives you full-map viability, mid-range capability, and a much more forgiving TTK if you miss shots. Replacing the S1897 with any AR immediately elevates your threat level at all ranges.
For CQC-specific gameplay (Sanhok, building clears), the UMP45 or P90 are dramatically superior alternatives. Both can hold sustained fire, work at 50-60m, and carry 25-50 rounds. The miss-tolerance is night-and-day compared to the S1897.
Final Verdict
The S1897 is D-Tier (3/10) and earns that rating fairly. Its design is fundamentally incompatible with the 2026 PUBG Mobile combat pace. The 0.75-second pump delay after every shot creates a vulnerability window that modern ARs and SMGs exploit without mercy. The 4-second empty reload is among the longest in the game. The pellet spread at 10m+ reduces its best-case damage significantly.
The One Legitimate Use Case: An ambush at 0-5m against an unarmoured target in the first 90 seconds of a match. That is a very specific, very brief window. Outside of this, the S1897 is a liability that punishes any imperfect play — and in PUBG Mobile, imperfect play is the human norm.
Final Recommendation: Do not actively seek the S1897. If you land near one with no other options, pick it up as an absolute emergency measure — attach SG Bullet Loops and a Choke, fight only at 0-5m, always tactical reload after every shot, and swap it for any S12K, AR, or SMG the moment you find one. There is no late-game scenario where the S1897 is the correct weapon choice.
Other D-Tier Weapon Guides
View Complete PUBG Mobile Gun Tier List Hub
D-Tier Shotgun – 12 Gauge – 2-Round Break-Action
D-Tier AR – 5.56mm – Burst Fire Only
D-Tier Sniper – .45 ACP – Miramar Exclusive


