Complete guide to progressing through Far Fields in Hollow Knight: Silksong. Learn how to get unstuck, find the Drifter’s Cloak, reach Greymoor, and collect the Mask Shard.
Far Fields is notorious for trapping players in an endless circular route where every path seems to lead back to where you started. This frustration is intentional – the area is designed as a progression gate that requires a specific ability to escape vertically.
Understanding the Drifter’s Cloak requirement, wind current mechanics, and proper progression sequence transforms Far Fields from a confusing maze into a straightforward vertical ascent to Greymoor and beyond.
Access previously unreachable areas throughout Pharloom
Drifter’s Cloak TL;DR: Complete Flexile Spines quest → get wind riding ability → unlock Far Fields progression
Alternative Approaches (Not Recommended)
While some areas might be accessible through advanced platforming techniques, the Drifter’s Cloak is the intended and most reliable method for Far Fields progression. Attempting to bypass this requirement typically leads to frustration and dead ends.
Optional but Recommended: Far Fields Mask Shard
Accessing the Hidden Mask Shard
Location: Above the Seamstress’s balloon in elevated secret area
Collection sequence:
Start from Seamstress home with Drifter’s Cloak equipped
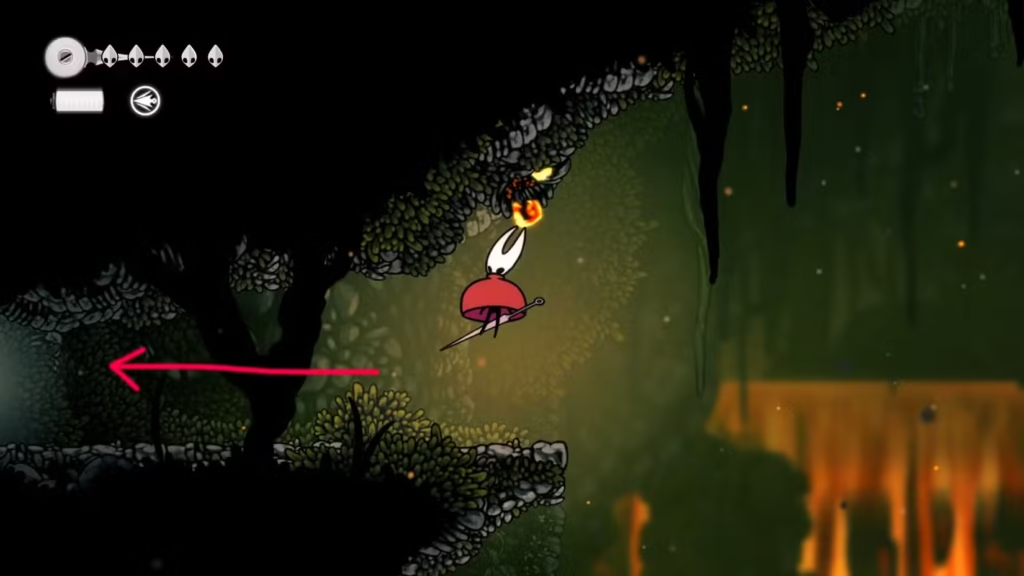
Head right until you see upward wind current
Ride first wind current upward
Continue to second wind current and ride it up
Land and head left on upper platform
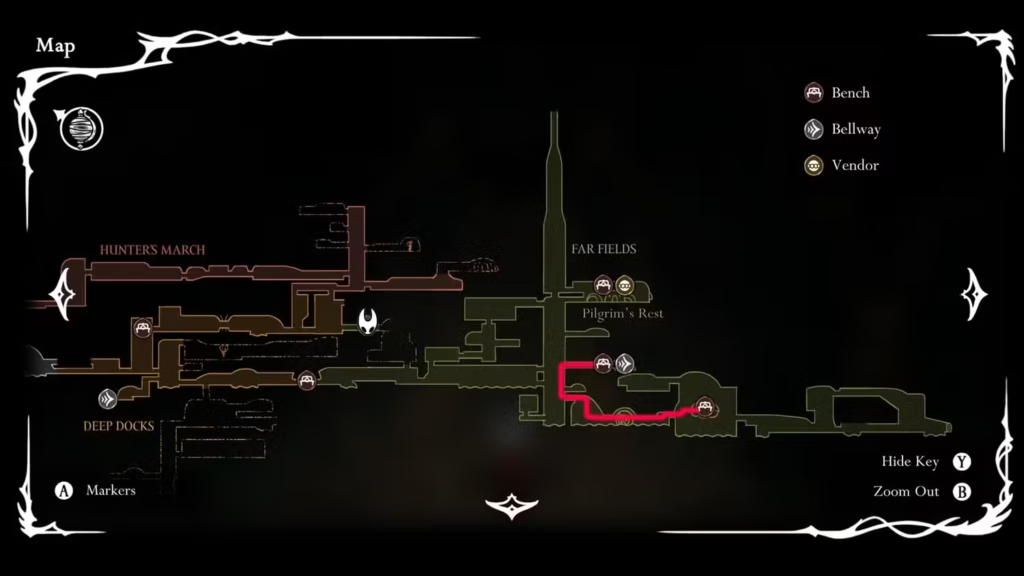
Initial Navigation TL;DR: Seamstress → right → up wind current → second wind current → left
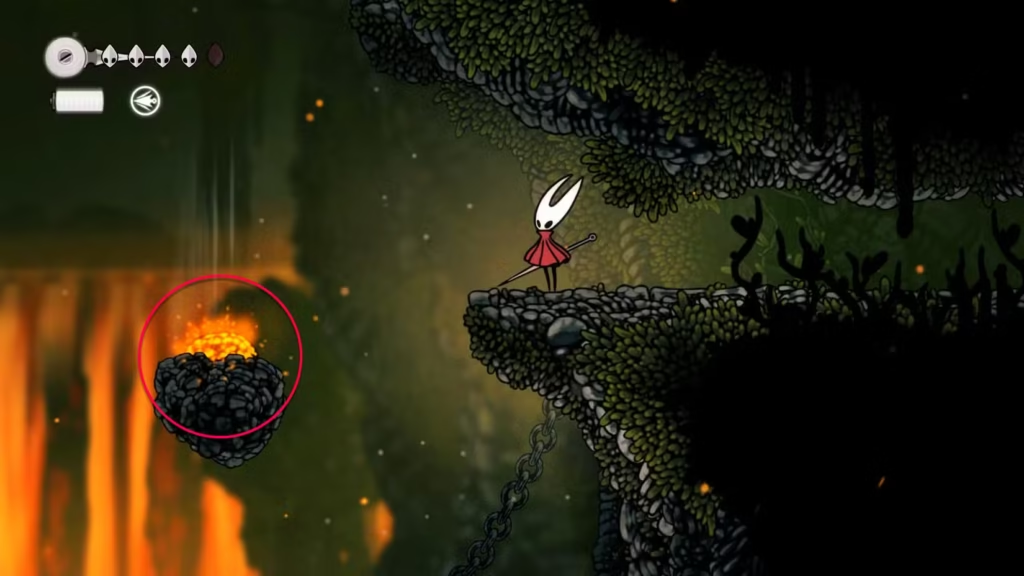
Explosive Rock Sequence
Breaking the first explosive rock:
Hit explosive rock to release new wind current
Avoid explosion damage by maintaining safe distance
Ride newly created wind current to next platform area
Continuing the sequence:
Find second explosive rock and break it (same method)
Ride resulting wind current to third explosive rock location
Break third rock to complete sequence
Total: 3 explosive rocks must be triggered to access Mask Shard area
Explosive Sequence TL;DR: Break 3 explosive rocks → each creates new wind current → follow sequence to Mask Shard
Final Mask Shard Collection
Entering the secret chamber:
Glide slowly to opening on the left
Enter hidden area and break any remaining explosive rocks
Look upward for yellow bomb above the area
Ride wind current to reach and destroy the yellow bomb
Always look for upward options rather than horizontal paths
Break every explosive rock encountered (creates new options)
Use systematic exploration rather than random wandering
Mark progress mentally to avoid backtracking confusion
Common Mistakes to Avoid
Progression errors:
Attempting horizontal navigation without vertical thinking
Skipping Flexile Spines quest and getting permanently stuck
Rushing through Fourth Chorus fight unprepared
Missing Mask Shard due to incomplete exploration
Understanding quest mechanics through experiences like the Flintbeetles quest can help avoid similar preparation mistakes.
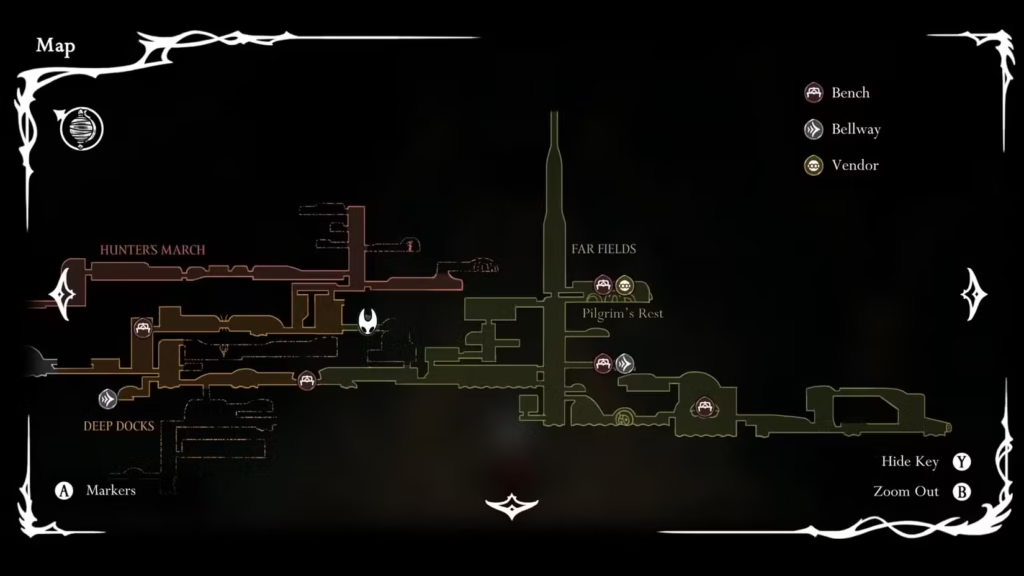
Far Fields Exit Options
Multiple Departure Routes
Once Drifter’s Cloak is obtained and Bellway is unlocked:
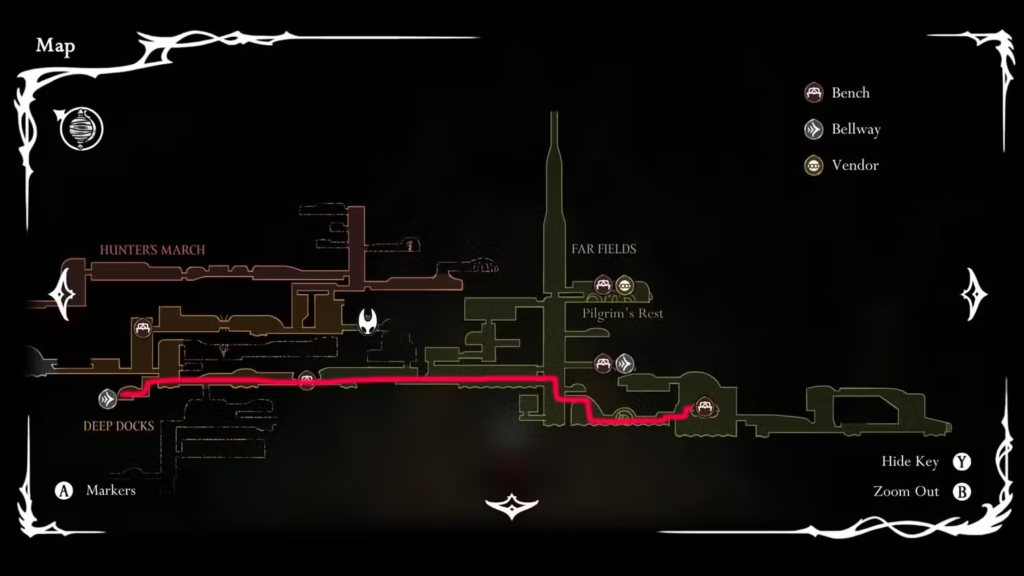
Option 1: Return to Deep Docks
Backtrack through original entry point
Useful for resource management or quest completion
Option 2: Use Bellway Fast Travel
Fast travel to any previously unlocked Bellway station
Most efficient for distant destinations
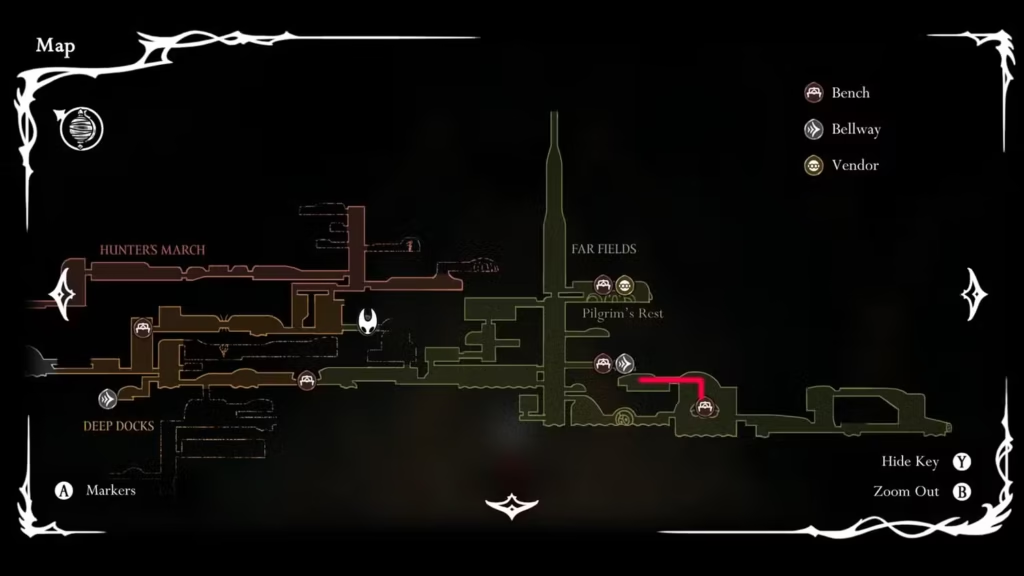
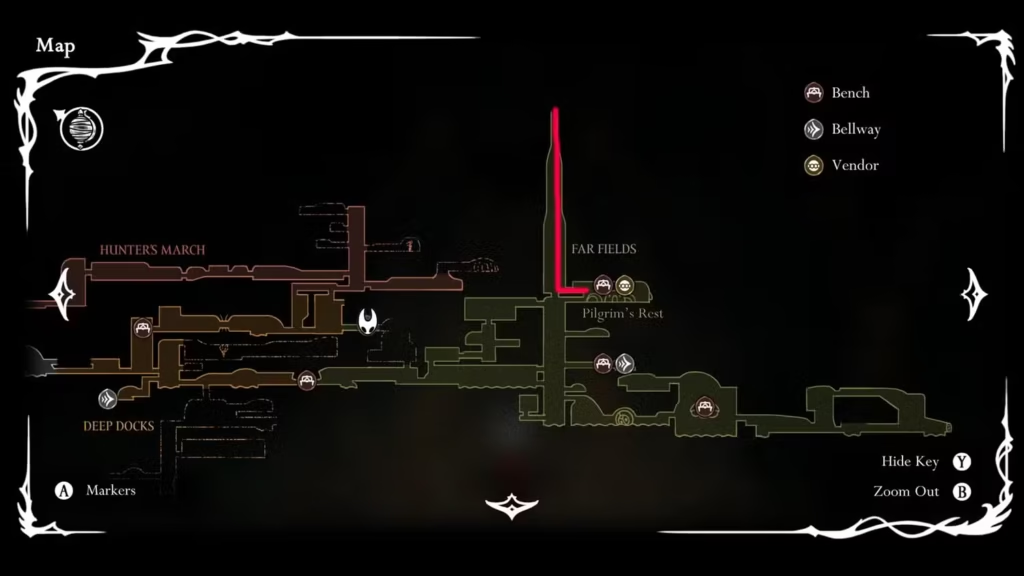
Option 3: Continue to Greymoor
Progress to new major area with fresh challenges
Recommended for main story advancement
Exit Options TL;DR: Back to Deep Docks → Bellway fast travel → forward to Greymoor
Your Path Through Far Fields
Far Fields transforms from an impossible maze to a straightforward vertical climb once you understand the Drifter’s Cloak requirement. The area teaches important lessons about seeking prerequisites and thinking vertically in Metroidvania progression.
Essential Far Fields progression checklist:
✅ Complete Flexile Spines quest for Drifter’s Cloak
✅ Collect optional Mask Shard via explosive rock sequence
✅ Navigate to lowest road and defeat Fourth Chorus boss
✅ Use wind currents for systematic upward progression
✅ Break explosive rocks to create additional navigation paths
✅ Reach Bellway location for fast travel access
✅ Continue through Pilgrim’s Rest to Greymoor
Master Far Fields navigation and you’ll have developed skills for similar vertical progression challenges throughout Pharloom’s remaining areas.
Sacheen Chavan is a seasoned gaming enthusiast, content creator, and tech lover with over 6 years of experience in the gaming industry. He has contributed to platforms like BollywoodFever and Buzzing Bulletin, where he shared insights on gaming trends, esports, and the latest gear.
Known for delivering honest reviews and practical tips, Sacheen helps gamers level up their experience — whether it's dominating the esports scene, grinding through RPGs, or testing cutting-edge tech. He blends hands-on experience with a passion for community-driven content.