Learn how to access Wisp Thicket in Hollow Knight Silksong, defeat Father of the Flame boss, and collect all hidden items in this challenging mid-game area.
Why Wisp Thicket Is Worth the Journey
Wisp Thicket represents one of Hollow Knight: Silksong’s most cleverly gated areas. Hidden behind both ability requirements and geographic knowledge, it rewards persistent explorers with unique challenges and valuable rewards. What makes this area special isn’t just the boss fight—it’s how it connects multiple regions and offers some genuinely creative platforming sequences.
During my first playthrough, I actually stumbled across the entrance several times before I had the double jump ability. There’s something satisfying about finally returning to crack open an area you’ve been eyeing for hours.
Prerequisites: What You Need Before Attempting Wisp Thicket
Essential Ability Requirements
Double Jump (Faydown Cloak) – This is non-negotiable. The entire area is designed around double jump mechanics, and you’ll encounter the requirement within seconds of trying to enter.
Highly Recommended Items
- Magma Bell – Reduces fire damage from two masks to one (crucial for the boss)
- Sufficient Rosaries – For map purchases and bench access on Mount Fay
- Multiple mask upgrades – The climbing sections can be unforgiving
Getting the Double Jump: Mount Fay Expedition
The double jump ability sits atop Mount Fay, and reaching it is an endurance test. Here’s what you need to know:
Survival Tips for Mount Fay:
- The cold wind damage is constant—don’t panic, just move efficiently
- Benches are strategically placed but require planning to reach
- Bring extra Rosaries for Shakra’s map—it’s worth every bead
- Consider this a test run for Wisp Thicket’s difficulty level
Step-by-Step Route to Wisp Thicket
Phase 1: Getting to Greymoor Tower System
Starting from Greymoor’s main area:
- Head left toward the Bellway Station tower
- Climb all the way to the top (use your wall jump abilities liberally)
- Exit through the right passage to reach the second tower
- Climb the second tower completely
- Exit through the LEFT passage this time
Navigation tip: The tower climbing can be disorienting. Remember: right exit first, then left exit. This pattern becomes muscle memory after a few runs.
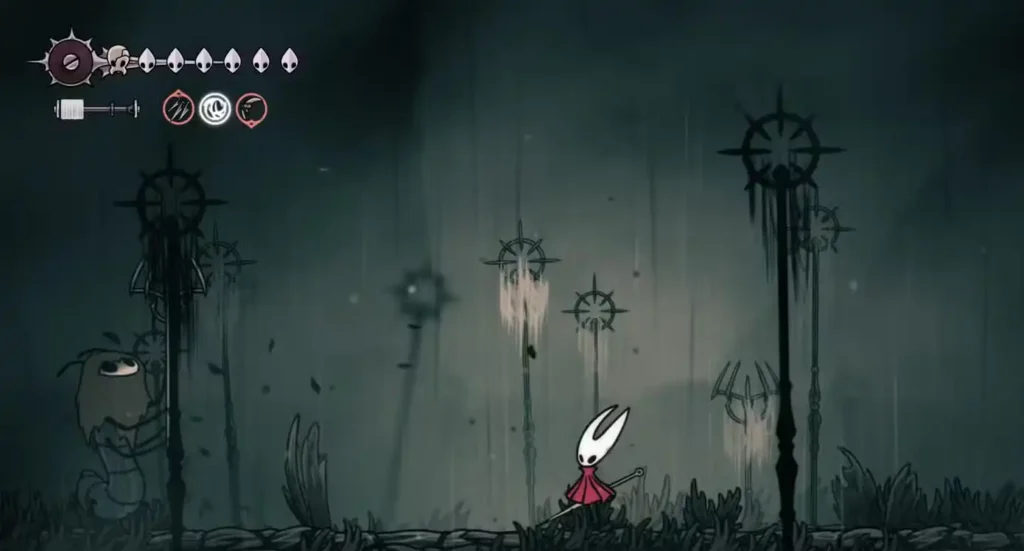
Phase 2: The Fan Gauntlet
You’ll emerge into an area filled with flying enemies and spike pits below. This section tests your timing and patience:
- Activate fans methodically – Don’t rush ahead without securing your next platform
- Watch for flying enemy patterns – They’re predictable but dangerous in groups
- Use the spikes to your advantage – Some enemies will fly into them
Phase 3: The Double Jump Section
When you reach the upward path, you’ll encounter the double jump requirement. This is where many players first realize they need the Faydown Cloak.
With double jump equipped:
- Navigate the spike corridors carefully
- Use pogo techniques on the balls for momentum
- Head right toward the bench—you’ve made it!
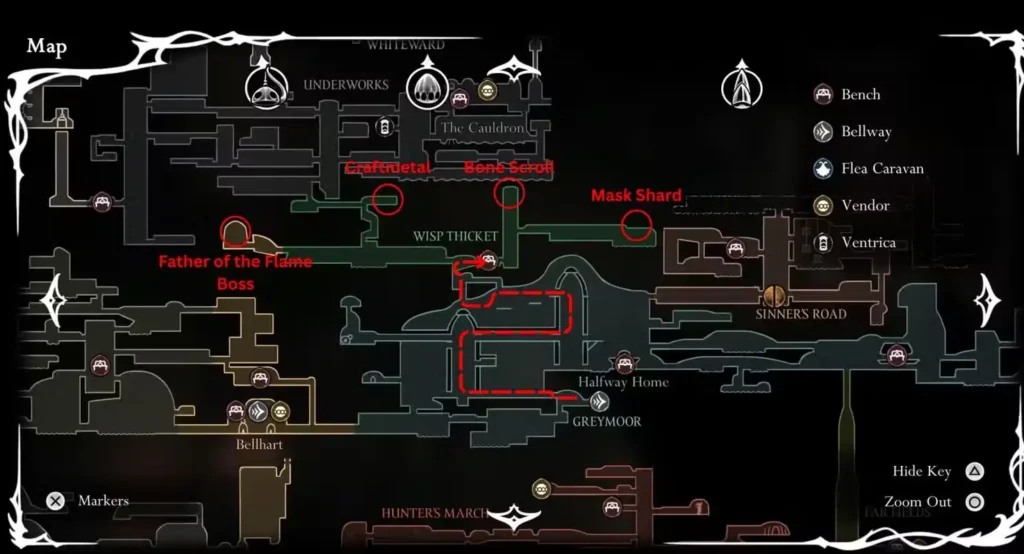
Wisp Thicket Layout and Exploration
The Self-Mapping Advantage
Unlike most areas, Wisp Thicket automatically maps itself as you explore. This is a thoughtful design choice that lets you focus on the challenging platforming without worrying about purchasing or finding a map.
Key Areas to Explore:
- Central bench area – Your safe haven and fast travel point
- Boss arena (left from bench) – Where Father of the Flame awaits
- Upper platforming sections – Contains valuable collectibles
- Connection routes – Links to Underworks and other areas
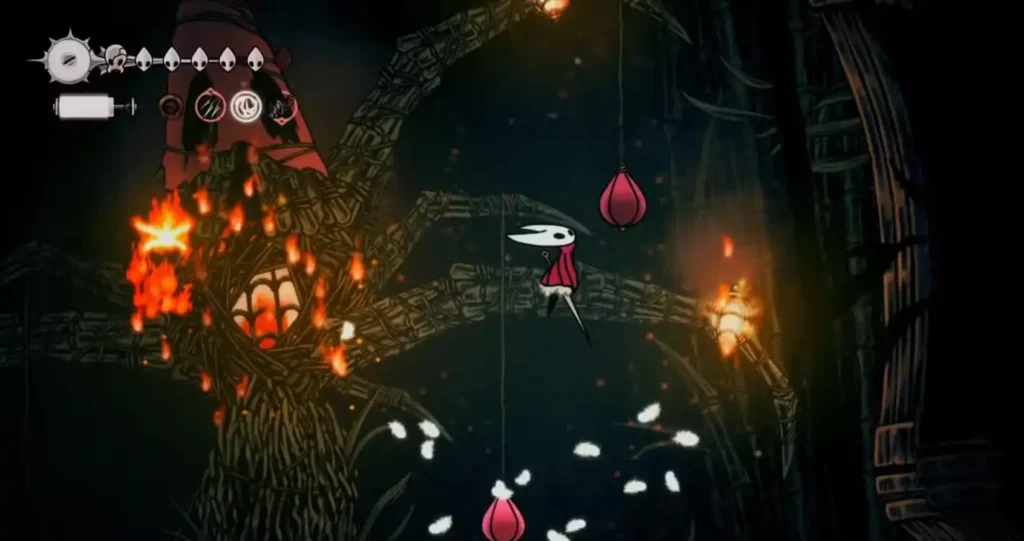
Father of the Flame: Boss Fight Breakdown
Finding the Boss Arena
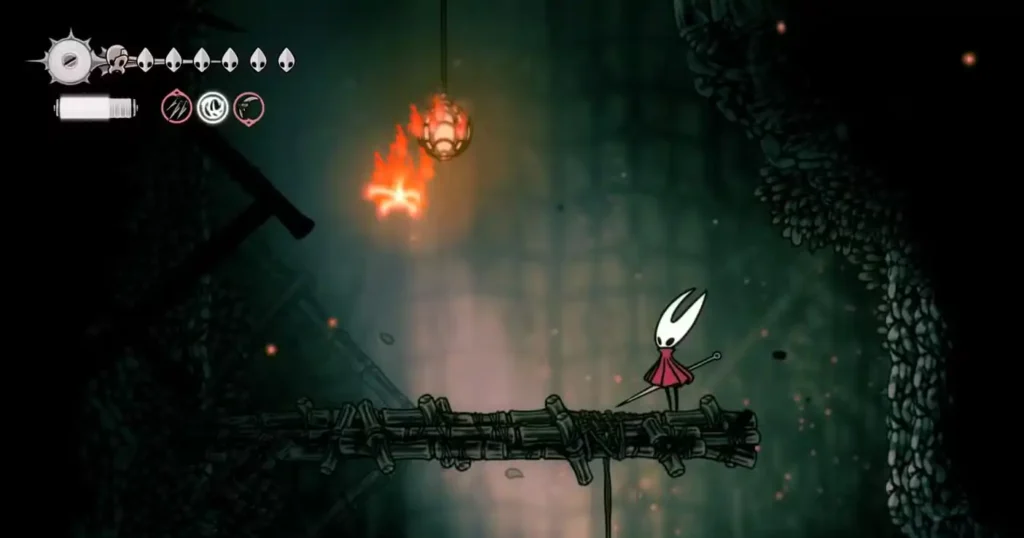
From the bench, the route to Father of the Flame is straightforward but hazardous:
- Head left and pogo off the ball
- Navigate past the flame-shooting enemy (those projectiles home in!)
- Pass the fire brazier climbing section
- Pogo off two balls and head left to the arena
Speed run tip: Use Clawline to bypass enemies entirely. Jump and grapple past the first enemy, swim through water to avoid the brazier, then jump and grapple past the second enemy.
Understanding the Fight Mechanics
Phase 1: Brazier Destruction The Father of the Flame’s main body is completely immune to damage. Your targets are the four hanging braziers:
- Each brazier requires multiple hits to destroy
- Pogo strategy: Jump over braziers and down-slash 2-3 times before retreating
- Fire orb tracking: The boss spawns homing projectiles that deal two mask damage
- Escalation: As you destroy braziers, the boss spawns multiple orbs with shorter intervals
Phase 2: Core Assault Once all braziers are down, target the caged fire in the center:
- Continue avoiding homing fire orbs
- Watch for the devastating roar attack—stop attacking and focus on dodging
- Multiple projectiles shoot in all directions during the roar
Advanced Strategies and Tool Usage
The Delver’s Drill Method (Cheese Strategy) Located in the Underworks, the Delver’s Drill trivializes this fight:
- Position yourself above braziers and activate the drill
- Cancel the animation to dodge attacks
- Works on both phases, though requires precise positioning for Phase 2
Alternative Tool Strategies:
- Sting Shards – Excellent for Phase 2 head shots
- Threefold Pin – Wide area coverage makes hitting easier
- Magnetite Dice – Low chance effects can provide crucial damage mitigation
Essential Equipment: The Magma Bell
The Magma Bell transforms this fight from brutal to manageable. Here’s why it’s crucial:
- Reduces fire damage from 2 masks to 1 mask
- Has a cooldown period between activations
- Located in Deep Docks – worth the detour
Without Magma Bell: This fight becomes a test of perfect execution. With it, you have room for mistakes and can focus on learning patterns.

Rewards and Collectibles in Wisp Thicket
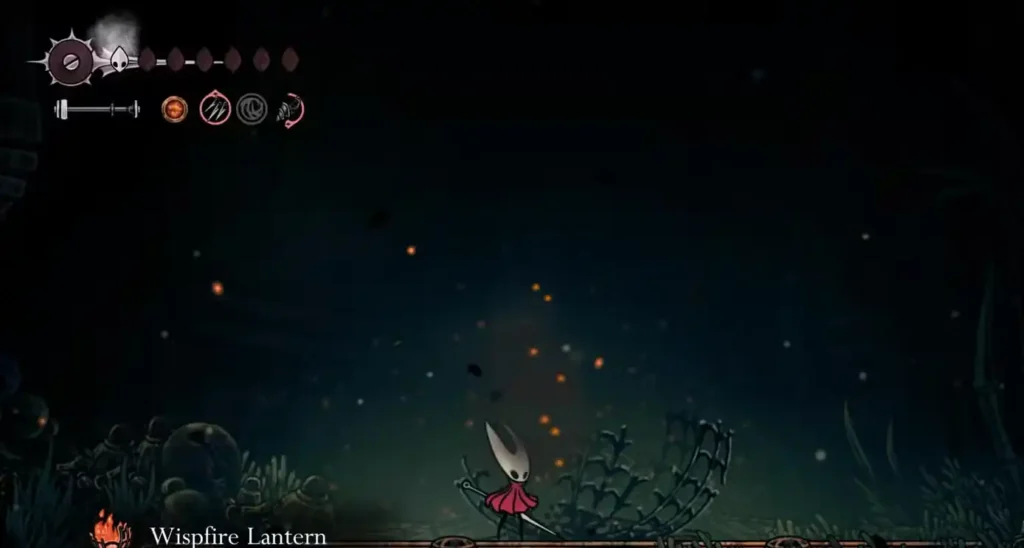
Primary Reward: Wispfire Lantern Tool
Defeating Father of the Flame grants the Wispfire Lantern, a versatile tool with multiple applications throughout Silksong. This tool becomes essential for certain late-game areas and puzzles.
Hidden Collectibles Guide
Right of the Bench:
- Navigate through fire brazier gauntlets shooting homing projectiles
- Bone Scroll location: Top of the area
- Trade value: Sell to Relic Seeker Scrounge in Bellhart for substantial Rosaries
Extended Right Path:
- Mask Shard reward – Another challenging platforming section
- Worth the effort – Health upgrades are always valuable
Left of Bench (Pre-Boss Area):
- Craftmetal location – Right side of the climbing section
- Underworks connection – Path above leads to bottom of Underworks
Strategic Connections and Area Flow
Regional Integration
Wisp Thicket serves as a crucial hub connecting multiple major areas:
- Greymoor – Primary access route
- Underworks – Direct connection from upper paths
- Sinner’s Road – Accessible via right-side paths from Greymoor
This positioning makes Wisp Thicket valuable for fast travel optimization and regional exploration efficiency.
Optimal Exploration Order
Recommended sequence:
- Clear the boss fight first for the Wispfire Lantern
- Collect the easily accessible Bone Scroll
- Attempt the Mask Shard platforming challenge
- Explore connections to other areas
Where to Play Hollow Knight: Silksong
Ready to tackle Wisp Thicket yourself? Get Hollow Knight: Silksong on your preferred platform:
- PC Gaming: Steam Store
- Nintendo Players: Nintendo Switch Store
- PlayStation Users: PlayStation Store
- Xbox Gamers: Xbox Store
Final Thoughts: Making the Most of Your Visit
Wisp Thicket exemplifies Silksong’s approach to area design—it’s not just about reaching the destination, but about earning your place there. The double jump requirement ensures you’re properly equipped, while the boss fight tests your mastery of the game’s mechanics.
What I appreciate most about this area is how it respects player agency. You can tackle it as soon as you have double jump for the challenge, or return later with better equipment for a more manageable experience. The self-mapping feature removes busywork, letting you focus on the genuine challenges ahead.
Whether you’re hunting for the Wispfire Lantern or just love discovering hidden areas, Wisp Thicket offers a perfectly crafted mid-game challenge that feels rewarding to both find and conquer.
Looking for more Silksong area guides? Check out our complete map locations guide or learn about essential tools to help you explore every corner of Pharloom.