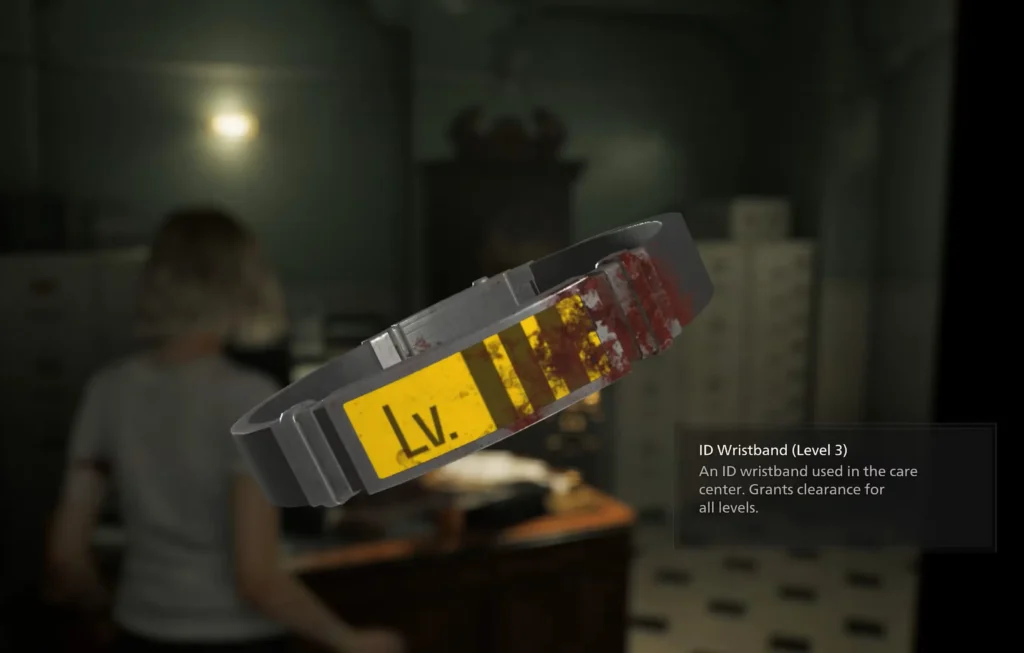
If you’ve been staring at those glowing Level 3 security doors in Resident Evil Requiem and wondering how to crack them open, you’re not alone. The Care Center is full of locked doors with tiered clearance requirements, and Level 3 is the final and highest clearance in the building. Getting there takes some effort — it’s the result of a long chain of puzzle-solving, backtracking, and surviving some of the Care Center’s nastiest enemies. This guide covers exactly where to find the ID Wristband (Level 3), everything you need to do before you can get it, and every door it unlocks once you have it.
Quick Answer: The Level 3 ID Wristband is found in the Security Manager’s Office inside the Isolation Ward (East Wing, ground floor). Walk in, examine the body slumped at the desk, and it’s yours. But to reach that office, you first need the Level 2 ID Wristband — which itself requires solving the organless corpse puzzle in the Examination Room.
What Is the Care Center Security Card Level 3?
In Resident Evil Requiem, the Rhodes Hill Chronic Care Center uses a tiered biometric wristband system instead of traditional keycards. There are three levels — Level 1, Level 2, and Level 3 — and each one opens a different set of locked security doors throughout the building. You can’t buy, find, or skip your way to Level 3. It is obtained through story progression inside the Isolation Ward, and only after you’ve already worked through the Level 1 and Level 2 clearance chains.
Think of the three wristbands as a gated sequence: each one you earn physically unlocks the next step, both in terms of doors and story events.
What You Need Before You Can Get Level 3
You cannot skip straight to Level 3. It sits at the end of a chain of required steps. Here’s the full prerequisite path at a glance:
Level 1 ID Wristband → Found on a headless corpse in the corridor near the Lead Researcher’s Office (East Wing, 2F). Beware — the Chunk enemy spawns the moment you pick it up.
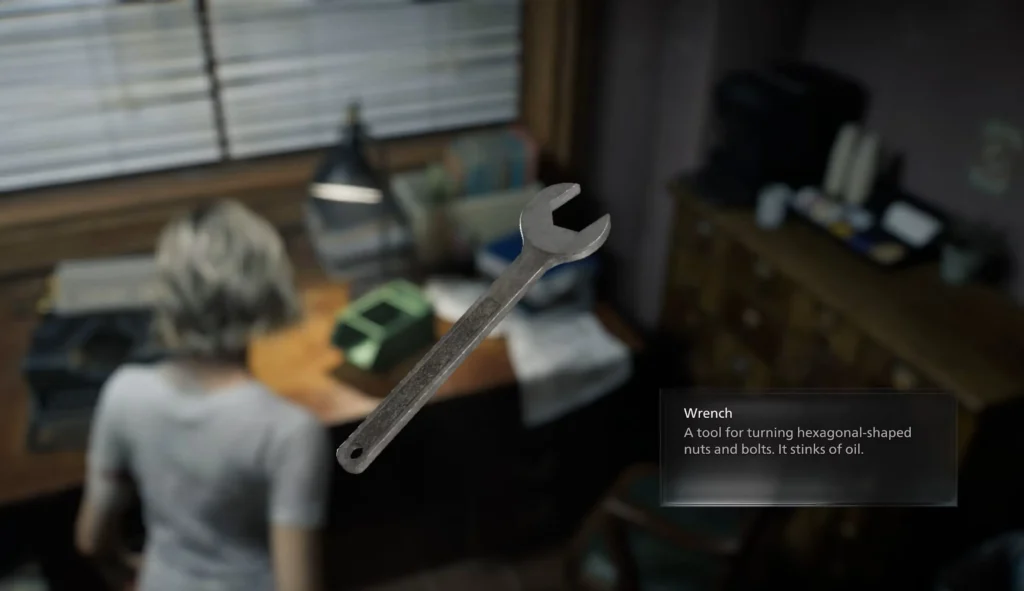
Wrench → Found in the Custodian’s Office (West Wing), accessed using Level 1 clearance through the security door south of the Kitchen.
Artificial Lungs → Retrieved from the Organ Transport Box in the Garage (West Wing). You’ll need to solve the organ box puzzle using instructions from the Leatherbound Notebook. Full steps are in our guide on how to complete the corpse puzzle in the Examination Room in RE9.
Artificial Heart → Hanging inside the Cold Storage room (West Wing, north-west corner). The handwheel on the door breaks when you try it, so you need to use the Wrench to force it open.
Level 2 ID Wristband → Insert both artificial organs into the corpse in the East Wing Examination Room. It reanimates, attacks you, and drops the Level 2 Wristband when defeated.
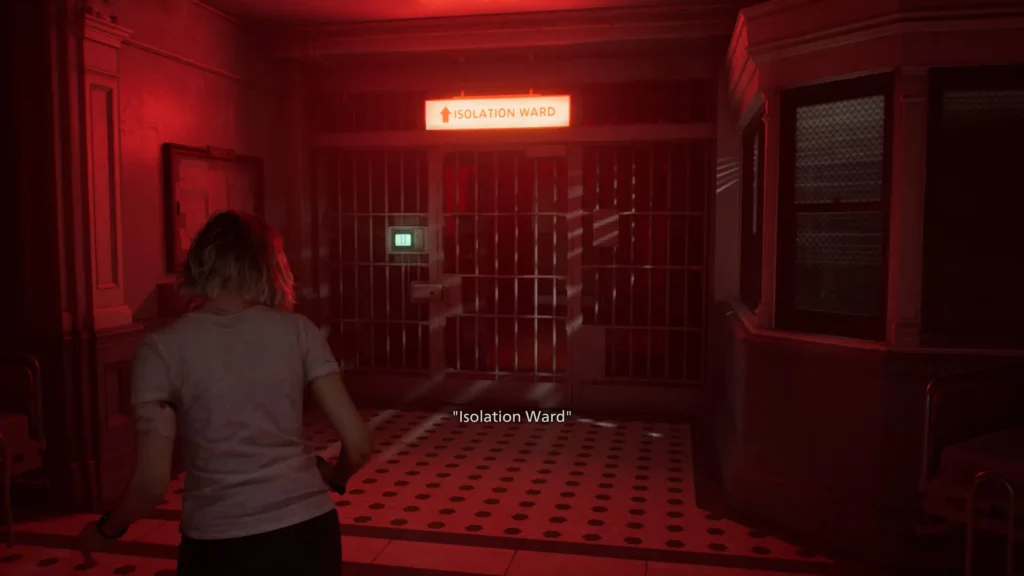
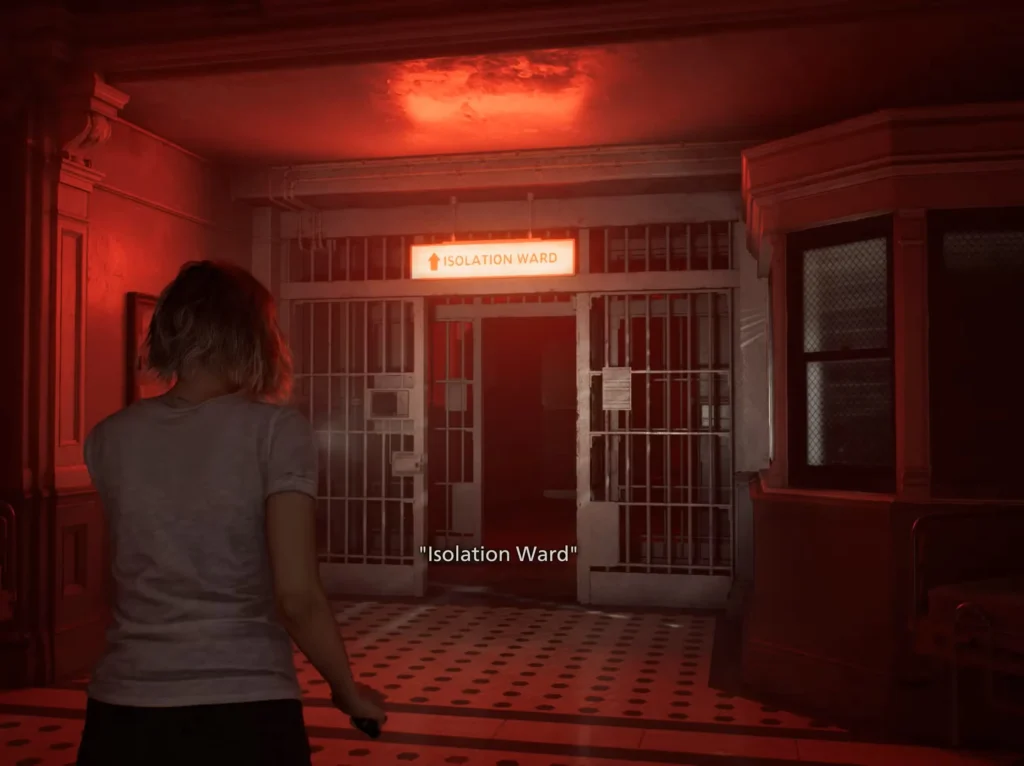
Access the Isolation Ward → Use the Level 2 Wristband on the green security gate in the red-lit north-east corridor of the East Wing ground floor (between the Blood Lab and Waiting Room). Our full guide on how to open the Isolation Ward in RE9 walks through this in detail.
Only once you’ve done all of the above can you reach the Security Manager’s Office and claim Level 3 clearance.
Where to Find the Level 3 ID Wristband — Step by Step
Step 1: Enter the Isolation Ward With the Level 2 Wristband equipped, use it on the green security gate in the East Wing’s ground floor corridor. The gate slides open, giving you access to the Isolation Ward. Proceed carefully — there are enemies inside, and the layout opens into a series of rooms and an office.
Step 2: Explore the First Office on the Right Just after entering the Isolation Ward, there’s an office on your right. Before pressing on, check it thoroughly. You’ll find File #30 – Double Mutation on a cardboard box and File #31 – Nurse’s Log on the desk. These are missable collectibles and worth grabbing now.
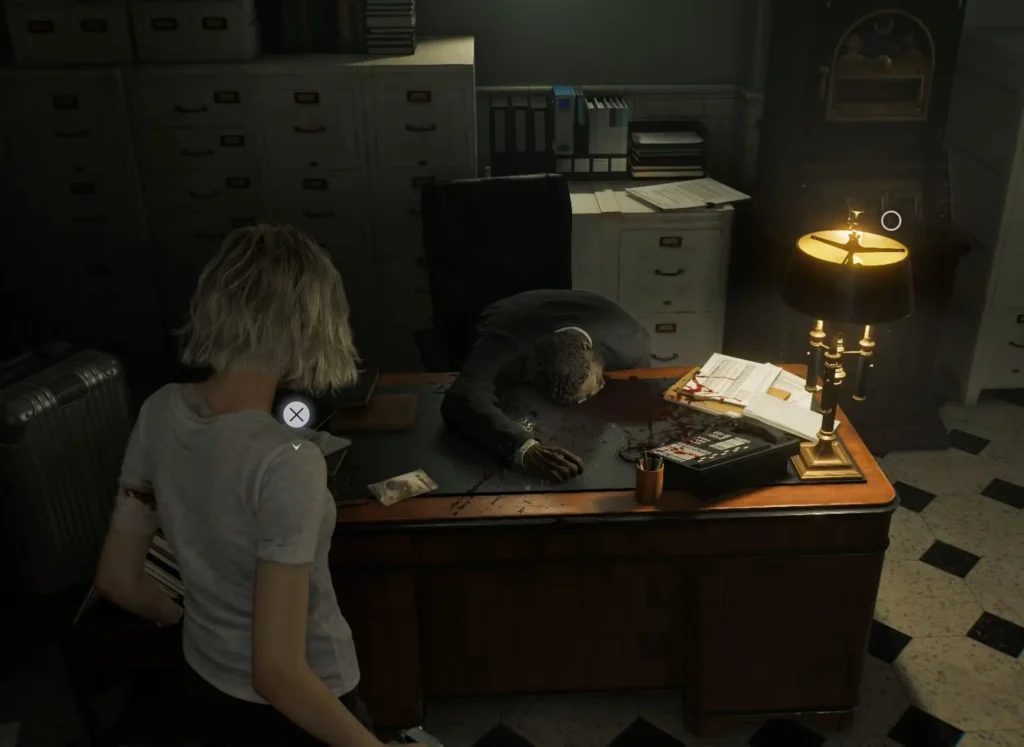
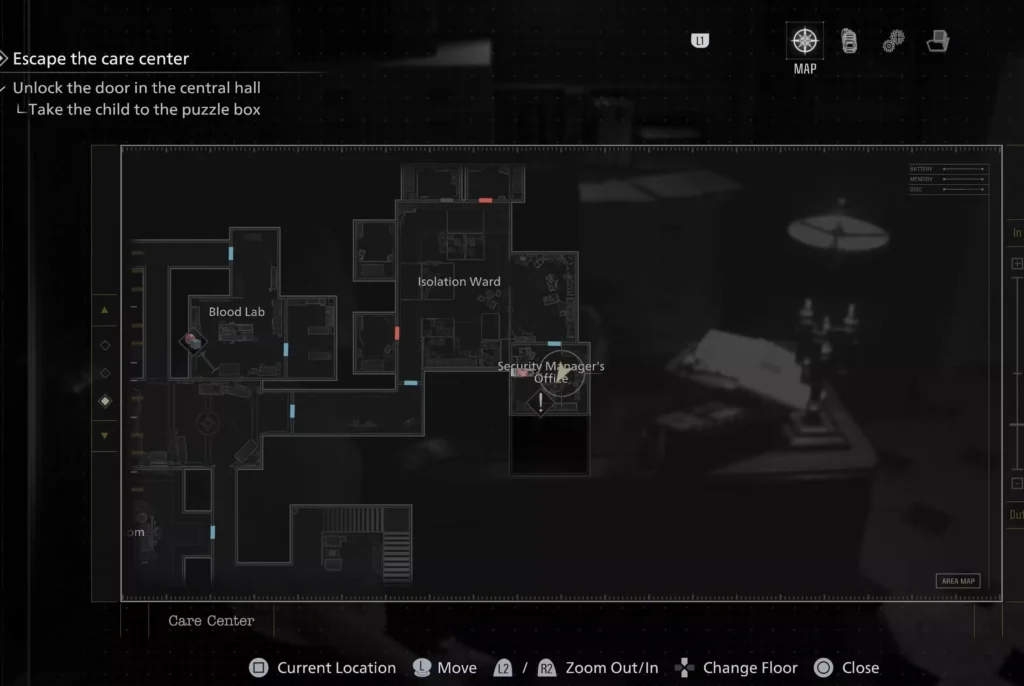
Step 3: Head to the Security Manager’s Office Continue through the Isolation Ward to the far end. The Security Manager’s Office is at the deepest point of the ward.
Show Image Inside the Security Manager’s Office — the wristband is on the body at the desk.
Step 4: Examine the Body at the Desk Approach the corpse slumped at the desk and interact with it. This triggers a short cutscene. When it ends, you’ll automatically receive the ID Wristband (Level 3). You’ll also be able to examine the puzzle box in the room and pick up the notebook on the desk, which explains that the puzzle box text is written in braille — meaning Grace can’t solve it alone.
What Does the Level 3 ID Wristband Unlock?
Unlike Level 1 (which opens multiple scattered doors across both wings) and Level 2 (which opens only the Isolation Ward), Level 3 clearance is primarily story-critical and opens a smaller but crucial set of doors.
Emily’s Cell (Medication Room): The most important door. Emily is a blind girl held in a glass enclosure in the Medication Room just off the Guard Office. Level 3 clearance opens her cell, allowing Grace to carry her. Emily is essential because she can read braille — the only way to solve the Security Manager’s Office puzzle box and obtain the Star Quartz.
The Adjacent Empty Cell (Medication Room): The second cell next to Emily’s can also be opened with Level 3. Inside, tucked between the wall and a bed frame, is Mr. Raccoon #5 — a missable collectible. Don’t forget to check this room before picking up Emily.
What to Do Immediately After Getting Level 3
Once you have the Level 3 Wristband in hand, the next objective is to get Emily to the Security Manager’s Office puzzle box. Here’s the smartest way to do it:
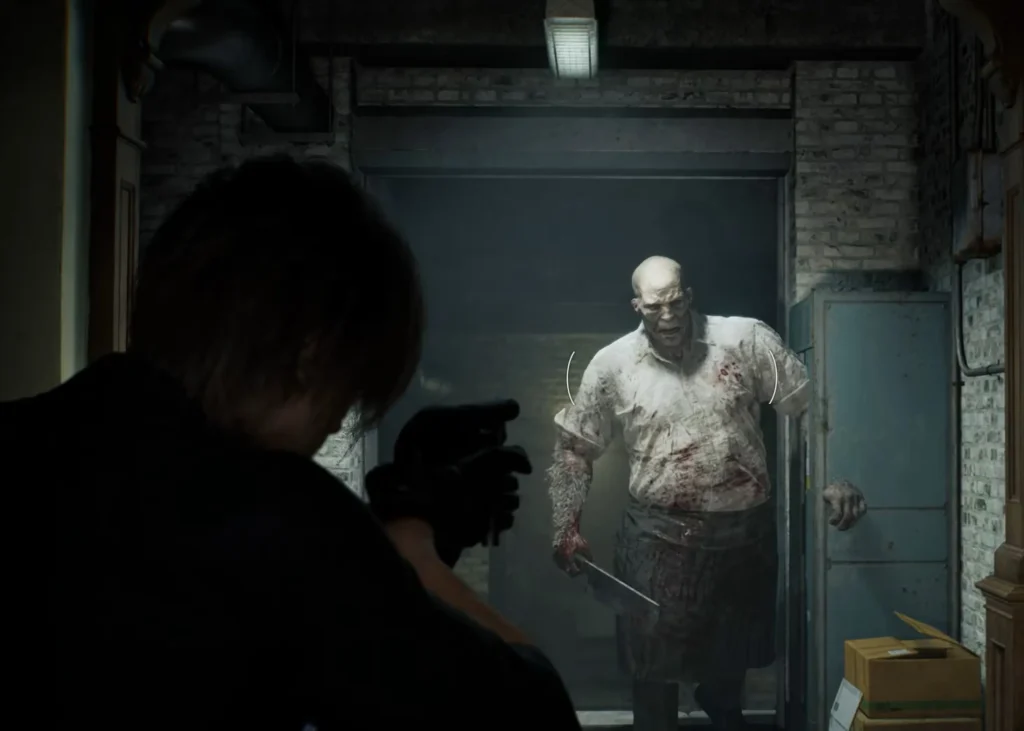
First, before touching Emily’s cell, go back through the Isolation Ward and clear out all enemies. You cannot attack while carrying Emily, which makes any leftover zombie an immediate threat. The Isolation Ward tends to have multiple zombies spawning during and after this sequence, including a Blisterhead as the final wave. Deal with them first.
After the Isolation Ward is clear, backtrack to the Medication Room via the Guard Office. Open the empty cell first to grab Mr. Raccoon #5, then open Emily’s cell to trigger the cutscene. Carry Emily through the Waiting Room to the Security Manager’s Office — if you need a break, you can set her down temporarily on the sofa in the Guard Office safe room. She cannot be put down anywhere else.
Once Emily is at the puzzle box, she’ll begin solving it automatically. Several waves of zombies will spawn inside the Isolation Ward during this sequence, so be ready. Survive the waves, and Emily will complete the code, unlocking the puzzle box and rewarding you with the Star Quartz — the third and final piece needed to open the Quartz door in the Central Hall and escape the Care Center.
All Level 3 Doors and What’s Behind Them
| Door Location | What It Unlocks |
|---|---|
| Emily’s Cell – Medication Room | Emily (required for Star Quartz puzzle and story progression) |
| Adjacent Empty Cell – Medication Room | Mr. Raccoon #5 collectible |
The Level 3 Wristband is narrow in scope by design. By the time you earn it, the rest of the Care Center has already been opened. Its sole purpose is gating this final story beat with Emily.
Common Questions
I’m inside the Security Manager’s Office but there’s no wristband — what’s wrong?
Make sure you’re actually interacting with the body at the desk, not just looking at the room. The cutscene only triggers when you examine the corpse directly. If the office is open but nothing is happening, check your interaction prompts carefully.
Can I get the Level 3 Wristband without going through the Isolation Ward?
No. The Security Manager’s Office is only accessible from inside the Isolation Ward, which itself requires Level 2 clearance. There is no alternate route.
Do I need Level 3 to progress the main story?
Yes. Without Level 3, you cannot open Emily’s cell. Without Emily, you cannot solve the Security Manager’s Office puzzle box. Without the Star Quartz, you cannot open the main exit door in the Central Hall. It is a required item for completing the Care Center.
Is the Mr. Raccoon in the empty cell easy to miss?
Very easy. Once you pick up Emily, you can’t fight back against enemies or interact freely with the environment. If you forget to check the empty cell before carrying Emily, you’ll need to put her down on the Guard Office sofa, backtrack, grab the collectible, and then come back. Save yourself the trouble and check the empty cell first.
What happens after I get the Star Quartz?
Place it alongside the Moon Quartz and Sun Quartz into the door indentation in the Central Hall. This opens the path to the Courtyard, marking the end of Grace’s main Care Center section.
Related RE9 Guides
- How to Open the Isolation Ward in RE9
- How to Complete the Corpse Puzzle in the Examination Room in RE9
- How to Open the Organ Transport Box – Resident Evil Requiem
- How to Open the Door Without a Handwheel – Care Center
- Level 1 ID Wristband Location – Resident Evil Requiem
- Examination Room Safe Code – Resident Evil Requiem
- Bar & Lounge Safe Code – Resident Evil Requiem
- RE Requiem East Wing Keycard Location
- RE Requiem Chairman’s Office Puzzle Box
- West Wing Keycard Location – Resident Evil Requiem
- Care Center Fuse Location – Resident Evil Requiem
- How to Destroy the Sturdy Padlock – Researcher’s Office