Stop Getting Dominated by Vehicles: The Ultimate Counter Guide
If you’ve played more than a few matches of Battlefield 6, you’ve definitely experienced this frustration: you’re having a great infantry game, capturing objectives, getting kills, and then BOOM—a tank rolls up and erases your entire squad in seconds. Or maybe you’re pinned down by an attack helicopter that seems impossible to hit.
Here’s the reality: Battlefield 6 features some of the most powerful vehicles in the franchise’s history. Conquest, Breakthrough, and Escalation modes throw tanks, IFVs, helicopters, and jets at you constantly across massive maps. If you don’t know how to counter them effectively, you’ll spend the entire match respawning.
But here’s what most players don’t realize—vehicles in BF6 aren’t overpowered when you know their weaknesses. Every single vehicle type has specific counters that can shred them in seconds. I’ve spent hundreds of hours mastering anti-vehicle gameplay, and I’m going to share everything you need to transform from “vehicle fodder” to “the player that makes tankers rage-quit.”
Whether you’re facing ground armor or aerial threats, this guide covers every effective counter in the game, from beginner-friendly options to advanced tactics that combine multiple tools for devastating effect.
The Engineer Class: Your Anti-Vehicle Foundation
Before we dive into specific counters, let’s establish something crucial: the Engineer class is your primary anti-vehicle toolkit. While other classes have some vehicle-countering capabilities, Engineers are specifically designed to be the bane of every vehicle player’s existence.
If you’re serious about stopping vehicles, you need to familiarize yourself with the Engineer class challenges and unlock the best equipment. The base loadout is decent, but the higher-tier unlocks are where the real power lies.
Anti-Vehicle Mines: The Silent Vehicle Killer
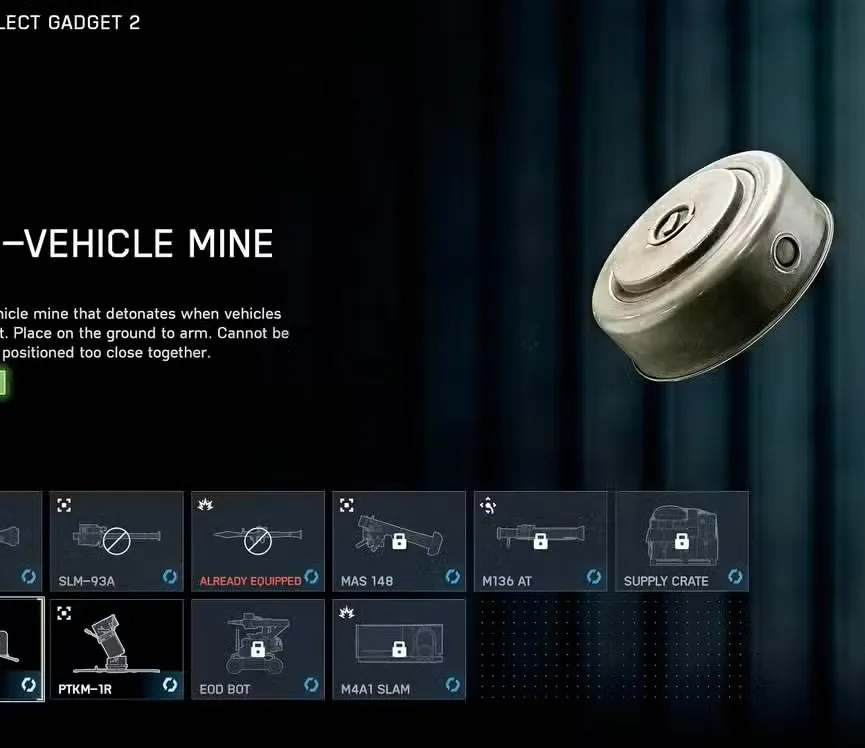
Why Mines Are Absolutely Broken (In a Good Way)
Anti-Vehicle Mines are honestly one of the most slept-on tools in Battlefield 6, and I have no idea why more players don’t abuse them. These beauties are available immediately to Engineers and are hands-down the most effective counter to ground vehicles in the game.
What Makes Them So Good:
- Set-and-forget gameplay – Deploy them and move on
- Massive instant damage – Can one-shot or critically damage most vehicles
- Psychological warfare – Vehicles become paranoid about every road
- Zero skill requirement – No aiming, no timing, just placement
- Passive XP farming – Get kills while doing other things
Strategic Mine Placement Guide
The difference between effective and ineffective mining is placement. Here’s where to put them:
S-Tier Locations:
- Main roads leading to objectives – Vehicles use these constantly
- Narrow chokepoints – Forces vehicles through specific zones
- Vehicle spawn exit routes – Catch them as they leave base
- Popular flank routes – Where tanks go to avoid direct combat
- Just around blind corners – No time to react or reverse
Pro Placement Tips:
- Space mines apart slightly – One explosion can chain-detonate others wastefully
- Hide them visually – Place near debris, shadows, or terrain irregularities
- Cover both lanes on two-way roads to prevent evasion
- Remember your mine locations – Don’t drive over your own traps
- Replenish constantly – Resupply and keep key routes mined
Advanced Tactic – The Ambush Combo:
- Place mines on a predictable vehicle route
- Position yourself with line-of-sight to that route
- When vehicle approaches, fire a rocket to scare them forward
- They panic-drive directly into your mines
- Laugh maniacally as they explode
Mine Limitations and Counters
What Mines Can’t Do:
- Won’t help against aircraft obviously
- Skilled drivers can spot and avoid them
- Limited deployment count per life
- Require enemies to actually drive over them
- Can be destroyed by explosives or spotted by alert players
How to Maximize Effectiveness:
- Combine with Support class ammo crates for unlimited redeployment
- Use Deploy Beacon to quickly return to prime mining locations
- Check all maps ranked to learn vehicle-heavy maps where mining pays off
Rocket Launchers: Direct Vehicle Destruction

Understanding Launcher Types
Battlefield 6 features two distinct launcher categories, each with specific use cases:
Free-Fire Launchers (Unguided):
- RPG-7V2 (the most popular choice)
- Require manual aiming and leading targets
- Higher skill ceiling but more versatile
- No lock-on warning to alert enemies
- Faster reload and fire rate generally
Lock-On Launchers (Guided):
- SLM-93A and MAS 148 are primary options
- Lock onto vehicles automatically
- Slower but guaranteed hits (if not evaded)
- Enemies receive warning and can deploy countermeasures
- Essential for aircraft
Free-Fire Launcher Mastery
The RPG-7V2: King of Anti-Tank
This launcher is beloved for one reason: velocity. The rocket travels faster than alternatives, making leading targets easier and giving vehicles less time to react.
How to Dominate with Free-Fire Launchers:
Against Tanks and IFVs:
- Target weak points exclusively:
- Top armor (most vulnerable)
- Rear armor (second most vulnerable)
- Side armor (better than frontal)
- Never waste shots on frontal armor
- Wait for distraction – Shoot when the tank is engaged elsewhere
- Fire and relocate – Don’t peek from the same position twice
- Distance matters – Mid-range is optimal (too close = suicide, too far = easy dodging)
Against Aircraft (Advanced):
- Only engage low-flying helicopters – Jets are nearly impossible
- Lead significantly ahead of the helicopter’s movement
- Aim for predictable patterns – Helicopters attacking ground targets
- One-shot potential – Direct hits often destroy helicopters instantly
- Master trajectory through practice in Portal modes
Pro Tips for RPG Success:
- Crouch or prone when firing for better accuracy
- Compensate for drop at longer ranges
- Watch for Deploy Bipod opportunities for stability
- Reload in cover, not exposed – obvious but many forget
- Track enemy vehicle loadouts to predict defensive abilities
Lock-On Launcher Tactics
Best Lock-On Choices:
- SLM-93A – Versatile against all vehicles
- MAS 148 – Powerful but slower lock-on
When to Use Lock-On vs Free-Fire:
- Use Lock-On: Against aircraft, mobile vehicles, long-range targets
- Use Free-Fire: Close-range tanks, distracted vehicles, when you need immediate damage
Advanced Lock-On Techniques:
The Painted Target Strategy: When vehicles are “painted” by Laser Designator or spotted, your missiles:
- Lock on faster
- Track more aggressively
- Deal bonus damage in some cases
- Are harder to evade with countermeasures
Team Coordination Method:
- Have a Recon player paint priority vehicles
- Multiple Engineers fire lock-on missiles simultaneously
- Overwhelm countermeasures with volume
- Guarantee vehicle destruction
- Move to next target
Aircraft Hunting:
- Lock from unexpected angles – Don’t be predictable
- Wait for flare cooldown – If they flare, wait 10-15 seconds and lock again
- Coordinate with multiple lockers – They can’t flare everything
- Shoot strafing helicopters – They’re most vulnerable during attack runs
- Learn sniper glint mechanics to spot attack helicopters scoping targets
Launcher Positioning and Safety
Where to Engage From:
- Elevated positions – Better angles on tank top armor
- Buildings with multiple exits – Escape routes after shooting
- Behind cover – Never stand in the open reloading
- Squad spawn points – Teammates can revive you if killed
Survival Tips:
- Never fire twice from same spot – Tanks will blast you
- Use Combat Roll immediately after firing for evasion
- Watch for secondary gunners – They’ll try to hit you
- Don’t tunnel vision – Check for flanking infantry
- Master how to spot enemies so team knows your position

Vehicle vs Vehicle: Fighting Fire with Fire
Sometimes the best counter to a vehicle is another vehicle. Let’s break down the vehicle-on-vehicle meta:
Main Battle Tanks (MBTs)
Anti-Vehicle Loadout:
- Multi-Purpose Shell – High damage, versatile
- Armor Piercing Shell – Maximum penetration against heavy armor
- Aim-Guided Shell – For painted targets and precision strikes
Tank Combat Strategy:
- Angle your armor – Never show flat surfaces to enemies
- Target weak points just like infantry launchers
- Reverse after shooting – Peek and retreat tactics
- Use terrain for cover – Mountains, buildings, ridges
- Coordinate with infantry – They protect you from AT troops
Tank gameplay rewards positioning and patience. Check best tips and tricks for general vehicle tactics.
Infantry Fighting Vehicles (IFVs)
Best Anti-Vehicle Tools:
- Armor Piercing Shell – Primary tank killer
- Aim-Guided Missile – Moderate damage, good tracking
- Lock-Guided Missile – Precision targeting for all vehicles
IFV Role:
- Support MBTs against enemy armor
- Hunt light vehicles and transport
- Provide mobile spawn point for squad
- Adapt loadout based on enemy composition
IFVs are incredibly versatile. Master them for flexible gameplay across all game modes.
Mobile Anti-Air (The Helicopter Destroyer)
Why This Vehicle is Broken:
- Specifically designed to shred aircraft
- Can fire two anti-air missiles simultaneously
- High-velocity shells for leading aerial targets
- Makes enemy pilots rage-quit when used effectively
Optimal AA Loadout:
- High Velocity Shells – Excellent against fast-moving jets
- Anti-Air Missiles – Dual-launch capability overwhelms flares
- Multi-Purpose option – When few aircraft are active
AA Positioning:
- Stay near team-controlled areas for protection
- Cover sky lanes where aircraft approach
- Relocate frequently – Helicopters will hunt you
- Don’t chase aircraft – Let them come to your kill zone
This vehicle single-handedly shuts down enemy air superiority. If helicopters are dominating, spawn the Mobile AA immediately.
Attack Helicopters
Anti-Vehicle Arsenal:
- Heavy Rockets – Devastating against all vehicles
- TOW Missiles – One-shot capability against many targets
- Aim-Guided Missiles – Precision ground strikes
- Autocannon (Gunner) – Sustained damage on light vehicles
Helicopter Anti-Vehicle Tactics:
- Attack from altitude – Top armor is weakest
- Use TOW on stationary targets – Tanks, camping vehicles
- Coordinate with gunner – Pilot marks, gunner destroys
- Stay mobile – Hovering = death from AA
- See full attack helicopter guide for complete mastery
Fighter Jets and Attack Jets
Jet Loadouts:
- Auto Cannon – Good against air and moderate vs ground
- Guided Missiles – Lock and pressure other aircraft
- Aim-Guided Bombs (Fighter) – Huge damage to ground vehicles
Jet Vehicle Combat:
- Fighters dominate air-to-air combat
- Attack jets focus ground vehicles primarily
- Speed is survival – Don’t slow down unnecessarily
- Attack runs must be precise – Limited windows
- Master how to fly jets first before attempting combat

Secondary Counters and Support Tools
C5 Explosives (Recon Class)
Why C5 is Amazing:
- Massive damage when stacked (2-3 charges destroy most vehicles)
- Remote detonation – Trigger at perfect moment
- Can be thrown onto vehicles in close quarters
- Sticky properties – Attach to moving vehicles
Advanced C5 Tactics:
The Jihad Jeep (Classic BF Move):
- Load light vehicle with C5 explosives
- Drive at enemy tank at full speed
- Jump out before impact
- Detonate as vehicle hits target
- Massive damage or destruction guaranteed
The Trap Method:
- Place C5 on common vehicle routes
- Hide nearby with detonator ready
- Wait for vehicle to roll over charges
- Detonate for instant kill
- Similar to mines but manual control
Urban Ambush:
- Stick C5 to walls/corners in urban maps
- Wait for vehicles to pass close by
- Detonate for side/rear armor damage
- Works great in tight city streets
AV Grenades (Engineer)
Use Cases:
- Quick harassment of vehicles
- Finishing damaged vehicles
- Thrown from safe cover unlike launchers
- Deals moderate damage to top armor
Best Practices:
- Aim for vehicle tops – Arc grenades over obstacles
- Combine with mines/rockets – Don’t rely solely on grenades
- Use during vehicle retreats – Finish low-health targets
- Spam resupply points for unlimited grenades
Laser Designator (Recon Class)
The Ultimate Support Tool:
This gadget doesn’t kill vehicles directly, but it’s absolutely critical for team-based anti-vehicle play.
What It Does:
- Paints targets for your entire team to see
- Makes lock-on missiles more effective
- Increases tracking of painted vehicles
- Highlights priority threats for team focus-fire
How to Use Effectively:
- Find safe vantage point with vehicle overview
- Paint high-priority threats (attack helicopters, MBTs)
- Call out in voice/text chat that target is painted
- Watch as your team’s engineers shred the target
- Repaint as needed
Best Positions:
- Rooftops with commanding views
- Hill crests overlooking vehicle routes
- Behind friendly lines where you’re protected
- Reference Liberation Peak sniper spots for good designator positions
Team Synergy: Combine Laser Designator with Recon class challenges completion for double benefit.
Class-Specific Anti-Vehicle Strategies
Engineer (Primary Anti-Vehicle)
Optimal Loadout:
- Primary: Mobile SMG like PW5A3 for self-defense
- Gadget 1: Anti-Vehicle Mines
- Gadget 2: RPG-7V2 or Lock-On Launcher
- Grenade: AV Grenades
- Equipment: Repair Tool for friendly vehicles
Playstyle: Aggressive mine placement, opportunistic rocket shots, constant vehicle harassment.
Recon (Support Anti-Vehicle)
Optimal Loadout:
- Primary: Best starter weapons or DMR
- Gadget 1: C5 Explosives
- Gadget 2: Laser Designator
- Equipment: Motion sensors for detecting vehicle approaches
Playstyle: Paint targets, trap routes with C5, support Engineer teammates.
Assault (Limited Anti-Vehicle)
Options:
- Mostly focused on infantry combat
- Can use grenades against light vehicles
- Best served protecting Engineers from enemy infantry
- See Assault class loadouts for details
Support (Indirect Anti-Vehicle)
Support Role:
- Drop ammo for Engineers (critical!)
- Suppress vehicle gunners with LMGs
- Help repair vehicles on your team
- Check Support class loadouts
Map-Specific Vehicle Counter Strategies
Different maps require different approaches:
Urban Maps (Manhattan Bridge, etc.):
- Focus on mines at street intersections
- Use buildings for rocket launch protection
- C5 traps work excellently in tight spaces
- Short sightlines favor free-fire launchers
Open Maps (Liberation Peak, etc.):
- Lock-on launchers are more effective
- Long-range rocket shots from hills
- Mine roads leading to objectives
- Use terrain for cover between shots
Mixed Maps:
- Adapt loadout based on current zone
- Carry both mines and launchers
- Switch classes at resupply based on needs
Team Coordination for Maximum Effect
Solo Anti-Vehicle: You can harass and occasionally destroy vehicles
Coordinated Anti-Vehicle: You can completely shut down enemy vehicle play
Team Tactics:
The Focus Fire Method:
- Multiple Engineers target same vehicle
- Call out target in voice chat
- Fire simultaneously to overwhelm repairs
- Destroy before they can retreat
- Move to next priority target
The Paint-and-Destroy:
- Recon paints high-value target
- Engineers lock and fire guided missiles
- Overwhelming missile volume bypasses flares
- Guaranteed destruction on painted vehicles
The Spawn Trap:
- Mine all exits from enemy vehicle spawn
- Position Engineers with rockets nearby
- Destroy vehicles immediately after spawn
- Completely deny enemy vehicle access
The AA Net:
- Multiple players spawn Mobile AA
- Create overlapping coverage zones
- Lock down all air corridors
- Enemy aircraft become useless
Advanced Tips and Tricks
Resource Management:
- Always carry mines – Set them even if no immediate threats
- Resupply constantly – Never run low on AT equipment
- Track ammo locations on each map
- Use Support teammates for unlimited supplies
Positioning Psychology:
- Predict vehicle routes by understanding objective flow
- Think like vehicle players – where would you drive?
- Camp resupply points – Damaged vehicles retreat here
- Deny safe zones with persistent mining
XP Optimization:
- Vehicle destruction grants massive XP
- Combine with XP farming methods
- Use XP Boosters during vehicle-heavy matches
- Work toward max level faster
Challenge Synergies:
- Complete Danger Close challenges with explosives
- Work on Unit Challenges simultaneously
- Progress Bulletstorm challenges with LMG vehicle suppression
Common Mistakes to Avoid
❌ Only using one counter type – Adapt based on situation ❌ Firing rockets from same position repeatedly – You’ll get destroyed ❌ Chasing vehicles as infantry – Let them come to your traps ❌ Ignoring friendly vehicles – Support them against enemy vehicles ❌ Playing solo against vehicles – Coordinate with team ❌ Wasting rockets on frontal armor – Patience for better angles ❌ Not mining consistently – Set-and-forget value is huge ❌ Exposing yourself unnecessarily – Use cover religiously
Performance and Technical Optimization
Improve Anti-Vehicle Performance:
- Fix high CPU usage for better frame rates
- Resolve packet loss issues for hit registration
- Optimize best settings for visibility
- Understand weapon bloom mechanics when leading rockets
Final Thoughts: Become the Vehicle Hunter
Vehicles in Battlefield 6 seem intimidating until you understand their weaknesses. Once you master anti-vehicle play, you’ll transform from helpless victim to feared hunter. Tank players will avoid objectives you’re defending. Helicopter pilots will retreat when they see your Engineer tag.
The key is consistency and adaptability. Always carry anti-vehicle tools. Always place mines on key routes. Always take shots when opportunities present. Always coordinate with teammates.
Remember: every destroyed vehicle is:
- One less threat to your team
- Massive XP for your progression
- A delay before they can spawn it again
- A psychological victory that tilts the enemy
Vehicle dominance isn’t inevitable—it’s just what happens when infantry players don’t know how to fight back. Now you do.
Get out there and start turning tanks into scrap metal.
Additional Resources:
- Weapons: Complete weapons list | Best meta weapons
- Classes: All classes guide
- Challenges: All achievements
- Multiplayer: Crossplay guide
Get Battlefield 6: Steam | PlayStation | Epic Games | Join r/Battlefield6