TL;DR – Best Aim Settings in GTA 6
- Best targeting mode: Partial, which helps you aim at enemies without fully locking onto them.
- Aim Assist Strength: Start at 4 for stronger assistance during gunfights.
- Aim Sensitivity: Set horizontal and vertical aim sensitivity to 5–6 for better accuracy.
- Aim Response Curve: Use Standard for balanced aiming or Precision for more controlled small movements.
- Controller Deadzone: Start around 2–4 and adjust until your right stick responds quickly without drifting.
- Combat assists: Keep Shooting Assist, Drive-By Assist, and Quick Draw enabled for easier story missions.
The best aim settings in GTA 6 for most PS5 and Xbox players are Partial Targeting, Aim Assist Strength at 4, Aim Sensitivity around 5–6, and the Standard or Precision Aim Response Curve. These settings make it easier to track moving enemies without turning every gunfight into automatic lock-on shooting.
GTA 6 gives players much more control over aiming than GTA 5. You can adjust how quickly your camera moves, how strongly the game assists your shots, and how the right analog stick responds to small movements.
However, the default settings will not feel perfect for everyone. Some players prefer strong lock-on targeting, while others want complete control over every shot.
Here are the recommended GTA 6 aim settings for PS5, PS5 Pro, and Xbox Series X|S, along with explanations of what each option actually changes.
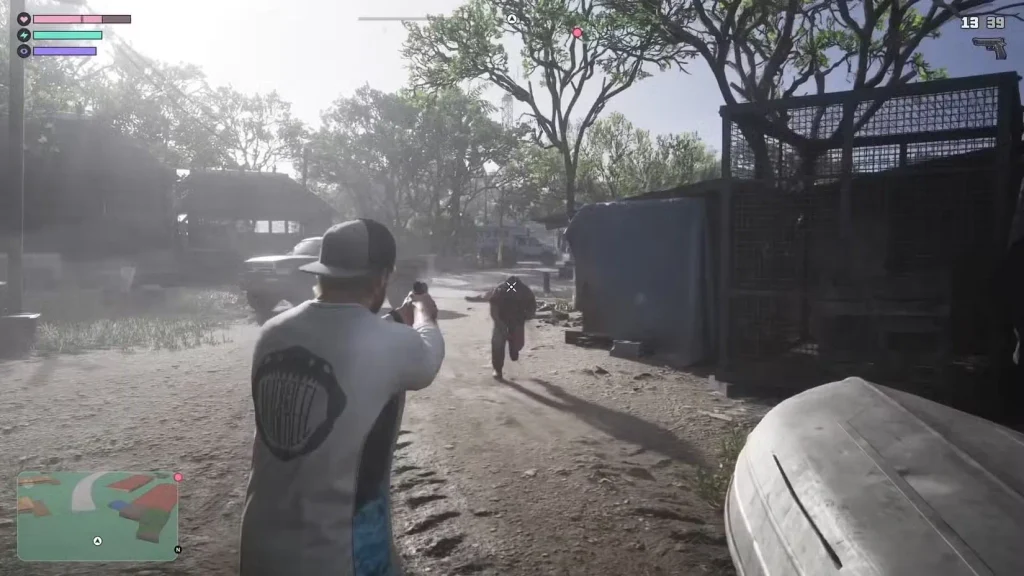
GTA 6 Best Aim Settings for PS5 and Xbox
If you want a balanced setup for story missions, police shootouts, and general combat, start with the following settings.
Best Controller Sensitivity Settings
| Setting | Recommended Value |
|---|---|
| Horizontal Look Sensitivity | 7–8 |
| Vertical Look Sensitivity | 7 |
| Horizontal Aim Sensitivity | 5–6 |
| Vertical Aim Sensitivity | 5–6 |
| Look Acceleration | 6 |
| Aim Acceleration | 4–5 |
| Aim Response Curve | Standard or Precision |
| Deadzone (Left Stick) | 2–4, depending on drift |
| Deadzone (Right Stick) | 2–4, depending on drift |
These values prioritize accuracy over extremely fast camera movements. They are recommended starting points, not universal settings that every player must use.
If your aim constantly moves past enemies, lower your aim sensitivity. If you struggle to turn toward an enemy quickly enough, increase it one step at a time.
Best GTA 6 Aim Assist and Combat Settings
| Setting | Recommended Value |
|---|---|
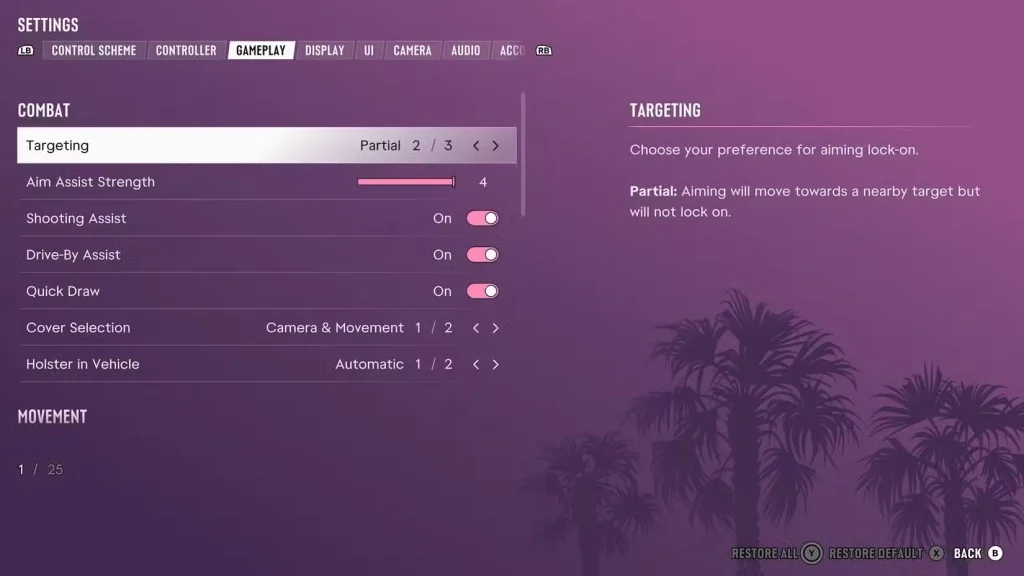
| Targeting | Partial |
| Aim Assist Strength | 4 |
| Shooting Assist | On |
| Drive-By Assist | On |
| Quick Draw | On |
| Cover Selection | Camera & Movement |
| Combat Movement Speed | Fast Walk |
| Camera Shake | Off |
| Weapon Sway | Off for a steadier view |
The most important combination is Partial Targeting with Aim Assist Strength at 4.
Partial helps move your reticle toward nearby enemies without taking complete control. You can still adjust your aim manually when targeting different body parts or dealing with multiple enemies.
For players struggling with gunfights, switching to Lock-On is another option. We will cover the differences below.
How to Change Aim Settings in GTA 6
You can adjust GTA 6 aiming settings directly from the pause menu. The process is almost identical on PlayStation 5 and Xbox Series X|S.
- Launch GTA 6 and enter your saved game.
- Press Options on PS5 or Menu on Xbox.
- Open Settings from the pause menu.
- Go to the Controller tab.
- Find the Aim & Look Sensitivity section.
- Adjust Look Sensitivity, Aim Sensitivity, Acceleration, and Aim Response Curve.
- Switch to the Gameplay tab.
- Under Combat, change Targeting, Aim Assist Strength, and other combat assists.
- Exit the settings menu and test your aim in free roam.
For sensitivity adjustments, use the same weapon while testing different settings. This makes it easier to tell whether the changes are actually improving your accuracy.
Do not change every setting at once. Start with Targeting and Aim Assist Strength, then adjust sensitivity and deadzones.
Best GTA 6 Targeting Mode: Lock-On vs Partial vs Free Aim
GTA 6 offers three targeting modes. Each changes how much assistance you receive when aiming at enemies.
| Targeting Mode | How It Works | Best For |
|---|---|---|
| Lock-On | Locks onto a nearby valid target when aiming | Beginners and easier combat |
| Partial | Moves your aim toward nearby targets without fully locking on | Most players |
| Free Aim | Leaves target selection and aiming under manual control | Experienced players |
Lock-On – Best for Beginners
Lock-On is the easiest targeting mode in GTA 6.
When you hold L2 on PlayStation or LT on Xbox, the aiming system locks onto a nearby enemy instead of requiring you to position the crosshair completely by yourself.
This is particularly useful when several enemies are shooting at you or when you are still learning how GTA 6’s weapons handle.
Once you enable Lock-On, additional settings can appear, including Lock-On Time and Lock-On Target Switch.
For an easier setup, try:
- Targeting: Lock-On
- Aim Assist Strength: 4
- Lock-On Time: Start around 4–5
- Lock-On Target Switch: On
- Shooting Assist: On
Lock-On Target Switch can help when you need to move between enemies during a busy gunfight.
The downside is that automatic targeting may select a different enemy from the one you intended to shoot.
Partial – Best Overall Targeting Mode
Partial is our recommended targeting mode for most GTA 6 players.
It provides a degree of assistance while still letting you decide where to aim.
This is especially useful during missions involving enemies behind cover, moving targets, and police officers approaching from different directions.
Use Partial if you want the game to help with target acquisition but still enjoy controlling your weapon manually.
Combining it with lower aim sensitivity can make precise shots easier than using the default controller sensitivity.
Free Aim – Best for Challenging Combat
Free Aim removes the automatic targeting behavior of Lock-On and Partial.
Instead of having your reticle move toward enemies, you must aim using the right analog stick.
If you want a fully manual shooting experience, try the following:
- Targeting: Free Aim
- Aim Assist Strength: 0
- Shooting Assist: Off
- Drive-By Assist: Off
- Aim Response Curve: Precision
- Aim Sensitivity: 5–6
Free Aim is more demanding, particularly when enemies are moving quickly or when several targets are attacking from different positions.
It can also make vehicle combat harder because you cannot depend on strong automatic assistance.
Best GTA 6 Aim Sensitivity Settings
GTA 6 separates Look Sensitivity and Aim Sensitivity. Understanding the difference helps you avoid camera controls that feel either too slow or too sensitive.
Look Sensitivity
Look Sensitivity controls how quickly the camera moves when you are not actively aiming a weapon.
A higher value makes it easier to turn around and check your surroundings.
For most players, 7–8 is a reasonable starting point for horizontal look sensitivity, while 7 works well vertically.
Keeping look sensitivity slightly higher than aim sensitivity lets you react quickly without making precision shots unnecessarily difficult.
Aim Sensitivity
Aim Sensitivity controls how quickly your reticle moves while aiming a weapon.
Higher values allow faster turning, but they can make small targets harder to hit.
For better accuracy, start with:
- Horizontal Aim Sensitivity: 5
- Vertical Aim Sensitivity: 5
If that feels too slow, increase both to 6.
Players accustomed to faster shooters may prefer higher values, but there is no benefit in increasing sensitivity if it causes you to miss shots.
Look Acceleration and Aim Acceleration
Acceleration controls how quickly the camera or reticle reaches a faster turning speed as you move the analog stick.
High acceleration can make your initial movement feel controlled before the camera speeds up. However, excessive acceleration may make it harder to predict where your aim will stop.
Try the following starting values:
- Look Acceleration: 6
- Aim Acceleration: 4–5
This keeps general camera movement reasonably quick while making weapon aiming more predictable.
If your aim suddenly moves farther than expected, reduce Aim Acceleration before increasing or decreasing every sensitivity setting.
Best Aim Response Curve in GTA 6
Aim Response Curve is one of the most useful controller settings in GTA 6.
It determines how the game interprets the movement of your right analog stick.
There are four options:
- Standard: A balanced response that works well for most players.
- Linear: Provides a more direct relationship between analog stick movement and aiming.
- Precision: Makes small stick movements easier to control, helping with careful shots.
- Aggressive: Reacts more strongly to smaller stick movements, favoring faster responses.
Should You Use Standard, Linear, or Precision?
Start with Standard if you are unsure which curve to choose. It is a reliable option for general gameplay and does not require you to completely relearn how the controls feel.
If you regularly miss headshots because the reticle moves too far, try Precision.
Precision makes smaller movements near the center of the stick easier to manage. This can help when aiming at distant enemies.
Linear is worth trying if you prefer more direct stick control and already play other shooters with a linear response curve.
Aggressive is less suitable for players who have trouble overshooting targets, although it may appeal to those who want very quick camera reactions.
Our recommendation: Standard for beginners and balanced gameplay. Precision for players who want finer manual aiming control.
Best GTA 6 Deadzone Settings for PS5 and Xbox
Deadzone determines how far you must move an analog stick before the game responds.
A large deadzone can make aiming feel delayed. A very small deadzone makes the stick react more quickly, but it may also expose controller drift.
GTA 6 lets you adjust both the left and right stick deadzones.
Best Right Stick Deadzone
For aiming, the right stick is the important one.
Try starting at 2–3 on a controller that is in good condition. If you notice the camera moving without touching the stick, increase the value.
To find the correct setting:
- Stand still in a safe location.
- Lower the Right Stick Deadzone slightly.
- Release the right analog stick completely.
- Watch the camera for several seconds.
- If the camera moves on its own, increase the deadzone by one step.
- Repeat until the unwanted movement stops.
The goal is to use the lowest stable value for your particular controller.
Do not automatically set deadzone to zero. Some controllers can handle it, but others will develop visible camera drift.
Best Left Stick Deadzone
The left stick controls movement rather than the camera.
A lower left stick deadzone can make Jason and Lucia react more quickly when you begin moving.
Start around 2–4 and adjust upward if your character walks without any input.
If your controller has noticeable stick drift, keeping the default value may be better than copying someone else’s configuration.
Best GTA 6 Aim Assist Settings for Shooting While Driving
Vehicle combat is one of the situations where GTA 6’s aiming assistance becomes particularly useful.
Trying to track an enemy while driving through traffic can be difficult, especially when both vehicles are moving quickly.
Open Settings > Gameplay > Combat and enable the following:
- Drive-By Assist: On
- Shooting Assist: On
- Quick Draw: On
- Targeting: Partial or Lock-On
Drive-By Assist helps with targeting while shooting from moving vehicles.
Quick Draw makes it easier to bring out your last-used weapon without opening the weapon wheel every time.
These settings are useful during police chases and missions that require shooting while moving.
However, aim assistance does not replace good positioning. If you are struggling to hit a target, focus on keeping your vehicle steady and avoiding unnecessary camera movements.
Best GTA 6 Reticle Settings for Better Accuracy
Your aiming reticle matters almost as much as your controller sensitivity.
If the reticle blends into the background, it becomes harder to track enemies in crowded streets or dark interiors.
To adjust it:
- Open the GTA 6 pause menu.
- Go to Settings.
- Select the UI tab.
- Find the Reticle section.
- Adjust the appearance and visibility settings.
Try the following configuration:
| Setting | Recommended Value |
|---|---|
| Persistent Center Dot | On |
| Reticle Hit Markers | On |
| Reticle Shape | Dot |
| Reticle Size | Default |
| Equipped Reticle Visibility | 10 |
| Aiming Reticle Visibility | 10 |
A simple dot reticle can make it easier to see exactly where your weapon is pointing.
Hit markers also provide useful feedback when your bullets connect with an enemy.
For a more realistic experience, you can reduce the reticle’s visibility or disable it entirely. However, that makes shooting more difficult, particularly with Free Aim enabled.
How to Make Aiming Feel More Responsive in GTA 6
If aiming feels sluggish even after changing sensitivity, the problem may not be the aiming controls alone.
GTA 6 targets 30 FPS on its current console versions. This can make camera movement feel less immediate than in games running at 60 FPS or higher.
You cannot unlock a higher frame rate through controller settings, but you can reduce some of the effects that make aiming uncomfortable.
Disable Camera Shake and Reduce Visual Distractions
Open Settings > Camera > Comfort.
Try:
- Camera Shake: Off
- Weapon Sway: Off if you prefer a steadier view
- Camera Bob: Reduce if movement feels distracting
You can also lower Motion Blur Strength under the Display settings.
These adjustments do not increase FPS or guarantee better weapon accuracy. They simply reduce visual movement that can make targets harder to follow.
Enable Game Mode on Your TV
If your television supports Game Mode, enable it.
Game Mode usually reduces display processing and input delay, which can make controller actions feel more responsive.
Avoid unnecessary TV motion smoothing if you prioritize low input lag.
For the full explanation of GTA 6’s 30 FPS limit, display options, and console optimization, read our How to Get 60 FPS in GTA 6 settings guide.
Best GTA 6 Aim Settings for Beginners vs Experienced Players
Not every player needs the same amount of aiming assistance. The easiest way to choose your settings is to match them to how you prefer playing.
| Setting | Beginner | Balanced | Manual Aim |
|---|---|---|---|
| Targeting | Lock-On | Partial | Free Aim |
| Aim Assist Strength | 4 | 4 | 0 |
| Aim Sensitivity | 5 | 5–6 | 6–8 |
| Aim Response Curve | Standard | Standard / Precision | Precision / Linear |
| Shooting Assist | On | On | Off |
| Drive-By Assist | On | On | Off |
For most players, start with the Balanced column.
If gunfights are still too difficult, switch Targeting to Lock-On without changing everything else.
If combat starts feeling too easy, experiment with Free Aim and lower assistance.
There is no reward for using uncomfortable settings. The best configuration is the one that makes controlling your weapon feel predictable.
How to Fix Bad Aim in GTA 6
If you are still missing shots after applying the recommended settings, identify what is actually going wrong before adjusting more sliders.
Problem 1: My Aim Keeps Moving Past Enemies
Your Aim Sensitivity or Aim Acceleration may be too high.
Lower Horizontal and Vertical Aim Sensitivity by one step. If the reticle still speeds up too abruptly, lower Aim Acceleration.
Try Precision Aim Response Curve if you need more control over small movements.
Problem 2: My Aim Is Too Slow
Increase Aim Sensitivity gradually, starting with one step on both axes.
Keep your Look Sensitivity slightly higher if you want to turn around quickly without making aimed shots harder to control.
Problem 3: The Camera Moves Without Touching the Controller
This usually indicates analog stick drift or a deadzone that is too low for your controller.
Increase the Right Stick Deadzone until the unwanted camera movement stops.
If the issue persists even with a larger deadzone, check whether your controller needs cleaning, calibration, or repair.
Problem 4: Aim Assist Is Not Locking Onto Enemies
First, check your Targeting mode.
Partial does not provide the same full lock-on behavior as Lock-On. If you want the reticle to snap onto targets more strongly, select Lock-On.
Also check Aim Assist Strength and make sure the target is within a valid aiming range.
Problem 5: Shooting While Driving Feels Difficult
Enable Drive-By Assist and Shooting Assist.
If your aim is too sensitive while the vehicle is turning, reduce Aim Sensitivity slightly.
Try to keep your camera movement controlled rather than constantly pushing the right stick to its maximum position.
How to Practice Aiming in GTA 6
The fastest way to find a comfortable setup is to test your settings in a controlled situation instead of changing them during a difficult story mission.
- Find a safe area with a visible object or stationary point.
- Equip the weapon you normally use in combat.
- Aim at a fixed point and move your reticle away from it.
- Try to return to the exact same position using small stick movements.
- If you repeatedly move past the point, lower sensitivity.
- If reaching it feels too slow, increase sensitivity slightly.
- Repeat the process before changing the response curve or acceleration.
Once stationary aiming feels comfortable, practice tracking moving objects and transitioning between two targets.
Do not judge a setting after only one missed shot. Give yourself a little time to become familiar with how it responds.
Before attempting dangerous activities or story missions, you can also create a manual save. Our GTA 6 save game guide explains how to manage manual saves and autosaves.
GTA 6 Best Aim Settings FAQs
What Are the Best Aim Settings in GTA 6?
For most players, use Partial Targeting, Aim Assist Strength at 4, Horizontal and Vertical Aim Sensitivity around 5–6, and the Standard or Precision Aim Response Curve. Keep Shooting Assist and Drive-By Assist enabled for easier combat.
What Is the Best Aim Assist Strength in GTA 6?
Aim Assist Strength at 4 is a strong starting point for players using Partial or Lock-On targeting. If aiming feels too assisted, lower the value to suit your preference.
Is Lock-On Better Than Partial in GTA 6?
Lock-On is easier because it automatically locks onto nearby valid targets. Partial provides more freedom by moving your aim toward enemies without fully locking on. Partial is better for players who want a balance between help and manual control.
What Is the Best Aim Response Curve in GTA 6?
Standard is the safest starting choice. Precision can help with small aiming corrections, while Linear offers a more direct response to analog stick movement.
What Is the Best Deadzone for GTA 6?
Start around 2–4 and adjust based on your controller. The best deadzone is the lowest value that does not cause unwanted movement or camera drift.
How Do You Turn On Auto Aim in GTA 6?
Open Settings > Gameplay > Combat and change Targeting to Lock-On. Adjust Aim Assist Strength for additional assistance.
How Do You Turn Off Aim Assist in GTA 6?
Set Targeting to Free Aim, lower Aim Assist Strength to 0, and disable Shooting Assist. You can also disable Drive-By Assist if you want to control vehicle shooting manually.
Are GTA 6 Aim Settings the Same on PS5 and Xbox?
Yes. The main targeting, sensitivity, response curve, and deadzone settings are available on both PlayStation 5 and Xbox Series X|S. PS5 also includes DualSense-specific settings for adaptive triggers and haptic feedback.
Does Changing Aim Sensitivity Increase FPS in GTA 6?
No. Sensitivity only changes how quickly aiming responds to controller input. It does not increase the game’s frame rate or unlock a 60 FPS performance mode.
Can You Change Aim Settings During a GTA 6 Mission?
You can access the settings through the pause menu during normal gameplay, including many missions. However, some sequences may temporarily restrict menu access or other actions.
Final Verdict: Which GTA 6 Aim Settings Should You Use?
The best place to start is with Partial Targeting, Aim Assist Strength at 4, Aim Sensitivity at 5–6, and Standard Aim Response Curve.
These settings provide useful assistance without removing control over your shots. Lower deadzones can make your controller more responsive, while disabling Camera Shake can make the aiming view steadier.
If you are struggling with difficult missions, switch to Lock-On. If you want a greater challenge, try Free Aim with shooting assistance disabled.
Most importantly, change one setting at a time and test it before moving on to the next.
For more combat tips, controller settings, missions, vehicles, and walkthroughs, visit our GTA 6 guides hub or check the GTA 6 beginner’s guide.

