TL;DR – GTA 6 Chapter 2: Paradise Lost
- Chapter 2 takes place in Port Gellhorn, Kelly County. You play mainly as Lucia while Jason recovers from the events of Chapter 1.
- There are 18 story entries when smaller objectives are included. The chapter begins with What’s in the Bag? and ends with Checking Out.
- You need at least $15,000 to unlock the final mission. Selling cars to Moses, completing robberies, and finishing Afternoon Delight are useful ways to earn it.
- Don’t miss two collectible cards: Vicki is inside the Starlet Motel office bathroom, and Victor Maravilla is on the kitchen fridge. Both locations become inaccessible after Chapter 2.
- Checking Out is the point of no return. Finish your motel activities, collect valuables, and make a manual save before starting it.
GTA 6 Chapter 2, Paradise Lost, begins at the Starlet Motel near Port Gellhorn after the Discharge Time mission. Lucia becomes your main playable character while Jason recovers. Your priorities are finding medical supplies, securing transportation, earning money, and preparing to move to Vice City.
The chapter includes 18 main story entries when shorter tasks are counted, although some mission lists only count the larger playable missions. You must complete the required objectives and save at least $15,000 before starting Checking Out, the final mission.
This GTA 6 Chapter 2 walkthrough covers the full mission sequence, important unlocks, combat tips, money-making opportunities, collectibles, and the point-of-no-return checklist. It also explains what to do if your next mission is not appearing.
If you are still in Key Lento, finish our GTA 6 Chapter 1 walkthrough first. It covers the previous missions, unique items, optional activities, and preparations before leaving Jason’s original house.
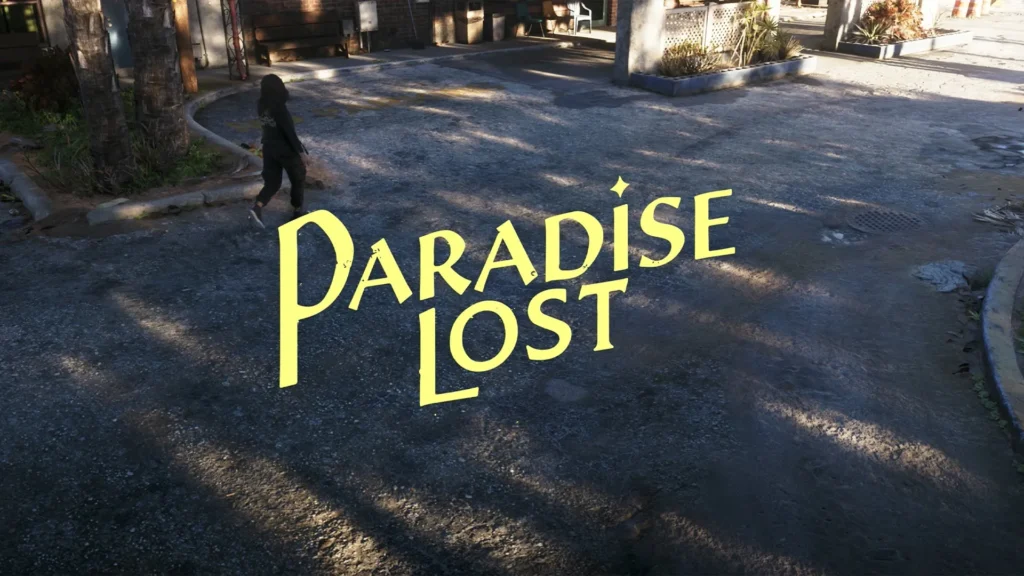
GTA 6 Chapter 2 Walkthrough: Missions and Overview
Paradise Lost shifts the story away from the Leonida Keys and introduces Port Gellhorn, a smaller industrial city in Kelly County.
The Starlet Motel becomes Jason and Lucia’s temporary home. You will spend the first part of the chapter controlling Lucia, completing smaller jobs, and helping Jason recover.
| Chapter Details | Information |
|---|---|
| Chapter Name | Paradise Lost |
| Starting Mission | What’s in the Bag? |
| Final Mission | Checking Out |
| Main Location | Port Gellhorn, Kelly County |
| Temporary Safehouse | Starlet Motel |
| Main Playable Character | Lucia Caminos, with Jason returning later |
| Story Entries | 18, including smaller objectives |
| Required Savings | $15,000 before Checking Out |
| Next Chapter | Chapter 3: Tits Ass Drug Money |
Important: Chapter 2 is not completely linear. Several missions become available together, while others require a phone call or a few in-game days to pass. Your exact mission order may differ from the walkthrough below.
All GTA 6 Chapter 2 Missions in Order
Here is the complete 18-entry checklist for Paradise Lost. It includes the shorter story tasks that some mission lists exclude.
| # | Mission | Main Objective |
|---|---|---|
| 1 | What’s in the Bag? | Examine Lucia’s belongings at the Starlet Motel. |
| 2 | Take Care of Jason | Check on Jason while he recovers. |
| 3 | Overnight Charges | Meet Linda, the motel manager. |
| 4 | Just Moved In | Buy essential supplies from the nearby store. |
| 5 | Girls’ Trip | Find painkillers and meet Vicki and Dunk. |
| 6 | Moses | Learn vehicle theft, scanning, and registration. |
| 7 | New Look | Buy Lucia a new hairstyle. |
| 8 | How Do I Look? | Buy new clothes for Lucia. |
| 9 | Painkiller Supplier | Wait for Dunk to arrange stronger medication. |
| 10 | Ambulance Chaser | Recover and destroy the abandoned ambulance. |
| 11 | Behind on Payments | Pay Linda $900 for the motel room. |
| 12 | Slam Dunk | Help Dunk obtain medication for Jason. |
| 13 | Daily Driver | Steal an ’82 Crawler for Moses. |
| 14 | Breakfast Run | Complete several robberies with Jason. |
| 15 | Coffee Break | Plan your next move and unlock character switching. |
| 16 | Prepare for Vice City | Earn at least $15,000. |
| 17 | Afternoon Delight | Help Vicki rob her boss at Delights. |
| 18 | Checking Out | Escape Port Gellhorn and travel to Vice City. |
Why do some guides say Chapter 2 has 11 missions? They count only the major story missions. The 18-entry version also includes shorter mandatory tasks such as Overnight Charges, Take Care of Jason, and Prepare for Vice City.
1. What’s in the Bag? – Starting Chapter 2
What’s in the Bag? begins automatically after completing Discharge Time, the final mission of Chapter 1.
Jason and Lucia are now staying at the Starlet Motel in Kelly County. Jason is recovering, so Lucia handles most of the work.
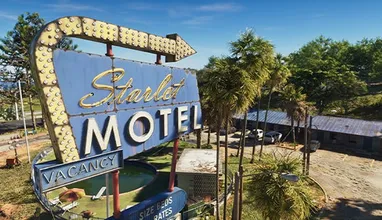
How to Complete What’s in the Bag?
- Examine the bag inside the motel room.
- Pick up the small statue.
- Turn it over and inspect the note underneath.
- Examine the hard drive.
- Finish the interaction to complete the mission.
The hard drive becomes relevant later. You cannot access its contents yet, so do not waste time looking for a computer during this opening sequence.
Reward: The Paradise Lost trophy or achievement becomes available, and Lucia can now explore the open world.
What to Do Immediately After the Mission
Before rushing into another job, spend a few minutes exploring the Starlet Motel.
There are collectible cards inside the building that can become unavailable when Chapter 2 ends.
Collect these as soon as possible:
- Vicki collectible card: Enter the bathroom inside the motel office. Look on the floor beside the toilet.
- Victor Maravilla collectible card: Visit the motel kitchen and inspect the refrigerator.
These are easy collectibles to overlook because the motel initially feels like a temporary stop rather than an important location.
2. Take Care of Jason – Play Nurse
This is an ongoing story task rather than a conventional mission with one starting marker.
Jason needs time to recover, and Lucia can check on him at the Starlet Motel.
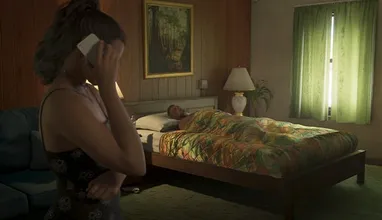
How to Complete Take Care of Jason
- Return to the Starlet Motel regularly.
- Check on Jason when the relevant interaction becomes available.
- Continue completing other Chapter 2 missions.
- Progress through the painkiller-related story objectives.
- Complete Breakfast Run later in the chapter.
The task finishes automatically as the story progresses. You cannot force Jason to recover immediately by repeatedly entering the motel room.
Tip: If the motel marker is green, it usually indicates an available interaction. When it becomes pink, check whether a required story objective is ready.
Spending time with Jason also contributes to the relationship between the two protagonists.
3. Overnight Charges – Meet Linda
After the opening mission, leave your room and visit the motel reception.
Linda, the Starlet Motel manager, wants payment for Jason and Lucia’s stay.
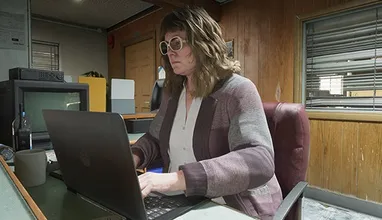
Walkthrough
- Leave the motel room.
- Head to the reception office.
- Speak with Linda at the front desk.
- Complete the conversation about paying for the room.
If Jason bought Lucia a necklace during the optional Chapter 1 homecoming preparations, Lucia hands it over as collateral.
You cannot avoid that outcome by letting the dialogue timer expire. The necklace can be recovered after paying the motel bill.
Exploration tip: Examine the map hanging inside the office. It helps reveal the surrounding Port Gellhorn area.
Also collect the Vicki card from the office bathroom before leaving.
4. Just Moved In – Buy Supplies for the Motel
Just Moved In is a simple shopping mission that helps establish Lucia and Jason’s temporary living situation.
Cross the street from the motel and enter the Alpha gas station convenience store.
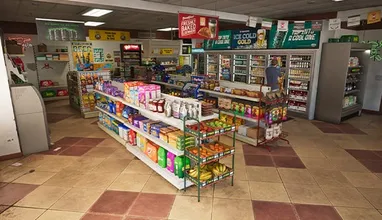
All Items to Buy in Just Moved In
You need eight items:
- Soda
- Protein bars
- Fruit
- Soup
- Gauze
- Bandanas
- Hair clippers
- Makeup bag
The required products appear as markers on the minimap.
Pick them up from the shelves, then return to the motel room.
Important: Items are paid for automatically when collected. You do not need to make a separate checkout transaction.
If you cannot find the products, check that the minimap is enabled in your interface settings.
Reward: Relationship improvement.
5. Girls’ Trip – Find Painkillers for Jason
Girls’ Trip begins after completing Overnight Charges and Just Moved In.
Lucia needs medication for Jason and starts asking around the Starlet Motel.

Step-by-Step Walkthrough
- Search the motel for someone who can provide painkillers.
- Speak to the man near reception.
- Go to Room 10 and meet Vicki.
- Pay Vicki $50 for the pills.
- Return to your room and discover that the medication is not what you need.
- Confront Vicki.
- Drive Vicki’s car to Delights, the club where she works.
- Follow her through the required interactions.
- Travel to Dunk’s trailer.
- Continue to the boatyard and car wash.
- Deal with the Kolts gang encounter.
- Chase Dunk and drive him home.
Best Choice During the Car Wash Encounter
When confronted by the gang, you can respond aggressively or attempt to calm the situation.
Choose Defuse twice if you want to avoid unnecessary combat and improve your criminal reputation.
Provoking the gang can lead to a fight, but it is not required to complete the mission.
Reward: Vicki reimburses the $50 through BuckMe.
Completing Girls’ Trip also opens several useful missions, including Moses and the missions to update Lucia’s appearance.
6. Moses – Unlock Vehicle Registration and Selling Cars
Moses is one of the most important early Chapter 2 missions. It unlocks practical vehicle services and a reliable way to make money.
Vicki introduces Lucia to Moses, a mechanic operating an auto shop in Port Gellhorn.
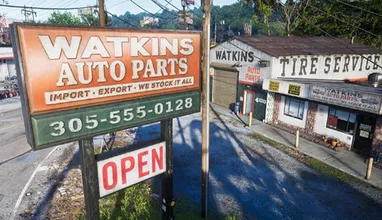
How to Complete the Moses Mission
- Steal or borrow a low-profile vehicle and drive it to Moses’s garage.
- Follow Moses into the yard behind the workshop.
- Open the Waink scanner by holding Up on the D-pad.
- Scan the three vehicles to check for tracking devices.
- Pick up the Slim Jim tool beside Moses.
- Approach the Montagne XL.
- Use the Slim Jim to unlock its door.
- Follow Moses back into the workshop.
- Prepare an eligible vehicle for registration.
- Respray it and register it as Lucia’s personal vehicle.
How to Use the Slim Jim
Approach the locked vehicle and press the interaction button.
On PS5, press Triangle. On Xbox, press Y.
Move the right analog stick until the lock indicator changes from white to pink.
The Slim Jim allows you to unlock certain vehicles without immediately triggering an alarm.
How Vehicle Trackers Work
Not every stolen car can be registered or sold to Moses.
| Tracker Type | What It Means |
|---|---|
| No Tracker | Suitable for registration and selling at Moses’s garage. |
| Standard Tracker | Can alert police to the vehicle’s theft location. |
| Advanced Tracker | Can continue reporting your location under certain driving conditions. More advanced equipment is required. |
Use the Waink scanner before taking a vehicle to Moses.
If your car has a tracker, find another vehicle on the main roads of Port Gellhorn. Moses may reject cars stolen too close to his garage.
Moses Mission Rewards
- Slim Jim tool.
- Scooter Bros vehicle delivery app.
- Lucia’s first registered personal vehicle.
- Ability to register eligible stolen vehicles.
- Ability to sell vehicles without trackers.
Money tip: Moses generally pays $1,000 or more for suitable stolen cars. There is a short cooldown after each sale, so use the downtime to scan and locate another vehicle.
This makes Moses useful for earning money before the later robbery missions become available.
7. New Look – Buy Lucia a Hairstyle
After Girls’ Trip, Lucia can visit the Pearl House Hair Salon in Port Gellhorn.
- Travel to the salon marker.
- Enter the building.
- Speak with the clerk.
- Choose and purchase a hairstyle.
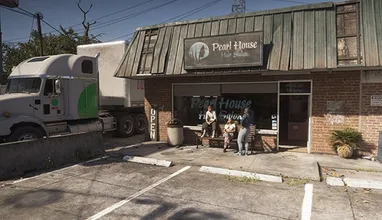
There is no specific hairstyle requirement. Any available paid option completes the objective.
If you are short on money, finish Moses first and sell an eligible stolen vehicle.
8. How Do I Look? – Buy New Clothes
Lucia also needs new clothing.
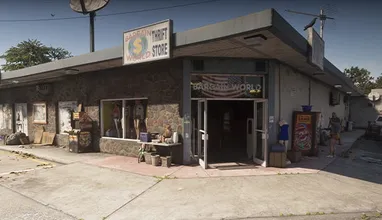
Visit Bargain World in southern Port Gellhorn.
- Enter the clothing store.
- Browse the available outfits.
- Buy a top.
- Buy pants or shorts.
- Finish the shopping objective.
The exact colors and styles are your choice.
Tip: Do not spend all your money on expensive clothing yet. You still need funds for the motel bill, weapons, and the eventual Vice City savings requirement.
9. Painkiller Supplier – How to Trigger Dunk’s Call
Painkiller Supplier is another background task rather than a mission you can start at a marked building.
After Girls’ Trip, Dunk needs time to arrange stronger medication for Jason.
What to Do While Waiting
- Finish Girls’ Trip.
- Continue with available missions such as Moses and Ambulance Chaser.
- Complete New Look and How Do I Look?
- Wait for Dunk’s first call.
- Continue playing until he contacts you again.
- Follow the new marker to begin Slam Dunk.
The task may appear as Dunk Will Be in Touch in your story list.
Do not repeatedly sleep just to force the mission. Completing other available objectives is a more useful way to progress while waiting for his calls.
10. Ambulance Chaser – Destroy the Ambulance
The ambulance from the previous chapter is still nearby, and Lucia needs to get rid of it.
Head to the barn east of the Starlet Motel.
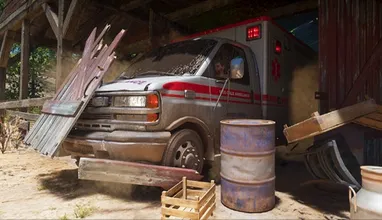
Ambulance Chaser Walkthrough
- Travel to the marked barn.
- Go around the building toward the rear stairs.
- Discover that other people have taken the ambulance.
- Get onto the nearby ATV.
- Chase the ambulance.
- Stay close until the vehicle crashes into a tree.
- Collect the red gas can.
- Pour gasoline over the ambulance.
- Use the ignition prompt to set it on fire.
- Leave the area before the police reach you.
How to Burn the Ambulance
After the ambulance stops, pick up the red gasoline can and hold R1 on PS5 or RB on Xbox to pour fuel.
Then press Triangle or Y when the ignition prompt appears.
Driving tip: Focus on keeping your ATV under control. You do not need to destroy the ambulance during the chase because the mission brings it to a scripted stop.
11. Behind on Payments – Pay Linda $900
Linda expects the motel bill to be paid.
After Overnight Charges, you will receive a requirement to collect $900.
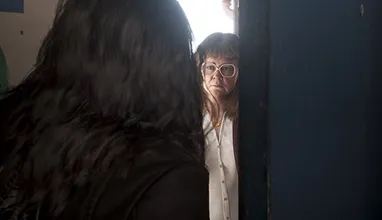
How to Pay the Motel Bill
- Earn at least $900.
- Return to Starlet Motel reception.
- Speak with Linda.
- Pay the outstanding bill.
- Recover Lucia’s necklace if it was used as collateral.
There is no need to grind small robberies if you have already unlocked Moses.
Selling one suitable vehicle may provide enough money to cover the bill.
Important: This $900 payment is separate from the $15,000 you need later for Prepare for Vice City.
12. Slam Dunk – Find Stronger Painkillers
Slam Dunk begins after Dunk has contacted Lucia and the required earlier missions are complete.
Meet him at his trailer in Port Gellhorn.

Slam Dunk Walkthrough
- Follow Dunk behind the convenience store.
- Wait for Dr. Bill to arrive.
- Follow Bill toward his vehicle.
- Drive to the docks where the Kolts gang operates.
- Enter the compound and follow the guard toward the office.
- When the meeting goes wrong, reverse out of the compound.
- Escape the pursuing Kolts.
- Find Dr. Bill after he runs away.
- Collect him and drive to the next meeting location.
- Reach the airstrip southwest of Port Gellhorn.
- Defeat the gang members attacking the area.
- Enter the central building and find Dunk.
- Drive Dunk back to his trailer.
Best Tips for the Slam Dunk Gunfight
The airstrip encounter is one of Chapter 2’s tougher combat sections.
- Bring Zombix healing supplies.
- Use cover instead of standing in the open.
- Watch for enemies shooting from inside buildings.
- Use Focus Mode to line up shots.
- Clear the exterior before entering the main building.
When the fight ends, Dunk collects the medication Jason needs.
Slam Dunk Rewards
- Painkillers for Jason.
- Dunk becomes available as a fence for stolen goods.
- A $1,700 payment through BuckMe on the following day.
- Two additional robbery locations are revealed later.
Unlocking Dunk makes selling certain stolen valuables easier, giving you another way to build toward the Vice City savings requirement.
13. Daily Driver – Steal the ’82 Crawler for Moses
Daily Driver becomes available after Moses sends Lucia a photograph of a vehicle he wants.
The target is a white ’82 Crawler near the old Trader’s Union building.

Daily Driver Walkthrough
- Check the vehicle photograph sent by Moses.
- Travel to the marked search area.
- Locate the white Crawler near the center.
- Get past the guards.
- Steal the vehicle.
- Drive it to Moses’s garage in Port Gellhorn.
- Deliver it in the best condition possible.
You can fight the guards or take the vehicle quickly and escape.
Reward: $1,250, with an additional $500 available for delivering the vehicle in good condition.
After progressing further, Moses also gives you access to the Port Gellhorn Garage and unlocks the Vice City Real Estate app.
Tip: Avoid unnecessary collisions during delivery. The bonus makes careful driving worthwhile.
14. Breakfast Run – Rob Stores With Jason
Breakfast Run becomes available after Slam Dunk, once Jason has recovered enough to leave the motel.
You may need to wait for a phone call before the mission marker appears.
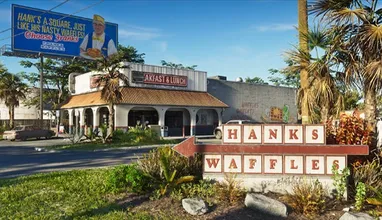
Breakfast Run Walkthrough
- Return to Starlet Motel after Jason contacts Lucia.
- Watch the scene showing his recovery.
- Drive to Hank’s Waffles.
- Threaten the staff and collect money from the register.
- Continue to the liquor store.
- Repeat the robbery.
- Visit the thrift store and collect the cash.
- Continue through the remaining scripted stops.
- Return to the vehicle.
- Escape the police with a two-star wanted level.
How to Rob the Stores
Aim your weapon at the clerk and press Square on PS5 or X on Xbox when the threaten prompt appears.
The clerk will place money on the counter. Take it before the robbery timer expires.
Each interactive robbery gives you around one minute to complete the objective.
How to Lose the Police
After the final robbery, drive away from the main roads and use smaller off-road paths.
This can help break police line of sight and avoid traffic blocking your escape.
You do not need to fight every police officer. Focus on getting away.
Rewards: The Trust trophy or achievement, Jason becomes playable again, and both protagonists have access to personal vehicles.
Breakfast Run transitions directly into Coffee Break.
15. Coffee Break – Unlock Free Character Switching
Coffee Break starts immediately after Breakfast Run.
This mission is important because it unlocks the ability to switch more freely between Jason and Lucia.
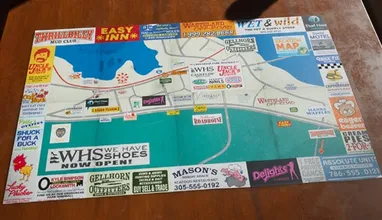
Coffee Break Walkthrough
- Walk toward the motel kitchen.
- Listen to Wyman’s information about local racing activities.
- Use the coffee machine.
- Buy Lucia a coffee for $2.
- Watch the conversation about the couple’s future plans.
- Return to the vehicle.
- Use the partner interaction controls.
How to Switch Between Jason and Lucia
After Coffee Break, hold Right on the D-pad and press R1 on PS5 or RB on Xbox to switch characters when free switching is available.
You may still encounter story situations that restrict switching.
Major unlock: Several optional jobs become available, including Thrillbillies, Hit Avery Pawn, Hit Kingpin Bowling, and Impounded Vehicle.
These activities are worth considering because the next major objective requires you to save money.
16. Prepare for Vice City – How to Get $15,000
Prepare for Vice City requires Jason and Lucia to accumulate at least $15,000 before they can leave Port Gellhorn.
This requirement appears after Coffee Break while arrangements for a new place in Vice City are being made.
You do not need to earn the entire amount from one robbery.
Best Ways to Make $15,000 in Chapter 2
| Activity | Potential Earnings | Why Do It? |
|---|---|---|
| Sell Cars to Moses | Usually $1,000 or more per eligible car | Repeatable source of money after his introductory mission. |
| Daily Driver | $1,250 + $500 condition bonus | Story progression and a useful garage unlock later. |
| Slam Dunk | $1,700 | Required story mission that also unlocks Dunk as a fence. |
| Afternoon Delight | $10,000 | Large story payout that covers most of the savings target. |
| Thrillbillies Race | Up to $2,500 for first place | Optional racing activity with a worthwhile prize. |
| Twist Wrist, Smash, Grab | $2,000 | Optional job from Billy’s questline. |
| Hit Avery Pawn | Depends on stolen valuables | Jewelry and other loot can be fenced for cash. |
| Veteran Hunted | $500 | Also rewards a unique hunting rifle variant. |
Fastest practical approach: Complete Afternoon Delight for its $10,000 payout, then use money from your other story missions, vehicle sales, or optional robberies to reach the remaining amount.
Remember that the Afternoon Delight payment arrives through BuckMe on the following day rather than immediately.
Why Isn’t Checking Out Unlocking After I Have $15,000?
Reaching the money target is only one requirement.
You must also complete the other available main story objectives.
Once those requirements are satisfied, allow some in-game time to pass. Your partner will contact you, and the Starlet Motel will receive the final mission marker.
Money tip: Keep your earnings in BuckMe rather than carrying large amounts of physical cash. Getting arrested or killed can cost you money, so avoid unnecessary crimes after reaching the target.
17. Afternoon Delight – Rob the Delights Safe
Afternoon Delight is one of the biggest money-making missions in Chapter 2.
Vicki contacts Jason and Lucia with a plan to rob her boss at Delights in Port Gellhorn.

Afternoon Delight Walkthrough
- Travel to Delights after receiving Vicki’s call.
- Approach the entrance with Jason and Lucia.
- Lucia enters through the front.
- Move Jason around the back of the building.
- Wait until the guards move away.
- Climb the rear fence.
- Enter the backstage area.
- Choose whether Jason will help with the performance.
- Continue the story sequence and reach the office.
- Open the safe.
- Fight your way out of the building.
- Escape the pursuing bikers.
- Deliver the money to Vicki.
GTA 6 Afternoon Delight Safe Code
The safe combination is:
2008
Enter the code when you reach the office safe.
Should Jason Help With the Performance?
You have two options during the backstage scene.
| Choice | What Happens |
|---|---|
| Help | Jason participates in the performance. The mission includes additional dialogue and a later clothing objective. |
| Don’t Help | The sequence is shorter, and you proceed to the robbery without the extended performance. |
Both choices lead to the robbery and the same final payout.
If you want to complete the mission faster, choose Don’t Help. If you want to experience the additional scenes, choose Help.
How to Escape the Bikers
After leaving Delights, drive away from the pursuing bikers.
Keep your vehicle moving and avoid getting trapped in narrow streets.
You do not need to eliminate every pursuer. Creating enough distance completes the escape.
Reward: Vicki sends $10,000 through BuckMe the next day.
This payout makes it much easier to satisfy Prepare for Vice City’s $15,000 requirement.
GTA 6 Chapter 2 Point of No Return: Before Checking Out
Checking Out is the point of no return for Chapter 2. Starting it ends your time at the Starlet Motel and moves the story toward Vice City.
You cannot continue using the motel as your home after the chapter transition.
Before starting the final mission, complete the checklist below.
Chapter 2 Point-of-No-Return Checklist
- Collect the Vicki card from the Starlet Motel office bathroom.
- Collect the Victor Maravilla card from the motel kitchen refrigerator.
- Finish any activities or interactions you want to experience at the motel.
- Collect useful weapons, ammunition, and healing supplies.
- Consider completing the optional Port Gellhorn robberies.
- Complete the available missions needed for the $15,000 savings objective.
- Deposit your money into BuckMe.
- Make a manual save in a separate slot.
The two Starlet Motel collectible cards are particularly important because their locations become inaccessible after Chapter 2.
Other copies or alternative locations have not been confirmed for those specific cards in the launch guides checked. Collecting them now is the safest option.
Completion note: You do not need every collectible card set for the standard 100% checklist. However, missing either motel card can prevent completion of its particular set unless another location is discovered.
18. Checking Out – Final Mission Walkthrough
Checking Out is the last mission of GTA 6 Chapter 2.
After completing the required story objectives and accumulating at least $15,000, Jason and Lucia prepare to leave Port Gellhorn.
Warning: The following walkthrough contains spoilers for the chapter finale.
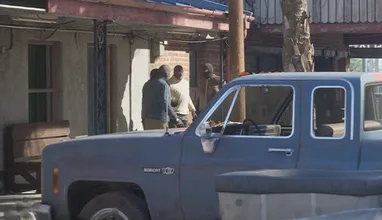
Step 1: Start Checking Out
Return to your room at the Starlet Motel after the final mission marker appears.
Interact with the bathroom door to begin the sequence.
When the situation escalates, pick up the shotgun from the bed.
Step 2: Regroup With Lucia
- Defeat the armed enemies attacking the motel.
- Move carefully toward the cafeteria.
- Use cover as you approach the building.
- Regroup with Lucia.
Combat tip: Do not sprint through open areas while enemies are firing. Use the nearby walls and vehicles for protection.
Step 3: Defend Yourself as Lucia
Control switches to Lucia.
Continue fighting the attackers and follow Jason toward the road.
Watch for a biker approaching Lucia.
Disable the rider and take the motorcycle.
Step 4: Follow Jason on the Motorcycle
Jason escapes in a car while Lucia follows on the motorcycle.
Keep Jason’s pink marker visible on the minimap and avoid hitting roadside obstacles.
Driving too aggressively can throw Lucia off the bike and fail the chase.
Step 5: Jump From the Motorcycle to Jason’s Car
When the jump prompt appears, move the motorcycle close to Jason’s vehicle.
Hold Square on PS5 or X on Xbox to perform the transfer.
Make sure you are close enough to the car before holding the button.
Step 6: Escape the Police
Jason takes control of the vehicle while Lucia fires at the pursuing police cars.
Aim for the police vehicles’ tires to disable them.
Continue defending the car until the escape sequence finishes.
The story then transitions into Vice City.
Chapter complete: Checking Out ends Paradise Lost and leads into Chapter 3, beginning with Welcome to Vice City.
Checking Out Bug: Jason Disappears During the Chase
Some launch walkthroughs report a bug where Jason’s objective marker disappears after failing the motorcycle chase.
The player can become stuck inside a police search area without the mission progressing.
Fix: Restart the mission rather than repeatedly trying to escape the search zone. Once the chase restarts, keep close to Jason and avoid crashing before the transfer prompt.
Best Optional Missions to Complete in GTA 6 Chapter 2
Chapter 2 also introduces several optional jobs. They can provide money, weapons, useful contacts, and activities for later completion.
Check Out McKittrick Farm
Read Kyle’s flyer outside the Starlet Motel reception to unlock his farm activity.
Travel to the airstrip, meet Kyle, and complete a crop-dusting job using his aircraft.
Fly low over the marked field and use the chemical spray when instructed.
Reward: $400 and access to Kyle’s follow-up activities.
Collect Chemicals for Kyle
Kyle later asks you to recover chemicals from a compound.
The people holding the supplies demand $5,000.
You can pay them or refuse and take the van by force.
Paying avoids some conflict, but it also consumes a large amount of money when you are working toward the $15,000 savings goal.
Reward: $1,000 and access to mutated strawberries that temporarily improve certain stats.
Thrillbillies – Mud Club Race
After Coffee Break, visit the Thrillbilly Mud Club.
- Buy the required clothing at the souvenir shop.
- Meet Billy and his crew.
- Rent a dirt bike.
- Enter the race.
- Finish at least 13th out of 14 riders to satisfy the mission objective.
You do not have to win the race, but finishing first provides the best payout.
Reward: Up to $2,500 for first place.
Twist Wrist, Smash, Grab
Billy contacts you after the Thrillbillies introduction.
Follow him on a dirt bike and take part in an armored-truck robbery.
The most important objective is staying on the bike and keeping up with Billy’s crew.
When the armored truck stops, place the explosive charge on its rear doors and collect the loot.
Reward: $2,000.
Hit Avery Pawn
This optional robbery becomes available after Coffee Break.
Visit the pawn shop in Port Gellhorn and collect jewelry from the display cases.
Police may respond quickly, so prepare a getaway vehicle in advance.
A safe is also available, but its combination should not be assumed to be the same in every playthrough. Check the clues or obtain it during the robbery.
The final earnings depend on how much loot you collect and successfully sell.
Hit Kingpin Bowling
Kingpin Bowling is occupied by Kolt gang members.
Prepare for a larger fight before entering the building.
Three valuables are worth collecting:
- Luxury Watch: Southeast room.
- Gutterball Moreland 850 shotgun: On the pool table in the northeast section.
- Office safe: Small room in the northeast area.
Bring body armor, healing supplies, and explosives if you intend to open the safe quickly.
Collecting the required valuables can unlock the Let’s Go Bowling trophy or achievement.
Note: The location becomes available again later, so missing the items during Chapter 2 does not necessarily make the trophy unobtainable.
Veteran Hunted – Jason’s Hunting Mission
Bret Vogel contacts Jason about a hunting job in Lummox County.
This mission can only be started while playing as Jason.
Travel to Bret’s location without Lucia accompanying you.
Follow the hunting tutorial, track the animal, and use a carefully placed shot to maintain the quality of the kill.
Rewards: $500 and the unique Killtelligence SM-69 hunting rifle variant.
This is a useful optional activity for players collecting unique weapons and completing wildlife-related challenges.
Best GTA 6 Chapter 2 Tips and Mistakes to Avoid
1. Finish Moses Early
Moses unlocks the ability to sell suitable stolen cars and register a personal vehicle.
Completing his mission early makes earning money and traveling through Port Gellhorn easier.
2. Don’t Ignore the Starlet Motel Collectibles
The motel is temporary. Its two important collectible cards can become inaccessible when you leave for Vice City.
Collect them during the opening missions instead of waiting until the finale.
3. Keep Money in BuckMe
Banking reduces the risk of losing your entire cash supply while completing robberies and vehicle thefts.
Make deposits after profitable activities, especially when you are close to the $15,000 goal.
4. Use the Waink Scanner Before Stealing Cars
Not every stolen car is suitable for Moses.
Scan vehicles for trackers before taking them to his garage. This prevents wasted trips and unwanted police attention.
5. Don’t Spend Too Much on Appearance
New Look and How Do I Look? require purchases, but you can choose inexpensive options.
Save your money for essential equipment and the story’s required savings target.
6. Complete Other Missions While Waiting for Calls
Painkiller Supplier, Daily Driver, and other objectives sometimes require you to wait for a contact.
Use that time for available missions rather than repeatedly returning to the same marker.
7. Make a Separate Save Before Checking Out
GTA 6 does not offer a traditional mission replay feature at launch.
Keeping a manual save before the finale allows you to return to Chapter 2 without restarting the game.
For more useful driving, combat, police, and money advice, read our GTA 6 beginner’s guide.
GTA 6 Chapter 2 Troubleshooting: Next Mission Not Appearing
If your next mission is missing, check the requirements before assuming the game is broken.
Check the Story Menu
Open the map and select the pink storybook icon to view available story missions.
Some tasks do not have their own visible map marker but remain listed in the story menu.
Wait for Dunk or Moses to Contact You
Painkiller Supplier and Daily Driver involve phone calls or messages.
Finish other available missions and allow in-game time to pass.
Check Your Money
Checking Out will not become available unless you have at least $15,000 and have completed the required story objectives.
Check your BuckMe balance and the Prepare for Vice City objective.
Return to the Starlet Motel
Several missions start at the motel, including Breakfast Run and Checking Out.
If the motel marker changes color, return and inspect the available interaction.
Check Which Character You’re Using
Some optional missions are limited to one protagonist.
For example, Veteran Hunted requires Jason and will not start if Lucia is accompanying him.
GTA 6 Chapter 2 FAQs
How Many Missions Are in GTA 6 Chapter 2?
Chapter 2 has 18 story entries when smaller tasks are included. Shorter mission lists often count 11 major story missions. Some of the additional entries are background objectives, shopping tasks, or other short interactions.
What Is the First Mission in Paradise Lost?
What’s in the Bag? is the first Chapter 2 mission. It begins automatically at the Starlet Motel after Discharge Time.
How Do You Get $15,000 in GTA 6 Chapter 2?
Complete Afternoon Delight for a $10,000 payout, sell eligible stolen vehicles to Moses, and finish other available jobs. You can also earn money from Billy’s activities and optional robberies.
When Can You Switch Between Jason and Lucia?
Free character switching unlocks after Coffee Break. Hold Right on the D-pad and press R1 on PS5 or RB on Xbox when switching is available.
How Do You Unlock Scooter Bros in GTA 6?
Complete the Moses mission in Port Gellhorn. The mission unlocks the Scooter Bros vehicle service and teaches you how to register eligible cars.
What Is the Delights Safe Code in Afternoon Delight?
The reported safe combination is 2008.
What Is the Last Mission of GTA 6 Chapter 2?
Checking Out is the final mission of Paradise Lost. Completing it moves Jason and Lucia into Chapter 3.
Are There Missable Collectibles in Chapter 2?
Yes. The Vicki collectible card in the motel office bathroom and the Victor Maravilla card on the kitchen refrigerator should be collected before Checking Out. The rooms become inaccessible after Chapter 2.
Can You Return to the Starlet Motel After Chapter 2?
You can return to Port Gellhorn later, but the Starlet Motel is no longer available as your home. Its office and kitchen collectible locations become inaccessible, so collect important items before leaving.
Can You Use GTA 6 Cheats During Chapter 2?
No. GTA 6 cheat functionality unlocks after completing the main story, and individual cheats have additional requirements. See our GTA 6 cheat codes guide for the known inputs and unlock conditions.
What Happens After GTA 6 Chapter 2?
Completing Checking Out moves the story into Chapter 3: Tits Ass Drug Money, beginning with Welcome to Vice City.
The next chapter introduces more criminal contacts, additional money-making opportunities, and a much larger part of Leonida’s criminal underworld.
Before moving forward, make sure you have collected the two motel cards, secured your money, and completed any Chapter 2 activities you do not want to miss.
For more mission walkthroughs, gameplay tips, and updates, visit the GamingProMax GTA 6 guides hub.

