Early in Grace Ashcroft’s exploration of the East Wing in Resident Evil Requiem (RE9), you will come across an organless corpse lying on a slab inside the Examination Room at the Rhodes Hill Chronic Care Center. A glowing wristband strapped to the body hints at an important reward, but you cannot simply take it. You need to find two missing artificial organs — the Artificial Heart and the Artificial Lungs — and place them inside the corpse’s open chest cavity to reanimate it and claim the Level 2 ID Wristband.
This puzzle is a critical story-progression step because the Level 2 Wristband is the only way to unlock the Isolation Ward, which leads to the Security Manager’s Office and, ultimately, the Star Quartz you need to escape the Care Center. Below is a full step-by-step walkthrough covering every item, location, and prerequisite you need.
Table of Contents
- Prerequisites Before You Begin
- Step 1 — Find the Wrench in the Custodian’s Office
- Step 2 — Get the Artificial Lungs (Organ Transport Box)
- How to Open the Organ Transport Box
- Step 3 — Get the Artificial Heart from Cold Storage
- Step 4 — Place the Organs and Complete the Corpse Puzzle
- Reward — Level 2 ID Wristband and What It Unlocks
- Combat Tips for the Reanimated Corpse Fight
- Bonus — Examination Room Safe Code
- Common Mistakes to Avoid
- Frequently Asked Questions
Quick Answer: To complete the corpse puzzle, you need the Artificial Lungs (from the Organ Transport Box in the Garage) and the Artificial Heart (from Cold Storage, opened with the Wrench). Place both organs into the corpse in the Examination Room. It will reanimate — kill it to get the Level 2 ID Wristband. You need the Level 1 ID Wristband before you can begin.
Prerequisites Before You Begin
You cannot complete the corpse puzzle the moment you discover it. Several items and access levels need to be obtained first. Here is what you need before you start collecting the organs:
- East Wing Keycard — Found under the table in the Parlor (West Wing), inside a severed hand. You need this to enter the East Wing where the Examination Room is located. For a detailed guide, check our RE Requiem East Wing Keycard location guide.
- Level 1 ID Wristband — Located on a headless corpse in the hallway near the Lead Researcher’s Office on the second floor of the East Wing. Picking this up summons the Chunk enemy, so be ready to run. We cover this in our Resident Evil Requiem Level 1 ID Wristband location guide.
- Leatherbound Notebook — Found inside the puzzle box in the Lead Researcher’s Office (code: Star, Sun, Moon, Sun). You need the Corrosive from the Conference Room to remove the padlock first. This notebook contains the instructions for the Organ Transport Box. See our guide on how to destroy the sturdy padlock in the Researcher’s Office.
Once you have the Level 1 ID Wristband, the path through the West Wing to the Custodian’s Office and Garage becomes available. This is where the puzzle truly begins.
Step 1 — Find the Wrench in the Custodian’s Office
The Wrench is a key item you need to open the Cold Storage door later. You should pick it up now while heading toward the Garage since the Custodian’s Office is on the way.
From the Kitchen in the West Wing, use your Level 1 ID Wristband on the Security Point gate in the corridor south of the Kitchen. Head down the corridor, and the Custodian’s Office will be on your left — look for the ornate Cherub-style door handle.
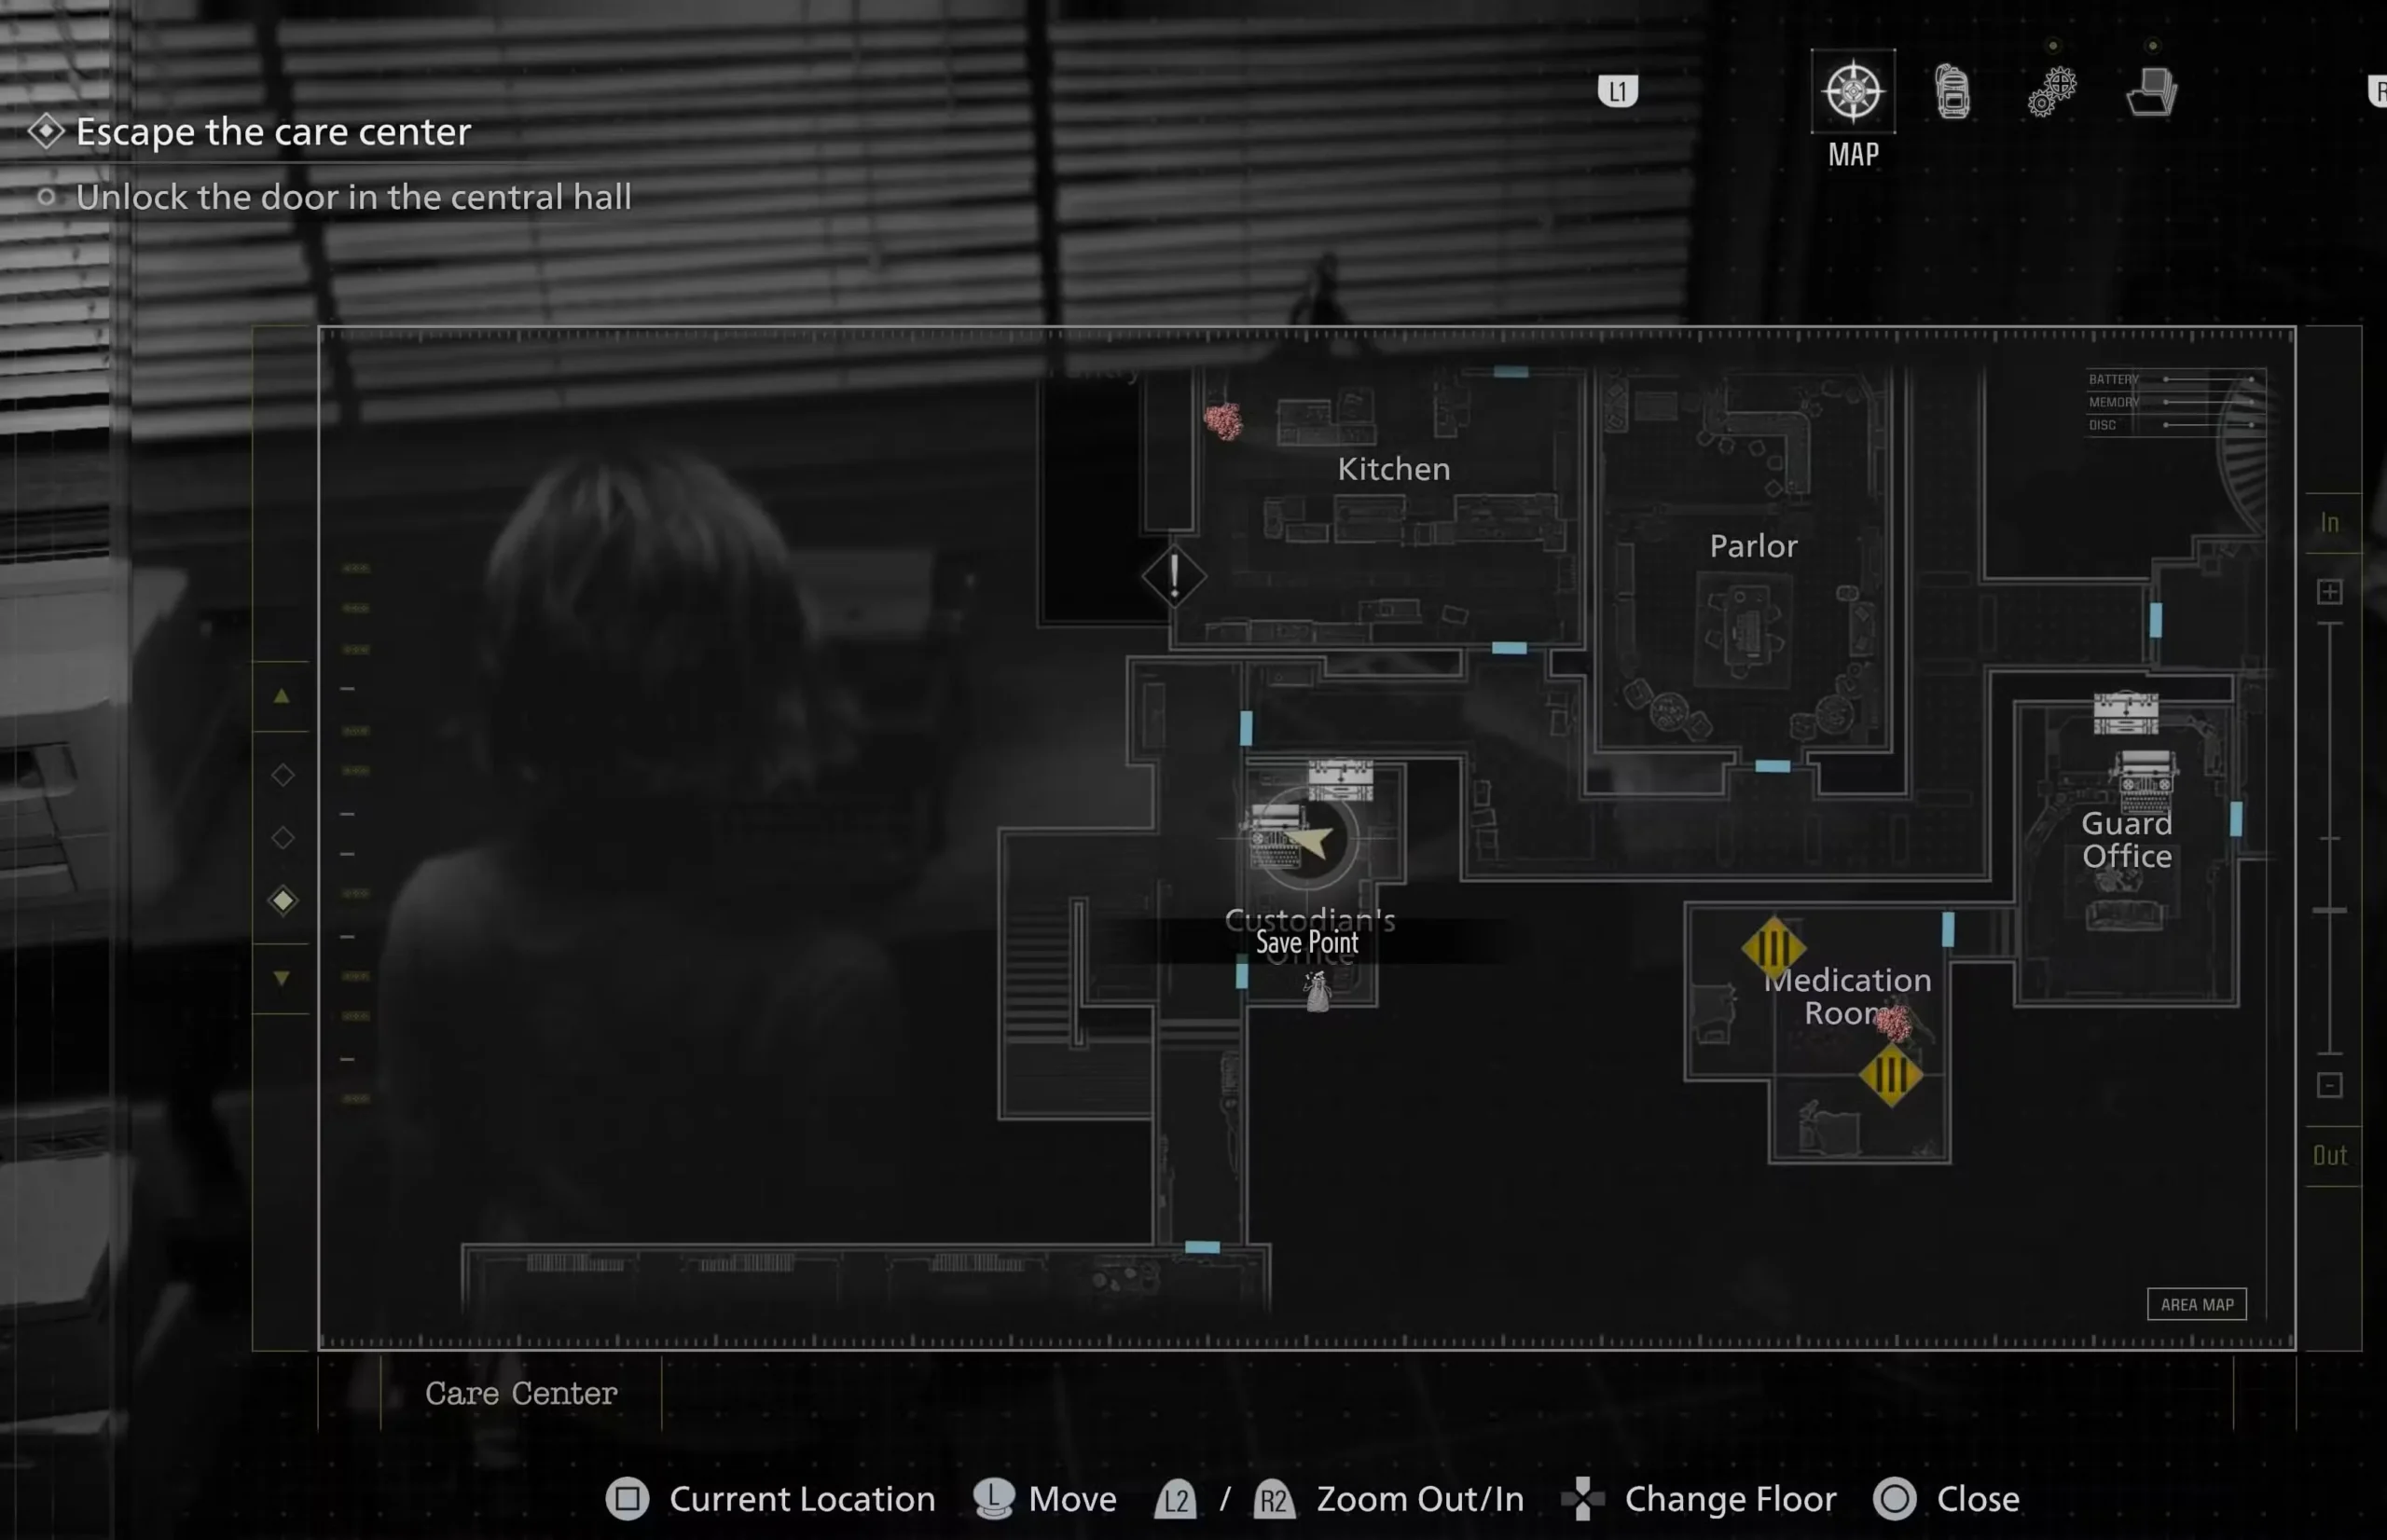
The Wrench sits on the desk beside the typewriter in the Custodian’s Office.
Inside, the Wrench is sitting on the desk in a green tray, right next to the typewriter. This room is also a safe room, so take the opportunity to save your game and organise your inventory before moving on. You will need at least two free inventory slots for the organs you are about to collect.
Tip: The Custodian’s Office has both a typewriter and a storage chest. Deposit any items you do not immediately need (like the Red Jewel if you still have it) to make space for the Wrench, Organ Transport Box, and both organs.
Step 2 — Get the Artificial Lungs (Organ Transport Box)
Continue south from the Custodian’s Office and proceed into the Garage. Make your way to the back of the room, where you will find a van with an open rear door. Inside the van is the Organ Transport Box — a blue locked container holding the Artificial Lungs.
Pick up the Organ Transport Box and immediately prepare yourself. As you try to leave the Garage, a bulldozer crashes through the wall and drives toward Grace. You need to quickly shoot the driver to stop it. On higher difficulties, you may also need to shoot the flaming area beneath the plow. Once the danger has passed, you can crawl over the bulldozer to exit the Garage.
Warning: Do not panic during the bulldozer event. Keep your aim steady and target the driver — it only takes a few shots from your handgun. Running away can push you into a corner with no escape.
Now you need to open the box, and this requires a very specific sequence. If you have the Leatherbound Notebook from the Lead Researcher’s Office, you already have the instructions. For a dedicated walkthrough, see our guide on how to open the Organ Transport Box in Resident Evil Requiem.
How to Open the Organ Transport Box
The Organ Transport Box has a puzzle panel on its back that must be manipulated in the correct order. Open your inventory, inspect the Organ Transport Box, and rotate it to find the panel on the back. Follow these steps exactly:
- Set the bottom-right switch from AUTO to HAND.
- Raise the right-hand lever/switch until it sits exactly at the middle level of the gauge.
- Press Button 5 (the lower button) so that it clicks down.
- Press Button 2 (the upper button) so that it clicks down.
- Set the bottom-right switch back from HAND to AUTO.
If performed correctly, you will get a prompt to open the container. Inside, you will find the Artificial Lungs. Take them and keep them in your inventory — you are halfway done with the corpse puzzle.
Tip: The Leatherbound Notebook file titled “Unlocking the Organ Transport Box” shows a diagram of this exact sequence. If you missed it, you obtained it from the Lead Researcher’s Office puzzle box (code: Star – Sun – Moon – Sun).
Step 3 — Get the Artificial Heart from Cold Storage
The Artificial Heart is located inside the Cold Storage room in the West Wing’s ground floor. You have probably already encountered this door — it has a large metal handwheel. When you first try to turn it, the wheel breaks off, leaving you unable to enter. The Wrench you picked up from the Custodian’s Office is the replacement.
To reach Cold Storage, head back toward the staircase near the Chairman’s Office in the West Wing. The Cold Storage door is in the northwest corner of the West Wing first floor. If you struggled with this previously, our guide on how to open the door without the handwheel explains the route in detail.
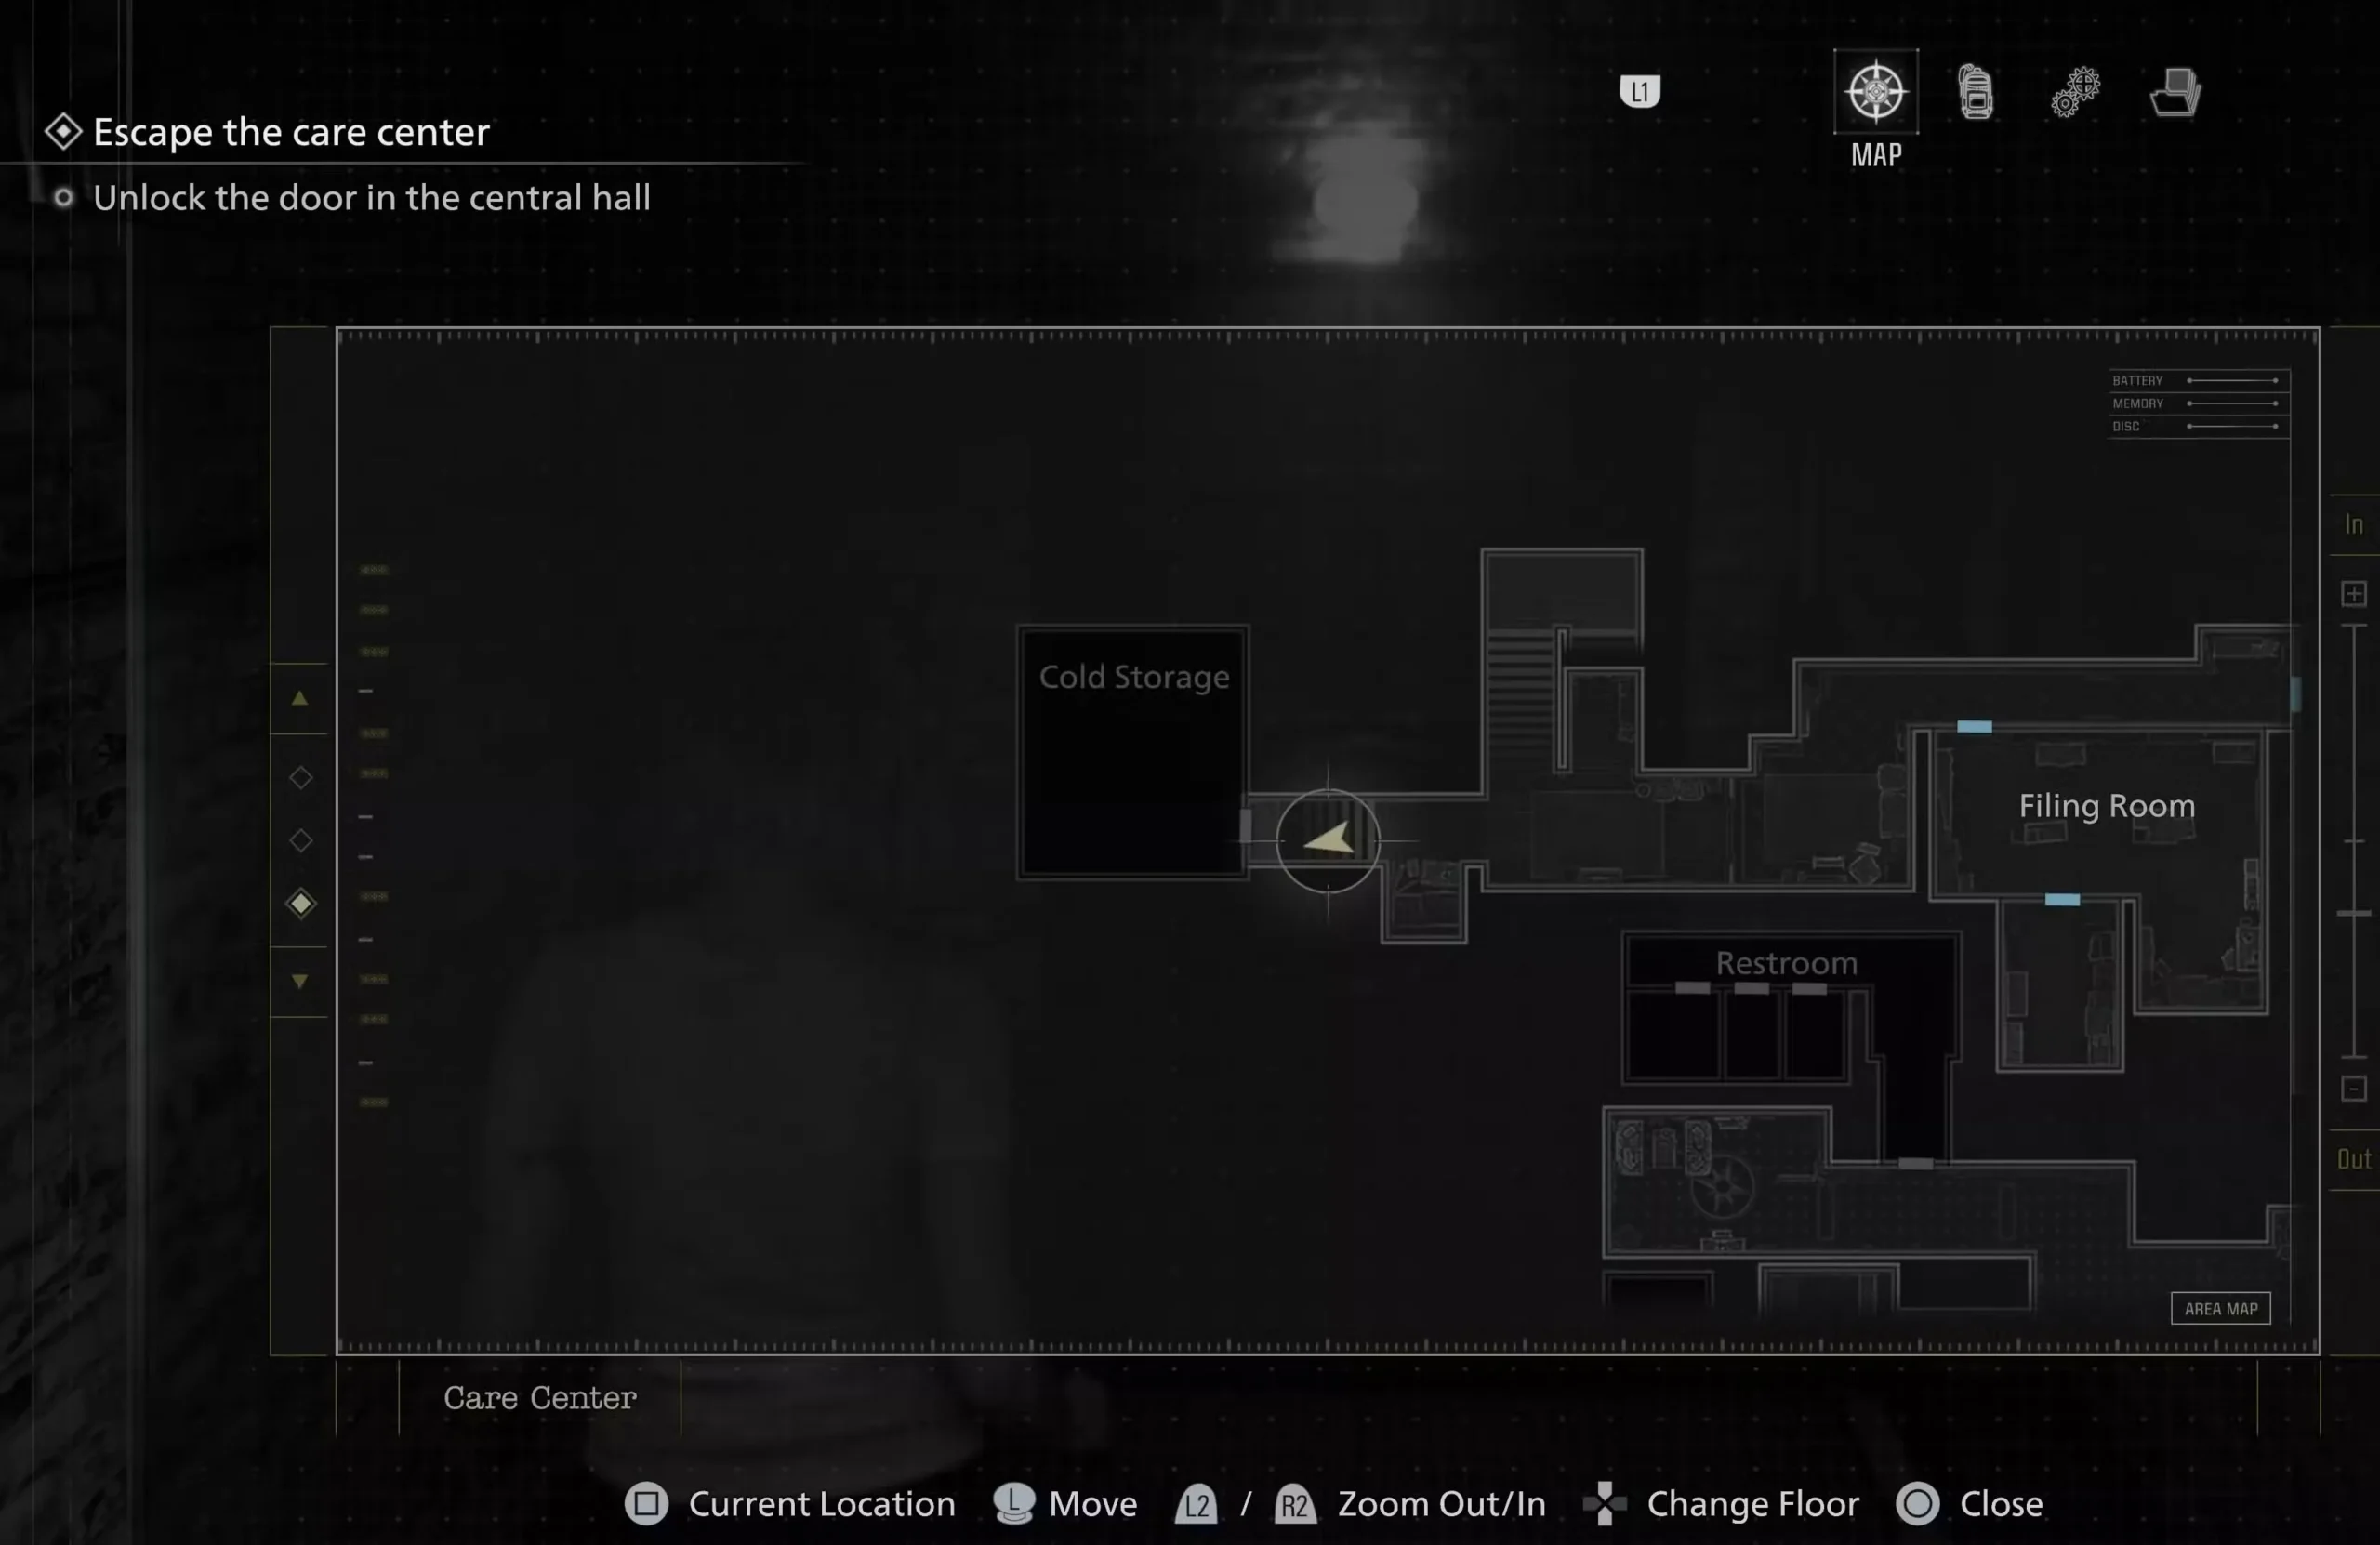
The Artificial Heart hangs from a rack inside Cold Storage. Use the Wrench to open the door.
Interact with the Cold Storage door and select the Wrench from your inventory. Grace will use it to turn the mechanism and open the door. Inside, you will see the Artificial Heart hanging in a bag on a rack directly in front of you. Grab it.
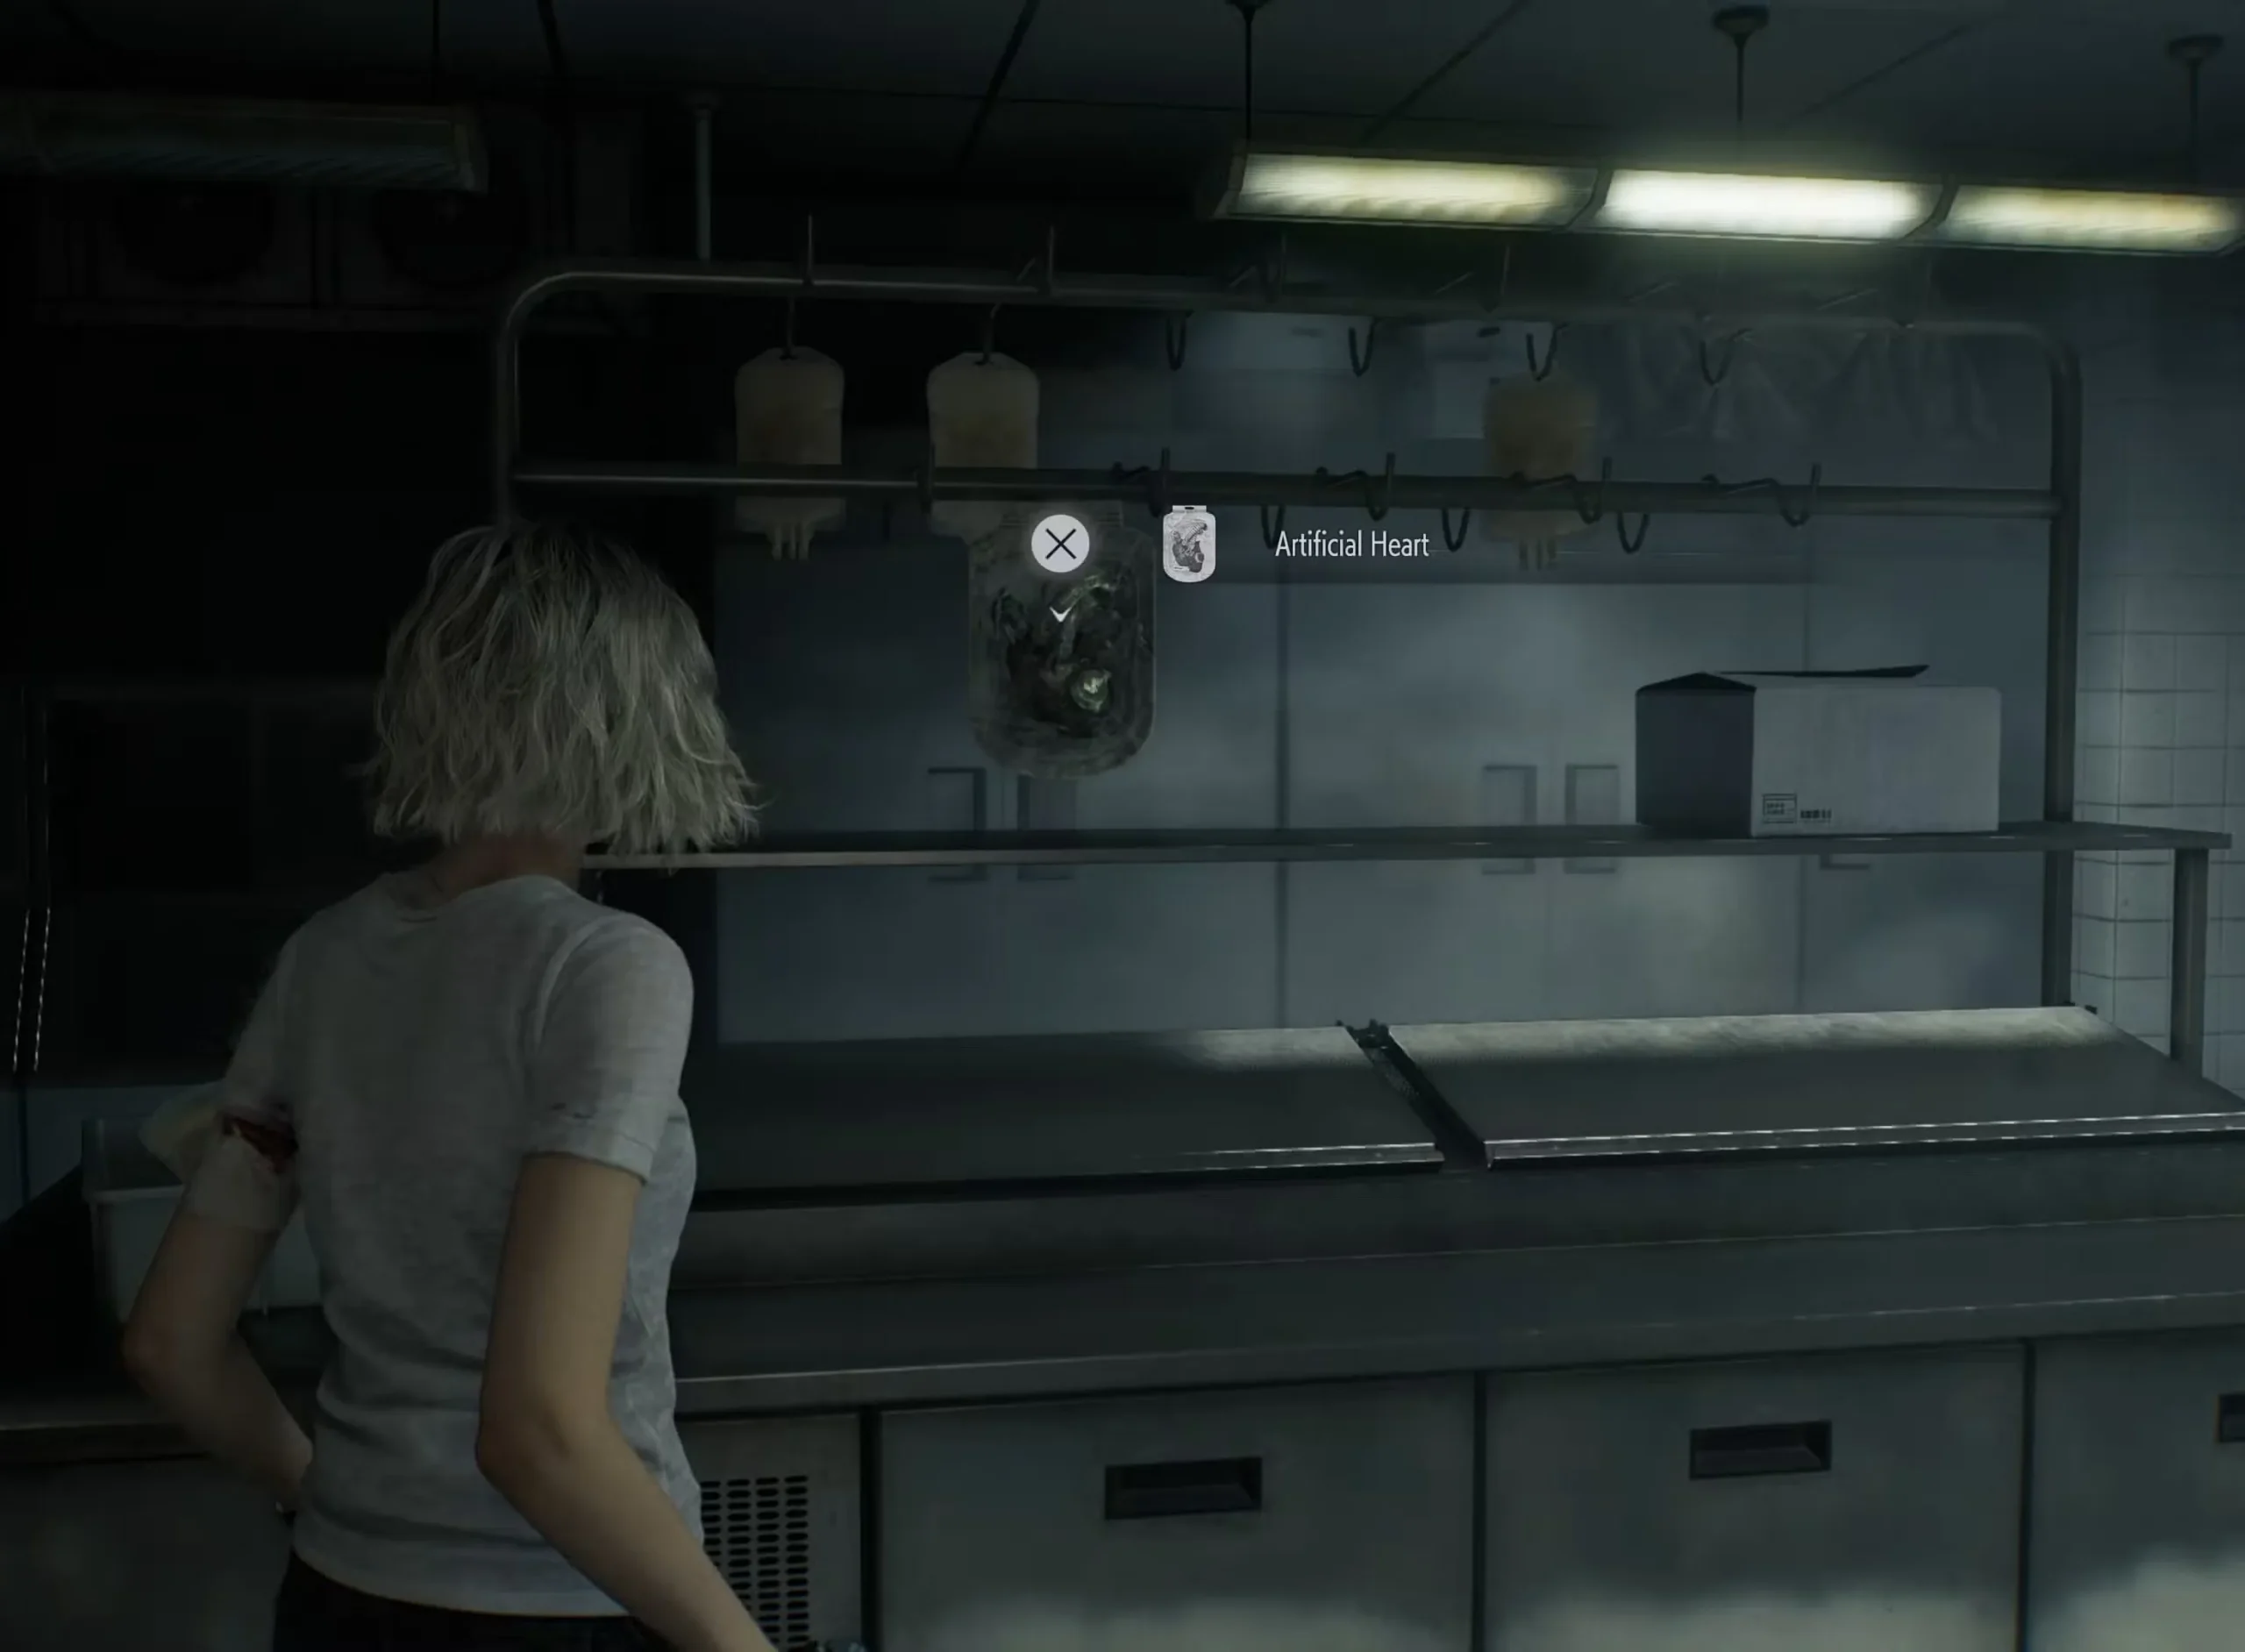
Collect the Artificial Heart from the rack inside Cold Storage.
With both the Artificial Heart and Artificial Lungs in your inventory, it is time to return to the Examination Room in the East Wing.
Step 4 — Place the Organs and Complete the Corpse Puzzle
Make your way back to the Examination Room on the first floor of the East Wing. The room is the same one where you first saw the organless corpse lying on the slab earlier in the game. Interact with the corpse’s open chest cavity to place both the Artificial Heart and the Artificial Lungs. The order does not matter — you can insert either organ first.
Once both organs are placed, a short cutscene plays. The corpse reanimates and breaks free from its restraints. It will attack Grace, and any other “dead” zombies nearby whose heads you did not destroy earlier may also reanimate at this point.
Combat Alert: Make sure you have at least some ammo and healing items before inserting the organs. The reanimated corpse is tougher than a standard zombie and can deal significant damage. We recommend having a Hemolytic Injector or a couple of Requiem rounds ready.
Kill the reanimated corpse (and any other zombies that rose up). Once the main corpse drops, you can loot the Level 2 ID Wristband from its wrist. The puzzle is now complete.
Reward — Level 2 ID Wristband and What It Unlocks
The Level 2 ID Wristband is the primary reward for completing the corpse puzzle, and it is essential for progressing the story. With it, you can unlock:
- Isolation Ward — Located near the Examination Room in the East Wing (northeast corner). Use the Level 2 Security Point to enter.
- Security Manager’s Office — Found at the end of the Isolation Ward. Inside, you will find the final puzzle box, interact with a notebook on the desk, and obtain the Level 3 ID Wristband via a cutscene.
The Level 3 Wristband allows you to free Emily from her cell in the Medication Room. You then carry Emily to the puzzle box in the Security Manager’s Office, where she reads the braille text and unlocks it for you, giving you the Star Quartz — the last quartz needed to open the Moon, Sun, and Star door in the Central Hall and escape the Care Center entirely.
Progression Note: After obtaining the Level 2 Wristband, the next key progression steps are: Enter the Isolation Ward, get the Level 3 Wristband, free Emily, get the Star Quartz, open the Central Hall door, and proceed to the Courtyard.
Combat Tips for the Reanimated Corpse Fight
The reanimated corpse is slightly stronger than standard infected enemies, and the fight can be chaotic if nearby zombies also rise. Here are some tips to handle it smoothly:
- Clear the area first — Before inserting the organs, make sure you have eliminated or permanently destroyed (head blown off) any zombies in the Examination Room and the nearby corridor. Zombies that were only “downed” but not destroyed will reanimate when the corpse reactivates.
- Use a Hemolytic Injector — If you have one available, stagger the reanimated corpse and use the injector for a guaranteed kill. This is the most ammo-efficient method.
- Aim for the head — As with all infected in RE9, headshots deal far more damage and can stagger the enemy quickly. Wait for the crosshairs to tighten for a more accurate shot.
- The Requiem revolver — A single Requiem round will make short work of this enemy. If you have one to spare, this is a good time to use it.
- Keep distance — The room is somewhat tight, but you can kite the zombie around the examination table. Avoid getting cornered near the back wall.
Bonus — Examination Room Safe Code
While you are in the Examination Room, do not forget about the safe that sits against the wall. The combination depends on your difficulty setting:
| Difficulty | Safe Combination |
|---|---|
| Casual / Standard (Modern and Classic) | Right 30 – Left 10 – Right 50 |
| Insanity | Left 50 – Right 30 – Left 90 |
The safe contains three Antique Coins, which you can spend in the Parlor to purchase upgrades for Grace. For all safe solutions in the game, refer to our Resident Evil Requiem Examination Room Safe Code guide and our Bar Lounge Safe Code guide.
Common Mistakes to Avoid
Many players get stuck or waste resources during this puzzle. Here are the most common mistakes and how to avoid them:
- Trying to complete the puzzle too early — You cannot get the organs until you have the Level 1 ID Wristband and have progressed into the West Wing. Do not waste time trying to force your way in.
- Forgetting to pick up the Wrench — The Custodian’s Office is easy to pass through quickly. The Wrench is small and easy to miss on the desk. Without it, you cannot open Cold Storage.
- Not reading the Leatherbound Notebook — If you skip inspecting this item in your inventory, you will not know how to open the Organ Transport Box. Always examine key items from the inventory screen.
- Full inventory when inserting organs — Make sure you have at least one free slot so that you can pick up the Level 2 ID Wristband immediately after the fight. If your inventory is full, you will need to drop or store an item first.
- Not destroying zombie heads beforehand — Any zombie in the area whose head is intact can reanimate during the corpse puzzle event. Use Hemolytic Injectors or headshots to permanently eliminate them.
Frequently Asked Questions
Can I complete the corpse puzzle without the Level 1 ID Wristband?
No. The Level 1 ID Wristband is required to access the Custodian’s Office (where the Wrench is) and the Garage (where the Organ Transport Box is). Both are behind Level 1 Security Points in the West Wing.
Does the order of inserting the organs matter?
No. You can place the Artificial Heart first or the Artificial Lungs first — the order makes no difference. The reanimation cutscene triggers once both are placed.
What happens after I get the Level 2 ID Wristband?
The Level 2 Wristband unlocks the Isolation Ward in the northeast section of the East Wing. Inside, you will find the Security Manager’s Office where you get the Level 3 Wristband and eventually the Star Quartz, which is needed to open the Central Hall door and escape the Care Center.
Can I avoid the fight with the reanimated corpse?
No. The corpse must be killed to drop the Level 2 ID Wristband. You cannot pick it up without defeating the zombie first. The fight is mandatory.
Where is the Organ Transport Box puzzle solution?
The solution is inside the Leatherbound Notebook, which is obtained by opening the puzzle box in the Lead Researcher’s Office (code: Star – Sun – Moon – Sun). You first need the Corrosive from the Conference Room to destroy the padlock. Check our Organ Transport Box guide for the full step-by-step solution.
Is this puzzle different on Insanity difficulty?
The corpse puzzle itself (finding and placing the organs) is identical on all difficulties. However, the Examination Room safe code changes on Insanity (Left 50 – Right 30 – Left 90 instead of Right 30 – Left 10 – Right 50), and the reanimated corpse deals more damage and takes more hits to kill.
What weapons should I bring for this fight?
Your handgun works fine if you aim for the head. A Hemolytic Injector is the most efficient option for a quick kill. If you have Requiem ammo, one shot will finish the job. Avoid wasting shotgun shells here — save those for Chunk and later boss fights.
More RE9 Guides on GamingProMax
- How to Open the Organ Transport Box in Resident Evil Requiem
- How to Open the Door Without the Handwheel (Care Center)
- How to Destroy the Sturdy Padlock in the Researcher’s Office
- RE Requiem Level 1 ID Wristband Location
- RE Requiem Examination Room Safe Code
- RE Requiem Bar Lounge Safe Code
- RE Requiem East Wing Keycard Location
- RE Requiem Chairman’s Office Puzzle Box Guide
- RE Requiem West Wing Keycard Location
- RE Requiem Care Center Fuse Location
Buy Resident Evil Requiem
Resident Evil Requiem is available now on PS5, Xbox Series X|S, Nintendo Switch 2, and PC. Pick up the game on your preferred platform: