Complete Build Guide • Wuthering Waves Version 2.7 / 3.1 • February 2026
S-Tier • Fusion • Pistol • Main DPS • 5★ Limited Banner • Fiend of Ever-burning Flame
Overview
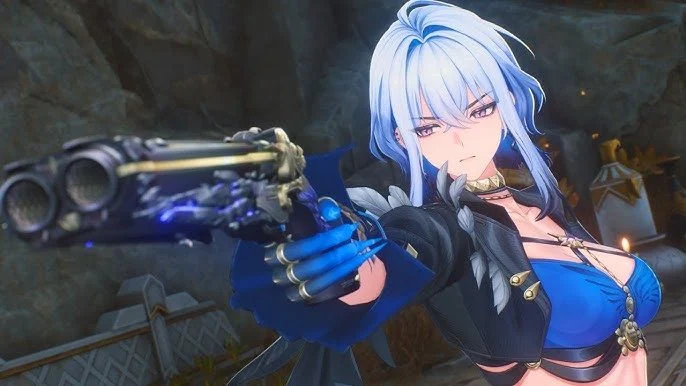
Galbrena is a 5-Star Fusion Pistol Main DPS introduced in Wuthering Waves Version 2.7. Known as the Fiend of Ever-burning Flame, she is a dual-phase fighter who transitions from her default Threshold State into the explosive Demon Hypostasis empowered form. Her kit revolves around two distinct damage types: Echo Skill DMG and Heavy Attack DMG — a split scaling that makes her flexible across multiple team compositions.
Her two Forte resources — Sinflame (purple bar, fills via hitting enemies) and Afterflame (red bar, filled by teammates casting Echo Skills) — must both be managed together. Once Sinflame hits 100, she enters Demon Hypostasis where all attacks are transformed into enhanced versions. Afterflame stacks then provide up to 60% DMG amplification on her enhanced attacks, making teammate Echo Skill usage the single most critical setup requirement.
Galbrena’s biggest strength is her straightforward playstyle with powerful self-buffs and broad team flexibility. Her biggest weakness is a severe weapon gap — her signature Lux & Umbra is the only pistol with passive effects that directly boost both her Echo Skill and Heavy Attack DMG simultaneously, and there are no F2P options that do the same.
🔥 The Three Forte Resources — Sinflame, Afterflame & Fated End
- Max 100 points
- Filled by Basic Attacks, Heavy Attacks, Resonance Skill, and Intro Skill
- At 100: Resonance Skill upgrades to Ascent of Malice — enter Demon Hypostasis
- Max 40 points (+8 per Echo Skill cast by any teammate)
- Same Echo name only counts once per reset
- In Demon Hypostasis: +1.5% DMG per point (max +60%)
- Reset on exiting Demon Hypostasis
- Inherent Skill — stacks by using different skill types (max 4)
- Each stack: +5% All DMG dealt by Galbrena (max +20%)
- Shown as C/B/A/S rank marks below enemy HP bar
- Same skill type: only 1 stack per 5 seconds
Strengths & Weaknesses
✓ Strengths
- ✓ Straightforward kit — intuitive two-phase playstyle easy to grasp
- ✓ Multiple strong self-buffs: Burning Drive (+90% ATK at S2), Afterflame (+60% DMG), Liberation buff (+85% Multiplier)
- ✓ Split Echo Skill / Heavy Attack scaling fits broadly across mono-Fusion, hypercarry, and sustain teams
- ✓ Hellstride special dodge mechanic — does not break Basic Attack chains, makes survivability high
- ✓ Stage 4 & 5 enhanced Basic Attacks have innate CC (spatial rift stall) in Demon Hypostasis
- ✓ High Outro Skill damage multiplier — 79.5%×3 + 556.5% ATK
✗ Weaknesses
- ✗ Severe weapon gap — Lux & Umbra signature is far ahead; no F2P pistol has Echo Skill or Heavy Attack buffs
- ✗ Afterflame depends heavily on teammates casting Echo Skills — poor team setup starves her damage
- ✗ Echo Skill DMG Bonus cannot be obtained from Echo sub-stats — niche buff source
- ✗ Triggering a Dodge Counter in Demon Hypostasis mid-chain causes significant DPS loss without using Hellstride
Skill Breakdown
4-hit combo. Stages 1–3 deal Heavy Attack DMG; Stage 4 deals Echo Skill DMG — the most important hit. After Stage 4, chain immediately into Stage 2 or hold for Heavy Attack to cancel recovery animation. Core damage-filler during Threshold State.
3-hit combo. Stages 1–2 deal Heavy Attack DMG; Stage 3 deals Echo Skill DMG. Interweave with Basic Attacks to quickly stack Fated End to S-rank. Alternating BA and HA chains builds Sinflame efficiently and maximizes Fated End buff uptime.
Encroach (normal): Dash + flip, deals Heavy Attack DMG. Low damage, only used to help fill Sinflame. Short 5s cooldown. Ascent of Malice (enhanced, at 100 Sinflame): Replaces Encroach — slashes with wings, enters Demon Hypostasis, converts Sinflame → Purging Flame.
Core damage source. In this state, all attacks are enhanced versions with higher multipliers and consume Purging Flame. Stages 4 & 5 of enhanced Basic Attack are Echo Skill DMG type and deal the highest individual hits. Dodge Counter in this state can interrupt chains — use Hellstride to cancel it and resume combo. Liberation must be cast first to apply +85% multiplier buff.
Deals high Echo Skill DMG and applies +85% DMG Multiplier to all enhanced attacks in Demon Hypostasis for 14s. Must be cast right after entering Demon Hypostasis — or just before entering. The 14s window must cover the full Purging Flame drain duration. Energy Cost: 125. Cooldown: 25s.
Unique mechanic. When Galbrena presses Dodge during any skill animation, Hellstride activates. It counts as a successful dodge (avoids damage) without resetting the Basic/Heavy Attack chain. Critical during Demon Hypostasis — use it to cancel a Dodge Counter mid-animation and continue the Stage 4 → Stage 5 chain to avoid massive DPS loss.
Intro (Hellflare Overload): Deals Fusion DMG, helps build Sinflame, triggers Burning Drive buff. Can chain into Basic Attack Stage 2. Outro (Ashen Pursuit): High damage multiplier (79.5%×3 + 556.5% ATK). Activates at full Concerto — always use when leaving the field for damage and team buff cycling.
Triggered by: Intro Skill, Hellstride, Basic Attack Stage 4 (enhanced), Resonance Skills. Provides +20% ATK (+90% ATK at S2) for 4 seconds. During her burst window in Demon Hypostasis this is essentially permanent. Ensure Liberation is cast while Burning Drive is active for maximum multiplier.
Skill Leveling Priority
| Priority | Skill | Reason |
|---|---|---|
| ★★★★★ 1st | Forte Circuit | All transformed enhanced attacks (Demon Hypostasis) scale directly with Forte Circuit level — her primary damage source |
| ★★★★ 2nd | Resonance Liberation | High individual Echo Skill DMG plus the +85% multiplier buff it applies — second largest damage source and rotation essential |
| ★★★ 3rd | Normal Attack | Basic and Heavy Attacks are used extensively for building Sinflame and contribute moderate sustained DPS |
| ★★ 4th | Resonance Skill | Minimal direct damage — level to 6 only. Used primarily to enter Demon Hypostasis, not for damage scaling |
| ★ Last | Intro Skill | Rotation opener only — minimal direct damage multiplier growth. Level last, if at all |
Best Weapons
| Weapon | Rarity | Substat | DPS | Key Passive |
|---|---|---|---|---|
| Lux & Umbra | 5★ Sig | Crit DMG 48.6% | 100% | +12% ATK. Echo Skill DMG → +24% Heavy ATK Amp for 6s. Heavy ATK DMG → +24% Echo Skill Amp for 6s. While BOTH active: ignores 8% target DEF. Self-sustaining cross-buff cycle perfectly matching Galbrena’s split scaling |
| The Last Dance | 5★ | Crit DMG 72.0% | 83.6% | +12% ATK. Intro/Liberation cast → +48% Resonance Skill DMG for 5s (useless on Galbrena). Justified purely by highest Crit DMG substat available |
| Static Mist | 5★ | Crit Rate 24.3% | 79.6% | +12.8% ER. Outro → next Resonator’s ATK +10% for 14s. Useful for ER comfort and team ATK buff |
| Solar Flame | 4★ BP | Crit Rate (variable) | 76.1% | BA/HA DMG → stacking +ATK and +Heavy ATK DMG Bonus (×4 stacks, 7s). Active during entire burst. Best non-5★ choice |
| Relativistic Jet | 4★ F2P | ATK% | ~72% | Resonance Skill → +6 Energy and +10% ATK for 16s. Budget option while saving for signature |
⚠ Signature Weapon is Strongly Recommended
Lux & Umbra is the only pistol in the game with a passive that directly boosts both Echo Skill DMG and Heavy Attack DMG simultaneously — matching both of Galbrena’s scaling types. The 8% DEF ignore while both buffs are active adds on top. The gap between Lux & Umbra (100%) and the next best option, The Last Dance (83.6%), is one of the largest weapon gaps of any character in Wuthering Waves. Pulling the weapon banner is highly recommended if you are investing in Galbrena.
Best Echo Sets
Flamewing’s Shadow (3) + Flaming Clawprint (2)
3-PC Flamewing’s Shadow: +Echo Skill DMG Bonus that stacks during combat — directly amplifies Galbrena’s primary damage scaling
2-PC Flaming Clawprint: +10% Fusion DMG Bonus (passive). Can substitute 2-PC Molten Rift if you lack Clawprint pieces with good sub-stats
Molten Rift (5-PC)
5-PC: Easy-to-activate Fusion DMG Bonus that stacks in combat
Farmable very early, maintains value throughout the entire game. Replace with Flamewing’s Shadow 3-PC once you have well-stat’d pieces
Best Main Echo — Corrosaurus (3-Cost)
Corrosaurus is the mandatory main echo for Galbrena. Passively grants +12% Fusion DMG Bonus and +20% Echo Skill DMG Bonus — both matching her core scaling. It is a summon-type echo (not a transform), so it can be activated mid-rotation without interrupting her combat chain. It also deals decent Fusion DMG on use. Do not replace it with Nightmare: Inferno Rider unless Corrosaurus is unavailable, as the Resonance Skill DMG from Inferno Rider is irrelevant to Galbrena.
Echo Main Stats — 43311 Layout
| Echo Slot (Cost) | Main Stat | Notes |
|---|---|---|
| 4-Cost Echo | Crit Rate | Galbrena has Crit DMG attribute bonuses from Forte — Crit Rate on 4-Cost balances the 75:250 target ratio |
| 3-Cost Echo ×2 | Fusion DMG Bonus | Fusion DMG is always active; do not use ATK% on 3-Cost slots — the difference is ~2% DPS per slot |
| 1-Cost Echo ×2 | ATK% | Standard ATK% on 1-Cost — Galbrena scales from ATK so these are correct for her |
Echo Sub-Stats Priority
| Sub-Stat | Priority | Notes |
|---|---|---|
| Crit Rate | ★★★★★ Top | Target 70–80%. Galbrena has ATK% attribute bonus — prioritize Crit Rate over ATK in sub-stats |
| Crit DMG | ★★★★★ Top | Target 250%+ (she has built-in Crit DMG bonuses from Forte attribute nodes). Higher is better once Crit Rate secured |
| Heavy Attack DMG Bonus | ★★★ Mid | Strong for stages 1–3 of Basic and Heavy Attacks — significant portion of total kit output |
| ATK% | ★★ Filler | Decent filler stat for increasing raw multiplier floor |
| Energy Regen | ★★ Comfort | 120% is comfortable; 110% is minimum viable. Do not over-stack ER above 120% |
🎯 Target Stat Goals
Optimal Rotation
Pre-Galbrena — Teammates Fill Afterflame (5 Echo Skill Casts Required)
›
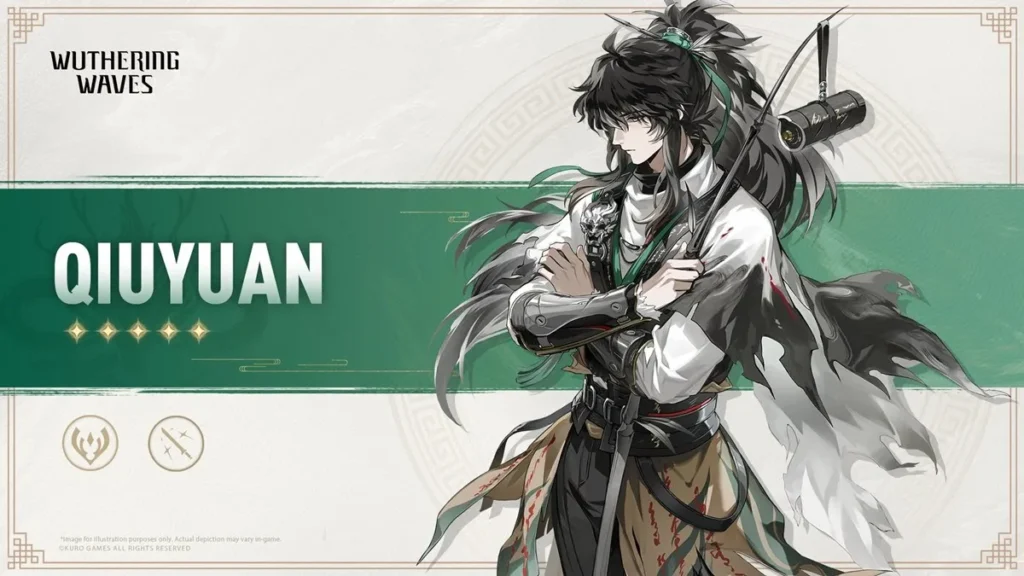
Qiuyuan Rotation + Echo Skill ×2
›
Outro → Switch to Galbrena
›
Afterflame = 40/40 ✓
Galbrena On-Field Rotation
›
Echo Skill (Corrosaurus)
›
Basic Attack ×6 (fill Sinflame)
›
Ascent of Malice (Enter Demon Hypostasis)
›
🔥 Liberation (Hellfire Absolution)
›
Enhanced Basic Attack ×7 (drain Purging Flame)
›
🔄 Outro Skill
Critical Notes: (1) Always ensure teammates cast 5 total Echo Skills before Galbrena enters — Afterflame resets on exiting Demon Hypostasis and must be refilled each rotation. (2) Cast Liberation immediately after entering Demon Hypostasis — the +85% multiplier buff must cover the entire enhanced attack window. (3) If you get hit and trigger a Dodge Counter during the enhanced chain, press Dodge again to activate Hellstride — this cancels the Counter animation without breaking your attack chain. (4) The Fated End (S-rank) debuff naturally reaches max during her burst window — no extra effort needed once in rotation.
Best Team Compositions
★ Premium BIS — Echo Deepen Team
Qiuyuan provides Echo Skill DMG Deepen via Outro and multiple Echo Skill casts to stack Galbrena’s Afterflame. Shorekeeper’s Stellarealm adds Crit buffs + all-DMG bonus.
💥 Mono Fusion — Brant + Lupa
Lupa provides Fusion DMG bonus, ATK bonus, and Fusion RES shred. Brant provides shields, sustain, and an Echo Skill for Afterflame. Both amplify all Fusion DMG types from Galbrena.
💪 Hypercarry — Iuno + Shorekeeper
Iuno provides huge Heavy Attack DMG Deepen amplification for Galbrena’s Heavy Attack-scaling hits in Demon Hypostasis. Mortefi is a budget replacement for Iuno.
✅ Budget / F2P Team
Mortefi provides Heavy Attack DMG amplification and off-field coordinated attacks at no cost. Verina provides sustained healing and all-team ATK/DMG buffs. Strong resource-efficient starter setup.
Resonance Chain (Sequence Nodes)
| Node | Name | Effect & Impact | Rating |
|---|---|---|---|
| S1 | Heart of Defiance Ever Ablaze | Each Afterflame point = +2% Crit DMG on enhanced attacks (max +80% at 40 stacks; +48% in standard teams). Interruption immunity on final hits of enhanced BA, HA, and aerial attacks. ~+16% DPS in standard teams, up to ~+23% in optimized setups | ★★★ Good |
| S2 | Hellbound Dive of Fire and Abyss | Burning Drive ATK bonus ×350% more — Burning Drive goes from +20% ATK to +90% ATK. Single largest DPS increase before S6. ~+23% damage increase. Best early investment after S0R1 | ★★★★★ Best Early |
| S3 | Hunter’s Blood Oath Rekindled | Resonance Liberation DMG Multiplier +130% (×2.3 total). ~+20% damage increase. Liberation is a key nuke component so this scales well | ★★★★ Great |
| S4 | Carry Forth This Fading Spark | Team-wide buff: Teammate Echo Skill cast → all Resonators gain +20% All-Attribute DMG Bonus for 20s. Galbrena and all teammates benefit. Significant flex value for team-building | ★★★★ Great |
| S5 | Though Light Fades, Torment Consumes | Resonance Skill multipliers +150%. Resonance Skills are not her primary damage — minor upgrade. Step toward S6 | ★★ Okay |
| S6 | I Remain Who I Am, Eternal My Flame | Demon Hypostasis → Eternal Hypostasis. Enhanced attacks get +60% DMG Multiplier. Each Afterflame point on entry → +0.875% Fusion Deepen (max +35% at 40 stacks). ~+37–46% total damage increase. Kit transformation | ★★★★★ Amazing |
⚡ Recommended Pull Order
S0R1 > S2R1 > S3R1 > S6R1 — S2 is the single best early upgrade: Burning Drive going from +20% to +90% ATK is a massive quality-of-life and DPS gain. S4’s team-wide buff is a strong incentive if you value team flexibility. S6 transforms the kit but is entirely optional for clearing all endgame content.
Should You Pull Galbrena?
🔥 Pull If…
- ✓ You want a strong Fusion DPS with an engaging dual-phase combat system
- ✓ You can invest in her signature Lux & Umbra — the weapon gap is severe
- ✓ You already have or plan to pull Qiuyuan for the optimal Afterflame setup
- ✓ You enjoy a fluid playstyle that rewards mastering Hellstride dodge cancelling
◯ Skip / Wait If…
- ✗ You cannot pull the signature weapon — the 17–24% DPS gap makes the investment feel incomplete
- ✗ Your current team cannot reliably cast 5 Echo Skills before each Galbrena rotation
- ✗ You are saving for Aemeath (3.1 SS-Tier) or other current banner priorities
The Verdict
🔥 The Fiend of Ever-Burning Flame
Galbrena earns her S-Tier / T1 ranking as a straightforward yet powerful Fusion DPS with one of the highest damage ceilings in Version 2.7/3.1. Her dual-phase Demon Hypostasis system, cross-amplifying Echo Skill + Heavy Attack buffs via signature weapon, and team-flexible Afterflame stacking mechanic make her a compelling main DPS choice that fits into multiple team archetypes.
What makes her worth pulling: Multiple self-buff layers (Burning Drive, Afterflame +60%, Liberation +85%), a unique Hellstride dodge that preserves combo chains in boss fights, and a high Outro Skill multiplier. Her split scaling across Echo and Heavy ATK damage makes her adaptable.
Final Recommendation: Pull with Lux & Umbra for maximum output, use Flamewing’s Shadow (3) + Flaming Clawprint (2) with Corrosaurus as main echo, and pair with Qiuyuan + Shorekeeper (best team) or Lupa + Brant (mono-Fusion). Master the Afterflame pre-stacking routine and Hellstride dodge mechanic — she rewards technical players with exceptional endgame damage.
🔗 Related Character Guides
📋 View Complete Wuthering Waves Character Tier List
Master Galbrena’s Demon Hypostasis burst rotation and dominate endgame content!
