Complete Build Guide • Wuthering Waves • February 2026
A Tier • Electro • Broadblade • Main DPS • 5★ Standard Banner • Leader of the Ghost Hounds
Overview
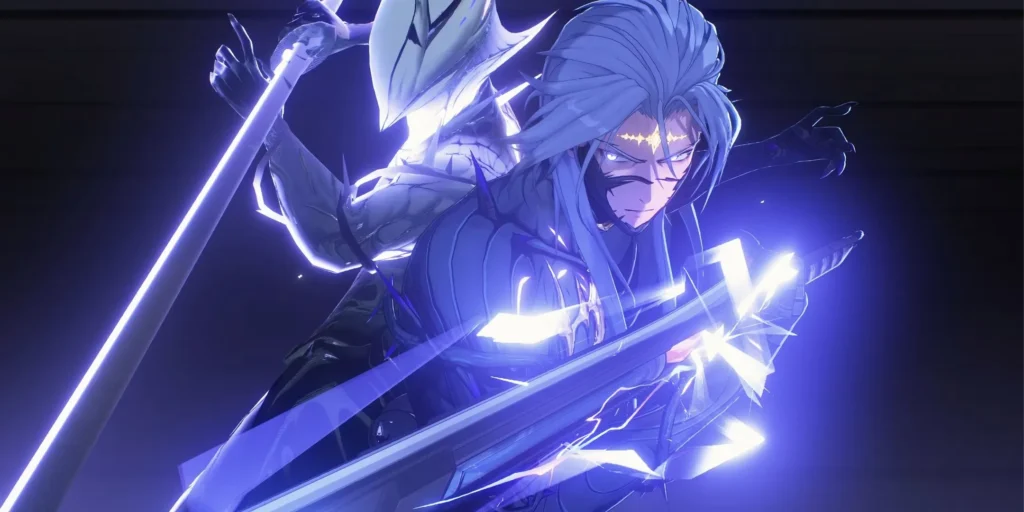
Calcharo is a 5-Star Electro Broadblade Main DPS from the standard banner pool and one of Wuthering Waves’ launch characters. Known as the cold and ruthless leader of the Ghost Hounds mercenary group, his entire combat identity is built around the Deathblade Gear state — an empowered Liberation form where his Basic Attacks transform into the Hounds Roar chain, building Killing Intent stacks that detonate into the devastating Heavy Attack: Death Messenger. His DPS ceiling is genuinely high — but reaching it requires mastering one of the most demanding rotations in the game.
Outside of his Liberation window, Calcharo’s setup phase uses his Resonance Skill (Extermination Order) three times to generate 3 stacks of Cruelty, then consumes them with Heavy Attack: Mercy to deal damage and build Resonance Energy. Once Liberation fires, he enters Deathblade Gear for 11 seconds — a tight window demanding 3 full Death Messenger casts (each needing 5 Killing Intent via 5 Hounds Roar hits). Mastering dash cancels or swap cancels significantly improves how many Death Messengers you can land.
As of February 2026, Calcharo sits in A Tier — a version 1.x character who has aged well enough to remain viable, especially with newer supports like Lynae and Mornye (via Tune Break mechanics) expanding his team options. He is a standard banner 5-star, making him accessible to most players, though he is best suited for players willing to invest in learning his advanced mechanics.
⚡ Deathblade Gear System — Cruelty, Killing Intent & Death Messenger
- Each hit of Resonance Skill (Extermination Order) grants 1 Cruelty stack
- Max 3 Cruelty — requires 3 full Extermination Order casts
- At 3 Cruelty, Heavy Attack becomes Heavy Attack: Mercy
- Mercy consumes all 3 stacks, deals Heavy ATK DMG, restores Energy & Concerto
- Activated by Resonance Liberation: Phantom Etching (125 Energy, 20s CD)
- Basic Attacks replaced with Hounds Roar (5-hit Electro chain)
- Each Hounds Roar hit grants 1 Killing Intent (max 5)
- Dodge Counter during this state deals Liberation-type DMG (boosted)
- At 5 Killing Intent → Heavy Attack becomes Death Messenger
- Massive Electro DMG burst — counts as Resonance Liberation DMG
- Restores Resonance Energy and Concerto Energy on hit
- Goal: land 3 Death Messengers per Liberation window (4 is the “holy grail” for experts)
- Hounds Roar Parts 4 & 5 are the slowest — cancel after Part 3 to reset
- Dash after Part 3 → resets combo to Part 1, gaining Killing Intent faster
- Skill Cancel (during Liberation) also works — builds more Concerto + Energy
- Swap Cancel on Death Messenger protects Calcharo from interruptions mid-cast
Strengths & Weaknesses
✓ Strengths
- ✓ High DPS ceiling — when rotations are executed with dash/skill cancels, his burst damage from Death Messengers rivals higher-tier characters
- ✓ Standard banner — accessible without spending limited pulls; easily obtainable through losing 50/50 on limited banners
- ✓ Outro Skill (Shadowy Raid) provides off-field Electro DMG via a Phantom slash — continuing team DPS value even when switched out
- ✓ Combo-rich gameplay — multiple execution paths (standard 5-hit, dash cancel, skill cancel, swap cancel) reward players willing to optimize with significantly better performance
- ✓ Expanded team options in 2025-2026 — Lynae + Mornye Tune Break compositions give Calcharo fresh synergies that significantly boost his overall team DPS
✗ Weaknesses
- ✗ Hardest rotation in the game — the 4 Death Messenger combo with dash cancels is widely considered nearly impossible to execute consistently even by top players
- ✗ Extremely punished by interruptions — Death Messenger has a very long wind-up animation; enemy attacks, movement, or AoE easily cancel it, causing massive DPS loss
- ✗ Virtually no AoE — nearly all damage is single-target; severely underperforms in multi-enemy content compared to every other comparable DPS
- ✗ Swap cancels (for safety) sacrifice Outro buff uptime — trading safety for consistency means forfeiting the team buffs Yinlin or Lynae apply, reducing theoretical damage ceiling
- ✗ Intro Skill has a long wind-up animation — costs significant time in Tower of Adversity timed content compared to faster-entering DPS characters
Skill Leveling Priority
| Priority | Skill | Reason |
|---|---|---|
| ★★★★★ 1st | Forte Circuit — Lv.10 | Death Messenger scales from Forte Circuit level, not Liberation — this is the #1 priority. All of Calcharo’s peak damage flows through this node |
| ★★★★★ 1st | Resonance Liberation — Lv.10 | Phantom Etching activates Deathblade Gear and boosts all Liberation-type DMG. Upgrade simultaneously with Forte — both are mandatory to Lv.10 |
| ★★★★ 3rd | Resonance Skill — Lv.10 | Extermination Order is used every rotation in the setup phase and contributes direct Electro DMG. Third priority after the core two |
| ★★ 4th | Normal Attack — Lv.6–8 | Enhanced Basic Attacks (Hounds Roar) are Liberation-type DMG boosted by Forte — Normal Attack level contributes but is a lower multiplier gain per level |
| ★ Last | Intro Skill — Lv.4–6 | Low multiplier gain per level. Intro enters Deathblade Gear rotation but isn’t the primary damage source — invest after all other skills are maxed |
Best Weapons
| Weapon | Rarity | Substat | Key Passive |
|---|---|---|---|
| Lustrous Razor | 5★ | ATK 36.4% | +Resonance Liberation DMG Bonus — triggers reliably from Extermination Order casts, near-unconditional buff perfectly aligned with Death Messenger DMG type. Best-in-slot despite lacking a Crit substat |
| Wildfire Mark | 5★ Limited | Crit Rate 24.3% | Liberation DMG bonus on Skill hits + Crit Rate substat makes it a near-equal alternative to Lustrous Razor. Crit substat helps with stat balancing but the passive is slightly less consistent |
| Verdant Summit | 5★ | Crit DMG 48.6% | High Crit DMG substat makes it a strong stat stick. Note: its Heavy ATK DMG passive only applies outside Liberation — use it as a Crit DMG stat stick rather than for its passive |
| Autumntrace | 4★ | ATK% | ATK stacking passive from Basic Attack hits. Good 4★ option that benefits from Calcharo’s rotation-heavy Basic Attack usage in Deathblade Gear state |
| Guardian Broadblade | 4★ F2P | ATK 24.3% | +12% Basic Attack and Heavy Attack DMG Bonus — directly amplifies Hounds Roar and Death Messenger. Craftable in Jinzhou. Best free option available; farm to R5 for full value |
Best Echo Sets
Void Thunder (5-PC)
2-PC: +10% Electro DMG Bonus — unconditional boost to all Electro hits including Hounds Roar and Death Messenger
5-PC: After Heavy Attack or Resonance Skill, Electro DMG +15% for 15s (stacks up to 2×, total +30%). Calcharo triggers both conditions naturally every rotation — effectively always active during burst window
Recommended Main Echo: Nightmare: Thundering Mephis — Electro DMG + Liberation DMG boost with no Echo Skill cast required. Best-in-slot echo for Calcharo hands down
Void Thunder (2-PC) + Lingering Tunes (2-PC)
Mix: +10% Electro DMG from Void Thunder 2-PC + +10% ATK from Lingering Tunes 2-PC — a solid mixed set while farming for a full 5-PC Void Thunder
Recommended Main Echo: Thundering Mephis — provides Liberation DMG and Electro DMG buffs. Note: unlike Nightmare version, requires Echo Skill cast to activate buff, which can be tricky mid-rotation
Crit DMG
Echo Substat Priority: Crit Rate ★★★ > Crit DMG ★★★ > Energy Regen% ★★ > ATK% ★★ > Res. Liberation DMG Bonus ★★ > Flat ATK ★ — Aim for 60–80% Crit Rate. Energy Regen breakpoint: ~120–160% depending on team (S1 reduces ER requirement by ~20%).
Recommended Endgame Stats
Best Teams
Calcharo + Lynae + Mornye
Calcharo’s best current team, leveraging the Tune Break mechanic. Lynae provides All DMG + Liberation DMG buffs via Outro, directly amplifying Death Messenger. Mornye increases Off-Tune Buildup Rate, enhances Tune Break DMG, and applies a DMG-taken debuff to enemies while healing — a synergy that elevates Calcharo’s output noticeably above older team compositions.
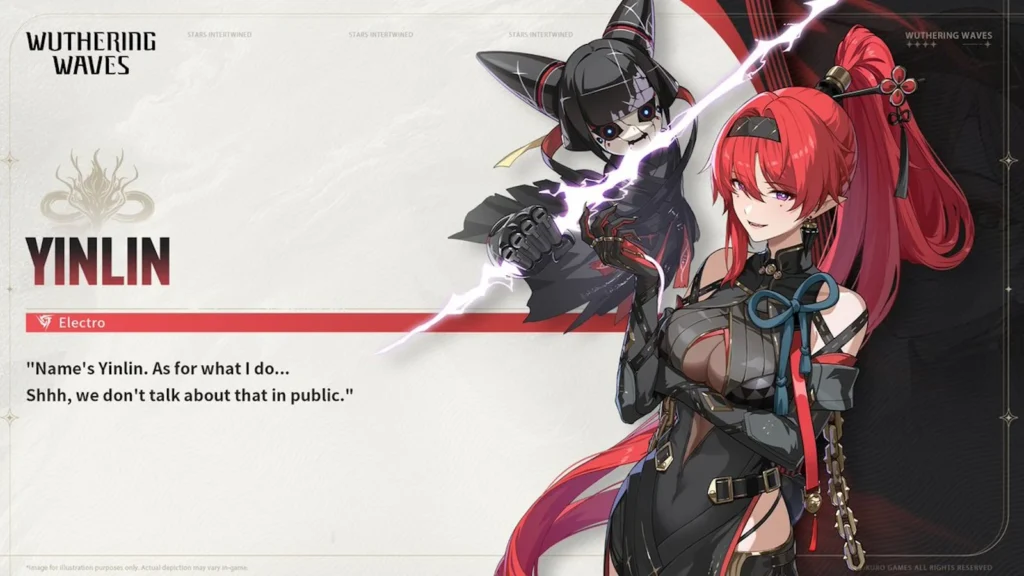
Calcharo + Yinlin + Shorekeeper
Calcharo’s original best team. Yinlin’s Outro applies +Electro DMG and +Liberation DMG Bonus to the incoming Resonator — directly amplifying Death Messenger. Her Coordinated Attacks also detonate her Punishment Marks while Calcharo is on-field, adding meaningful team DPS. Shorekeeper provides ATK + Crit buffs and sustain. Requires Yinlin (limited 5-star) to function at peak.
Calcharo + Sanhua + Shorekeeper / Verina
Sanhua’s Outro grants +Basic Attack DMG Amplification, boosting Calcharo’s Hounds Roar chain inside Deathblade Gear state. While the Basic ATK Amp doesn’t amplify Death Messenger (Liberation DMG type), it meaningfully increases the setup damage between Messengers. Shorekeeper or Verina in the third slot provides full sustain and Crit/ATK buffs.
Optimal Rotation
💡 Tip: Always cast Echo Skill before the combo and swap-cancel it. Fire Intro → one Resonance Skill → immediately Liberation. During Deathblade Gear, use Skill Cancel or Dash Cancel after Hounds Roar Part 3 to speed up Killing Intent generation and squeeze in an extra Death Messenger. Swap Cancel on each Death Messenger cast reduces interruption risk at the cost of some buff uptime.
Resonance Chain (Sequences)
| Chain | Name | Effect & Value |
|---|---|---|
| S1 | Covert Negotiation | Resonance Skill hits restore +10 Resonance Energy (once per 20s). Reduces ER requirement by ~20% — the best single upgrade for Calcharo, enabling more reliable Liberation access each rotation |
| S2 | Zero-Sum Game | After Intro Skill, Resonance Skill DMG +30% for 15s. Meaningful damage boost for the setup phase and adds value to the post-Liberation Intro “Necessary Means” |
| S3 | Iron Fist Diplomacy | During Deathblade Gear state, Electro DMG Bonus +25%. Direct amplification to all Hounds Roar and Death Messenger hits — solid DPS chain |
| S4 | Dark Alliance | After Outro, team-wide +20% Electro DMG Bonus for 30s. Useful in double-Electro teams; weaker benefit in mixed compositions |
| S5 | Unconventional Compact | Intro Skills deal +50% DMG. Improves Wanted Outlaw and Necessary Means damage — decent for the opening and post-Liberation window |
| S6 | The Ultimatum | On Death Messenger, summons 2 Phantoms dealing 100% ATK each (Liberation DMG type). Adds ~200% ATK worth of bonus Liberation damage per Death Messenger — significant ceiling increase at max investment |
📌 Chain Priority: S0 is playable but ER-hungry. S1 is the highest-value upgrade — reduces ER pressure and smooths out every rotation. S1 is often described as making Calcharo “feel complete.” Pulling further is optional unless deeply invested in the character.