TL;DR – GTA 6 Checking Out Walkthrough
- Starting location: Room 06 at the Starlet Motel, Port Gellhorn, Kelly County.
- Unlock requirement: Finish the remaining Chapter 2 story missions and reach the $15,000 Prepare for Vice City target.
- Point of no return: Starting Checking Out ends Chapter 2 and permanently removes the Starlet Motel as your safehouse. Make a manual save first.
- Main objectives: Fight through the motel, defend Lucia, escape on a motorcycle, jump into Jason’s car, and survive the police chase.
- Motorcycle jump controls: Ride alongside Jason’s car and hold Square on PS5 or X on Xbox when the prompt appears.
- Reward: Complete Chapter 2: Paradise Lost and unlock Chapter 3, beginning with Welcome to Vice City.
To complete Checking Out in GTA 6, return to the Starlet Motel after finishing the required Chapter 2 missions and reaching the $15,000 savings target. Enter your room and interact with the bathroom door to start the finale. Fight off the armed attackers, regroup with Lucia, and escape the motel on a motorcycle before jumping into Jason’s getaway car.
The last objective is to shoot at the pursuing police vehicles while Jason drives toward Vice City. Once the escape sequence finishes, Chapter 2: Paradise Lost ends and the next chapter begins.
Important warning: Checking Out is a point-of-no-return mission. You lose access to the Starlet Motel as a safehouse after starting it. Collect the two important motel cards, finish any activities you want to complete there, and create a separate manual save before interacting with the bathroom door.
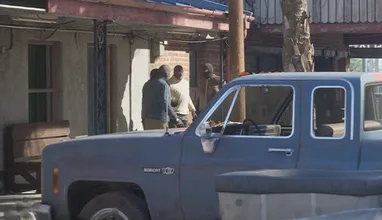
GTA 6 Checking Out Mission Overview
| Mission Details | Information |
|---|---|
| Mission Name | Checking Out |
| Map Objective | Move to Vice City |
| Chapter | Chapter 2: Paradise Lost |
| Mission Type | Mandatory Main Story |
| Playable Characters | Jason Duval and Lucia Caminos |
| Mission Givers | Jason and Lucia |
| Starting Location | Starlet Motel, Port Gellhorn |
| Main Requirements | Chapter 2 story progression and $15,000 savings target |
| Mission Vehicles | Motorcycle and getaway car |
| Main Objectives | Regroup, Defend, Follow Jason, Jump to Car, Escape |
| Cash Reward | None |
| Gold Medal Objectives | None |
| Next Mission | Welcome to Vice City |
How to Unlock Checking Out in GTA 6
Checking Out is the final story mission of Chapter 2: Paradise Lost.
To unlock it through the standard progression route, you need to finish the remaining Chapter 2 main story objectives and reach the $15,000 Prepare for Vice City target.
This savings objective becomes available after Coffee Break, when Jason and Lucia decide to leave Port Gellhorn and return to Vice City.
During that mission, the couple contacts Dre’Quan, who agrees to help them find somewhere to stay.
However, they need money for the move.
One of the most important jobs for reaching the target is Afternoon Delight, where Jason and Lucia rob the Delights strip club with Vicki.
Vicki sends $10,000 through BuckMe on the following in-game day, making it much easier to reach the required savings amount.

Steps to Unlock the Checking Out Mission
- Complete Coffee Break to unlock the Prepare for Vice City objective.
- Continue the available Chapter 2 story missions.
- Complete Afternoon Delight and receive Vicki’s payment.
- Earn enough additional money to reach the $15,000 target.
- Check Map > Story for any unfinished main objectives.
- Allow additional in-game time to pass after completing the requirements.
- Wait for the call about a news article sent by Cal.
- Return to the Starlet Motel when the Move to Vice City marker appears.
Most launch walkthroughs list the $15,000 target and completion of the available story missions as the standard requirements for Checking Out. Some reports differ on whether reaching the money target is strictly mandatory or only accelerates the unlock.
For reliable progression, complete the savings objective and clear your remaining required Story tasks before attempting the finale.
How to Earn $15,000 Before Checking Out
If you have not reached the savings target, there are several ways to make money around Port Gellhorn.
- Afternoon Delight: Receive $10,000 from Vicki after completing the Delights robbery.
- Daily Driver: Earn up to $1,750 for delivering the ’82 Canis Crawler to Moses in good condition.
- Vehicle sales: Sell eligible stolen cars without trackers to Moses at Watkins Auto Parts.
- Thrillbillies: Compete in off-road races for prize money.
- Hit Avery Pawn: Steal valuables and sell eligible goods to a fence.
- Other robberies: Complete available Port Gellhorn jobs to increase your earnings.
You do not need to earn the entire amount from one mission.
Complete the available jobs and keep your money in BuckMe rather than carrying large amounts of cash.
Tip: Deposit cash regularly. Being arrested or killed can cost you money, so avoid unnecessary crimes once you are close to the savings target.
GTA 6 Checking Out Point of No Return – What to Do Before Starting
Do not start Checking Out until you are ready to leave Chapter 2.
Once the mission begins, the story moves toward Vice City. The Starlet Motel stops being your home, and certain locations inside the motel become inaccessible.
Before entering the final mission, complete this checklist:
- Collect the Vicki card: Found in the bathroom inside the Starlet Motel reception building.
- Collect the Victor Maravilla card: Attached to the refrigerator in the motel kitchen.
- Finish motel interactions: Complete any remaining activities you want to experience before leaving.
- Complete desired optional jobs: Finish Port Gellhorn activities you do not want to postpone.
- Prepare your equipment: Carry ammunition, healing items, and useful weapons for the upcoming firefight.
- Check your money: Review your BuckMe balance and deposit any large amount of pocket cash.
- Make a manual save: Use a separate save slot so you can return to Chapter 2 if needed.
Missable Starlet Motel Collectibles
The two motel collectible cards are particularly important because their known locations become inaccessible after the chapter transition.
| Collectible | Location | Where to Look |
|---|---|---|
| Vicki Card | Motel Reception Bathroom | Magazine beside the toilet |
| Victor Maravilla Card | Motel Kitchen | Attached to the refrigerator |
If you missed either card during the earlier missions, collect it now.
The Vicki card can be obtained while exploring the reception building during Overnight Charges.
The Victor Maravilla card is located in the kitchen visited during Coffee Break.
Alternative pickup locations have not been established for these particular cards, so collecting them before Checking Out is the safest option.
GTA 6 Checking Out Walkthrough – All Mission Objectives
Checking Out has five main gameplay objectives:
- Regroup with Lucia.
- Defend yourself.
- Follow Jason.
- Jump to the car.
- Escape with Jason.
The mission begins at the Starlet Motel and ends with Jason and Lucia escaping toward Vice City.

1. Return to Room 06 and Start Checking Out
Once you have completed the required story progression, return to the Starlet Motel.
A mission marker appears at Jason and Lucia’s room.
Enter Room 06 and approach the bathroom door.
Interact with the door to begin the final story sequence.
Jason and Lucia are preparing to leave Port Gellhorn after learning that the people pursuing them are getting dangerously close.
Cal has sent information about a disturbing news report, adding to their concerns.
During the opening cutscene, Linda, the motel manager, interrupts the couple while they are packing.
Before they can leave, armed men arrive outside the motel.
The situation quickly becomes a fight for survival.
2. Pick Up the Shotgun From the Bed
Once the cutscene ends, you take control of Jason inside the motel room.
Before leaving, look toward the bed.
A shotgun is lying there, and you can collect it before heading outside.
Do not miss this weapon. The next section contains a large firefight, and the shotgun is useful against enemies who approach at close range.
After collecting it, check your remaining ammunition and healing supplies.
When you are ready, leave the motel room.
Your objective changes to Regroup with Lucia.

3. Fight Through the Starlet Motel Parking Area
As soon as Jason steps outside, multiple armed enemies begin firing toward the motel rooms.
The attackers include corrupt police officers connected to the people pursuing Jason and Lucia since the events of Chapter 1.
Your job is to survive and reach the motel cafeteria, where Lucia is waiting.
Follow these steps:
- Take cover immediately after leaving the room.
- Use the motel walls and parked vehicles for protection.
- Identify enemies shooting from the parking area.
- Eliminate the nearest threats before advancing.
- Move from cover to cover toward the cafeteria.
- Collect ammunition from defeated enemies when it is safe.
- Reach Lucia inside the motel kitchen.
Combat tip: Do not sprint straight across the open parking area. Several enemies can shoot at Jason simultaneously, and you can lose health quickly.
Use the shotgun against close targets and switch to a longer-range firearm when enemies are farther away.
Focus Mode is also useful for landing accurate shots when multiple attackers are visible.
4. Regroup With Lucia Inside the Motel Kitchen
Once Jason reaches the cafeteria, a short sequence brings the couple back together.
The game switches control to Lucia.
However, the attackers have not given up.
More armed enemies arrive and begin shooting into the building.
Your next objective is Defend Yourself.
How to Survive the Motel Kitchen Shootout in GTA 6
The kitchen defense is one of the hardest parts of Checking Out because enemies can fire through multiple windows.
Simply hiding behind one object will not protect you from every direction.
5. Take Cover Behind the Breakfast Counter
As Lucia, move behind the breakfast counter or another solid object in the cafeteria.
Watch the windows for incoming enemies.
The attackers can approach from different angles, so you need to adjust your position as the fight continues.
Use this strategy:
- Stay low: Use the breakfast counter to reduce incoming damage.
- Watch multiple windows: Enemies can attack from more than one side.
- Prioritize nearby shooters: Eliminate enemies who have a clear view into the kitchen.
- Use Focus Mode: Slow the action when several targets appear together.
- Heal between attacks: Use Zombix or adrenaline if Lucia’s health drops.
- Conserve ammunition: Fire controlled shots rather than spraying continuously.
There is no need to rush out of the kitchen while enemies are still surrounding the building.
Continue defending the position until the game updates your objective.
Important: If you are struggling to survive, prioritize eliminating enemies who can shoot directly through the windows before looking for targets farther away.
6. Follow Jason Toward the Road
Once the main group of attackers has been defeated, Jason and Lucia have an opportunity to escape.
Follow Jason out of the cafeteria and toward the road outside the motel.
Jason begins looking for a getaway vehicle.
During the escape, an armed biker approaches Lucia.
The game automatically activates Focus Mode, giving you a chance to stop the rider before he reaches her.
Aim carefully and shoot the biker.
Once he falls, Lucia takes his motorcycle.
Jason steals a car from the road and drives away.
The next part of the mission becomes a motorcycle chase.
GTA 6 Checking Out Motorcycle Chase – How to Follow Jason
7. Get on the Motorcycle and Chase Jason’s Car
After dealing with the biker, Lucia takes control of his motorcycle.
Jason is already escaping in a car, and you must catch up with him.
Your objective changes to Follow Jason.
Jason’s vehicle appears as a pink marker on the minimap.
Follow the marker along the road while avoiding traffic and other obstacles.
You do not need to overtake Jason or force him to stop.
The goal is to stay close enough to complete the next scripted interaction.
Best Tips for the Motorcycle Chase
- Watch the minimap: Jason’s pink marker is more reliable than trying to keep his car visible through every turn.
- Avoid aggressive steering: Sudden movements can make Lucia lose control of the motorcycle.
- Stay on the road: Collisions with roadside objects can throw Lucia from the bike.
- Keep a safe distance: Follow Jason without crashing into the back of his vehicle.
- Do not stop to fight: Your priority is reaching Jason’s car, not defeating every pursuing enemy.
If you fall too far behind, the mission can fail.
Maintain a steady speed and keep following Jason until the game displays the next objective.
How to Jump From the Motorcycle to Jason’s Car in GTA 6
The motorcycle-to-car jump is the most important driving interaction in Checking Out.
After following Jason for a short distance, the game prompts Lucia to transfer from the moving motorcycle into his car.
You must position the motorcycle close enough to the vehicle before the interaction becomes available.

8. Ride Alongside Jason’s Car and Jump
Follow these steps:
- Continue chasing Jason until the objective changes to Jump to the Car.
- Accelerate toward Jason’s vehicle.
- Position the motorcycle alongside the car.
- Match the car’s speed and stay close to its side.
- Wait until the Jump prompt appears.
- Hold Square on PS5 or X on Xbox.
- Keep the vehicles close while the jump animation begins.
- Lucia transfers into Jason’s car, completing the objective.
Important: You must hold the interaction button when the prompt appears. Pressing it too early or while too far from the car may not trigger the transfer.
Do not try to jump from directly behind Jason. Ride alongside the vehicle so Lucia can reach it.
What to Do If the Jump Prompt Does Not Appear
If you cannot see the interaction prompt, check your position.
The most common issue is being too far away from Jason’s car.
Accelerate gently until you are riding alongside him.
Try to keep your speed similar to his rather than repeatedly accelerating and braking.
Once you are close enough, the game should display the Jump prompt.
Hold the required button to perform the transfer.
Tip: Focus on staying parallel to the car. Do not worry about making a dramatic jump yourself. The game handles the animation after the correct interaction.
How to Escape the Police in GTA 6 Checking Out
9. Shoot the Police Cars While Jason Drives
After Lucia successfully jumps into Jason’s car, the mission enters its final escape sequence.
Jason handles the driving while Lucia fights off the pursuing police.
Your objective changes to Escape With Jason.
You do not need to steer the getaway vehicle.
Instead, use Lucia’s firearm to stop the police cars following the couple out of Port Gellhorn.
The best strategy is to aim at the pursuing vehicles’ tires.
Follow these steps:
- Keep your weapon aimed toward the approaching police vehicles.
- Identify the nearest car threatening Jason’s getaway vehicle.
- Aim at its tires to reduce its ability to pursue.
- Use Focus Mode when available for more accurate shots.
- Switch targets when another police vehicle gets closer.
- Continue defending the car until the scripted escape ends.
Best combat tip: Shooting tires is often more effective than trying to destroy an entire vehicle. A disabled police car can fall behind, giving Jason more room to escape.
Do not waste ammunition firing at distant vehicles that are no longer a threat.
Prioritize the cars closest to your position and keep shooting until the game transitions into the final cutscene.
10. Reach Vice City and Complete Checking Out
After surviving the pursuit, Jason and Lucia finally escape the people attacking them in Port Gellhorn.
The game transitions into a cutscene showing the couple making their way toward Vice City.
They have left the Starlet Motel and their temporary life in Kelly County behind.
Checking Out is now complete.
Chapter 2: Paradise Lost ends, and the story moves into Chapter 3.
The next mission is Welcome to Vice City.
GTA 6 Checking Out Not Starting or Completing – Common Problems
Checking Out Is Not Appearing After Reaching $15,000
Reaching the savings target may not be enough by itself.
Check Map > Story for any unfinished main story objectives.
Make sure you have completed the required Chapter 2 progression, including Afternoon Delight.
After completing the remaining missions, allow some in-game time to pass and wait for the call about Cal’s article.
The final objective should then appear at the Starlet Motel.
Cannot Start the Mission at the Starlet Motel
Return to Room 06 and look for the interaction at the bathroom door.
Checking Out does not begin by speaking to Linda or walking through the main entrance of the motel.
The bathroom-door interaction starts the final sequence once the mission has unlocked.
Keep Dying During the Motel Shootout
The motel fight contains enemies positioned across the parking area and around the kitchen.
Use cover rather than trying to fight in the open.
Pick up the shotgun from the bed before leaving Jason’s room, and use healing supplies between waves.
During Lucia’s kitchen defense, watch for attackers firing through different windows.
Cannot Catch Jason During the Motorcycle Chase
Watch Jason’s pink marker on the minimap.
Do not attempt risky shortcuts or aggressive turns unless necessary.
Stay on the road and maintain enough speed to remain close to his vehicle.
The objective is to follow Jason until the jump interaction becomes available.
Cannot Jump From the Motorcycle to the Car
You need to be riding alongside Jason’s car before the prompt appears.
Match his speed and approach the side of the vehicle.
When the prompt appears, hold Square on PS5 or X on Xbox.
If the prompt disappears, adjust your position and move closer again.
Jason Disappeared During the Chase – Possible Bug
Some launch-period walkthroughs report a bug that can occur after failing the motorcycle chase.
In this situation, Jason’s objective marker may disappear while the police search area remains active.
The game may then fail to advance even if you continue riding around.
Reported fix: Restart the mission rather than repeatedly trying to escape the search area.
Once the chase restarts, stay close to Jason, avoid crashes, and perform the jump as soon as the prompt becomes available.
The Police Chase Will Not Finish
During the final escape sequence, Jason controls the car while Lucia shoots at pursuing police vehicles.
Focus on disabling the closest vehicles by targeting their tires.
Keep following the scripted escape until the final cutscene begins.
There is no need to take over driving or find a particular hiding place.
GTA 6 Checking Out Rewards and Unlocks
Checking Out does not provide a direct cash reward, unique weapon, vehicle, or dedicated trophy or achievement.
Its main reward is completing Chapter 2 and opening the next part of the story.
| Reward | Details |
|---|---|
| Cash Reward | None |
| Unique Weapon | None awarded for completion |
| Unique Vehicle | None awarded for completion |
| Gold Medal Objectives | None |
| Story Progression | Completes Chapter 2: Paradise Lost |
| New Chapter | Unlocks Chapter 3 |
| Next Mission | Welcome to Vice City |
Although Checking Out does not award money, it is an important story milestone.
Jason and Lucia finally leave Port Gellhorn, giving them access to the next stage of their adventure in Vice City.
What Happens After Checking Out in GTA 6?
After Checking Out, the main story continues with Welcome to Vice City, the opening mission of Chapter 3.
Jason and Lucia travel to Vice City to meet Dre’Quan and begin building a new life after their escape from Port Gellhorn.
The Starlet Motel is no longer available as their home, although Port Gellhorn remains part of the wider game world.
Chapter 3 introduces new story contacts, activities, and opportunities as the couple becomes more involved in Vice City’s criminal underworld.
Before continuing, check that you completed everything you wanted from Chapter 2. If you created a separate manual save before Checking Out, you can return to that earlier point without replaying the entire game.
For the full mission sequence, collectibles, and progression checklist, follow the GTA 6 Chapter 2: Paradise Lost walkthrough.
You can also visit the GTA 6 guides hub for more story walkthroughs, gameplay tips, and mission guides.

