TL;DR
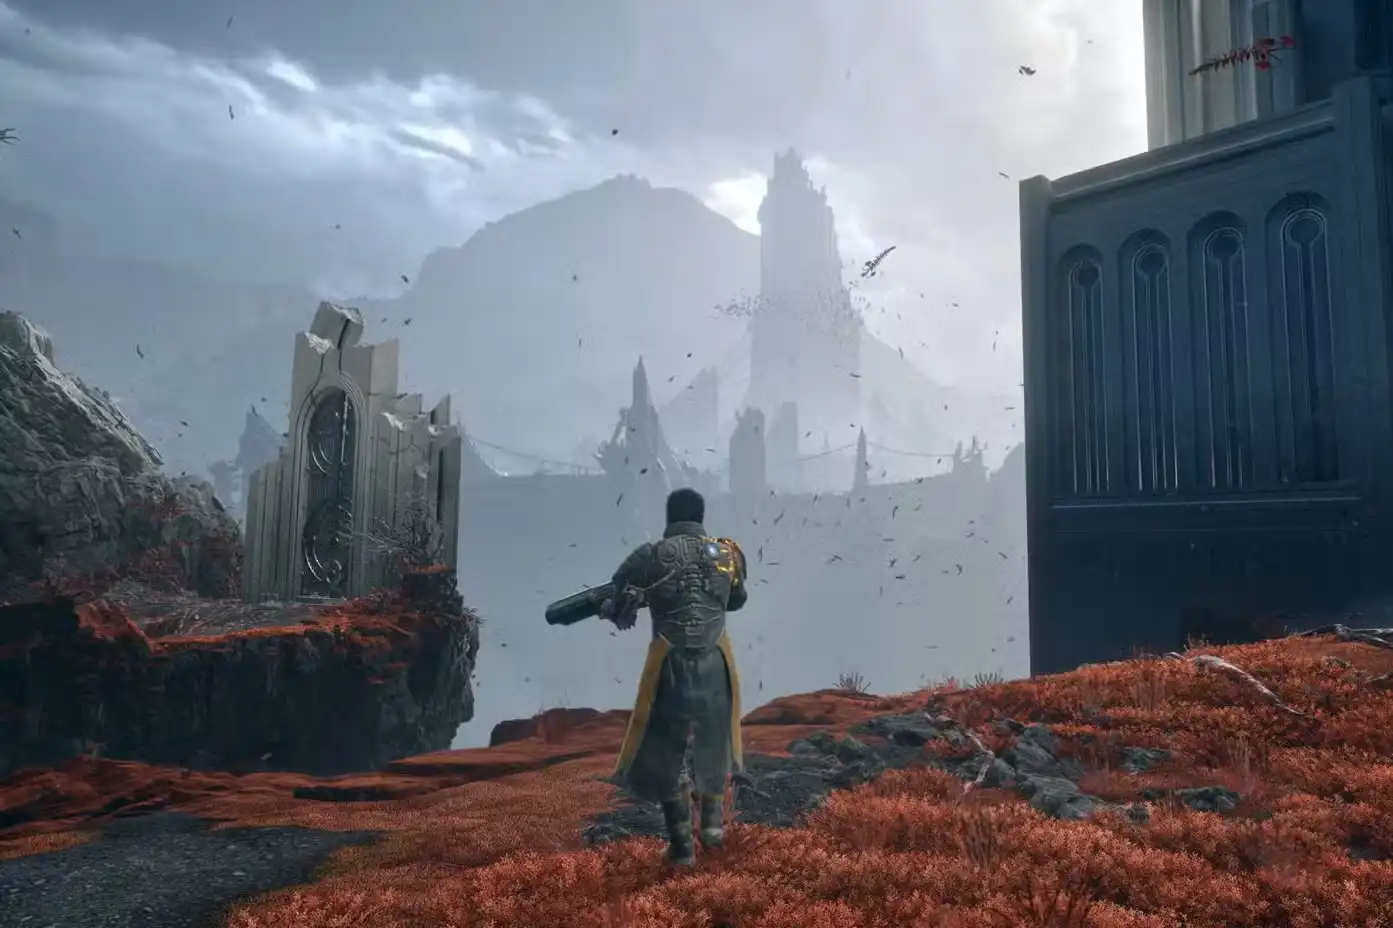
- Saros has 8 combat biomes on the moon of Carcosa — two more than Housemarque’s previous game, Returnal.
- Each biome has a named Overlord boss, a fixed Halcyon count (except Yellow Shore), Audio Logs, and Text Logs.
- Biomes are unlocked in sequence by defeating each Overlord boss and progressing the story.
- The map layout randomises every run, but objectives, bosses, and collectible totals stay the same.
- Acolyte’s Haven is the only biome accessed through a hidden route in another biome (Blighted Marsh).
- The Cathedral has the highest Halcyon count in the game at 50 and features a gravity-reversal mechanic.
- Yellow Shore is the final biome and the only one with no tracked Halcyon count.
How Biomes Work in Saros
Saros is built around Carcosa, an alien moon divided into eight distinct combat biomes. Each one has its own visual identity, enemy roster, environmental hazards, and a named Overlord boss that gates your progression to the next zone. You reach each biome in order by defeating the previous one’s boss — with one exception, which we’ll cover below.
The layout of each biome randomises every run. The exact room order changes, enemies appear in different spots, and the path to the boss shifts. But the objectives, boss strategies, collectible totals, and unlock mechanics stay consistent. Knowing what each biome demands means every run gets faster and smarter.
Each biome also has a fixed number of Halcyon collectibles. Once you have found the cap for a biome, Halcyon stops spawning there. This makes tracking your total across runs important, especially for Platinum hunters. The one exception is Yellow Shore — more on that at the end.
Before the biomes, there is the Passage — the central hub you return to after every run. This is where you spend Lucenite and Halcyon at Primary to unlock permanent Armor Matrix upgrades, check Carcosan Modifiers, view the Databank, and fast travel to any biome you have already unlocked via the World Dial. The Banyan Tree above the hub connects to story segments needed for the true ending. For a full breakdown of how to unlock that, see our guide on how to get the true ending in Saros.
Biome 1 — Shattered Rise
Boss: Prophet | Halcyon: 8 | Audio Logs: 17 | Text Logs: 3
Shattered Rise is the opening biome. It sits in mountainous terrain with rocky corridors, open valleys, and vertical sections that introduce the game’s core traversal. This is where Saros teaches you everything fundamental: how weapons work, how Artifacts function, how the Eclipse changes the world, and how the dash-and-dodge rhythm underlies every encounter.
The Eclipse is mandatory here. To reach the Prophet, you need to find and activate a hand-like device in the environment to trigger it, then power up a mechanism that opens the main gate to the boss arena. The biome has the highest Audio Log count in the game at 17, making it the richest zone for early lore if you take the time to explore every side path.
Prophet is the first real Overlord in Saros and acts as a difficulty check on the game’s core mechanics. The fight has three phases. You cannot damage Prophet directly — you must first destroy the yellow bud nodes on the walls to open the central eye, then fire into it while dodging wave attacks. Our full guide on how to beat the Prophet in Shattered Rise covers every phase and attack in detail.
Key tips:
- Defeating Prophet unlocks the Jump Network fast travel system. Use the World Dial at Primary to move between biomes from this point forward.
- The Nightmare Strand in Shattered Rise requires the Grapple to access — you will need to return here after Biome 3.
- Unlock Second Chance at Primary before your first serious Prophet attempt. It gives you an extra life mid-boss fight.
Biome 2 — Ancient Depths
Boss: Bastion | Halcyon: 14 | Audio Logs: 14 | Text Logs: 6

Ancient Depths is a subterranean biome built around tunnels, glowing caverns, and rising platform mechanisms that reward vertical awareness. The visual shift from the rocky open terrain of Shattered Rise is immediate — this biome is darker, more enclosed, and more mechanically layered.
The central landmark here is the Vault — a large chamber with a sealed door in the middle and two paths on either side. Both must be explored to progress, but one of them is only accessible after you have triggered the Eclipse. Do not skip the Eclipse activation if you want full access to the biome’s collectibles and the Nightmare Strand.
The Nightmare Strand in Ancient Depths is particularly noteworthy. It sits in the Eclipse side of the Vault room and is only reachable via Eclipse Threads — meaning you cannot access it until after you unlock that ability in Biome 5. Make a point of returning once you have it.
Bastion is the second Overlord and a different fight from Prophet. It has no weak point mechanic — you can damage it freely from the start. Between each of its three health bars, it retreats and sends in waves of bots. Clear the bots before the boss returns, and use your Power Weapon consistently throughout. Defeating Bastion unlocks Carcosan Modifiers — difficulty customisation options that do not disable trophies.
Key tips:
- Trigger the Eclipse before heading to the Vault. Missing the Eclipse window on a run means missing the second path’s collectibles.
- Jump Network Pads unlock in this biome — see our guide on how to unlock Jump Network Pads for details.
- Return after unlocking Eclipse Threads to access the Nightmare Strand hidden in the Vault room.
Biome 3 — Shattered Descent
Boss: Rhabdom | Halcyon: 12 | Audio Logs: 14 | Text Logs: 6

Shattered Descent is the shortest biome in the game by a clear margin. It is a vertical, gap-heavy zone where falls can kill you outright. Without the Grapple — which you unlock here — the biome would be nearly unnavigable. With it, crossing chasms and climbing walls becomes a movement puzzle rather than a death trap.
The Grapple unlocks at the very start of this biome on your second visit, via interaction with a Soltari terminal. The full unlock process is covered in our guide on how to unlock the Grapple in Saros. Once you have it, grapple points from all previous biomes also become active — giving you more to explore in Shattered Rise and Ancient Depths on your next return.
Rhabdom is the third Overlord and the only boss in Saros with a single health bar. Do not mistake that for an easy fight. Unlike the stationary Prophet, Rhabdom is mobile — it chases Arjun around the arena and hits hard. The Nightmare Strand in Shattered Descent appears just before the boss area. Complete it for a Second Chance restore and strong loot before the fight.
Key tips:
- Shattered Descent also unlocks the Overdrive ability mid-biome after speaking to Eli. L3 + R3 fires a powerful charged attack that charges over time during combat.
- Shattered Descent starts every run with the Eclipse already active — unlike other biomes where you must trigger it manually.
- This biome connects to multiple others once you have the full traversal toolkit. Acolyte’s Haven is accessible from here under certain conditions.
Biome 4 — Blighted Marsh
Boss: Legion | Halcyon: 20 | Audio Logs: 10 | Text Logs: 1

Blighted Marsh is the swamp biome — and it earns that description in the most hostile way possible. Industrial pollution fills the waterways. Proximity traps are scattered throughout, exploding if you move through them carelessly and chain-triggering nearby ones if you are not paying attention. Poisoned water erupts periodically and punishes anyone standing still.
The environmental hazard density here is the highest of any biome in the early-to-mid game. Moving deliberately and clearing traps before pushing forward is more important than speed. The biome also introduces the Parry ability — unlocked by completing a task for a character named Alab and powering up a Carcosan device via a nearby tower. Once you reach it, the bridge lowers and Alab grants the Parry, which lets you deflect red projectiles back at enemies.
To reach Legion, you need to restore power to terminals at both branching paths on either side of an elevator. Only once both are powered does the elevator activate and take you to the boss. Legion is one of the more approachable bosses in the game but has a trick — it spawns multiple flying enemies and one of them is the real boss. A weapon with Auto-Hit helps track the correct target automatically.
Blighted Marsh is also where the hidden route to Acolyte’s Haven (Biome 6) is located. Thorough exploration of this biome pays off twice.
Key tips:
- Move carefully through rooms. Proximity traps chain-explode. Clearing one carelessly can damage you before you know what hit you.
- The large red tree found in Blighted Marsh (just past the Nightmare Strand ruins) is part of the true ending sequence — you return here post-game.
- Unlock the Parry from Alab. It is one of the most impactful abilities in the game for both combat and Corruption management.
Biome 5 — Desecrated Fortress
Boss: Architect | Halcyon: 25 | Audio Logs: 11 | Text Logs: 1

Desecrated Fortress is a once-grand citadel now reduced to falling debris and shattered stonework. It is one of the largest biomes in the game, both in physical scale and in the number of new mechanics it introduces at once.
The two new mechanics here are Honorarium Sigils and Eclipse Threads. Sigils are collectible key items that drop from white containers throughout the biome. Collect up to 6 of them and spend them at the Sealed Chamber — the Honorarium — just before the boss fight to unlock doors containing Lucenite, Augments, Halcyon, and an Audio Log. More Sigils means more doors open. Our full guide on where to use Honorarium Sigils in the Desecrated Fortress covers the exact location and all rewards.
Eclipse Threads unlock mid-biome at a dead-end room containing the Eclipse Device. Activate it, pick up the glowing yellow item that appears, and the ability is permanently added to Arjun’s kit. These threads allow crossing gaps along fixed beams of light by pressing L1, and they retroactively activate in every previous biome. See our full guide on how to unlock Eclipse Threads in Saros for everything you need.
Architect is the Overlord — a flying boss with a large health pool and three phases. The final approach to its arena requires combining Grapple points and Eclipse Threads to climb the fortress’s highest spire. This is the first platforming sequence in the game that demands both traversal tools working together.
Key tips:
- Explore every side path before following the objective marker. Missing Sigil containers means arriving at the Honorarium short on keys.
- After unlocking Eclipse Threads, go back to Ancient Depths immediately to access the Nightmare Strand that was locked until now.
- The Sealed Chamber is located past the large red laser room — navigate the lasers, then drop through the hole in the floor to find the Honorarium door.
Biome 6 — Acolyte’s Haven
Boss: Shepherd | Halcyon: 35 | Audio Logs: 9 | Text Logs: 1

Acolyte’s Haven is the only biome in Saros that is not accessed from the World Dial directly. It is hidden behind a route that branches off from Blighted Marsh. Thorough exploration of Biome 4 is what reveals the path to it — if you rush through Blighted Marsh, you may not find this biome for several runs.
The biome itself is a dock-and-wharf zone built above a shimmering, dangerous sea. Floating platforms and combat-grapple navigation define how you move through it. The grapple points here have a unique twist — they only activate once Arjun shoots them. That turns movement through the zone into an active puzzle rather than passive traversal. You need to identify which points to shoot and in which order to build your path forward.
Shepherd is widely described as one of the most cinematic boss fights in Saros. Before the boss itself appears, the first phase involves fighting its tentacles — which slam the arena and fire Corruption bullets and shockwaves. To draw the boss out fully, you must first activate a beacon at the edge of the docks. Do not skip the beacon step — without it, the fight does not proceed. Once the beacon is active, a teleporter leads you to the Wharf for the full confrontation.
Key tips:
- Explore Blighted Marsh thoroughly on every run until you find the hidden path. It is worth the time investment.
- Shoot grapple points before trying to use them. The prompt does not appear on unactivated points, so the biome can feel confusing until you understand this mechanic.
- Activate the beacon before engaging Shepherd fully. The fight sequence depends on it.
Biome 7 — Cathedral
Boss: Priestess | Halcyon: 50 | Audio Logs: 13 | Text Logs: 5

Cathedral has the highest Halcyon count in the game at 50 — and the biome design earns that density through genuinely unusual level architecture. This was the ancestral home of the masters, and its structure reflects that: it is a vast, towering temple with its own internal gravity system.
By activating specific mechanisms inside the Cathedral, Arjun can reverse his alignment and walk on the ceiling. A significant portion of the hidden Halcyon nodes are located in these inverted sections. If you are not actively flipping gravity and checking the ceiling areas, you are missing a large chunk of the biome’s collectibles.
To reach the boss, both branching side paths must be cleared. The stairs to the Priestess’s arena are accessible only after exploring both routes and making a large bell fall in the center chamber. This also opens a secret optional area behind the bell. The Priestess is the final Overlord of Act 2. Defeating it and returning to the Passage triggers a cutscene that opens the path to Act 3 and the final biome.
The Cathedral is also relevant to the true ending — Nitya’s Lab is located here, just before the boss arena. You return post-game to watch a holocache recording inside it as part of the epilogue sequence.
Key tips:
- Activate the gravity mechanisms and explore the ceiling. Half the Halcyon in this biome is up there.
- Clear both side paths before the boss. The bell only falls when both are done.
- Second Chance is deactivated during the post-game epilogue return to Cathedral. Play conservatively when you come back for the true ending sequence.
Biome 8 — Yellow Shore
Boss: King | Halcyon: No tracked count | Audio Logs: Unknown | Text Logs: Unknown

Yellow Shore is the final biome in Saros and the setting for the game’s climax. It is a somber, beautiful coastal environment — a stark contrast to the industrial decay and alien architecture of earlier zones. This is where Arjun’s journey reaches its end, and the tone of the biome reflects that weight.
The most significant unlock in Yellow Shore happens immediately upon entering for the first time: the Blazing Strike ability. This powerful melee-dash permanently enhances Arjun’s melee attack. It lets you break through yellow barriers in every biome, open yellow containers without a Carcosan Key, and deal increased melee damage. More importantly, it is required to break the King’s guard during the final boss fight. Our guide on how to get past yellow barriers covers everything Blazing Strike unlocks.
Yellow Shore is the only biome with no tracked Halcyon count. Halcyon here drops from Alpha hostiles and appears in containers and on the ground, but there is no in-game counter showing how many are available. The game focuses your attention on combat performance rather than collectible totals in this final stretch.
The King is the final Overlord and the boss of the main ending. You fight it again during the epilogue for the true ending. On that second fight, the key moment is what you do after the boss falls — walk through the portal that opens rather than attacking the King. Getting this moment wrong requires replaying the full Yellow Shore run. Everything you need is in our full guide on how to get the true ending in Saros.
Key tips:
- As soon as you unlock Blazing Strike in Yellow Shore, go back to earlier biomes and clear every yellow barrier room you found during the main run. These hold collectibles and loot that count toward completion.
- For the true ending fight, do not attack the King after winning. Walk through the portal.
- Collect 20 Halcyon in Yellow Shore for the “Never Enough” Bronze trophy.
All Biomes at a Glance
- Biome 1 – Shattered Rise: Boss: Prophet | Halcyon: 8 | Audio Logs: 17 | Text Logs: 3
- Biome 2 – Ancient Depths: Boss: Bastion | Halcyon: 14 | Audio Logs: 14 | Text Logs: 6
- Biome 3 – Shattered Descent: Boss: Rhabdom | Halcyon: 12 | Audio Logs: 14 | Text Logs: 6
- Biome 4 – Blighted Marsh: Boss: Legion | Halcyon: 20 | Audio Logs: 10 | Text Logs: 1
- Biome 5 – Desecrated Fortress: Boss: Architect | Halcyon: 25 | Audio Logs: 11 | Text Logs: 1
- Biome 6 – Acolyte’s Haven: Boss: Shepherd | Halcyon: 35 | Audio Logs: 9 | Text Logs: 1
- Biome 7 – Cathedral: Boss: Priestess | Halcyon: 50 | Audio Logs: 13 | Text Logs: 5
- Biome 8 – Yellow Shore: Boss: King | Halcyon: No tracked count
Key Abilities Unlocked Across All Biomes
Each biome introduces or rewards a new permanent ability that changes how you move through the game. Here is the full unlock order:
- Jump Network (Biome 1): Unlocked after beating Prophet. Enables fast travel via the World Dial at Primary.
- Grapple (Biome 3): Unlocked via a Soltari terminal on your second visit to Shattered Descent.
- Overdrive (Biome 3): Unlocked mid-biome after speaking with Eli. Charged attack fired with L3 + R3.
- Parry (Biome 4): Unlocked by completing Alab’s task in Blighted Marsh. Deflects red projectiles back at enemies.
- Eclipse Threads (Biome 5): Unlocked at the Eclipse Device in Desecrated Fortress. Lets you ride beams of light to cross large gaps.
- Blazing Strike (Biome 8): Unlocked automatically upon entering Yellow Shore. Breaks yellow barriers and enhances melee.
Tips for Exploring All Biomes Efficiently
- Prioritise side paths over the main objective. The most valuable loot — Halcyon, Sigils, Audio Logs, containers — is almost always off the critical path. Take every white flag route on your minimap before following the objective marker.
- Return to earlier biomes after unlocking new abilities. Grapple points, Eclipse Threads, and yellow barriers all retroactively open areas in biomes you have already cleared. Plan dedicated revisit runs after each major unlock.
- Trigger the Eclipse before exploring collectible-gated areas. In Ancient Depths especially, one entire path is only available during the Eclipse. Do not skip activation.
- Use the Nightmare Strand in each biome. These optional challenge rooms restore your Second Chance and give strong loot. They are available every cycle and essential for the Gold Nightmare Strands trophy. See our guide on Nightmare Strands explained in Saros for everything on how they work.
- Manage your Attributes per biome. The demands shift across the game — Resilience first in early biomes, Command more important in later ones. Understanding how Attribute Volatility fits into this helps. Our guide on how Attribute Volatility works in Saros covers the full system.
- Check the Databank. As you explore, Audio Logs and Text Logs fill in the Databank in your menu. If you are missing lore or trying to track what you have found, this is the reference point.
Note
Eight biomes across a moon consumed by an eclipse — each one with its own look, mechanics, enemy set, and Overlord boss waiting at the end. Saros rewards players who take their time. The runs are short, but fully clearing a biome takes multiple passes and a growing toolkit.
Work through the biomes in order, come back after every major ability unlock, and keep exploring the side paths. The game hides a surprising amount of content off the beaten route, and finding it all is part of what makes Carcosa worth revisiting.
For a full picture of how long all of this takes, see our guide on how long Saros takes to beat. And if you are aiming for the Platinum, our complete Saros Trophy Guide has everything you need. Grab Saros on PS5 via the PlayStation Store if you have not already.


