Complete Build Guide • Wuthering Waves • February 2026
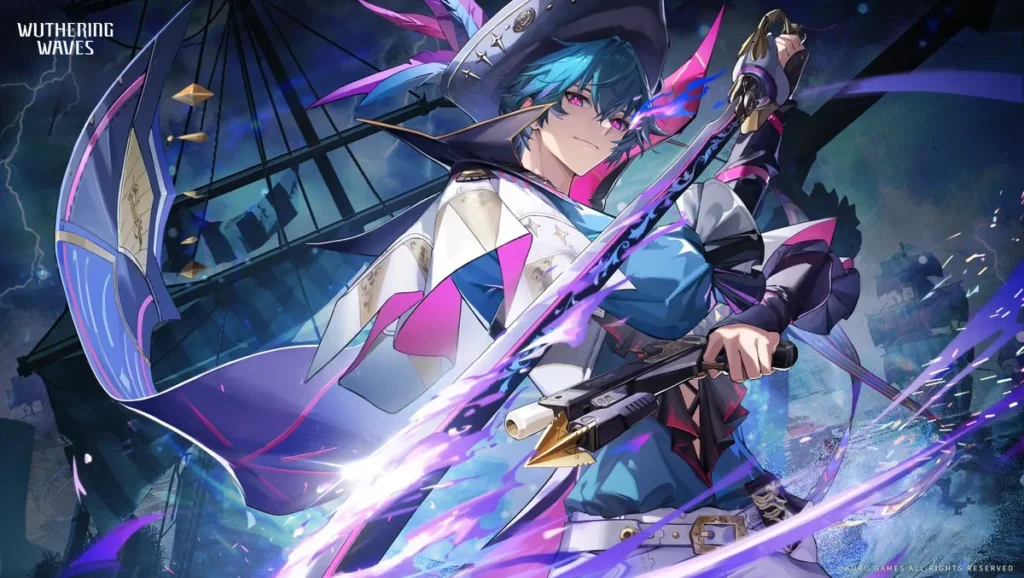
T0 • Spectro • Rectifier • Universal Support / Healer • 5★ Limited • Guardian of the Black Shores
Overview
Shorekeeper is a 5-Star Spectro Rectifier Universal Support and Healer — the Guardian of the Black Shores and the most impactful limited support character in Wuthering Waves. She is the game’s premier buffer, combining sustained team healing, the strongest Crit buffs available to any support, death prevention, interruption recovery, and a universal +15% All DMG Amplification Outro — all in a single character slot.
Her core mechanic is the Stellarealm — a three-stage evolving field generated by her Resonance Liberation. Starting as the Outer Stellarealm (continuous healing), it upgrades to Inner Stellarealm after one teammate Intro Skill (+12.5% Crit Rate at 250% ER), then to Supernal Stellarealm after a second Intro Skill (+25% Crit DMG at 250% ER). These Crit buffs scale directly from her Energy Regen — making 250% ER the single most critical stat threshold in her entire build.
Unlike most supports, Shorekeeper is element-agnostic — her Crit buffs, healing, and +15% All DMG Outro apply to every Resonator in the game regardless of element or weapon type. This universal utility means she fits comfortably as the third slot in virtually any team composition. Her S0R0 is already excellent — she is widely considered a must-pull, as her kit at base is comparable to or exceeds any other support at higher investment levels.
🦋 The Stellarealm System — Three Stages, Scaling Crit Buffs & Empirical Data
- Activates immediately on Liberation cast
- Heals all nearby allies every 3 seconds — passive sustained healing
- At S2: additionally grants +40% ATK to all party members
- Requires teammates to stay inside the field radius to receive buffs
- Triggered by 1st Intro Skill inside Outer Stellarealm
- For every 0.2% ER Shorekeeper has → all allies gain +0.01% Crit Rate
- At 250% ER = +12.5% Crit Rate for the entire team
- Inherits all Outer Stellarealm healing effects
- Triggered by 2nd Intro Skill inside Inner Stellarealm
- For every 0.1% ER Shorekeeper has → all allies gain +0.01% Crit DMG
- At 250% ER = +25% Crit DMG for the entire team
- Unlocks Shorekeeper’s Intro Skill — Discernment (her empowered burst Intro)
- Max 5 segments — built via Normal Attacks (BA3 gives 2), Dodge Counter, Mid-air Attack
- At 5 segments: Heavy Attack (Illation) consumes all, pulls enemies + deals Spectro DMG
- At 5 segments: Mid-air Attack (Transmutation) — alternative Spectro AoE burst
- Illation also instantly converts all Collapsed Cores into Flare Star Butterflies
Strengths & Weaknesses
✓ Strengths
- ✓ Universal T0 support — her +12.5% Crit Rate + +25% Crit DMG + +15% All DMG Amp applies to every character in the game regardless of element
- ✓ Three-layer healing system — Intro Skill (burst), Resonance Skill (cooldown heal), and Stellarealm (sustained tick every 3s) — covers all damage types
- ✓ Death prevention passive — if any teammate would die, Shorekeeper transfers 50% of her own HP to them instead (once every 10 minutes)
- ✓ Outro grants interruption recovery for 30s — teammates launched or knocked back can dodge-counter to negate the stagger, unique defensive utility
- ✓ S0R0 is already excellent — her base kit needs no investment beyond 250% ER to be competitive with every other support in the game at high investment
- ✓ Inherent Skill: Fallacy Echo provides +10% ER on cast + 10% ATK for the entire team — directly contributes to the 250% ER breakpoint and team damage simultaneously
✗ Weaknesses
- ✗ Requires 2 Intro Skills to fully upgrade the Stellarealm — teams must be structured around quick-swap Intro cycles; field-hungry or single-DPS lineups cannot fully exploit her buffs
- ✗ High Energy Regen requirement — reaching 250% ER demands careful weapon and echo selection; under-invested builds hit a noticeably smaller Crit buff ceiling
- ✗ Stellarealm buffs are field-locked — teammates must stay inside the radius; highly mobile bosses or wide arenas can force teammates out of the buff zone
- ✗ As a limited character, she requires waiting for reruns — newer players who miss her banner must wait; Verina serves as the strongest free alternative in the interim
Skill Breakdown
4-stage Spectro combo. Each hit generates 1 Collapsed Core (which transforms into a Flare Star Butterfly after 6s — off-field auto-attack). Stage 3 generates 2 Empirical Data instead of 1. Hitting 5 Collapsed Cores instantly converts one into a butterfly. Used primarily to build Empirical Data for Illation — not a meaningful damage source. Upgrade last.
16s cooldown. Heals all nearby allies and summons Dim Star Butterflies that track enemies for sustained Spectro DMG. The heal is instant — core burst recovery option alongside Intro Skill. Shorekeeper can continue directly into her BA chain after casting Resonance Skill to keep building Empirical Data mid-rotation without losing gauge progress. Upgrade to Lv.10 — it is a primary heal tool.
Governs Empirical Data generation and Illation / Transmutation unlocks. Illation (5 Data, Heavy Attack): pulls all nearby enemies inward + deals Spectro DMG, converts all Cores into butterflies. Transmutation (5 Data, Mid-air Attack): AoE Spectro burst alternative. Forte builds Concerto efficiently — essential for reaching Liberation quickly. Low priority to upgrade — her supportive power doesn’t scale from Forte.
Core ability — generates the Stellarealm. Creates the Outer Stellarealm (continuous healing every 3s). Two Intro Skills from teammates upgrade it through all three stages. Energy Cost: 125. 25s cooldown — with proper ER, Liberation cycles reliably every rotation. The Stellarealm persists even after Shorekeeper switches out, allowing the DPS to remain inside the buff field while on-field. Upgrade to Lv.10 first.
Proof of Existence: On entry — instantly heals all nearby allies + summons 5 Dim Star Butterflies. Strong burst heal. Discernment (Supernal unlock): Replaces Intro when Supernal Stellarealm is active — ends the Stellarealm, heals the team again, and deals massive guaranteed-crit Spectro DMG (HP-scaling, Liberation DMG type). After Discernment, the Liberation cycle begins again. Upgrade Intro first — it deals the biggest burst damage of any of her abilities.
Inherent Skill 1 (Death Prevention): If any teammate would die, Shorekeeper immediately heals them for 50% of her own HP (she loses that HP but cannot go below 1). Triggers once per 10 minutes — a genuine life-save in hard content. Inherent Skill 2 (ER Passive): While a Resonator is inside an active Stellarealm, Shorekeeper gains +10% ER. If Rover is on the team, they also gain +10% ER. Factors into 250% ER calculation — lowers the gear threshold meaningfully.
+15% All DMG Amplification for 30 seconds — applies to all nearby team members, persists through character swaps, and benefits every element and weapon type equally. Additionally grants interruption recovery: teammates who are launched or staggered can tap Dodge to immediately recover and trigger a Dodge Counter. Both effects make Binary Butterfly one of the most impactful Outros in the game for all-round team protection.
Unbound Form (hold): Shorekeeper enters butterfly form, continuously generating Deductive Data (→ Empirical Data) and auto-collecting nearby plant collectibles. Ends via BA cast or STA exhaustion — ends with a Spectro DMG hit. Illation (5 Empirical Data + HA): Pulls nearby enemies inward + Spectro DMG burst + instantly converts all Collapsed Cores to butterflies. Core Concerto-building tool in her rotation — use this whenever available in the BA chain.
Skill Leveling Priority
| Priority | Skill | Reason |
|---|---|---|
| ★★★★★ 1st | Intro Skill — Lv.10 | Discernment (empowered Intro) is a guaranteed-crit Liberation DMG burst that scales from HP and is her hardest-hitting damage tool. Proof of Existence also deals solid AoE damage — burst damage from Intro is Shorekeeper’s biggest personal DPS contribution |
| ★★★★★ 2nd | Resonance Liberation — Lv.10 | Generates the Stellarealm — the source of all her team healing, Crit Rate, Crit DMG buffs, and the Supernal upgrade that enables Discernment. Her most important support ability by a wide margin. Level to 10 simultaneously with Intro Skill |
| ★★★★ 3rd | Resonance Skill — Lv.8 | Primary cooldown heal source — cast every 16s. Scales from HP with decent per-level improvement. Level to 8 for meaningful healing gains without exhausting all resources before Liberation and Intro are maxed |
| ★★ 4th | Forte Circuit — Lv.1 | Empirical Data and Illation deal modest Spectro DMG — not a meaningful support tool. Shorekeeper’s team buffs do not scale from Forte at all. Skip entirely unless you have surplus materials |
| ★ Last | Normal Attack — Lv.1 | Used only to build Empirical Data and Collapsed Cores. Damage is negligible — leave at Level 1. Flare Star Butterfly damage doesn’t scale meaningfully enough to warrant investment |
Best Weapons
| Weapon | Rarity | Substat | Key Passive |
|---|---|---|---|
| Stellar Symphony | 5★ Sig | Energy Regen +77% | +24% HP (boosts healing + Discernment DMG). Restores 16 Concerto Energy when casting Liberation (once every 20s). Increases ATK of nearby party members by +28% for 30s after Resonance Skill heals. The +77% ER makes reaching 250% ER trivial — with signature, only 1 ER 3-Cost echo may be needed |
| Variation | 4★ Craftable | Energy Regen | Restores 8–16 Concerto Energy when casting Resonance Skill (once per 20s). ER substat + Concerto restore makes rotation significantly smoother. Best non-signature option — widely available, craftable, and provides exactly what Shorekeeper needs |
| Call of the Abyss | 4★ Free | Energy Regen | ER substat + Healing Bonus passive on Liberation cast. Best free-to-play weapon — obtained from an exploration quest in Rinascita with no gacha required. Provides more Healing Bonus than Rectifier#25 at the cost of a slightly weaker passive |
| Rectifier#25 | 4★ Craftable | Energy Regen | Restores 8–12 Resonance Energy when casting Resonance Skill (once per 20s). Good supplement to reach 250% ER — similar to Variation but slightly weaker. Solid craftable fallback if Variation is not available |
| Rectifier of Voyager | 4★ | Energy Regen | Similar stats and effects to Variation — viable early option if you obtain it before crafting Variation or Call of the Abyss. Use any ER Rectifier over ATK-based weapons without exception |
💡 Weapon Rule: Always prioritize Energy Regen substat weapons for Shorekeeper. Any weapon without an ER substat — regardless of how high its ATK or other stats are — is a step backward. Reaching 250% ER is more important than any other stat optimization on this character.
Best Echo Sets
Rejuvenating Glow (5-PC)
2-PC: +10% Healing Bonus — unconditional boost to all of Shorekeeper’s healing output across every heal source (Intro, Skill, Stellarealm tick)
5-PC Sonata Effect: After healing a teammate, all nearby party members gain +15% ATK for 30 seconds. With how often Shorekeeper heals, this is effectively a permanent +15% ATK buff for the entire team — an excellent complement to her Stellarealm Crit buffs
Moonlit Clouds (5-PC)
5-PC: After Shorekeeper’s Outro, the incoming Resonator gains +22.5% ATK for 15s — strong burst-window buff timed around the DPS entering with Shorekeeper’s Outro
Better if you use Fallacy of No Return as main echo alongside a Spectro DMG 3-cost echo — the combination provides ER, ATK, and Healing synergy. Can slightly outperform Rejuvenating Glow in certain team configurations
Best Main Echo — Fallacy of No Return (4-Cost)
Fallacy of No Return is Shorekeeper’s must-use main echo in the 4-Cost slot. On cast: deals Spectro DMG equal to 15.86% of Shorekeeper’s Max HP, then grants her +10% Energy Regen for 20s and grants +10% ATK to all team members for 20s. The +10% ER from the echo directly contributes to the 250% ER threshold — meaning players who equip Fallacy need 10% less ER from other sources. Its HP-scaling damage also benefits from high HP builds. Bell-Borne Geochelone is a viable alternative for pure survivability — it provides a shield blocking 50% of damage from up to 3 hits — but deals less personal damage and has shorter buff uptime than Fallacy.
Echo Main Stats — 43311 Layout
| Echo Slot (Cost) | Main Stat | Notes |
|---|---|---|
| 4-Cost Echo | Healing Bonus or Crit DMG | Fallacy of No Return always goes here. Healing Bonus main stat maximizes all her heals. At S6 specifically, HP% on the 4-Cost performs best due to Discernment’s massive Crit DMG scaling — check your sequence node before committing |
| 3-Cost Echo ×2 | Energy Regen (both) | Both 3-Cost slots should be Energy Regen main stat. This is non-negotiable at S0 without signature weapon. With Stellar Symphony (R1), you may be able to replace one 3-Cost ER with Spectro DMG Bonus if sub-stat ER is strong enough — but ER main stats are always the safe choice |
| 1-Cost Echo ×2 | HP% (both) | Shorekeeper’s healing scales from HP. HP% on both 1-Cost slots maximizes all heals from Intro, Resonance Skill, and Stellarealm ticks. HP also scales Fallacy of No Return and Discernment damage directly |
Echo Sub-Stats Priority
| Sub-Stat | Priority | Notes |
|---|---|---|
| Energy Regen | ★★★★★ #1 Always | The most critical stat. Every additional % of ER over 100% increases Crit Rate and Crit DMG buffs directly. Target 250% total (150% additional). Count: base 100% + Fallacy +10% + Inherent +10% + weapon + echo mains + sub-stats = 250% |
| HP% | ★★★★★ Top | After hitting 250% ER, HP% is the most impactful secondary stat — scales all healing (Intro, Skill, Stellarealm tick), Fallacy Echo damage, and Discernment burst. Target 40,000+ total HP |
| Healing Bonus | ★★★ Good | Amplifies all healing output multiplicatively with HP%. Good filler sub-stat after ER and HP% goals are met — take opportunistically from rolls |
| Crit DMG | ★★ Optional | Benefits Discernment’s guaranteed-crit burst. At S6, Crit DMG sub-stats become significantly more valuable — her Discernment gets +500% Crit DMG from S6. At S0–S5, only invest in Crit DMG after ER and HP are optimized |
| ATK% / Flat ATK | ★ Avoid | Shorekeeper does not scale damage or healing from ATK. Any ATK or Flat ATK sub-stat on echoes is a wasted roll — prioritize rerolling these pieces if other stats are also poor |
🎯 Target Endgame Stats
Optimal Rotation
Opening Rotation (Cold Start — No Concerto Available)
After Outro: Switch to Sub-DPS → use Intro Skill inside Stellarealm (upgrades to Inner, +12.5% Crit Rate) → complete Sub-DPS rotation → switch to Main DPS → use Intro Skill (upgrades to Supernal, +25% Crit DMG). Both DPS characters now fight inside the Supernal Stellarealm with full Crit buffs active.
Subsequent Rotations (With Intro Available)
Note: With S1 Variation or Stellar Symphony, additional Basic Attacks between Skill and Liberation can be removed for faster rotations. With S3 unlocked, Liberation restores 20 Concerto Energy — significantly shortening subsequent cycles. Teams built around quick-swap Intro usage maximize Shorekeeper’s buff uptime.
Best Team Compositions
★ Premium — Phrolova Hypercarry
Shorekeeper’s universal Crit buffs synergize perfectly with Phrolova — Dream of the Lost already provides Crit Rate, so Shorekeeper’s +12.5% CR + +25% CDmg push Phrolova’s DPS ceiling dramatically. Cantarella provides the Echo Skill casts to trigger Enhanced Hecate attacks off-field.
🦋 Augusta / Iuno Team
Shorekeeper’s +15% All DMG Amp stacks multiplicatively with Iuno’s +50% Heavy ATK Amp on Augusta — triple-layer amplification. Shorekeeper provides the team Crit buffs; Iuno provides healing and Heavy ATK amplification; Augusta is the primary damage dealer maximizing both Outro buffs.
⚡ Lupa / Galbrena Team
Shorekeeper replaces Mornye in Lupa/Galbrena compositions when Mornye is unavailable or deployed elsewhere. Her universal Crit buffs benefit Galbrena’s Heavy ATK burst windows. Lupa provides DEF stacking, death resistance, and party protection to complement Shorekeeper’s healing.
✅ F2P Universal — Any Hypercarry
Shorekeeper’s element-agnostic buffs mean she works with literally any team that can provide two Intro Skills. She is the ideal universal third-slot support — pair her with any hypercarry regardless of element or weapon type and the Crit buffs immediately translate to higher damage.
Resonance Chain (Sequence Nodes)
| Node | Name | Effect & Impact | Rating |
|---|---|---|---|
| S1 | Where the Butterfly Rests | Stellarealm effective range increased by +150%. Duration extended by +10 seconds. Casting Intro Skill — Discernment no longer ends the existing Stellarealm. Massive QoL and coverage upgrade — bosses that move out of range are far easier to handle. Discernment no longer ending the Stellarealm is crucial in dual-DPS compositions where field time is long. Best cost-effective stopping point for light spenders | ★★★★★ Must-Have |
| S2 | To the New World | The Outer Stellarealm now grants +40% ATK to all party members. Applies from the very first stage — immediately on Liberation cast, before even a single Intro is used. ~15% team DPS increase for dual-DPS teams. Combined with S1: range, duration, Discernment persistence, and permanent ATK buff make S1+S2 the strongest support constellation investment in the game for general play | ★★★★★ Amazing |
| S3 | Drifting Light of the Sea | Casting Resonance Liberation — End Loop grants Shorekeeper +20 Concerto Energy (once every 25s). Directly shortens her rotation — she needs fewer Basic Attacks to reach Liberation on subsequent cycles. Particularly impactful with Stellar Symphony or Variation R1 where rotation can be compressed to a very tight 4-ability sequence. Good stopping point for players who want smoother rotations | ★★★ Good |
| S4 | Promise of the Deep | Gain +70% additional Healing Bonus when casting Resonance Skill — Chaos Theory. Dramatically amplifies the Resonance Skill heal — roughly doubles its healing output per cast. More meaningful in content with sustained burst damage spikes rather than steady damage. Low DPS contribution, primarily a survivability and healer quality-of-life node | ★★ Niche |
| S5 | Eternal Guardian | Extend the pulling range of Basic Attack Stage 3 by +50% and Illation’s pull range by +30%. Utility node — improved enemy grouping is helpful in Whimpering Wastes wave content but has no impact on single-target boss encounters. Filler node toward S6; provides minimal power increase in most practical scenarios | ★ Filler |
| S6 | Till the Sea Turns Clear | Intro Skill — Discernment DMG Multiplier increased by +42%. Casting Discernment increases Shorekeeper’s own Crit DMG by +500%. With S6, using HP% on the 4-Cost echo outperforms Crit DMG. Discernment becomes a genuinely powerful burst damage tool — 30,000+ HP scaling hit at S0 crits become massive at S6. Transforms Shorekeeper from a pure support into a credible burst damage dealer on the Discernment cast | ★★★★ Great |
Resonance Chain Investment Guide: S0R0 is already excellent — she doesn't need sequences to be one of the best supports in the game. S1 is the most impactful upgrade for practical play (range + duration + Discernment persistence). S1+S2 together form the ideal stopping point for most players. Recommended: S0R1 (standard) → S1 (practical best) → S2 (team ATK buff sweet spot) → S3 (rotation QoL) → S6 (dedicated Discernment DPS). Skip S4 and S5 as standalone targets.
Should You Pull Shorekeeper?
🦋 Pull If…
- ✓ You don't have Shorekeeper yet — she is the strongest limited support in the game and should be a priority for any account that needs a universal buffer + healer
- ✓ You run 2 teams in endgame content — Shorekeeper in Team 1 and Verina in Team 2 is the optimal split for Tower of Adversity / Whimpering Wastes
- ✓ You want to maximize any DPS investment — her +12.5% Crit Rate and +25% Crit DMG translate directly to every character's damage ceiling regardless of element
- ✓ You plan to pull Phrolova, Lynae, Qiuyuan, or Galbrena in the near future — all of them receive her Crit buff support and benefit from her universal +15% All DMG Outro
- ✓ You want the death prevention passive — unique safety net for learning hard content, making her particularly valuable for newer players tackling Holograms
⊘ Wait / Consider If…
- ✗ You already own Shorekeeper — this is a guide for builds, not a reason to pull again. Invest existing resources into her sequences or weapons instead
- ✗ You are saving all resources for Aemeath (3.1 SS-Tier DPS) — if you must choose between Shorekeeper and Aemeath, the hypercarry may benefit your clear times more immediately
- ✗ You only run a single team and clear all content easily with Verina — for pure content-clearing efficiency without team diversity goals, Verina at high investment is viable until you need a second team
The Verdict
🦋 Guardian of the Black Shores
Shorekeeper is the definitive universal support of Wuthering Waves — a T0 limited character whose combination of team Crit buffs, three-layer healing, death prevention, interruption recovery, and a +15% All DMG Outro makes her irreplaceable in any serious team-building discussion. Her buffs apply to every Resonator regardless of element, weapon, or playstyle, and her S0R0 is already stronger than most other supports at high investment.
What makes her essential: The Stellarealm's +12.5% Crit Rate + +25% Crit DMG cannot be replicated by any other support in the game simultaneously. Her Outro's interruption recovery provides safety in hard content. The death prevention passive is a genuine insurance policy in the hardest Hologram encounters. No future DPS released is out of scope for her buffs.
Final Recommendation: Build with Stellar Symphony (signature) or Variation (F2P), use Rejuvenating Glow (5-PC) with Fallacy of No Return as main echo, target exactly 250% Energy Regen first, then stack HP% for maximum healing. Invest to S1 for field coverage and S2 for the permanent +40% ATK team buff. She is a lifelong roster cornerstone — every future DPS you pull will want her in their team.
🔗 Related Character Guides
📋 View Complete Wuthering Waves Character Tier ListLet the Stellarealm of the Black Shores guardian light the way to victory for your entire team!