TL;DR
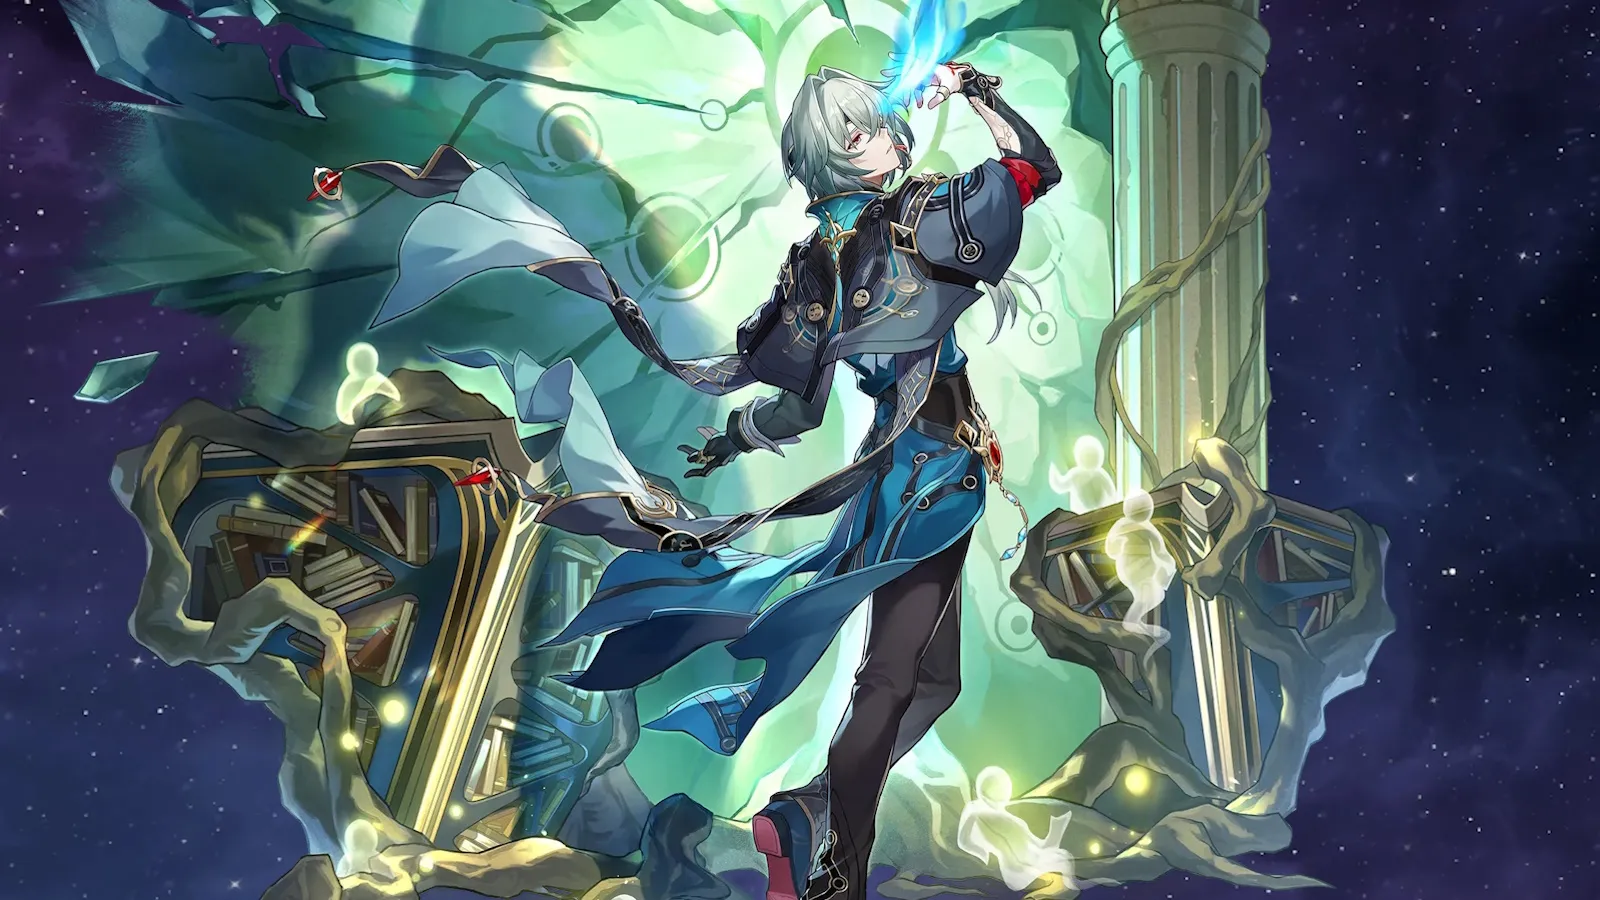
- Anaxa is a 5-star Wind Erudition DPS who implants random Weakness types on enemies with every hit, building toward his powerful Qualitative Disclosure (QD) state.
- At 5 or more different Weakness types on a target, QD triggers — Anaxa deals 30% more damage and fires a free bonus Skill cast at no SP cost.
- His Ultimate Sublimation instantly applies all 7 Weakness types to every enemy on the field and delays their next action.
- Best Light Cone: Life Should Be Cast to Flames (his signature) — the single biggest power spike for Anaxa.
- Best Relics: Eagle of Twilight Line (4-piece) + Rutilant Arena (Planar Ornament).
- Best hypercarry team: Anaxa / Cyrene / Cerydra / Dan Heng • Permansor Terrae.
- He can also function as a sub-DPS paired with The Herta in one of the best Pure Fiction teams in the game.
- His A4 trace Imperative Hiatus is one of the strongest passive bonuses in the meta — unlock it immediately.
- E2 is the recommended investment stop point. His signature LC outperforms E1 for most players.
- Anaxa debuted in Version 3.2 and last ran in Version 3.6. Watch for future reruns if you missed him.
Who Is Anaxa in Honkai Star Rail?
Anaxa is a 5-star Wind character following the Path of Erudition in Honkai Star Rail. He debuted in Version 3.2 and has remained one of the most versatile and highly rated DPS characters in the game. As of patch 4.3, he sits among the top tier in Memory of Chaos, Apocalyptic Shadow, and Pure Fiction, making him a strong investment across all endgame content.
His full name is Anaxagoras. He is one of the Chrysos Heirs from Amphoreus, hailing from the Grove of Epiphany — a place where knowledge flourishes and philosophers are born. Yet Anaxa is called a blasphemer, a rebel who challenges the Coreflame of Reason and dares to drive the thorns of doubt into the Sacred Tree of wisdom. His entire lore is built around questioning established truths, which connects perfectly to his gameplay — he breaks conventional enemy resistances by forcing Weakness exposure onto every target he touches.
Anaxa can be played as a solo hypercarry or as a sub-DPS alongside The Herta in a dual-DPS setup. Both roles are strong, and both benefit from the same core build. His last banner rerun was in Version 3.6, Phase 2 (October 15 – November 4, 2025). Keep an eye on future banner schedules for the next opportunity to pull him. For more context on patch 4.3 characters and events, check the official HoYoverse Honkai Star Rail news page.
Anaxa Kit Overview – How His Abilities Work
Anaxa’s entire kit orbits one engine: implant Weakness types, trigger Qualitative Disclosure, and chain free Skill casts against QD targets. Every ability he has feeds this loop in a different way.
Qualitative Disclosure (QD) – The Core State
While Anaxa is on the battlefield, any enemy that accumulates 5 or more different Weakness types enters the Qualitative Disclosure state. In this state, Anaxa deals 30% more damage to that target. More importantly, whenever he uses a Basic ATK or Skill on a QD target, he automatically fires an additional Skill cast — completely free, no SP cost, and it cannot chain-trigger itself again. If the target dies before the free Skill lands, it redirects to a random enemy. QD is the heart of Anaxa’s burst window. The whole rotation is built around reaching it as fast as possible and then milking every free Skill cast while it lasts.
Basic Attack – Argumentum Ad Absurdum
Deals Wind DMG to a single enemy. Straightforward. Its main gameplay value is generating 10 additional Energy per use (from his A2 trace) and triggering his Talent to implant one Weakness. You also get a free Skill cast off it if the target is already in QD. In most rotations, you use Basic ATK mainly to top up Energy when you don’t want to spend a Skill Point.
Skill – Fractal, Exiles Fallacy
Deals Wind DMG to one target and then bounces to other enemies — up to 5 bounce hits total. Each hit prioritizes enemies that haven’t been hit yet in that bounce chain, so against multiple enemies this Skill spreads Weakness implants broadly and efficiently. Against a single enemy, it hits the same target multiple times, rapidly stacking different Weakness types. Each hit from the Skill (and from the bounce) also triggers Anaxa’s Talent to implant one random Weakness. This Skill is Anaxa’s primary damage and Weakness-stacking tool. Getting QD up fast almost always starts here.
Ultimate – Sprouting Life Sculpts Earth: Sublimation
Anaxa’s Ultimate is one of the most unique in the game. It inflicts the Sublimation state on all enemies simultaneously, applying all 7 elemental Weakness types (Wind, Quantum, Lightning, Fire, Ice, Imaginary, Physical) to every target. It also deals Wind DMG to the whole field. While Sublimation is active, enemies without Control RES cannot take action — effectively a full field delay. This means every enemy on the battlefield instantly has QD active, and Anaxa can immediately start chaining free Skill casts against all of them. Timing your Ultimate right before a burst window is the key rotation decision for Anaxa.
Talent – Tetrad Wisdom Reigns Thrice
Every time Anaxa lands a single hit on an enemy, he implants 1 random Weakness type on that target — always prioritizing types the enemy doesn’t have yet. This passive fires on every Basic ATK, every Skill hit, and every bounce instance. Against a single target with many hits, this rapidly fills all 7 Weakness slots. Against multiple targets in a multi-enemy fight, the bouncing Skill spreads Weakness implants across the field at once. Both the QD damage bonus and the free Skill chain are governed by this Talent. Leveling it is your first priority.
A2 Trace – Roaming Signifier
Anaxa’s Basic ATK generates an additional 10 Energy (equal to his Skill’s Energy gain). At the start of his turn, if no enemy currently has QD active on the field, he immediately gains 30 Energy. The second part functions like a free reset bonus — entering a new wave, clearing the last enemy, or starting a fresh fight all give him a 30 Energy head start toward his next Ultimate. Both effects together make his Energy rotation consistent without needing an Energy Rope in most team setups.
A4 Trace – Imperative Hiatus
This is one of the strongest passive traces in the current meta. Its effect depends on the number of Erudition characters on your team:
- Exactly 1 Erudition character (Anaxa solo): Anaxa gains +140% CRIT DMG. This is a massive personal damage buff that makes him an extremely potent standalone hypercarry.
- 2 or more Erudition characters: All allies deal 50% increased damage. This makes Anaxa an extraordinary team amplifier in dual-DPS lineups like Anaxa + The Herta, where both DPS characters benefit from the flat 50% DMG boost.
Both effects are live simultaneously based on your team composition. You don’t choose — it reads the roster and applies both applicable bonuses. Unlock this trace the moment you have materials available.
A6 Trace – Qualitative Shift
For every different Weakness type on a target, Anaxa’s damage against that target ignores 4% of the enemy’s DEF — up to a maximum of 28% DEF ignore at 7 Weakness types. Since Anaxa naturally reaches 7 Weakness types on most targets through his kit, this acts as a permanent 28% DEF ignore bonus in practice. This stacks with his signature Light Cone’s DEF reduction and E1’s DEF shred, creating substantial combined DEF penetration that benefits the whole team. Unlock this early as well.
Technique – Terrified State
Anaxa’s Technique causes nearby enemies to enter the Terrified state, causing them to flee from him for 10 seconds. If any ally attacks a Terrified enemy to start a battle, it always counts as attacking through a Weakness. After entering battle, Anaxa applies 1 Weakness of the attacking character’s element type to every enemy on the field. Always use the Technique before fights — it pre-loads a free Weakness on every enemy and guarantees a Weakness Break entry bonus for your whole team.
Anaxa Best Light Cones in HSR
Anaxa follows the Path of Erudition. Only Erudition path Light Cones activate their passive effects on him. His signature is extremely tailored to his kit — more so than most characters — because the passive condition (enemies with implanted Weaknesses) is almost always active due to how his Talent works.
Life Should Be Cast to Flames (Signature – Best in Slot)
This is Anaxa’s dedicated 5-star Light Cone and the best-in-slot option by a clear margin. It regenerates 10 Energy at the start of his turn — which is the exact amount needed to enable consistent 2-turn Ultimates when using an ATK% Link Rope instead of an Energy Regeneration Rope. It grants an 80% DMG buff against any enemy that Anaxa has implanted a Weakness on — a condition that is nearly permanently active given how his Talent works. Finally, every hit applies a 12% DEF reduction to the target, which stacks with his A6 DEF ignore and E1 DEF shred for a significant combined penetration bonus that benefits all teammates. The signature is the single biggest power spike for Anaxa by a wide margin. If you have him, this is the first upgrade to chase.
Into the Unreachable Veil (The Herta’s Signature – Strong Alternative)
The second-best option for Anaxa in most contexts. It provides strong CRIT DMG and a passive that boosts damage when attacking debuffed or weakened targets — a condition that Anaxa almost always meets through QD and Weakness implants. If you already have this from pulling The Herta and can share it, this is an excellent substitute. Be careful about over-capping CRIT Rate when running this, as the CRIT Rate it provides can push past 100% if your relics are already well-loaded.
The Great Cosmic Enterprise (Free – Best Budget Option)
This 4-star Light Cone, obtainable from the Anniversary event at maximum Superimposition, provides ATK% and additional DMG bonuses that scale with the number of different Weakness types on an enemy. This is a direct synergy with Anaxa’s kit and is genuinely competitive at S5 for players who cannot pull his signature. If you played during the Anniversary period and maxed this out, use it confidently.
Today Is Another Peaceful Day (Battle Pass)
A general-use DMG% Light Cone from the Battle Pass. Provides CRIT-related buffs that become viable at S3–S5. Useful as a placeholder for hypercarry Anaxa setups when the above options are unavailable. Requires Battle Pass access.
Anaxa Best Relics in HSR
Anaxa’s relic goal is straightforward: maximize CRIT Rate to keep QD windows consistent, then stack CRIT DMG to convert those crits into big numbers. His A4 trace already gives him a massive CRIT DMG buffer (140% in solo Erudition setups), so CRIT Rate is usually the limiting stat.
Best 4-Piece Relic Set: Eagle of Twilight Line
This is Anaxa’s best relic set in most team compositions. The 2-piece bonus gives Wind DMG increase. The 4-piece is the reason to farm it: after using his Ultimate, Anaxa receives a 25% action advance, immediately taking another turn before enemies respond. This directly feeds into the QD chain window — after firing Sublimation, Anaxa immediately acts again while all enemies have all 7 Weakness types active, allowing him to chain free Skill casts while QD is live and enemies are weakened. The action advance is one of the cleanest rotation tools in the game for him.
Alternative: Genius of Brilliant Stars
A strong alternative that focuses on DEF ignore. The 4-piece bonus allows Anaxa to ignore a portion of enemy DEF with each hit, which stacks with his A6 DEF ignore and signature LC DEF reduction. This set performs especially well in content with high-DEF enemies (Apocalyptic Shadow bosses) and pairs particularly well with his signature Light Cone. If you have excellent Genius pieces with good substats, use these while farming for Eagle of Twilight Line.
Best Planar Ornament: Rutilant Arena
Anaxa’s best Planar Ornament. It grants CRIT Rate and a DMG% bonus to Basic ATK and Skill when CRIT Rate is at or above 70%. Since Anaxa’s Skill is his primary damage source and you will always aim for high CRIT Rate, the full bonus activates reliably with decent relic investment. This is the Planar Ornament to farm in Simulated Universe.
Alternative Planar Ornament: Izumo Gensei and Takama Divine Realm
A usable alternative that grants CRIT Rate and a DMG bonus when at least one other ally shares the same path. Since Erudition path supports like Permansor Terrae or The Herta are common on Anaxa’s teams, this frequently procs. Use it if you have strong pieces here and are still farming Rutilant Arena.
Relic Main Stats to Target
- Head: HP (fixed)
- Hands: ATK (fixed)
- Body: CRIT Rate (priority — you need to reach 70%+ consistently for Rutilant Arena and reliable crits)
- Feet: SPD (aim for 134+ to stay ahead of supports and enemies; or ATK% if running the signature LC which handles Energy with its passive)
- Planar Sphere: Wind DMG Bonus
- Link Rope: ATK% (if running signature LC for consistent 2-turn Ultimates) or Energy Regeneration Rate (if using a non-signature Light Cone)
Key Substat Priority
CRIT Rate first until you reach 90–100%. Then CRIT DMG to push toward 200%+. ATK% is a meaningful secondary stat once CRIT stats are solid. SPD substats matter if you are not hitting the 134 breakpoint from feet main stat alone. Avoid flat ATK — always prefer ATK% over it.
Stat Targets
- CRIT Rate: 90–100%
- CRIT DMG: 180–200%+ (in hypercarry with A4’s 140% CRIT DMG bonus, this is easier to hit than on most characters)
- SPD: 134+
- Energy Regen: ~40–60% if not running signature LC
Anaxa Best Teams in HSR
Anaxa has two primary team archetypes — solo hypercarry and dual-DPS with The Herta. Both are strong. Your A4 trace tells you which role you’re playing: one Erudition character gives you +140% personal CRIT DMG; two or more gives the team +50% DMG. Both bonuses are worth playing around.
Premium Hypercarry: Anaxa / Cyrene / Cerydra / Dan Heng • Permansor Terrae
This is Anaxa’s best hypercarry team as of patch 4.3. Cyrene grants Anaxa immediate action advance, a Skill Point refund, and additional Bounce instances on his Skill after every Ultimate — all of which are extraordinarily high-value for a character built around chaining Skill casts. Every Cyrene Ultimate directly extends Anaxa’s QD window. Cerydra provides Military Merit buff and Peerage state, massively boosting an ally’s Skill CRIT DMG and RES penetration, enabling Coup de Main burst windows that multiply Anaxa’s QD Skill chain damage. Dan Heng • Permansor Terrae provides shields and ATK buffs to Anaxa through his Bondmate mechanic. The shield compensates for Anaxa’s relatively low base HP (970 at max level), while the ATK buff and his summon’s frequent actions help cover Energy and provide survivability. This team delivers strong output in Memory of Chaos and Apocalyptic Shadow.
Dual-DPS: Anaxa / The Herta / Tribbie / Dan Heng • Permansor Terrae
One of the highest-ceiling Pure Fiction teams in the game. The Herta and Anaxa together activate both conditions of A4 Imperative Hiatus, giving the entire team +50% DMG. The Herta’s follow-up attacks trigger constantly off Anaxa’s Weakness implants and Sublimation delay, while Anaxa converts all the Weakness chaos into QD chains. Tribbie is the best buffer for this team because her buffs apply equally to both DPS units. Dan Heng • Permansor Terrae handles sustain and provides passive ATK buffs to the Bondmate. This team absolutely dominates in multi-enemy content.
Strong Alternative Hypercarry: Anaxa / Cerydra / Sunday / Dan Heng • Permansor Terrae
Sunday adds immediate 100% action advance, CRIT DMG, and strong buffing to any ally — letting Anaxa spike into a burst window immediately after Sublimation. Cerydra handles Coup de Main Skill amplification. Permansor provides shields and ATK buffs. This team is slightly more aggressive in its burst timing and works particularly well in Apocalyptic Shadow single-target fights. Sunday’s ability to designate Anaxa as the primary buffer recipient means he can fire QD Skill chains with buffed CRIT DMG right after Sublimation lands.
F2P Friendly Team: Anaxa / Trailblazer (Remembrance) / Asta / Lynx
Trailblazer (Remembrance) provides CRIT DMG buffs and True DMG amplification. Asta gives SPD and ATK buffs through her stacks, which helps Anaxa reach action breakpoints and cycle faster. Lynx handles direct healing to keep Anaxa alive given his low base HP. This team is accessible for all players and performs reliably in standard endgame content. Not at the ceiling of the premium teams, but absolutely viable.
Notable Support Options
- Robin – Constant ATK and DMG% buff, synergizes with Anaxa’s multi-hit Skill bounces.
- Ruan Mei – SPD bonus, passive DMG%, and Break efficiency for Weakness-heavy content.
- Tribbie – RES PEN and DMG Taken debuffs that are highly valuable for Anaxa’s already-saturated damage profile.
- Aventurine – Shields plus the Unnerved CRIT DMG debuff, compensates for Anaxa’s low HP.
- Huohuo – ATK buff and direct healing, solid budget sustain option.
Anaxa Trace Priority
Invest your upgrade materials in this order:
- Talent (Tetrad Wisdom Reigns Thrice) – First. This governs QD’s 30% damage bonus and the free Skill trigger. Higher Talent level directly increases his output during the entire QD chain window — the most important phase of every rotation. Always max this first.
- Skill (Fractal, Exiles Fallacy) – Second. Higher Skill level increases both the bounce damage multipliers and the Weakness implant volume per use. More Skill damage means bigger free Skill casts during QD. Closely tied with Talent in priority.
- Major Traces A4 and A6 – Unlock immediately. A4 (Imperative Hiatus) gives either +140% CRIT DMG solo or +50% team DMG — both are enormous. A6 (Qualitative Shift) gives up to 28% DEF ignore at full Weakness stacks. Both are always active and require no rotation management. Unlock these as your first materials go.
- Ultimate – Third. Higher Ultimate level increases Sublimation’s damage multiplier and the potency of the all-Weakness application. Less critical than Talent and Skill per level-up but still a meaningful upgrade.
- Basic Attack – Last. Used primarily for Energy generation and occasional QD free Skill triggers. The damage contribution is minimal. Level this to 6–8 and focus remaining materials on higher priorities.
Anaxa Eidolons – Which Ones Are Worth It?
Anaxa is fully functional at E0 in all endgame content. His vertical investment profile is actually one of his honest limitations — his early Eidolons deliver smaller gains relative to cost than most 3.x characters. The consensus recommendation across the community is that his signature Light Cone delivers more value than E1 for most players.
E1 – Moderate DEF Shred Upgrade
E1 applies 16% DEF shred on every Skill hit. This stacks with his A6 DEF ignore (up to 28%) and his signature Light Cone’s 12% DEF reduction, creating a meaningful combined DEF penetration total that benefits the entire team. In isolation, E1 is roughly a 10–13% personal DPS improvement over E0. Valuable if you already have the signature LC and want to push further, but not worth pulling before the signature.
E2 – Best Value Eidolon (Recommended Stop Point)
E2 applies a permanent 20% All-Type RES shred on all enemies — a team-wide damage multiplier that benefits every character on the field, not just Anaxa. It also triggers one Talent Weakness implant when enemies enter battle, solving the ramp-up issue in wave content where new enemy groups spawn mid-fight. E2’s 15% personal DPS improvement number sounds modest, but the team-wide RES shred makes it considerably more impactful in practice. This is the clear recommended stopping point for players committed to Anaxa.
E4 – Incremental Upgrade
E4 improves multi-hit interactions, bounce and Weakness stacking, and burst uptime. The gains are meaningful in optimized teams and high-level content but represent noticeably smaller marginal returns compared to E1 or E2. Suitable for dedicated players squeezing endgame performance, but not a priority over earlier Eidolons or other account investments.
E6 – Maximum Investment
E6 makes both effects of Imperative Hiatus trigger simultaneously and unconditionally, removing the dependency on Erudition character count. It also increases all of Anaxa’s damage by 130% of its original value. This is a massive power spike at prohibitive cost. Anaxa is very complete at E0S1, so E6 is firmly in whale territory. Worth noting for completeness but not a practical recommendation for most players.
Anaxa Rotation Guide – How to Play Him
Anaxa’s rotation has two clear phases: a stacking phase and a burst phase. Learning to transition between them cleanly is what separates a good Anaxa from a great one.
Pre-Fight Setup
Always use Anaxa’s Technique before entering a fight. Enemies enter Terrified and flee, and when an ally attacks a Terrified enemy, it always counts as hitting their Weakness. After battle starts, Anaxa automatically applies 1 Weakness of the attacker’s element type to every enemy on the field. This pre-loading means you enter the fight with Weakness stacks already building on every target, potentially reaching QD on the first enemy faster than usual.
Stacking Phase
Use Anaxa’s Skill to bounce across enemies and implant multiple Weakness types simultaneously. His bouncing hits prioritize unhit targets, spreading Weakness implants broadly across the field. Focus bounces on your primary target when you need a single enemy in QD fast. In multi-enemy content, the Skill naturally spreads enough to get several targets into QD within 1–2 uses.
When Energy is tight or you want to save a Skill Point, use Basic ATK instead. It generates the same Energy as a Skill (thanks to A2) and still triggers a Talent Weakness implant on hit. If the target is already in QD, you also get a free Skill cast off the Basic ATK at no SP cost.
Burst Phase – Sublimation into QD Chain
When your Ultimate is ready, hold it until you are in a good position to maximize the chain window. Fire Sublimation to apply all 7 Weakness types to every enemy on the field simultaneously — all targets enter QD instantly. With Eagle of Twilight Line’s 4-piece effect, Anaxa immediately takes another turn (25% action advance) after his Ultimate. You then have Anaxa acting again while all enemies have QD active and are delayed.
In this window, use Skill (or Basic ATK) on any QD target. The free bonus Skill fires automatically. That’s effectively two Skill hits per action at no SP cost, all at the 30% QD damage bonus. Use Cyrene’s support to push additional bounces in this window if she’s on your team. This is Anaxa’s main damage burst — everything before it is setup, everything after it is recharge.
Post-Burst Recharge
After the QD window expires, return to Skill usage to rebuild Weakness stacks on primary targets for the next cycle. The A2 trace’s 30 Energy bonus at the start of his turn (when no QD is active on the field) helps accelerate the next Ultimate significantly. With his signature LC restoring 10 Energy per turn, most teams can hit a clean 2-turn Ultimate cycle with an ATK Rope equipped.
Should You Pull Anaxa in HSR?
Yes, if you are looking for a flexible, endgame-viable DPS with a genuinely unique playstyle. Anaxa occupies a rare position in the roster: he is strong as a solo hypercarry, and he is equally strong as a sub-DPS next to The Herta in a dual-DPS setup. Very few characters can flex between these two roles without sacrificing core power. That flexibility means he stays relevant across changing metas — even when new DPS characters arrive, Anaxa often fits as a synergy partner rather than being replaced.
His practical advantages are significant. He imposes no Weakness restrictions on himself or his team because he creates his own Weaknesses. His Sublimation Ultimate applies universal Weakness instantly to every enemy and delays their next action. His A4 trace makes him either a personal powerhouse or a team-wide amplifier depending on composition. And his Technique gives a free advantage entering any fight.
The honest limitations: Anaxa has very low base HP (970 at max level), so he requires either a shielder like Dan Heng • Permansor Terrae or a direct healer for survivability. His Eidolons offer below-average returns per pull compared to most 3.x characters — his signature LC delivers more power than E1 or E2 for most accounts. And he performs slightly below his ceiling in slow single-target fights compared to pure boss killers like Phainon.
Overall, Anaxa is one of the safest pulls in the current meta. He works in both team slots, excels in every endgame mode, and hits his ceiling at E0S1 — meaning you do not need to chase Eidolons to get full value. If he appears on a rerun banner in a future patch, strongly consider pulling.
For other top-tier DPS options, check our guides for Castorice, Acheron, and The Herta. For supports and sustainers that pair well with Anaxa, see our guides for Cyrene, Cerydra, Tribbie, Robin, and Aventurine.
Anaxa Build Guide HSR – Quick Summary
- Role: Main DPS / Sub-DPS
- Element: Wind
- Path: Erudition
- Best Light Cone: Life Should Be Cast to Flames (signature) > Into the Unreachable Veil (The Herta’s sig) > The Great Cosmic Enterprise (free, Anniversary)
- Best 4-Piece Relic Set: Eagle of Twilight Line (most teams) / Genius of Brilliant Stars (DEF-heavy content)
- Best Planar Ornament: Rutilant Arena
- Body Main Stat: CRIT Rate
- Feet Main Stat: SPD
- Sphere Main Stat: Wind DMG Bonus
- Rope Main Stat: ATK% (with signature LC) / Energy Regeneration Rate (without)
- Stat Goals: 90–100% CRIT Rate, 180–200%+ CRIT DMG, 134+ SPD
- Trace Priority: Talent > Skill > A4 & A6 (unlock immediately) > Ultimate > Basic Attack
- Best Eidolon: E2 (20% permanent All-Type RES shred team-wide). Signature LC > E1 for most accounts.
- Best Hypercarry Team: Anaxa / Cyrene / Cerydra / Dan Heng • Permansor Terrae
- Best Dual-DPS Team: Anaxa / The Herta / Tribbie / Dan Heng • Permansor Terrae
- Critical Rule: Always unlock A4 (Imperative Hiatus) and A6 (Qualitative Shift) as your first trace priorities.
For full skill calculations, complete Eidolon breakdowns, and the latest meta placement data, visit the complete Anaxa guide on GamingProMax.
For official version notes and event details, check the HoYoverse official Honkai Star Rail news page.


