TL;DR
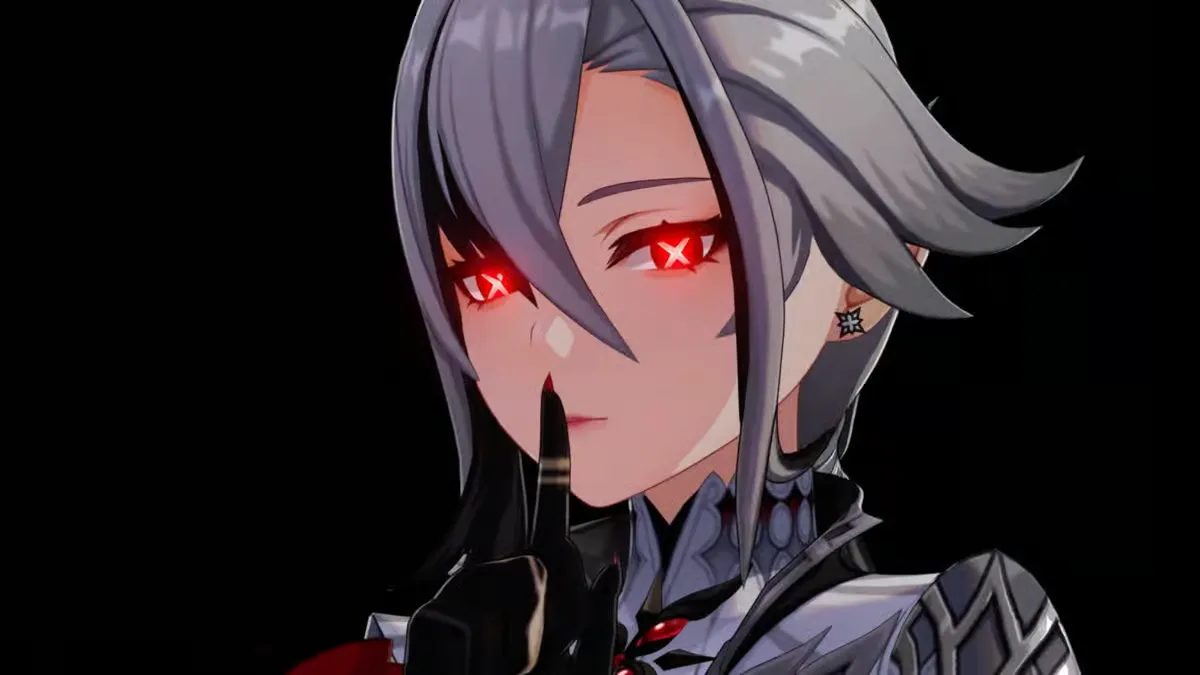
- Arlecchino is a 5-star Pyro Polearm DPS who deals damage through her unique Bond of Life mechanic.
- She cannot be healed by teammates — only her own Elemental Burst restores her HP in combat.
- When her Bond of Life reaches 30% of her Max HP, she enters Masque of the Red Death — infusing all attacks with Pyro and gaining massive damage bonuses.
- Best weapon: Crimson Moon’s Semblance (signature) or Staff of Homa.
- Best artifact set: 4-piece Fragment of Harmonic Whimsy (near-unconditional 54% DMG increase).
- Her strongest teams include Melt (with Citlali + Xilonen), Vaporize (with Yelan + Bennett), and Mono Pyro (with Kazuha + Xiangling + Bennett).
- C1 is her most impactful constellation — a 20–25% DPS increase plus interruption resistance.
- Ascension materials include Rainbow Rose (Fontaine), Fragment of a Golden Melody (Legatus Golem boss), and Fatui Insignias.
- She is an SS-tier DPS and one of the strongest characters in the current meta.
Who Is Arlecchino in Genshin Impact?
Arlecchino is a 5-star Pyro character who wields a Polearm. She became playable in Version 4.6 and quickly established herself as one of the most powerful on-field DPS characters in the game. Known as The Knave, she is the Fourth of the Eleven Fatui Harbingers — a rank that places her among the most dangerous individuals in Teyvat. Her true name is Peruere.
Beyond her role as a Harbinger, Arlecchino is the head of the House of the Hearth — an orphanage and Fatui intelligence organization where she is known to her children simply as “Father.” Her constellation is Ignis Purgatorius and her birthday is April 27th. See the full Arlecchino character page for more details on her profile and story.
If you are building other Fatui or Snezhnaya characters alongside her, you may also want to check our guides for Tartaglia (Childe) and newer Snezhnaya characters like Alyosha and Odette.
Genshin Impact is free to play on PC via the official site, Android, iOS, PlayStation, Epic Games Store, and Xbox.
Understanding Arlecchino’s Bond of Life Mechanic
Bond of Life is the core of Arlecchino’s entire kit. Here is what it means and how it works:
Normally in the game, Bond of Life is a debuff that prevents a character from being healed by external sources until they receive healing equal to the Bond of Life value. For most characters, this is purely harmful. For Arlecchino, it is the opposite — she converts it into power.
When Arlecchino’s Bond of Life reaches or exceeds 30% of her Max HP, she enters the Masque of the Red Death state:
- All of her Normal Attacks, Charged Attacks, and Plunging Attacks are converted to deal Pyro DMG. This infusion cannot be overridden.
- She gains a bonus to her attack damage that scales with her ATK multiplied by her current Bond of Life percentage.
- Each Normal Attack in this state consumes a portion of her Bond of Life, also reducing her Elemental Skill cooldown by 0.8 seconds per hit.
The practical result is a self-sustaining loop: build Bond of Life via her Elemental Skill → enter Masque → deal Pyro-infused Normal Attacks → consume Bond of Life to reduce skill cooldown → refresh Bond of Life again with the skill. She stays in Masque almost permanently once the rotation is established.
The critical trade-off is that while she has any Bond of Life, she cannot be healed by external sources. Bennett’s healing zone, healers, and food will not restore her HP. The only way she heals in combat is through her own Elemental Burst. This requires strong situational awareness and good positioning — or a shielder to absorb incoming damage instead.
Arlecchino Skills and Abilities
Normal Attack: Invitation to a Beheading
Arlecchino performs up to 6 consecutive polearm strikes. Her Charged Attack dashes toward a nearby opponent and cleaves with one strike — or, if held, sustains up to 5 seconds of high-speed movement consuming Stamina. Her Plunging Attack drops from mid-air for AoE damage on impact. In the Masque of the Red Death state, all of these deal Pyro DMG instead of physical.
Elemental Skill: All Is Ash
Arlecchino summons Balemoon Bloodfire, dealing Pyro DMG to multiple nearby opponents and performing a dash-cleave against one of them for further AoE Pyro DMG. Each opponent struck is marked with a Blood-Debt Directive that lasts for 30 seconds.
When Arlecchino performs a Charged Attack or uses her Elemental Burst, she absorbs nearby Blood-Debt Directives, gaining Bond of Life for each one absorbed:
- Absorbing a Blood-Debt Directive grants 65% of Max HP as Bond of Life
- If the Directive waited long enough to upgrade into a Blood-Debt Due (after 5 seconds at C2, earlier at higher constellations), absorbing it grants 130% of Max HP as Bond of Life
The skill also has an A4 passive interaction: for 20 seconds after using All Is Ash, both Normal Attacks and Elemental Burst gain 10% increased CRIT Rate and 70% increased CRIT DMG. This is a massive bonus that makes the timing of her skill critical for maximizing damage windows.
Elemental Burst: Balemoon Rising
Arlecchino absorbs all nearby Blood-Debt Directives and Dues, gaining Bond of Life. She then unleashes a powerful strike that deals massive AoE Pyro DMG scaling with both her ATK and her current Bond of Life percentage. After the burst, her Bond of Life is fully cleared.
This burst is also her only source of HP restoration in combat. By clearing Bond of Life through the burst, her HP (which was blocked from external healing by the Bond of Life) is restored. The amount healed scales with her ATK and how much Bond of Life was cleared. Additionally, using the burst resets the cooldown of her Elemental Skill, making it immediately available for the next rotation.
Passive Talents
- A1 – Agony Alone May Be Repaid: Blood-Debt Directives on opponents are upgraded to Blood-Debt Dues after 5 seconds. When a Due is absorbed via Charged Attack or Burst, Arlecchino gains Bond of Life equal to 130% of her Max HP (instead of the base 65%). This is the mechanic that rewards letting the Directives cook before absorbing them.
- A4 – Strength Alone Can Defend: For 20 seconds after using All Is Ash, Arlecchino’s Normal Attacks and Burst gain +10% CRIT Rate and +70% CRIT DMG. This passive is enormous — timing your skill correctly unlocks massive burst windows of damage. The effect can trigger once every 15 seconds.
- Utility Passive – The Balemoon Alone May Know: Arlecchino gains 1% All Elemental and Physical RES for every 100 ATK she has above 1,000, up to a maximum of 20% each. This passive scales with ATK investment and gives her surprising survivability in high-ATK builds.
Arlecchino Constellations
Arlecchino is extremely strong at C0. Each constellation adds meaningful upgrades but none are required for her to perform well. Here is what each one offers:
- C1 – All Reprisals and Arrears Mine to Bear: The Masque of the Red Death state is further enhanced — the value of the damage increase is doubled (100% more). Additionally, Arlecchino gains interruption resistance when performing Normal or Charged Attacks while in Masque. This is her most important constellation. It represents a 20–25% DPS increase and addresses one of her biggest combat weaknesses — being staggered out of her Normal Attack chains. Many players consider C1 more valuable than her signature weapon.
- C2 – All Rewards and Retribution Mine to Bestow: Blood-Debt Directives are now already Blood-Debt Dues when first applied. When Arlecchino absorbs a Due, she unleashes a Balemoon Bloodfire explosion in front of her dealing additional Pyro DMG. This significantly improves her rotation speed and adds a burst of AoE damage on every skill absorption.
- C3 – All Mourning and Moaning Mine to Hear: Increases the level of Balemoon Rising (Elemental Burst) by 3, up to Level 15.
- C4 – All Penance and Atonement Mine to Bear: When Arlecchino uses her Elemental Skill while in the Masque of the Red Death state, she regains 15 Energy and can consume Directives to reduce the Elemental Burst cooldown by 4 seconds. Gives her more burst uptime and further smooths her rotation.
- C5 – All Transience and Disquiet Mine to Soothe: Increases the level of All Is Ash (Elemental Skill) by 3, up to Level 15.
- C6 – All Bonds and Grievances Mine to Untie: During Masque of the Red Death, Normal Attack CRIT Rate is increased by 10% and Normal Attack CRIT DMG is increased by 70%. The Elemental Burst’s DMG is also increased in a similar fashion. An exceptionally powerful constellation that pushes her damage ceiling to an elite level.
Best Weapons for Arlecchino in Genshin Impact
Best-in-Slot Weapon
- Crimson Moon’s Semblance (5-star, Signature): Built specifically for Arlecchino’s kit. It provides a high Base ATK, CRIT Rate as a substat, and grants her a Bond of Life equal to 25% of her Max HP when a Charged Attack hits. While Bond of Life is active, the weapon gives a 12% DMG bonus, scaling up further when Bond of Life equals 30% or more of Max HP. It feeds directly into the Masque of the Red Death threshold and keeps her damage buffs active. Her best weapon by a meaningful margin in most builds.
Strong Alternatives
- Staff of Homa (5-star): CRIT DMG substat with a passive that increases Max HP and adds a large ATK bonus based on HP. In teams with consistent HP fluctuation, this weapon competes closely with the signature and is often recommended as the top alternative. Excellent for Arlecchino in any team.
- Primordial Jade Winged-Spear (5-star): CRIT Rate substat with a stacking ATK and DMG bonus on hit. Strong all-around stat stick that works in any Arlecchino team without any special conditions.
- Deathmatch (4-star, Battle Pass): CRIT Rate substat with an ATK boost based on enemy count. Her best accessible 4-star option. The CRIT Rate it provides helps reach the CRIT balance needed for her A4 passive windows.
Best Free-to-Play Option
- White Tassel (3-star): CRIT Rate substat with a passive that increases Normal Attack DMG by 24–48% at refinement 5. Arlecchino’s Normal Attacks are her primary damage source, and this weapon at max refinement is genuinely competitive in early-game or budget situations. It is not a long-term solution but is a strong placeholder.
Best Artifacts for Arlecchino in Genshin Impact
Best Set: 4-Piece Fragment of Harmonic Whimsy
This is Arlecchino’s signature artifact set and her clear best-in-slot option. The 4-piece passive provides an 18% DMG bonus each time the wearer’s Bond of Life increases or decreases. Since Arlecchino’s Bond of Life fluctuates constantly — every Normal Attack consumes it, every Charged Attack or skill cast refreshes it — this bonus stacks up to 3 times almost immediately and stays active throughout her entire damage window. At max stacks, this is a near-unconditional 54% DMG increase on all her attacks. Farm this set from the Harmonious Dreams domain.
Alternative: 4-Piece Gladiator’s Finale
If you are still building toward Fragment of Harmonic Whimsy, 4-piece Gladiator’s Finale is a strong interim option. The 4-piece bonus increases Normal Attack DMG by 35% for Polearm users. Since all of Arlecchino’s Masque-state attacks are converted Normal Attacks, this set is highly relevant. It is a reliable fallback that keeps her competitive while you farm the better set.
Other Viable Sets
- 4-piece Echoes of an Offering: Can outperform Gladiator’s Finale in some scenarios if the proc rate is reliable. Works similarly but the randomness of the passive can make it less consistent in practice.
- 4-piece Marechaussee Hunter: When Arlecchino is paired with Furina, whose HP-drain mechanics trigger Marechaussee stacks, this set raises CRIT Rate significantly. Works specifically in Furina team comps and should not be used without her.
Artifact Main Stats
- Sands: ATK%
- Goblet: Pyro DMG Bonus%
- Circlet: CRIT Rate% or CRIT DMG%
- Sub-stats to prioritize: CRIT Rate, CRIT DMG, ATK%, Elemental Mastery (in Melt teams)
Important: Do not build HP% on Arlecchino. Her Bond of Life is calculated from her Max HP, so higher HP can actually push Bond of Life beyond the effective cap faster and cause issues. Stick to ATK% and CRIT stats for her main and sub-stats. The only exception is when running specific Melt builds where EM on the Sands can be considered.
Best Teams for Arlecchino in Genshin Impact
Best Team: Melt with Citlali and Xilonen (SS Tier)
- Arlecchino – On-field Pyro Main DPS
- Citlali – Off-field Cryo application, shielding, and Pyro/Hydro RES shred
- Xilonen – Elemental RES reduction and healing
- Bennett – Massive ATK buff and Pyro Resonance
This is Arlecchino’s current strongest team. Citlali provides consistent Cryo application off-field for Arlecchino to trigger Melt (2x Pyro multiplier) with her infused Normal Attacks, while also shielding the team and shredding Pyro resistance. Xilonen stacks elemental RES reduction and provides healing to keep Arlecchino topped up after her burst clears Bond of Life. Bennett provides a large ATK buff — which Arlecchino can still receive even though she cannot be healed — plus Pyro Resonance for additional ATK. This team pushes Arlecchino’s damage ceiling to its highest point. See the Citlali guide and Xilonen guide for their builds in this setup.
Vaporize Team
- Arlecchino – On-field Pyro Main DPS
- Yelan – Off-field Hydro sub-DPS for Vaporize reactions
- Xingqiu – Additional off-field Hydro and DMG reduction via rain sword
- Bennett – ATK buff, Pyro Resonance
This is Arlecchino’s most popular and widely accessible team. Yelan is her best Hydro partner, providing frequent off-field Hydro application that syncs well with Arlecchino’s rapid Normal Attack Pyro hits, triggering Vaporize (1.5x) consistently. Xingqiu adds more Hydro coverage and provides some damage reduction through his rain swords, which helps protect Arlecchino while she cannot be healed. Bennett provides his ATK burst zone — Arlecchino cannot be healed by it but she absolutely benefits from the ATK bonus. Running double Hydro (Yelan + Xingqiu) is recommended over single Hydro to ensure consistent Hydro aura uptime for Vaporize. Check the Yelan guide and Xingqiu guide for their builds here.
Mono Pyro Team
- Arlecchino – On-field Pyro DPS
- Kaedehara Kazuha – Anemo grouping, Viridescent Venerer resistance shred, Pyro DMG buff
- Xiangling – Off-field Pyro sub-DPS
- Bennett – ATK buff, healing, Pyro Resonance (three Pyro total)
Mono Pyro is the most straightforward team for Arlecchino — no reaction dependency, just stacking as many Pyro buffs as possible and letting Arlecchino deal raw Pyro damage. Kazuha runs 4-piece Viridescent Venerer to shred Pyro resistance by 40%, increasing Arlecchino’s and Xiangling’s damage simultaneously. Bennett and Xiangling generate energy for each other through Pyro resonance particles, reducing everyone’s ER needs. Kazuha’s EM bonus from his A4 passive also applies indirectly to team damage through VV shred. See the Kazuha guide and Xiangling guide for their optimal builds. You can also check Bennett’s guide for his best support setup.
Overload Team (with Chevreuse)
- Arlecchino – On-field Pyro Main DPS
- Fischl – Off-field Electro for Overload via Oz
- Chevreuse – Pyro/Electro-only team buff, RES shred, modest healing
- Bennett – ATK buff, Pyro Resonance, or swap for Beidou for more Electro coverage
Overload teams use the Pyro + Electro reaction, which deals AoE Dendro damage on impact. Unlike physical DPS who hate being knocked back by Overload explosions, Arlecchino is partially ranged in her attack range and can quickly re-engage staggered enemies. Chevreuse’s Pyro/Electro-only restriction significantly buffs all team members’ Pyro and Electro DMG, making this a surprisingly potent alternative to Vaporize. See the Fischl guide and Chevreuse guide for their builds in Overload teams.
Budget Vaporize Team (No 5-Stars Needed)
- Arlecchino – Main DPS
- Xingqiu – Off-field Hydro for Vaporize
- Bennett – ATK buff and healing
- Sucrose – Anemo resistance shred (4-piece VV) and EM buff
This is a fully 4-star support team for Arlecchino that handles most content. Sucrose replaces Kazuha’s grouping and EM bonus at a lower investment level, while Xingqiu covers Hydro for Vaporize. See the Sucrose guide for her best support setup in this team.
Arlecchino Ascension Materials
Gem Type
- Agnidus Agate (Sliver, Fragment, Chunk, and Gemstone) – The Pyro gem. Drops from Pyro bosses including the Pyro Regisvine (west of Luhua Pool in Liyue), Pyro Hypostasis, Emperor of Fire and Iron, and La Signora weekly boss. Can also be crafted at the Alchemy Bench.
Boss Drop
- Fragment of a Golden Melody (46 needed) – Dropped by the Legatus Golem world boss, located in the lost underground kingdom of Remuria beneath Fontaine. Access Remuria by completing the World Quest that begins in the Fontaine island village of Petrichor. You will need approximately 18 boss runs at 40 Original Resin each (around 720 Resin total at World Level 8).
Local Specialty
- Rainbow Rose (168 needed) – A pink flower found exclusively in Fontaine, primarily around the Court of Fontaine, the Beryl Region, the Fountaine of Lucine, and the road north of Fontaine’s main hub. There are only 81 Rainbow Rose spawns per world, so you may need to visit a friend’s world to collect extras. They respawn every 48 hours. Use the Seed Dispensary gadget to collect seeds and grow more in your Serenitea Pot. If you have Lyney, his passive talent marks Fontaine local specialties on the minimap, making farming faster.
Enemy Drops
- Recruit’s Insignia (18 needed)
- Sergeant’s Insignia (30 needed)
- Lieutenant’s Insignia (36 needed)
All three drop from Fatui enemies — including Fatui Skirmishers, Fatui Agents, Cicin Mages, and Pyro Agents. Thematically fitting for Arlecchino as a Fatui Harbinger. Fatui enemies can be found throughout Teyvat; use the Adventurer’s Handbook to mark notable groups on the map.
Ascension Stat
Arlecchino gains CRIT DMG as her ascension stat, reaching 88.4% bonus CRIT DMG at max Level 90 ascension. This is one of the best possible ascension stats and makes leaning into CRIT Rate on her Circlet and artifact sub-stats the correct approach for balancing CRIT ratios.
Arlecchino Talent Materials
To level up Arlecchino’s talents, you will need:
- Order Talent Books: Teachings, Guide, and Philosophies of Order — farmed from the Pale Forgotten Glory domain in Fontaine on Wednesdays, Saturdays, and Sundays
- Fatui Insignias (all three tiers) — enemy drops from Fatui Skirmishers and similar enemies
- Fading Candle — weekly boss material from the Arlecchino Trounce Domain (Scattered Ruins)
- Crown of Insight — required to max a talent to Level 10
Talent Priority
- Normal Attack first — By a wide margin. All of Arlecchino’s damage in Masque of the Red Death state comes through her Normal Attacks. Leveling this talent raises the multiplier on every hit she deals, making it the single most impactful talent upgrade. Max this first.
- Elemental Skill second — All Is Ash deals good initial AoE Pyro damage and its level also affects the Bond of Life percentage she receives. Leveling it improves both her setup damage and her Bond of Life management.
- Elemental Burst third — Balemoon Rising deals strong damage and heals Arlecchino, but contributes less total damage per rotation than the first two talents since it is only cast once per rotation. Level it after the others.
Note for C2 owners: At C2, the burst becomes significantly more important since it triggers Balemoon Bloodfire explosions. Consider prioritizing the burst over the skill at C2.
Arlecchino Rotation Guide
Arlecchino’s rotation is straightforward once you understand the Bond of Life loop. Here is the standard approach:
- Setup off-field supports first. Activate Bennett’s burst, Yelan or Xingqiu’s burst and skill, Kazuha’s grouping and buff — whatever your team requires. Do all of this before Arlecchino takes the field, so buffs are active when she starts attacking.
- Use Arlecchino’s Elemental Skill. Dash in, use All Is Ash to apply Blood-Debt Directives to as many enemies as possible. Then immediately use a Charged Attack to absorb the Directives and gain Bond of Life. The A4 passive activates here, giving you +10% CRIT Rate and +70% CRIT DMG for 20 seconds.
- Enter Masque of the Red Death. With Bond of Life above 30%, all Normal Attacks are now Pyro-infused. Begin your Normal Attack chain, dealing Pyro DMG on every hit. Each hit slightly reduces Bond of Life and reduces skill cooldown by 0.8 seconds.
- Use Elemental Burst to reset. When Bond of Life is running low or when you need to heal, use Balemoon Rising. It deals massive Pyro DMG, heals Arlecchino by clearing Bond of Life, and resets the Elemental Skill cooldown. Then use the skill again immediately to reapply Directives and restart the loop.
- Advanced tip — let Directives age before absorbing. If you have the A1 passive (which is baseline), wait at least 5 seconds after casting the skill before absorbing the Directives with a Charged Attack. This upgrades them to Blood-Debt Dues, giving 130% HP as Bond of Life instead of 65%. More Bond of Life means more time in Masque and higher damage multipliers.
Arlecchino Playstyle Tips
- Use a shielder if you are still learning her rotation. Since she cannot be healed externally, incoming damage is the biggest threat. Characters like Zhongli (for his jade shield), Layla, or Thoma absorb damage for her and allow her to attack freely without dying. Even Xingqiu’s damage reduction via rain swords helps significantly.
- Do not stack HP on her artifacts. Higher HP increases how much Bond of Life she needs to reach 30% threshold and also affects her healing scaling — but her damage comes from ATK and CRIT stats, not HP. HP% sub-stats and main stats are wasted on her.
- Use her burst before Bond of Life runs out. If Bond of Life drops to 0 before you use her burst, she exits Masque of the Red Death and loses her Pyro infusion. Try to use the burst while she still has Bond of Life active to maintain uptime.
- Bennett’s healing does not restore her HP but his ATK buff does apply. Running Bennett is still worth it even though his burst zone cannot heal her. She benefits from the flat ATK bonus from his burst and from Pyro Resonance. Just do not rely on him to keep her alive — that job belongs to her own burst or a shielder.
- Be cautious with Furina in the same team. Furina’s HP-drain mechanic reduces Arlecchino’s HP while she already cannot be healed externally. This combination requires extremely consistent burst usage to prevent dying. Only use Furina in Arlecchino teams if you are comfortable with the rotation and have strong Hydro or another support keeping the team alive.
Arlecchino Lore and Background
Arlecchino’s true name is Peruere. She was recruited into the House of the Hearth — the Fatui’s orphanage and intelligence network — at a young age. Over time, through her extraordinary ability and iron will, she rose through the organization until she became its head. The children of the House call her “Father,” a title she has taken as her own identity rather than adopting traditional gender-coded terms of authority.
She is the Fourth of the Eleven Fatui Harbingers, ranked beneath only Pierro (The Jester), Pulcinella (The Rooster), and Capitano (The Captain). Her codename — The Knave — comes from commedia dell’arte, the Italian theatrical tradition that names all the Harbingers. She is described as a poised, ruthless diplomat who operates with cold efficiency. To outsiders, she is feared. To her children, she is the most important figure in the world — an authority they respect and depend on, even if they do not always understand her.
Arlecchino’s story is deeply tied to the events in Fontaine. Her role in the Archon Quest and her connection to the House of the Hearth reveal a character of contradictions: she is simultaneously an agent of Snezhnaya’s ambitions and a protector of children who have nowhere else to go. She does not show warmth easily, but the children of the House are her genuine responsibility — and she takes it seriously in her own way.
Her philosophy, echoing a quote from Pierro, is clear: fate grants favors to no one. Only those who fight it with every ounce of their being earn the right to challenge it. For Arlecchino, every relationship, every contract, every bond is something to be earned — and something she guards fiercely once it is hers to protect.
How to Get Arlecchino
Arlecchino is a limited 5-star character. She was first released in Version 4.6 and has rerun multiple times since. She cannot be obtained from the Standard Wish banner. You must wait for her event banner rerun and save Primogems accordingly. She is one of the most popular characters in the game, so reruns happen relatively frequently. Check current banner schedules and plan your Primogem savings in advance.
Is Arlecchino Worth Building?
Arlecchino is an SS-tier DPS and one of the strongest characters in Genshin Impact. She is excellent at C0 and gets meaningfully better with her first constellation. Her flexibility across multiple team archetypes — Vaporize, Melt, Overload, and Mono Pyro all work well — makes her one of the most versatile main DPS options in the game.
Her Bond of Life mechanic takes some adjustment, particularly the restriction on external healing. But once you understand the rotation and have a shielder or consistent burst usage to protect her, she is also surprisingly comfortable to play. She is a high-reward character that consistently clears Spiral Abyss content. If you are spending Primogems on a Pyro DPS, Arlecchino is one of the safest investments in the current roster. For players building Fontaine content teams, she pairs especially well with Fontaine characters like Furina and Neuvillette on opposing sides of Spiral Abyss.
Quick Summary – Arlecchino at a Glance
- Rarity: 5-Star
- Element: Pyro
- Weapon: Polearm
- Region: Snezhnaya (Fatui Harbinger, active in Fontaine)
- Role: On-field Pyro Main DPS (Hypercarry)
- Best Weapon: Crimson Moon’s Semblance (signature) or Staff of Homa
- Best Artifact Set: 4-piece Fragment of Harmonic Whimsy
- Best Teams: Citlali + Xilonen + Bennett (Melt); Yelan + Xingqiu + Bennett (Vaporize); Kazuha + Xiangling + Bennett (Mono Pyro)
- Key Constellation: C1 – All Reprisals and Arrears Mine to Bear (100% Masque enhancement + interruption resistance)
- Ascension Stat: CRIT DMG (88.4% at Level 90)
- Ascension Materials: Agnidus Agate, Rainbow Rose, Fragment of a Golden Melody, Fatui Insignias
- Talent Books: Order series (Pale Forgotten Glory domain, Fontaine — Wednesdays, Saturdays, Sundays)
- Weekly Boss Material: Fading Candle (Arlecchino Trounce Domain — Scattered Ruins)


