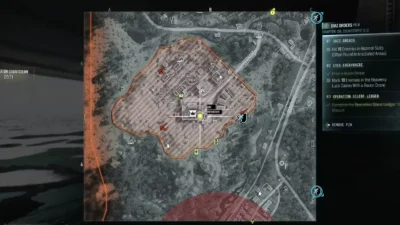
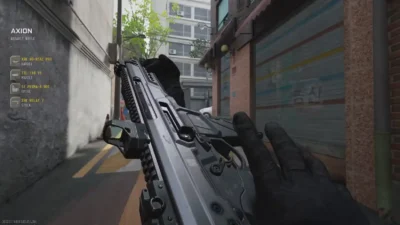
- Modern Warfare 4 DMZ has 19 locked key doors spread across Hajin — each tied to a specific POI and threat level.
- Keys drop from loot containers, AI enemies, and boss kills — some are guaranteed rewards from Operations.
- Always keep important keys in your hotbar, not your backpack — backpack items are lost if you fail extraction.
- The Counting Room Vault and Vault Armory are different doors — easy to confuse at the Heavenly Luck Casino.
- Some of the best keys reward you with 3D printer recipes, weapon manuals, and rare materials.
- The Supreme Leader’s Bunker needs an access card, not a standard key — and it’s behind an EXTREME threat area.
Keys in Modern Warfare 4 DMZ unlock some of the most valuable rooms on the Hajin map. A good key can mean the difference between a routine infil and walking out with top-tier loot, weapon manuals, or 3D printer recipes. But the map is large, threats vary wildly by POI, and figuring out where each key actually goes isn’t always obvious from the item card alone.
This guide covers every key door in MW4 DMZ — where the door is, how to get the key, the threat level to expect, and what loot you’ll typically find inside.
How DMZ Keys Work in Modern Warfare 4
Each key in MW4 DMZ has an item card showing its rarity, a value of $100, and a short text hint. That hint always starts with a map grid reference — for example, “F5” or “G7”. Open your map, find that grid square, and look for the POI mentioned in the hint text. That’s where the door is.
When you get close to a locked door without the key, you’ll see a padlock icon and a “LOCKED” prompt. With the key in your inventory, the prompt changes to “UNLOCK” — press F on PC or Square on PlayStation. A successful unlock rewards 300 XP and shows “DOOR UNLOCKED” or “STRONGHOLD UNLOCKED” depending on the room type.
Important: If you fail an extraction, any keys kept in regular backpack slots are permanently lost. Always move rare or epic keys to your hotbar before entering a high-threat area.
Learn more about DMZ mechanics in the MW4 DMZ Deployment Bonus guide and our best traits for Modern Warfare 4 DMZ breakdown.
All MW4 DMZ Key Locations
1. Mirae Electrical Room (Rare)
POI: Mirae General Hospital | Grid: F5 | Threat: LOW
This is one of the more accessible keys in DMZ. The door is in the northwest basement parking garage of Mirae General Hospital — specifically on level B2. Look for a grey double door set into a purple wall under a “Danger” sign. The room holds tool chests, footlockers, and military bags. Loot includes Electronic Sensors, Encrypted Archives, Armor Plates, and Electronics.
How to get the key: Guaranteed reward for completing Operation Critical Extraction. Also drops from loot containers in the area.
2. Counting Room Vault (Epic)

POI: Heavenly Luck Casino, Cheongun Village | Grid: F4 | Threat: HIGH
One of the highest-value key rooms in the game. Head behind the main casino gaming floor into the staff access corridor. The door has a dark wooden frame, a keypad, and a fingerprint reader on the wall beside it. The in-game prompt reads “HEAVENLY LUCK CASINO COUNTING ROOM – UNLOCK” — note that the door label doesn’t match the key name exactly.
Inside is a weapons storage room that can hold a Zip Gun Recipe for the 3D printer, followed by a vault lined with safe-deposit boxes and a safe. Possible loot includes Nuclear Program Files, Encrypted Archives, and Gold Skulls.
How to get the key: Guaranteed reward for completing Operation Silent Ledger. Can also be found as field loot in an Industrial Locker at the Rice Mill in Imjin Farmland, or inside a Military Locker in the Haksan School Armory at Deadtown.
For the full walkthrough, see the Counting Room Vault key location guide.
3. Mechanic’s Shack (Rare)
POI: Cheongun Village | Grid: F5 | Threat: LOW

A small standalone hut just south of the clinic in Cheongun Village. It’s a single room but packs a decent amount of loot — footlockers, a rifle case, an armor box, tool chests, military lockers, and a duffel. A KG-7 Vulcan and Power Regulator can turn up here. Low threat makes this one of the safest key rooms to visit.
How to get the key: Random field loot from containers and enemy AI drops in the area.
4. Police Station Armory

POI: Pyeonghwa Village Police Station | Threat: MODERATE
Head to the blue building in Pyeonghwa Village marked “보안성 · POLICE STATION” on the map. Take the main stairwell down to the basement and follow the corridor past the holding cells. The door is at the end next to the mesh-reinforced armory window. Unlocking it gives “300 XP STRONGHOLD UNLOCKED”. Inside is a Basic Weapons Locker and military bags.
Note: There’s a second Police Station Armory door at Revolution Dam with the same name and layout.
How to get the key: Random field loot. See the MW4 DMZ police station locations guide for all station spots on the map.
5. Militia Arms Depot (Rare)

POI: Hajin River Heights, Gangbyeon Apartment B | Grid: G7 | Threat: MODERATE
The key card reads “G7 – Unlocks the armory on the lower floor of the Gangbyeon Apartment B building of the compound within Hajin River Heights.” Head to the lower floor of that building and look for the armory door.
How to get the key: Often found in duffel bags at The Citadel East Wing cell block inside the 14th Political Prison. Fair warning — that location is CRITICAL threat, so go prepared.
6. Field Depot
POI: Chang-san Air Base Hangar | Threat: CRITICAL

This is a high-risk key room inside the corrugated-metal hangar buildings at Chang-san Air Base. Look for a white door with a red panel reading “FIELD DEPOT – LOCKED”. The CRITICAL threat level here means you’ll face heavy AI resistance and possibly other operators.
How to get the key: Random field loot drops, AI enemies at the Air Base.
7. Re-Education Center Annex

POI: Re-Education Center, Main Building | Threat: MEDIUM
Inside the main building of the Re-Education Center. Look for a wooden door near a “NO PUBLIC ACCESS” sign in the main building area. Medium threat — manageable, but still worth bringing solid armor.
How to get the key: Random field loot drops in and around the Re-Education Center.
8. Underground Propaganda Store Room

POI: Re-Education Center, Underground | Threat: MEDIUM
Go underground at the Re-Education Center and follow the dark corridor. The door is in a dimly lit passage off the main underground route. This is a separate room from the Annex above — both are at the same POI but different floors and different keys.
How to get the key: Random field loot at the Re-Education Center.
9. Executive Arms Auction

POI: DBN Headquarters | Threat: EXTREME
Inside DBN HQ, look for a dark teal door set into a carpeted office floor. EXTREME threat level means this is one of the most dangerous key rooms in DMZ. Only go for this if you’re in a full squad and loaded up on armor and supplies.
How to get the key: Random field loot drops from high-value targets and elite AI.
10. Rice Mill Bunker
POI: Rice Mill, Imjin Farmland | Grid: Column D, rows 7–8 | Threat: LOW
At the Rice Mill in Imjin Farmland, find a green metal door with a circular round knob. The prompt reads “RICE MILL BUNKER – LOCKED” until you arrive with the key. There’s also a nearby locked door marked “IMJIN MILL FOREMAN’S OFFICE – LOCKED”, so make sure you’re at the right door. LOW threat makes this one of the safest high-value rooms to clear.
How to get the key: Random field loot, Industrial Lockers in the Imjin Farmland area.
11. The Doctor’s Command Office
POI: Mirae General Hospital | Grid: F5 | Threat: LOW
This one is a boss drop. Find The Doctor — a Lieutenant boss — patrolling inside Mirae General Hospital. Defeat them and loot the key. Head to the upper floor office area and look for a pale wooden door with “THE DOCTOR’S COMMAND OFFICE – LOCKED” as the prompt.
Inside the room, the LT CRATE contains the recipe for the Tempered Armor Vest — one of the better 3D printer rewards in DMZ. Well worth the boss fight.
How to get the key: Guaranteed drop from The Doctor boss at Mirae General Hospital.
12. Commandant Office

POI: Admin Complex No. 2, Chang-san Air Base | Threat: EXTREME
Admin Complex No. 2 sits inside Chang-san Air Base territory. Follow the hallway with red curtains and flags — the door is inside that corridor. Another EXTREME threat room that demands a full squad run with proper preparation.
How to get the key: Random field loot from high-threat AI drops in the Air Base area.
13. Shop Records Room

POI: Wolves Stadium | Grid: F7 | Threat: MEDIUM
Enter Wolves Stadium through the grey metal-framed glass double doors in the red-brick wall. Cross the shop floor with its blue-and-white counters and look for the frosted-glass door beside an apartment-sale poster in a glass case. The prompt reads “SHOP RECORDS ROOM – UNLOCK” with the key.
How to get the key: Random field loot.
14. Coin Mining Den

POI: NuriGO West | Grid: G6 | Threat: MEDIUM
Head into the multi-storey building at NuriGO West and climb the stairs to the landing with a large “3” painted on the wall. Look for a plain grey door under a wall sign reading “사무실 OFFICE” with a green exit sign and red fire alarm on the wall nearby.
How to get the key: Guaranteed reward for completing Operation Shopping Hacks. Also available as random field loot. Check the Coin Mining Den key location guide for the exact route.
15. Vault Armory

POI: Heavenly Luck Casino Parking, Cheongun Village | Threat: HIGH
This is a different door from the Counting Room Vault above. From the casino gaming floor, take the white side door and stairwell down to the parking area. Go through the grey door near the yellow “통제구역 RESTRICTED AREA” sign. In the caged room with a counter window, the mesh door reads “VAULT ARMORY – UNLOCK”. Inside, the Weapons Locker can hold a weapon manual — for example “MANUAL: PPSH-41” — which unlocks that weapon for purchase in the Gunsmith.
Note: There’s also a vault gate in the same parking area that reads “DOOR UNLOCKS VIA SECURITY SYSTEM” — that gate cannot be opened with any key. Don’t confuse the two.
Full details in the Roze’s Highrise Armory key guide.
16. Haksan School Armory
POI: Deadtown | Grid: Columns B/C, rows 6–7 | Threat: LOW
At Deadtown, find the school building with teal-and-white tiled walls and red railings on the outdoor walkway. Follow the walkway to a red wooden door with a glass panel — the prompt reads “HAKSAN SCHOOL ARMORY – UNLOCK”. Inside is a classroom converted into an armory, with weapons, a Medium Backpack, a Defibrillator, and 3D printer materials. A Military Locker in this room can hold a Counting Room Vault key.
How to get the key: Random field loot drops at Deadtown.
17. Gun Store Weapons Locker (Rare)
POI: Gun stores in Western Cheongun Village and Northern Songdo Wharf | Threat: LOW
This key works differently from the others — it opens green Weapons Lockers inside gun stores, not a single locked door. There are two gun store locations: one in western Cheongun Village and one in northern Songdo Wharf. In each store’s back room, look for the green lockers with the “GUN STORE WEAPONS LOCKER – UNLOCK” prompt. One key opens one locker. The other lockers in the same store will remain locked without additional keys.
One of these lockers can hold a KG-7 Vulcan and a Cipher Code Ledger.
How to get the key: Free at DMZ Level 16 (Equipment Kit) and DMZ Level 42 (Trap Equipment Kit). Also random field loot. More details in the Gun Store Weapons Locker key location guide.
18. Hazard Storehouse
POI: Haneul Nuclear Reactor | Grid: Column I, rows 4–5 | Threat: HIGH
The Haneul Nuclear Reactor sits on an island on the south side of the map. Look for a white corrugated storage shed marked “창고 STORAGE” with a light-blue door and blue barrels outside. That’s the Hazard Storehouse entrance. HIGH threat means you’ll be dealing with heavy AI activity — be ready before entering the reactor area.
How to get the key: Random field loot. See also the legendary hazmat suit locations guide for more on this area.
For the Reactor DRC Locker — a separate key door at the same location — see the Reactor DRC Locker key location guide.
19. Supreme Leader’s Bunker (Access Card)
POI: Chang-san Air Base Bunker | Grid: Column B, rows 5–6 | Threat: EXTREME
This one is technically an access card rather than a standard key. From Admin Complex No. 2, take the stairwell marked “02” down to the basement and follow the corridor and metal stairs down to a pair of large white blast doors painted “자유” with red star crests. The card reader on the red brick wall requires the Supreme Leader’s Bunker Access Card — regular keys will not work here.
EXTREME threat. This is the most dangerous key room in MW4 DMZ. Full squad required.
How to get the card: Story mission reward. See the Supreme Leader’s Bunker access card guide for the full details.
Tips for Using Keys in MW4 DMZ
- Read the item card before you infil. Every key tells you the map grid and the POI in the text — plan your route before you deploy.
- Hotbar your best keys. Epic and rare keys go in your hotbar, not your backpack. If you die, hotbar items are kept. Backpack items are gone.
- Match threat level to your loadout. Don’t walk into an EXTREME threat zone solo with base armor and a pistol. HIGH and EXTREME doors need full squads and proper prep.
- Some missions hand you keys directly. Operations like Critical Extraction, Silent Ledger, and Shopping Hacks guarantee specific keys on completion. Check your active missions before spending time farming loot for a key you could earn from a mission.
- The Counting Room Vault ≠ The Vault Armory. Both are at Heavenly Luck Casino but require different keys and are in different parts of the building. Don’t mix them up.
For more on DMZ, check out:
- Best SMGs Ranked in COD Modern Warfare 4
- All DMZ Story Missions and Rewards in MW4
- All DMZ Boss Locations in COD Modern Warfare 4
- All MW4 DMZ 3D Printer Recipes
- MW4 DMZ Wanted Hunter System Explained
- MW4 DMZ All Compound Locations and How to Clear Them
- MW4 DMZ All Radio Tower Locations
- All DMZ Operator Traits and How to Unlock Them
- All FOB Stations in MW4 DMZ and How to Unlock Them
Get the game on your platform: