TL;DR
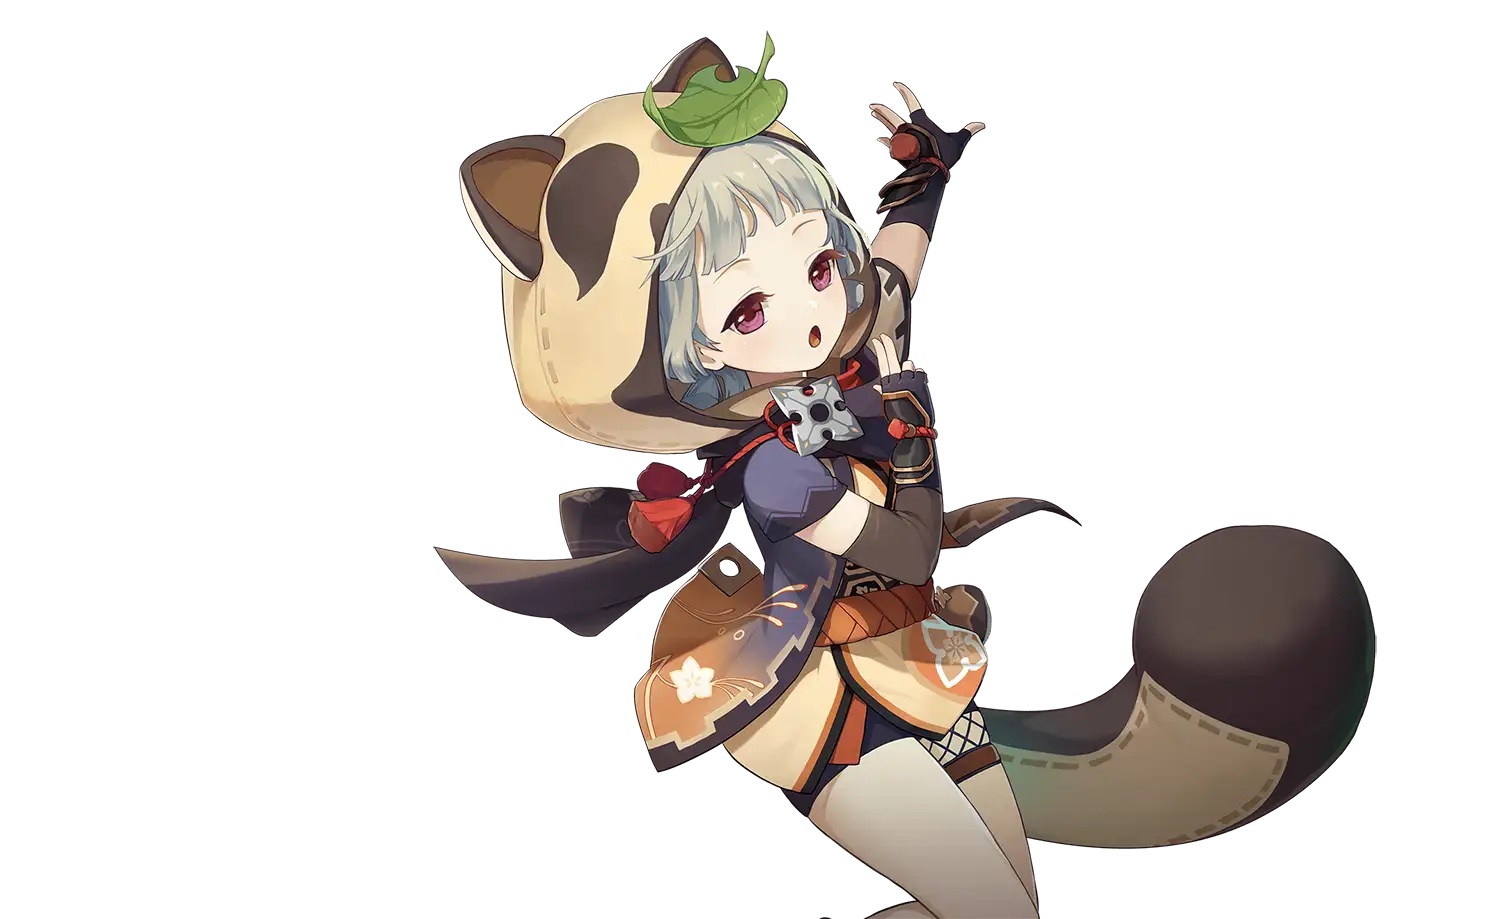
- Sayu is a 4-Star Anemo Claymore character released in Version 2.0 — a tiny ninja from Inazuma’s Shuumatsuban who would rather be sleeping.
- She heals, deals off-field Anemo damage, and Swirls elements — all from one kit.
- Her Elemental Skill is a spinning wheel dash that deals Anemo DMG and can be held to absorb elements for Swirl reactions.
- Her Elemental Burst summons a Muji-Muji Daruma that heals and attacks at the same time.
- Stack Elemental Mastery for her best build — it boosts both her healing and her Swirl damage simultaneously.
- Best artifact set is 4-piece Viridescent Venerer — no exceptions.
- Best 4-star weapon is Favonius Greatsword; best EM weapon is Makhaira Aquamarine.
- C1 and C6 are her most impactful constellations.
Who Is Sayu in Genshin Impact?
Sayu is a 4-Star Anemo character who wields a Claymore. She was released in Version 2.0 on August 10, 2021, alongside Yoimiya. Her constellation is Nyctereutes Minor and her title is Sheep O’Clock.
Sayu works as a ninja operative for the Shuumatsuban, a secretive intelligence organization in Inazuma that operates in the shadows. She is extremely skilled — her ability to move silently, roll at high speed using Anemo techniques, and vanish without a trace makes her one of the most effective operatives in the group. The Shuumatsuban’s leader, Kamisato Ayato, relies on her for reconnaissance and covert missions that cannot be assigned to anyone else.
The only problem is that Sayu desperately wants to sleep. She is convinced that sleeping more will help her grow taller — and since she has not grown in what feels like forever, she treats every opportunity to nap as a strategic priority. Her colleagues can rarely find her when she is not on a mission because she is usually curled up asleep in a corner, wrapped in her tanuki-ear disguise. Despite this, she is professional and reliable when it counts, and her laid-back attitude conceals a genuinely sharp mind.
In Genshin Impact, Sayu is one of the few characters who can heal and deal off-field damage simultaneously. Her kit combines Anemo application, Swirl reactions, and continuous healing through a single placed Burst mechanic. If you are building an Anemo-focused team, also check our guides on Kaedehara Kazuha and Xiao for other strong Anemo carries and supports.
Sayu Role and Playstyle
Sayu is a Healer and Anemo Support. She fits into teams that need both healing and Viridescent Venerer’s Elemental RES shred — filling two roles with a single character slot. This is her core value proposition: she replaces both a dedicated healer and a VV shredder in one unit.
Her gameplay centers on two abilities. Her Elemental Skill has a unique roll mechanic — she curls into a spinning wheel and charges across the field, dealing Anemo DMG to any enemy she collides with. If you hold the Skill, she keeps rolling and can absorb an element mid-roll for a more powerful Swirl on release. If enemies hit her while she rolls, she deals additional Anemo hits back at them. This Skill is both a mobility tool and a combat ability, and it generates Anemo particles for her Burst.
Her Elemental Burst summons a Muji-Muji Daruma — a small rolling spirit — that attacks nearby enemies and heals the party member with the lowest HP percentage at regular intervals. At C0 the Daruma either attacks or heals depending on conditions; at C1 it does both at the same time without restrictions. The Burst is the core of her support role and needs to be up every rotation for her to contribute consistently.
The most important mechanic on Sayu is her A1 passive — when she triggers a Swirl reaction while on-field, she heals all party members for 300 HP plus 1.2 HP per point of Elemental Mastery. This means stacking EM on Sayu simultaneously increases her Swirl damage and her healing output — making EM a uniquely dual-purpose stat on her kit.
Sayu Strengths and Weaknesses
Strengths
- Heals and Swirls at the same time — fills a healer and VV debuffer role in one slot.
- Her A1 passive makes Elemental Mastery scale both her healing and Swirl damage simultaneously.
- Muji-Muji Daruma provides off-field healing and damage while your main DPS stays on field.
- The Elemental Skill is also a mobility tool — she can cross terrain quickly while rolling.
- Unique utility passive: animals (including Crystalflies) do not flee when party members approach while Sayu is in the team.
- Low field time required — use Skill and Burst, swap out, and she continues healing and Swirling off-field.
- Easy to build — EM on all main stats, 4-piece VV, done.
Weaknesses
- Her healing is not as strong as dedicated healers like Kokomi, Bennett, or Baizhu — moderate output only.
- High Energy Recharge requirements for her 80-cost Burst can be demanding without support.
- At C0, the Muji-Muji Daruma attacks or heals — not both simultaneously. C1 is highly recommended.
- Her Swirl application requires being on-field briefly, which limits some rotations.
- Less useful in teams that already have a dedicated VV carrier or a stronger healer.
- Not a top-tier pick compared to Kazuha or Jean in meta team compositions.
Sayu Skills Explained
Normal Attack – Shuumatsuban Ninja Blade
Performs up to 4 consecutive Claymore strikes. Her Charged Attack spins and deals multiple hits with Stamina cost. Her Plunging Attack drops from height for AoE DMG. Sayu’s Normal Attacks are not used in any recommended build and should not be leveled. She does not spend meaningful time on the field attacking — her value comes entirely from her Skill and Burst.
Elemental Skill – Yoohoo Art: Fuuin Dash
This is Sayu’s most distinctive and fun ability. She curls up and transforms into a high-speed rolling wheel, dealing Anemo DMG to any enemy she collides with. The Skill has two modes:
- Tap: Sayu instantly performs a quick Fuuin Dash and deals Anemo DMG in a small radius. Fast and low cooldown. Best used when you just need a quick Anemo particle generation without spending much time on field.
- Hold: Sayu enters a sustained rolling state. She rolls continuously and can steer her direction. While rolling:
- She absorbs the first element she contacts from an enemy or the environment — this is used to set up specific Swirl reactions on release.
- If enemies strike her while she rolls, she automatically retaliates with additional Anemo DMG.
- Holding the Skill longer increases the strength of the final impact when released.
When Sayu is rolling she is not considered airborne — she stays on the ground and can even roll through terrain gaps. This makes the Skill useful for traversal as well as combat. The Hold Skill’s cooldown is 6 seconds after the roll ends, regardless of how long she held it. Always use the Hold Skill in combat to absorb an element and set up stronger Swirl reactions.
Elemental Burst – Yoohoo Art: Mujina Flurry
Sayu summons a Muji-Muji Daruma — a small spirit that stays on the field for 12 seconds. The Daruma has two behaviors:
- Attacks nearby opponents with AoE Anemo DMG if enemies are present within range.
- Heals the active character with the lowest HP percentage if no enemies are nearby (or if their HP is below 70%).
At C0, the Daruma chooses between attacking and healing on each tick. At C1, it attacks and heals simultaneously on every tick — which is a major gameplay improvement. The Burst costs 80 Energy, making consistent uptime dependent on good Energy Recharge or teammates who generate particles. The Daruma provides off-field sustain and damage while your main DPS is active — one of the most valuable parts of Sayu’s kit in extended fights.
Sayu Passives Explained
A1 Passive – Someone More Capable
When Sayu triggers a Swirl reaction while she is the active character, she heals all party members and nearby allies for 300 HP plus 1.2 HP per point of her Elemental Mastery. This effect can trigger once every 2 seconds. This passive is the cornerstone of her entire build philosophy. At 800 EM, for example, each Swirl trigger heals the team for 300 + 960 = 1,260 HP. Since she Swirls frequently during her Elemental Skill, this passive delivers consistent party-wide healing simply by playing her normally. More EM means more healing per Swirl — which is why EM is her best scaling stat by far.
A4 Passive – No Work Today!
Enhances the Muji-Muji Daruma from her Elemental Burst in two ways:
- When the Daruma heals a character, it also heals all nearby party members for 20% of the amount healed.
- The AoE radius of the Daruma’s attacks is increased.
This passive turns the Daruma’s targeted healing into a small AoE heal. The character with the lowest HP still receives the full heal, while everyone else nearby receives a 20% top-up. This makes Sayu’s sustain more consistent in multi-character fights since the team does not need to stack around one character to benefit from the Daruma.
Utility Passive – Yoohoo Art: Silencer’s Secret
When Sayu is in the party, your characters will not startle Crystalflies and certain other wild animals when approaching them. This is one of the most celebrated utility passives in the entire game for exploration players. Crystalflies are among the most valuable and frustrating collectibles in Genshin Impact — they flee the moment a character gets close. With Sayu in the party, you can walk right up to them without triggering the flee animation, making Crystalfly farming dramatically faster. Keeping Sayu in an exploration team slot purely for this passive is a legitimate strategy many players use.
Best Weapons for Sayu
Sayu benefits most from weapons that provide Elemental Mastery (for her healing and Swirl damage) or Energy Recharge (for consistent Burst uptime). Both stats address her core needs from different angles.
5-Star Weapons
- Skyward Pride: Energy Recharge secondary and a passive that increases all DMG and fires vacuum blades after using the Burst. The ER secondary helps Sayu get her Burst up reliably every rotation. A strong 5-star option that solves her Energy problem while providing a damage boost.
- Wolf’s Gravestone: High Base ATK and an ATK% secondary with a teamwide ATK buff passive. Less optimal than ER or EM weapons for Sayu specifically — she does not scale off ATK — but the teamwide ATK buff after hitting opponents makes it useful in teams where your carry scales off ATK.
4-Star Weapons
- Favonius Greatsword (Best All-Rounder): Energy Recharge secondary and a passive that generates Elemental Particles on CRIT hits. Solves Sayu’s high Energy requirement, generates extra particles for the whole team, and requires some CRIT Rate to trigger the passive reliably. The most team-friendly weapon for Sayu in most compositions — get your Burst up every rotation with minimal ER investment elsewhere.
- Makhaira Aquamarine (Best EM Option): Elemental Mastery secondary and a passive that converts a portion of EM into ATK for Sayu and nearby party members. The EM secondary directly boosts her A1 healing per Swirl and Swirl DMG. The ATK conversion also gives the team a small passive ATK buff. Best used in teams that want maximum Swirl damage and healing strength over pure Energy generation.
- Mailed Flower: EM secondary and a passive that increases ATK and EM after using the Elemental Skill. Pairs nicely with her frequent Skill usage. A solid free-to-play-adjacent EM option.
- Rainslasher: Elemental Mastery secondary and increased DMG against Hydro or Electro-affected enemies. The EM stat is the reason to use this weapon. Best in Electro-Charged teams where the passive’s condition is frequently met.
- Sacrificial Greatsword: Energy Recharge secondary and a passive that resets the Skill’s cooldown on a CRIT hit. Useful for more frequent Skill uses but requires some CRIT Rate to trigger. Less optimal than Favonius for pure ER needs but has utility in on-field rolling builds.
- Katsuragikiri Nagamasa (Best Craftable): Energy Recharge secondary and a passive that restores Energy after using the Elemental Skill. Fully craftable at the blacksmith using a Northlander Claymore Billet. A solid free-to-play option if Favonius Greatsword is unavailable.
Best Artifacts for Sayu
Sayu’s artifact choice is one of the clearest in the game. 4-piece Viridescent Venerer is always correct on Sayu — there is no build where a different set meaningfully outperforms it for her primary role.
4-Piece Viridescent Venerer (Only Recommended Set)
The 2-piece bonus gives 15% Anemo DMG Bonus. The 4-piece passive increases Swirl DMG by 60% and reduces enemy Elemental RES of the Swirled element by 40% for 10 seconds. This RES shred applies to the element absorbed in the Swirl — so Swirling Pyro reduces enemy Pyro RES by 40%, benefitting your Pyro DPS. No other artifact set provides this team utility at the same level. Sayu carries Viridescent Venerer so your main DPS does not have to — the shred stacks directly with other forms of RES reduction and is invaluable for all reaction-based teams.
What if another teammate already has VV? In that edge case, a 4-piece Noblesse Oblige (for ATK buffs after her Burst) or 2-piece Viridescent + 2-piece Noblesse hybrid works acceptably. However, in most teams Sayu is the VV carrier by default since she cannot contribute much else at a high level without it.
Artifact Main Stats
- Sands: Elemental Mastery (always — boosts both Swirl damage and A1 healing per proc)
- Goblet: Elemental Mastery (for maximum EM) or Anemo DMG Bonus (slightly more Swirl damage in on-field driver builds)
- Circlet: Elemental Mastery (most builds) or Healing Bonus (if pure healer is the only goal and EM is already high through weapon and substats)
Recommended Substats
- Elemental Mastery (aim for 700–900+ total EM)
- Energy Recharge (enough to Burst every rotation — around 180–200% without Favonius Lance; 150–160% with Favonius Lance active)
- ATK% (minor contribution but worthwhile once EM and ER needs are met)
- CRIT Rate (only if using Favonius Greatsword to trigger its passive)
Best Teams for Sayu
Sayu works in any team that needs Viridescent Venerer RES shred alongside healing. Her best teams are reaction-based compositions where the VV shred on a specific element provides the most value.
Sayu + Xiao (Classic Anemo Team)
- Xiao — Main DPS
- Sayu — Healer + Off-field Anemo support
- Fischl / Ororon — Electro Sub-DPS
- Zhongli / Lan Yan — Shield / Anemo Support
Sayu is one of Xiao’s best healer options. Her Muji-Muji Daruma heals Xiao off-field during his Burst plunge window without requiring him to stop attacking. Her VV shred helps his Anemo damage, and her Skill generates Anemo particles that can help battery him during pre-Burst setup. The combination of off-field healing and VV shred in one slot frees the other two spots for more damage-oriented supports.
Sayu + Arlecchino Vaporize Team
- Arlecchino — Main DPS
- Sayu — Healer + Pyro VV Shred
- Citlali — Cryo Sub-DPS + Support
- Bennett — ATK Buffer + Healer
Arlecchino cannot be healed by most external sources during her Bond of Life state — but Sayu’s Swirl-triggered A1 healing bypasses this restriction since it activates on Sayu herself triggering the reaction rather than healing Arlecchino directly. Sayu Swirls Pyro off Arlecchino’s aura, shreds Pyro RES by 40% through VV, and simultaneously heals the whole party. This makes her a uniquely compatible healer for Arlecchino compared to many alternatives.
Sayu Swirl Driver Team
- Sayu — On-field Swirl Driver
- Xiangling — Pyro Sub-DPS
- Fischl — Electro Sub-DPS
- Zhongli / Bennett — Shield / Healer
In this composition, Sayu stays on the field as the active character and uses her rolling Skill to continuously Swirl Pyro and Electro from Xiangling’s Pyronado and Fischl’s Oz. Every Swirl spreads those elements to nearby enemies and shreds their RES through VV. Her A1 passive heals the team on each Swirl proc. This is a budget-friendly team where Sayu acts as the “driver” character while off-field Sub-DPS characters deal the majority of damage through reactions she facilitates.
Sayu Electro-Charged Team
- Ororon — Electro Sub-DPS
- Sayu — On-field Healer + Swirl Driver
- Xingqiu / Yelan — Hydro Sub-DPS
- Flex — Utility
Sayu uses her roll to Swirl Electro from Ororon, spreading it to all nearby enemies and shredding their Electro RES. Combined with Hydro application from Xingqiu or Yelan, the team generates consistent Electro-Charged reactions. Sayu heals while driving and the constant Swirl procs from her rolling Skill keep the team healthy through her A1 passive.
Sayu Constellations Guide
Sayu is usable at C0 but meaningfully better at C1. Her best constellations are C1 and C6 — both interact with her most important abilities.
C1 – Multi-Task no Jutsu (Best Early Constellation)
Effect: The Muji-Muji Daruma created by Yoohoo Art: Mujina Flurry ignores the HP threshold and can both attack opponents and heal party members simultaneously.
At C0, the Daruma chooses between attacking and healing depending on whether enemies are in range and whether HP is below 70%. This creates situations where it heals unnecessarily or attacks instead of healing when the party needs it. C1 removes this logic entirely — the Daruma always attacks and heals at the same time on every tick. This doubles the effective output of Sayu’s Burst by making both functions run simultaneously rather than choosing one. C1 transforms her from a situational healer into a reliable one. It is the single most impactful constellation on Sayu and is strongly recommended as a priority unlock.
C2 – Encores in the Dead of the Night
Effect: When Sayu is healed or picked up by the active character, a Fuuin Dash is triggered after a short pause. This Fuuin Dash gains increased damage and healing from Elemental Mastery scaling.
A niche constellation with limited practical impact in most team rotations. The auto-triggered Fuuin Dash can help in very specific scenarios but does not fundamentally change how Sayu is played. Low priority.
C3 – Moonlit Wanderings
Effect: Increases the Level of Yoohoo Art: Mujina Flurry (Elemental Burst) by 3. Maximum upgrade level is 15.
A talent level boost for her Burst. Higher Burst talent improves both the Daruma’s damage and its healing output. A consistent small upgrade — a natural step if you are already at C2.
C4 – I Got Your Back
Effect: When Sayu triggers a Swirl reaction while in Fuuin Dash, the damage and healing triggered by her Passive Talent “Someone More Capable” will be doubled. This Passive Talent now allows Sayu to heal all nearby party members even when she is not the active character.
This is a meaningful improvement for her A1 passive. Doubling the Swirl-triggered healing during her rolling Skill makes the Hold Skill window much more impactful as a heal. The additional clause — allowing the passive to heal even when Sayu is off-field — gives her consistent passive healing throughput throughout the rotation, not just during the brief moments she is on-field. A solid constellation that meaningfully improves her sustain in longer fights.
C5 – Yoohoo Forever
Effect: Increases the Level of Yoohoo Art: Fuuin Dash (Elemental Skill) by 3. Maximum upgrade level is 15.
A talent level boost for her Elemental Skill. Higher Skill talent increases the damage on each roll collision and the final impact damage. Modest but consistent improvement.
C6 – Sleep O’Clock (Best High-Investment Constellation)
Effect: The Muji-Muji Daruma created by Yoohoo Art: Mujina Flurry will also benefit from Sayu’s Elemental Mastery. Each point of Elemental Mastery provides: DMG dealt by the Daruma’s attacks increased by 0.2% ATK (maximum 400% ATK bonus); HP restored by the Daruma increased by 3 HP (maximum 6,000 HP).
C6 directly connects her EM stacking to both the Daruma’s attack damage and its healing output. At 800 EM, the Daruma’s attacks gain 160% ATK in bonus damage and each healing tick restores an additional 2,400 HP. This is a massive upgrade for players who fully invest in Sayu as their primary healer and off-field damage dealer. The maximum bonus at very high EM values (2,000+ EM) caps at 400% ATK bonus and 6,000 HP additional healing per tick — theoretical ceiling builds approach these caps in niche EM-stacking setups. C6 is the constellation that justifies deep EM investment rather than splitting between EM and ER.
Sayu Ascension Materials
Here is everything needed to fully ascend Sayu from Level 1 to Level 90. She gains Elemental Mastery as her ascension stat, totalling 96 additional EM at Level 90 — which feeds directly into both her A1 passive healing per Swirl and her Swirl damage. All of her materials tie back to Inazuma, reflecting her background as an Inazuman ninja.
- Vayuda Turquoise Sliver x1
- Vayuda Turquoise Fragment x9
- Vayuda Turquoise Chunk x9
- Vayuda Turquoise Gemstone x6 — Drop from the Anemo Hypostasis in Mondstadt’s Cape Oath or the Maguu Kenki boss in Inazuma. Can also be crafted using Dust of Azoth.
- Marionette Core x46 — Drop exclusively from the Maguu Kenki Field Boss on Broken Isle in Inazuma’s Golden Apple Archipelago (or accessible via the permanent version in Inazuma after the event). Farm this boss at least 23 times at World Level 8. The Maguu Kenki is a large puppet samurai that fights using both Anemo and Cryo techniques.
- Crystal Marrow x168 — A local specialty found only in Inazuma, primarily on Yashiori Island near the serpent skeleton and shoreline areas. Cannot be grown in the Serenitea Pot. Respawns every 48 hours. Yashiori Island is the most efficient farm location with the highest density of Crystal Marrow nodes.
- Whopperflower Nectar x18
- Shimmering Nectar x30
- Energy Nectar x36 — All three drop from Whopperflowers of any element found throughout Teyvat. One of the most commonly available mob materials in the game.
- 420,000 Mora
Sayu Talent Materials
To level all three of Sayu’s talents to Level 10, you need:
- Teachings of Light x9
- Guide to Light x63
- Philosophies of Light x114 — Obtained from the Violet Court domain in Inazuma on Tuesdays, Fridays, and Sundays. This is the same domain used by Raiden Shogun, Kuki Shinobu, Yoimiya, Kokomi, and other Inazuma characters.
- Whopperflower Nectar x18
- Shimmering Nectar x66
- Energy Nectar x93 — All farmed from Whopperflowers.
- Gilded Scale x18 — Weekly drop from the Azhdaha Trounce domain — Narukami Island: Tenshukaku — in Inazuma. This domain becomes accessible after completing the relevant Archon Quests and Ei’s first Story Quest. You can also convert other Azhdaha weekly drops using Dream Solvents.
- Crown of Insight x3 — For maxing all three talents to Level 10.
- 1,652,500 Mora
Sayu Talent Priority
- Elemental Burst — Level first. The Muji-Muji Daruma is Sayu’s primary healing and off-field damage source. Higher Burst talent level increases both the Daruma’s attack hits and its healing per tick. Since the Burst is what she contributes to the team while off-field, this talent has the highest priority.
- Elemental Skill — Level second. Higher Skill talent increases the damage of each collision during the roll and the final impact hit. More Skill damage means more consistent Swirl procs and better A1 passive healing. Worth leveling after the Burst reaches a comfortable level.
- Normal Attack — Do not level. Sayu does not deal damage through Normal Attacks in any recommended build. Skip this talent entirely and save the materials for her Burst and Skill.
How to Play Sayu – Rotation Guide
Sayu’s rotation is quick and exits fast so your main DPS can take over the field. The goal is to Swirl as many times as possible during her brief on-field window to maximize A1 passive healing and VV stacks.
Standard Support Rotation
- Ensure your off-field Sub-DPS characters have their Skills and Bursts active (Fischl’s Oz, Xiangling’s Pyronado, etc.) so elements are present on enemies.
- Switch to Sayu. Use her Hold Elemental Skill — roll through or near enemies to absorb their element and trigger Swirl on collision. Each Swirl procs her A1 passive, healing the whole team.
- Release the Skill to deliver the final Fuuin Dash impact hit.
- Use her Elemental Burst to summon the Muji-Muji Daruma.
- Immediately swap to your main DPS — the Daruma will heal and attack automatically in the background for 12 seconds.
- When the Daruma expires, return to Sayu and repeat the Skill and Burst sequence.
Swirl tip: For VV’s RES shred to be most effective, make sure Sayu Swirls the element your main DPS deals damage with. Swirling Pyro shreds Pyro RES, benefitting a Pyro carry. Swirling Electro shreds Electro RES, benefitting an Electro carry. Time the roll to hit enemies who already have the right elemental aura.
Energy tip: Sayu’s rolling Skill generates Anemo particles on each collision. Use the Hold Skill and roll through enemies multiple times to maximize particle generation before using the Burst. Running Favonius Greatsword with some CRIT Rate helps fill the remaining Energy gap.
Where to Get Sayu
Sayu is a 4-Star character available on the Standard Wish banner (Wanderlust Invocation) since Version 2.3. She also appears as an off-banner drop on any Event Wish. She is one of the more accessible 4-star Anemo characters in the game — players who have been pulling for some time will likely already have her at one or more constellations.
Play Genshin Impact on:
Is Sayu Worth Building?
Yes — especially if you want a character who heals and carries Viridescent Venerer simultaneously without needing two separate characters for those roles. Sayu is the most efficient slot in the game for combining moderate healing with VV RES shred, and her unique A1 passive makes Elemental Mastery a genuinely powerful scaling stat rather than just a reaction bonus.
She is not a top-meta healer — Kokomi, Jean, and Baizhu all out-heal her in most scenarios — but none of them combine healing with VV in the same way. If your team already has a stronger healer and needs VV coverage separately, Sayu is redundant. If you need both roles filled in one slot, she is excellent value.
Her exploration utility passive — preventing animals from fleeing — is also one of the most genuinely useful quality-of-life abilities in the game. Many players keep her in their exploration party permanently for this reason alone.
For other strong Anemo support options, see our guides on Kaedehara Kazuha and Sucrose. And if you want to build a Xiao team with Sayu as the healer, see the full guide on Xiao.
Sayu Quick Reference
- Rarity: 4-Star
- Element: Anemo
- Weapon: Claymore
- Role: Healer / Anemo Support / VV Carrier
- Scaling Stat: Elemental Mastery (healing and Swirl damage)
- Ascension Stat: Elemental Mastery (96 additional EM at Level 90)
- Region: Inazuma
- Affiliation: Shuumatsuban
- Constellation: Nyctereutes Minor
- Release Version: 2.0
- Best Artifact: 4-piece Viridescent Venerer
- Best Weapon: Favonius Greatsword / Makhaira Aquamarine (EM build) / Katsuragikiri Nagamasa (F2P)
- Best Teams: Xiao support, Arlecchino Vaporize, Swirl Driver, Electro-Charged
- Best Constellations: C1 (strongly recommended), C6 (high investment)
- EM Target: 700–900+
- ER Target: 150–160% (with Favonius) / 180–200% (without)
Frequently Asked Questions About Sayu
Is Sayu a good healer in 2026?
She is a moderate healer — not the strongest in the game, but uniquely valuable for combining healing with Viridescent Venerer RES shred in a single character slot. At C1 and with 700+ EM, her Swirl-triggered healing through the A1 passive and Daruma ticks provide reliable sustain for most content. In very high-damage scenarios she is less ideal than Kokomi or Baizhu, but in regular Abyss and Overworld content she sustains teams comfortably.
Does Sayu need Energy Recharge or Elemental Mastery?
Both, but EM is the priority. EM boosts her A1 healing per Swirl, her Swirl damage, and at C6 also the Daruma’s damage and healing. Energy Recharge addresses her 80-cost Burst requirement. The recommended balance is triple EM main stats (Sands/Goblet/Circlet) plus enough ER in substats or through Favonius Greatsword to get her Burst up every rotation. If using Favonius, aim for 150–160% ER. Without it, aim for 180–200% ER.
Can Sayu heal without being on the field?
Yes, through two sources. Her Muji-Muji Daruma from the Burst heals the lowest-HP party member automatically while she is off-field. At C4, her A1 passive — which heals on Swirl — also extends to off-field scenarios. At C0–C3, the A1 passive only triggers when Sayu herself is on-field and triggers the Swirl. The Daruma is always the reliable off-field heal source regardless of constellation level.
What makes Sayu’s exploration passive special?
Crystalflies and many wild animals flee the moment a character walks near them — making them frustrating to collect without a bow character. With Sayu in the party, characters can walk directly up to Crystalflies, small animals, and certain other wildlife without triggering the flee animation. Since Crystalflies are used for Character Ascension materials for several characters and are found in small clusters that flee instantly, Sayu’s passive can cut Crystalfly farming time by 80% or more. Many experienced players keep her in their exploration party permanently for this reason.
Is Sayu’s C1 worth getting?
Yes — C1 is strongly recommended. At C0, the Muji-Muji Daruma either attacks or heals on each tick based on conditions. C1 removes that split and makes the Daruma attack and heal simultaneously at all times. This approximately doubles her Burst’s effective output since both functions run in parallel. Getting C1 on a Standard pool 4-star character is achievable over time without targeted pulling.
Does Sayu work with Xiao?
Yes — Sayu is actually one of the better healer options for Xiao teams. Her Muji-Muji Daruma heals Xiao while he is plunging during his Burst without interrupting his DPS window. Her VV shred applies to Anemo (via Swirl spread), which is Xiao’s element. She also does not take up the Anemo resonance slot since Xiao already provides it. The combination of off-field healing and VV coverage in one slot frees the rest of the team for more damage-focused supports.


